

В Genshin Impact A robot from the Krumkake workshop, Ineffa possesses support abilities and is a secondary Electro damage dealer. She fights with the Lunar Blast reaction—an alternative version of Charged, which replaces it and summons a thundercloud with electrical strikes. Because of this playstyle, she performs best in teams with Hydro and Electro companions, using the summoned creature Birgitte in battle. Furthermore, the heroine buffs this reaction automatically, making her indispensable in such teams.
She is quite easy to build, since her damage and shield durability depend on her ATK, and her Lunar-Charged damage depends on her elemental mastery. The difference in stats will not cause any problems, since the character has the ability to transfer ATK into EM.
| Rating | S+ position in tier lists |
| Rarity | ⭐⭐⭐⭐⭐ |
| Appeared in-game | July 30, 2025 (patch 5.8) |
| How to Get the Character | Character Event Banner |
| Element | Electro |
| Weapon | Polearm |
| Ascension Stat | CRIT Rate |
| Gender | Female |
| Affiliation | Clink-Clank Krumkake Craftshop |
| Constellation | Vanilla Planifolia |
| Home region | Nod-Krai |
| Birthday | April 2 |
| Zodiac sign | Aries |
| Age | over 6000 years |
| Height | 160-165 cm |
| Special dish | "Thunderclap!" |
| Voice actors |
|
How to Get the Character

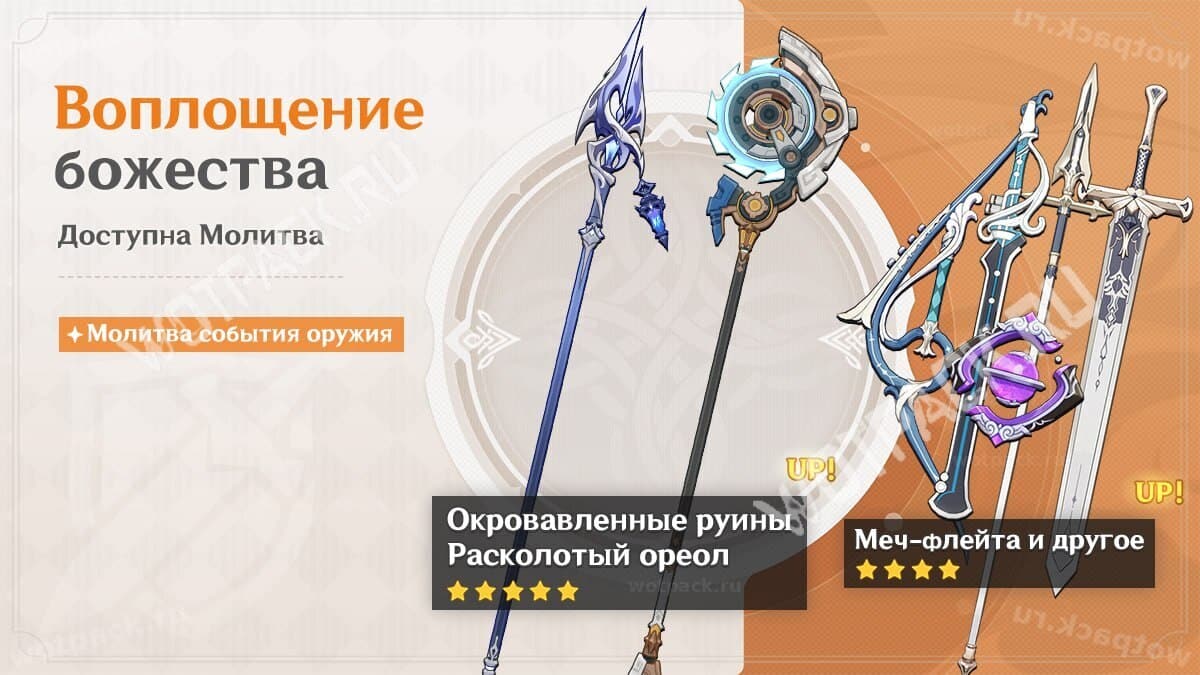
Ineffa can be knocked out from the event banner in the second half the patch 7.0, September 1 to 22, 2026. In addition, there is also a chance to get her signature weapon, a polearm called Fractured Halo.
Follow the updates in the banner schedule, in order not to miss the re-run of Ineffa and other characters.
Strengths and Weaknesses

Ineffa combines the functions of a support and a sub-DD: with her E key, she not only activates a shield, but also summons a creature that attacks enemies on its own and does not disappear even when the heroine leaves the battlefield. Her key feature is the ability
| Strengths | Weaknesses |
| Brings variety to the gameplay, introducing the reaction Lunar charge instead of Charged, which is significantly stronger than the latter. | Dependent on constellations, which significantly enhance Lunar-Charged and simplify gameplay. For example, C1 gives a direct increase in damage dealt, and C2 allows you to apply a shield with the ult. |
| A large selection of artifacts and weapons. There are several work kits that can be changed in different squads, and several F2P versions of the spear. | Plays only in Hydro + Electric combinations, and isn't needed for teams of other elements. If you're not interested in building or strengthening such a squad, having it on your account won't bring much benefit. |
| Easy Electro Infliction. Provides a stable and direct status infliction without skill gaps, which allows you to free up other characters of this element for the second team. | |
| Creates a shield. Able provide additional protection to party members and allow them to carry weapons or artifacts that work off a shield. |
Best Ineffa Builds in Genshin Impact

In the game, the robot girl takes the position of a secondary damage dealer and requires a fairly strict balance of stats if you want to get good direct damage from her. Well-built Ineffa should have a large amount of ATK, which increases her damage, enhances reactions, improves shields and the amount of converted EM. In addition, it is desirable for her to have CRIT Rate/DMG and at least a little bit of energy recharge.
Recommended Stats
The priority stat is ATK, since its stat determines damage and buffs. ATK should be looked for in the clock and secondary stats. Always take the Cup on ATKThere should be a crown. CRIT Rate or CRIT DMG, but it is advisable to focus on CRIT Rate, especially if you have a signature weapon. Additionally, it is recommended to stack enough energy recharge for stable ultimate usage.
| Artifact | Stats |
|
Main Stat: HP (fixed) |
Substats:
|
|
Main Stat: ATK (fixed) |
Substats:
|
|
Main Stat: ATK % |
Substats:
|
|
Main Stat: ATK % |
Substats:
|
|
Main Stat: CRIT Rate or DMG |
Substats:
|





Recommended values:
- ATK: minimum 2000 for the first talent to work as intended. However, you can get more to increase EM of allies.
- Energy recharge: 130%-180% depending on if there are other Electro and Favonius-equipped team members.
- Elemental Mastery: 100-200.
- KS: ~60%-70%.
- CRIT DMG: 150% and more, for a ratio of 1:2 with Crit Rate.
Weapon Tier List
It is recommended to choose weapons mainly for ATK or CRIT Rate/DMG. You can also choose an ER spear, but in this case you need to consider the benefits of the weapon's passive talent.
| Name | Passive | Recommendation |
 Fractured Halo ⭐⭐⭐⭐⭐ Base ATK: 46-608 CRIT DMG: 14.4%-66.2% |
After activating an E-attack or ultimate, ATK increases by 24-48% for 20 sec. If the equipping character creates a shield during this time, they gain the Electrifying Edict effect for 20 sec: the Lunar-Charged reaction damage of all nearby allies is increased by 40-80%. | Ineffa's signature weapon, which fits her best. Provides a large amount of CRIT Rate/DMG, and also additionally buffs the interaction of Hydro and Electro. |
 Staff of the Scarlet Sands ⭐⭐⭐⭐⭐ Base ATK: 44-542 CRIT Rate: 9.6%-44.1% |
The equipping character gains an ATK bonus equal to 52%-104% of his elemental mastery. Hitting an enemy with an E-attack grants the Dream of the Scarlet Sands for 10 sec: the equipping character's bonus is increased by 28%-56% of their elemental mastery. Dream of Scarlet Sands stacks up to 3 times. | Has good base stat and CRIT Rate, which in total will be equal to 68.3%, so you will have to choose a circlet with CRIT DMG only. The character will be able to fully use the passive, since she transfers ATK to EM herself. |
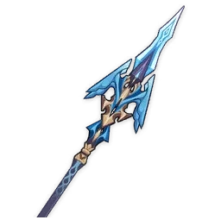 Calamity Queller ⭐⭐⭐⭐⭐ Base ATK: 49-741 ATK: 3.6%-16.5% |
Grants 12%-24% damage bonus for all elements. Using an E-attack applies Consummation for 20 sec, causing ATK to increase by 3.2%-6.4% per second. Can be stacked up to 6 times. When the character equipped with this weapon is not on the field, the ATK bonus from Consummation is doubled. | Powerful polearm, can be difficult to balance all the stats with it. |
 Symphonist of Scents ⭐⭐⭐⭐⭐ Base ATK: 46-608 CRIT DMG: 14.4%-66.2% |
ATK is increased by 12%-24%. When the equipping character is off-field, this stat is additionally increased by 12%-24%. After initiating healing, the equipping character and the character they have healed gain the Sweet Echoes effect: their ATK is increased by 32%-64% for 3 sec. | Strong option similar to the signature weapon, increases ATK and CRIT DMG. However, the character cannot heal, so she uses the first buff only. |
 Vortex Vanquisher ⭐⭐⭐⭐⭐ Base ATK: 46-608 ATK: 10.8%-49.6% |
Increases shield durability by 20%-40%. On hit, increases ATK by 4%-8% for 8 sec, the effect stacks up to 5 times and occurs once every 0.3 sec. In addition, when the shiled is active, bonus effect increases by 100%. | Since the girl is a shielder, she will be able to receive buffs from the passive. Since the shield is used with no time gaps, the bonus will be active all the time. |
 Lumidouce Elegy ⭐⭐⭐⭐⭐ Base ATK: 46-608 CRIT Rate: 7.2%-33.1% |
Increases ATK by 15%-31%. When the equipping character activates Burning on an enemy or deals Dendro damage to enemies with the Burning status, the damage dealt is increased by 18%-38%. This effect lasts for 8 seconds and stacks up to 2 times. After gaining 2 stacks or refreshing the duration with 2 stack, restores 12-16 Energy. You can restore Energy this way once every 1 seconds. All effects also work if the character is off-field. | The polearm is notable for its high base stat and CRIT Rate. Weapon skill does not work, as Burning is not triggered with the team. |

Bloodsoaked Ruins |
After activating Elemental Burst, the equipping character's Lunar-Charged reaction damage is increased by 36 % for 3.6 sec. If the carrier triggers this reaction, its K/U increases by 28 % for 6 seconds, and it also restores 12 Energy. Energy Recharge occurs once every 14 seconds. | It will facilitate energy regeneration and increase K/U, but the 3,6-second bonus to HP is too small to provide a significant damage boost. Therefore, despite being a rare bonus, it offers little practical benefit. |
 Sacrificer's Staff ⭐⭐⭐⭐ Base ATK: 45-620 CRIT Rate: 2%-9,2% |
For 6 seconds after the elemental skill hits an enemy, attack power increases by 8/10/12/14/16%, and energy recovery by 6/7,5/9/10,5/12%This effect stacks up to 3 times and occurs even when the equipped character is not on the battlefield. | Although the gear has very low K/S, it's valuable thanks to its high base value and two useful effects. At awakenings (R4-R5), it's almost on par with legendaries, with the exception of the signature. |
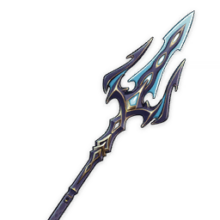 Ballad of the Fjords ⭐⭐⭐⭐ Base ATK: 42-510 CRIT Rate: 6%-27.6% |
If there are 3 or more characters of different elements in a party, elemental mastery increases by 120-240 . | Has good base stat and CRIT Rate. Increases EM for reactions depending on team composition. For this, apart from Hydro and Electro, you can add other characters to the team - e.g. Anemo, Dendro or Geo. |
 Frost Breath ⭐⭐⭐⭐ Base ATK: 42 - 510 Energy recharge: 10% - 45,9% |
Activating Cryo or Hydro Reactions increases the attack power of the equipped character for 15 seconds. 20/25/30/35/40%, and also restores other characters in your squad 6/7,5/9/10,5/12 Energy units. The effect can occur once every 16 sec. | Ineffa herself doesn't really need the VE% stat, but if her squad members are low on energy, she can be used as a semi-support solution. |
 Staff of Homa ⭐⭐⭐⭐⭐ Base ATK: 46-608 CRIT DMG: 14.4%-66.2% |
Increases HP by 20%-40%. Also grants an ATK bonus equal to 0.8%-1.6% of the equipping character's max HP. When the equipping character's HP drops below 50%, their ATK is additionally increased by 1%-1.8% of their max HP. | The robot does not play off HP, but can still get an increase to ATK. It also has a high base stat and increases CRIT. |
 Prospector's Shovel ⭐⭐⭐⭐ Base ATK: 42-510 ATK: 9-41.35% |
Reaction Damage Charged is increased by 48-96%, and the reaction Lunar charge - on 12-24%. Lunar Omen - Supreme Radiance: Lunar Charge's reaction damage is additionally increased by 12-24%. | One of the few pieces of equipment with a direct affix to reaction damage, and also an accessible one - part Nod-Kray craft line. |
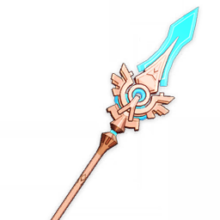 Skyward Spine ⭐⭐⭐⭐⭐ Base ATK: 48-674 Energy recharge: 8%-36.8% |
Increases CRIT Rate by 8%-16% and attack speed for normal attacks by 12%. When you hit an enemy with a normal or charged attack, there is a 50% chance to activate a vacuum blade that deals 40%-100% damage in a small radius every 2 sec. | Allows you to gain enough ER for a stable ultimate usage and has a high base stat. For the passive, only CRIT Rate is needed, since the character does not use normal attacks. |
 Deathmatch ⭐⭐⭐⭐ Base ATK: 41-454 CRIT Rate: 8%-36.8% |
If there are 2 or more nearby enemies, ATK and DEF are increased by 16%-32%; if there are less than 2 enemies nearby, ATK is increased by 24%-48%. | The effect of the weapon depends only on the number of enemies on the battlefield. Works best against bosses. |
 Favonius Lance ⭐⭐⭐⭐ Base ATK: 44-565 Energy recharge: 6.7%-30.6% |
Critical hits have a 60%-100% chance to create elemental particles that restore 6 Energy. Occurs once per 12-6 sec. | Fits all supports and secondary damage dealers. Does not affect personal damage, but benefits the group, restoring a lot of energy. |
 Missive Windspear ⭐⭐⭐⭐ Base ATK: 42-510 ATK: 9%-41.3% |
Within 10 sec. after activating an elemental reaction, ATK is increased by 12%-24%, Elemental Mastery - by 48-96 . | Grants a lot of ATK off base stats, as well as useful stats from the passive. The character often activates reactions, so the buff will constantly be active. |
 Kitain Cross Spear ⭐⭐⭐⭐ Base ATK: 44-565 Elemental Mastery: 24-110 |
Increases elemental skill damage by 6%-12%. When an E-attack hits an enemy, the character loses 3 Energy and restores 3-5 Energy once every 2 sec. for the next 6 sec. The effect can occur once every 10 sec. even if the equipping character is off-field. | Free craftable option from Inazuma increases EM and enhances E-attacks. Also helps activating the ultimate more often. |
Choosing Artifacts
Ineffa's items should also address her stat needs, such as ATK and MS. Support sets that will buff the entire party will also be effective. Note that [unclear text] is not suitable for her. Night of the Sky's Unveiling, since its effect is only triggered if the wearer is an active fighter on the battlefield.
| Name | Description | Recommendation |
 Moonlit Offering’s Opulent Dream ⭐⭐⭐⭐ ⭐⭐⭐⭐⭐ |
2-Piece Bonus:increases Elemental mastery by 80. 4-Piece Bonus:While the wearer is off the battlefield, Lunar Reactions' damage is increased by 20%. If Ascendant Gleam is active, the damage is further increased by 40%. This effect expires 3 seconds after entering the battlefield. |
A signature set worth aiming for in almost every squad. This will give her a 60% bonus, and if she presses the buttons quickly, she'll be able to land her ultimate with the bonus. |
 Silken Moon's Serenade ⭐⭐⭐⭐ ⭐⭐⭐⭐⭐ |
2-Piece Bonus: Increases Energy Recharge rate by 20%. 4-Piece Bonus: Dealing elemental damage causes the Moonglare effect to occur for 8 seconds: if the party's Moonsign is Nascent Gleam/Ascendant Gleam, all party members' Elemental Mastery is increased by 120. The party's Moonshine reaction damage is increased by 10% for each different Moonglare effect active. The effect occurs even if the character is off-field. |
While this set doesn't add many valuable stats to your personal stats, it does allow you to strengthen your allies. Choose it when using a hero with a more powerful Columbine, who will be equipped with Dawnsong. |
 Gilded Dreams ⭐⭐⭐⭐ ⭐⭐⭐⭐⭐ |
2-Piece Bonus: Increases Elemental Mastery by 80. 4-Piece Bonus: For 8 sec. after trigerring an elemental reaction, the equipping character receives the following buffs, depending on the elements of their team members:
Each of these buffs counts up to 3 characters. The effect can occur once every 8 seconds and works even if the equipping character is off-field. |
The character needs both ATK and EM, so she will get all the necessary stats from this set. With the help of allies' elements, you can control the stats obtained with the set. |
 Tenacity of the Millelith ⭐⭐⭐⭐ ⭐⭐⭐⭐⭐ |
2-Piece Bonus: Increases HP by 20%. 4-Piece Bonus: When an E-attack hits enemies, all allies' ATK is increased by 20% and their shield durability increases by 30%. The effect lasts for 3 sec. and can occur once every 1 sec. |
Best support set. The character's skill periodically hits enemies around her, so she can buff her allies and protect them with a stronger shield. |
 Thundersoother ⭐⭐⭐⭐ ⭐⭐⭐⭐⭐ |
2-Piece Bonus: Increases Electro Resistance by 40%. 4-Piece Bonus: Increases damage for enemies affected by Electro by 35%. |
Teams with the robot constantly afflict Hydro and Electro and maintain elemental effects, so the XNUMXp bonus is active all the time. |
 Noblesse Oblige ⭐⭐⭐⭐ ⭐⭐⭐⭐⭐ |
2-Piece Bonus: Increases elemental burst damage by 20%. 4-Piece Bonus: Activating Elemental Burst increases ATK of all party members by 20% for 12 sec. |
Alternative support set to buff the team. Can be chosen if there are no other characters equipping it in the team. |
|
Gladiator’s Finale (Shimenawa's Reminiscence / Vermillion Hereafter / Echoes of an Offering / Nighttime Whispers in the Echoing Woods, Fragment of Harmonic Whimsy, Unfinished Reverie) |
2-Piece Bonus: Increases ATK by 18%. 2-Piece Bonus: Increases ATK by 18%. |
If you can't get full sets listed above, you can choose the 2+2 option to maximize ATK. |

When choosing who to equip the Serenade to and who to give the Dawn Song to, consider the constellation's availability. The Song is best for the strongest character, as it directly increases their personal damage, while the Serenade is more focused on buffing the party. If both characters are C0, then in most cases it's better to give the Song to Ineffa and the Serenade to Columbine. However, if the Moon Maiden is C1, for example, she becomes the preferred wearer for the Dawn Song.
|
Ineffa
Moonlit Offering’s Opulent Dream
Silken Moon's Serenade |
Columbina
Silken Moon's Serenade
Moonlit Offering’s Opulent Dream |
|
Ineffa
Moonlit Offering’s Opulent Dream |
Aino
Silken Moon's Serenade |


Teams

Teams for Ineffa should consist of at least one Hydro character to trigger Lunar-Charged. It's imperative, since the character's gameplay is based on the interaction of these elements. As for the other members of the team, they can also be Hydro, Electro or other elements, such as Dendro, Anemo or Geo, which will diversify gameplay and allow you to simultaneously trigger other reactions.
If desired, Ineffa can be used for Overloaded or Superconduct to get the status, but this makes no practical sense, since the whole point of her mechanics will be lost, and her damage will also be lower, since Birgitta will not have additional hits.
Recommended characters
The following allies interact best with Ineffa:
| Character | Element | Weapon | Interaction |
|---|---|---|---|
 Columbina |  Hydro |  Catalyst | Ineffa's best partner makes for a strong, independent team. Pair them with any Hydro or Electro main damage dealer, even if it's not Kirill, and a buffer/debuffer to create a powerful team. |
 Aino | Hydro |  Claymore | A budget replacement for Columbine that can be taken if Kuutar is busy with another team or is not on the account. |
 Kirill Chudomirovich Fleance |  Electro |  Polearm | A signature main damage dealer that synergizes perfectly with mechanics. He also benefits from Lunar Charge and requires a Nod-side ally. |
 Clorinde | Electro |  Sword | Fontaine's Duelist gains bonuses when Elemental Reactions occur, and Lunar-Charged counts as one of them. Additionally, the Swordswoman needs support from the off-field to better generate energy for her Ultimate. |
 Neuvillette | Hydro | Catalyst | Strong Hydro main damage dealer whose buff depends on reactions. To deal a lot of damage, needs another element in the team, like Anemo or Geo. |
 Mizuki |  Anemo | Catalyst | Anemo driver, plays best with characters that can hit from the off-field on their own. Needs EM, which she will get off the robot's buffs. |
 Jahoda |  Anemo |  Bow | It will help close the resonance and provide resistance reduction with the Viridescent Venerer set. Suitable for scenarios where the two of them are the only edge nodes in the group. |
The other Hydro sub-DDs perform worse. If you still decide to add them to your squad. Archon Furina or spy Ye Lan, keep in mind that their buff does not work on Lunar Reactions.
Damage dealers
Main and secondary damage dealers to pair Ineffa with:
| 1 | 2 | 3 | 4 | 5 |
|---|---|---|---|---|
 Ayato (Hydro, sword) |  Mona (Hydro, catalyst) |  Tartaglia (Hydro, bow) |  Mualani (Hydro, catalyst) |  Varesa (Electro, catalyst) |
 Keqing (Electro, sword) |  Raiden (Electro, spear) |  Yae Miko (Electro, catalyst) |  Fischl (Electro, bow) |  Ororon (Electro, bow) |
 Cyno (Electro, spear) |  Wanderer (Anemo, catalyst) |  Chasca (Anemo, bow) |  Ifa (Anemo, catalyst) |
Viable Setups
The character has the best synergy with Hydro and other Electro allies.
Dendro allies are not recommended, since the Quicken reaction is really 'dense' in terms of status infliction, and will interfere with triggering Lunar-Charged.
Lunar-Charged Teams
Combine Hydro and Electro characters, add in Anemo or Geo support.
| Character 1 | Character 2 | Character 3 | Character 4 | Features |
|---|---|---|---|---|
| Kyryll |  Ineffa |  ColumbinaAino |  Sucrose | Signature squad with Kirill. Columbine and Aino are interchangeable: Hyposelenia is stronger, but if she's already occupied by other squads or isn't on your account, this won't cause any critical issues. |
| Kyryll | Ineffa | ColumbinaAino |  Odette | Group from combination Starry and Lunar Reactions. It's not worth building it on its own, but this combination works great against 7.X bosses, allowing you to bypass their mechanics. |
| Kyryll | Ineffa |  Furina  Yelan | Jahoda | An alternative option if Sakuroza and Aino are busy with other groups or haven't been leveled up yet. Weaker than the options above, but will cover content. |
| Neuvillette | Ineffa | ColumbinaFurina | Sucrose Xilonen  Zhongli | A squad with Nevillette is protected from charged attacks by buffs from Furina or Columbine. The robot activates his E and retreats to the enemy, while Birgitte triggers reactions. Any of the listed heroes can be used as a support. |
| AyatoTartaglia | Ineffa | ColumbinaAinoFurina | XilonenZhongli | A group with Ayato or Tartaglia from Lunar Charge. If you don't have Kuutar, take any Hydro sub-DD whose abilities are triggered by normal attacks. Geo support provides survivability and resistance reduction. |
| NeuvilletteAyatoTartaglia | Ineffa | Sucrose |  Kuki  Dori | A budget squad for those without an expensive support. With the MC boost, Sucrose is a great addition to the Maid. For this combo, it's important to take a Hydro main DD, not Electro, to ensure enough status to consistently trigger reactions. |
Clorinde RaidenCyno | Ineffa | ColumbinaAino | Sucrose | A group with a "standard" Electro damage dealer, where any character of that element and role can be placed in the first slot. Columbine is highly recommended here, as Aino will be significantly worse. |
| MizukiIfa | Ineffa |  Sigewinne | ColumbinaFurina | A good team with Anemo Driver. Mizuki plays Disperse, and Ifa can boost Lunar Charge together. |
| Wanderer | Ineffa |  Bennett  Nicole | ColumbinaFurina | The Wanderer can also act as a driver, receiving buffs from allied elements if he interacts with two of them. In this team, in addition to the status from the maid and water sub-DDs, as well as the ATK buff from Bennett or Nicole, he can also receive a bonus from Pyro, increase the duration of Kugo Reku, or restore energy. |
Alternative Setups
As an exception, you can make setups playing off Overloaded or Overloaded + Vaporize, but Ineffa will not give her best in them. It is better to resort to such teams only in a situation of a limited set of characters on the account, since there are stronger options for all the listed combinations.
Funeral Parlor Manager Hu Tao, Archon Mavuika and Klee the Elf strike with Pyro way to often, interrupting the attacks of their allies, therefore won't fit in the Pyro+Hydro+Electro setups.
| Character 1 | Character 2 | Character 3 | Character 4 | Recommendation |
|---|---|---|---|---|
 Arlecchino  Yoimiya | Ineffa | ColumbinaFurinaYelan | Bennett | Harlequin and Yeimiya, thanks to their status mechanics, are the most suitable Fire-based partners, as they don't apply it too often and won't interfere with the constant generation of Lunar Charge. Ye Lan provides more Water than Furina or Columbine, but the latter will be stronger in terms of damage. Bennett heals and closes Resonance. |
 MavuikaVaresaArlecchino | Ineffa |  Chevreuse | Bennett Iansan | If you have no Hydro characters on your account at all, the robot can be added to Overloaded teams as an off-field support for an Electro or Pyro damage dealer. However, the benefits of such a setup are not so great, and Ororon or Fischl are more advantageous in this position. |
Stats
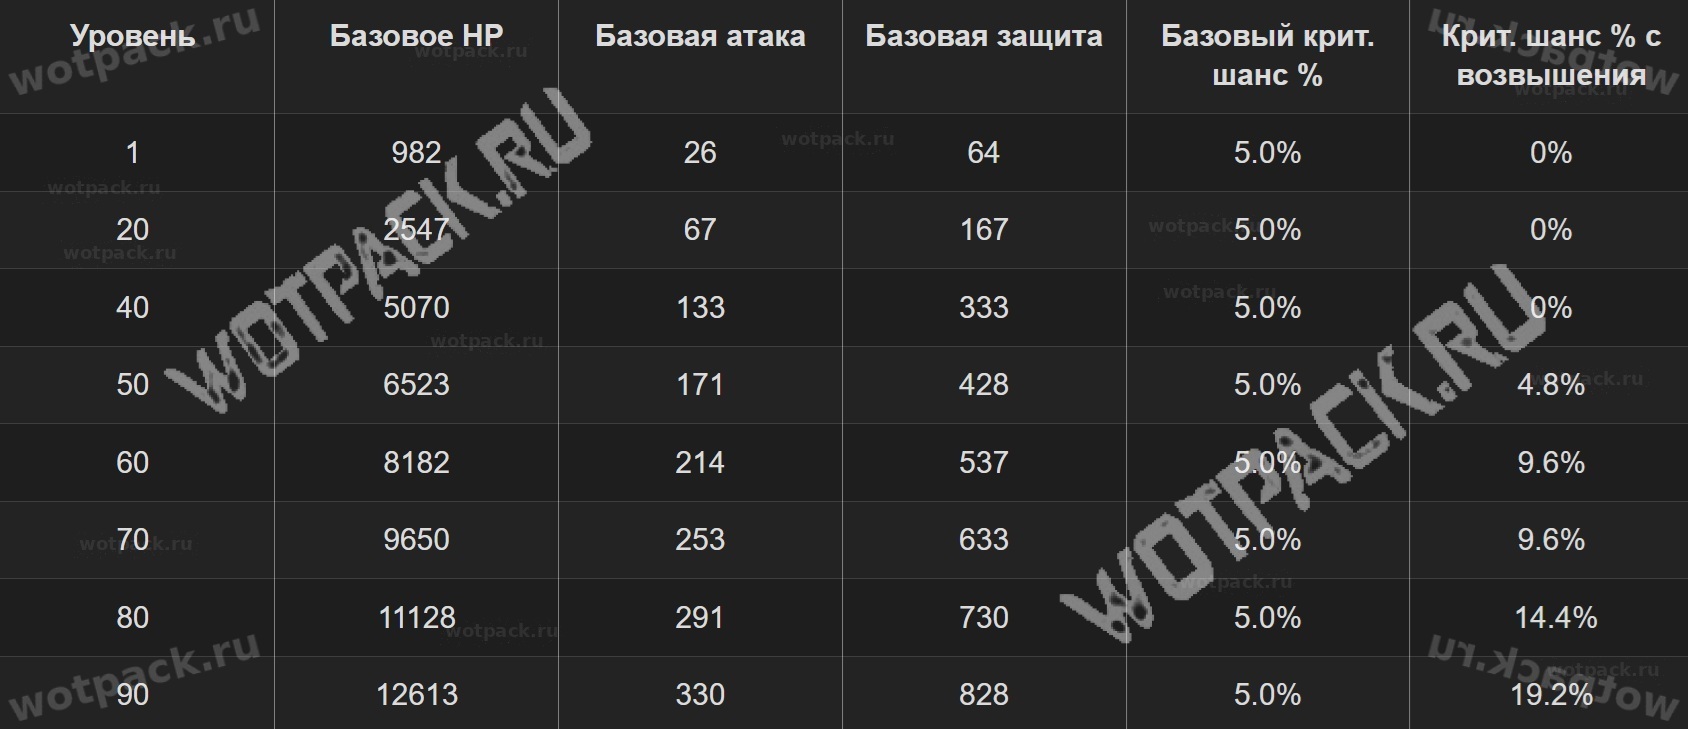
The heroine's main characteristic is critical chance, and after full ascension you can get 24.2% of this stat excluding artifacts and weapons. Besides that, leveling also increases stats such as HP, ATK, and defense. Reach level 95/100 using Wandering fortune It's possible if you have a lot of sympathy for this character, but it's better to invest in main-DD.
Leveling
Almost all resources for the heroine can be collected in Natlan.
Ascension
All you need to level up to 90:
| Resource | Where to find it |
 Slivers, fragments, chunks and gemstones of Vajrada Amethyst. |
World and weekly boss drop. |
 Sentry's Wooden Whistle ×18 Warrior's Metal Whistle ×30 Saurian-Crowned Warrior's Golden Whistle ×36 |
Dropped by Sauroform Tribal Warriors from Natlan. |
 Secret Source Airflow Accumulator ×46 |
Dropped by Secret Source Automaton: Overseer Device. |
 Glowing Hornshroom × 168 |
Specialty from Natlan, grows primarily in the Tezcatepetonco Range area. |
|
Hero's Wit × 421 |
Awarded for events, quests, Ley Line Outcrops. |
|
Mora ×1 |
Rewarded for most ingame activities. |


Talents
To upgrade your skills, you will need the following resources:
| Resource | Where to find it |
 Teachings of Conflict ×3 Guide to Conflict ×21 Philosophies of Conflict ×38 |
Talent books are obtained in the dungeon Blazing Ruins в Wednesday, Saturday и Sunday. |
| Sentry's Wooden Whistle ×6 Warrior's Metal Whistle ×21 Saurian-Crowned Warrior's Golden Whistle ×31 |
Dropped by Sauroform Tribal Warriors all over Natlan. |
 Eroded Sunfire ×4 |
Rare resource, dropped by Lord of Eroded Primal Fire. |
|
Crown of Insight × 1 |
Item for leveling talents up to 10. Rewarded for various events. |
|
Mora ×1 |
Rewarded for various game content. |

Skills

In a battle, the robot acts as a strong secondary damage dealer, who, with the help of her skills, applies elemental status on enemies and triggers the Lunar-Charged reaction, buffing herself at the same time. She protects the team and summons an Assistance Unit, Birgitta, who periodically damages opponents. At the same time, the character increases Elemental Mastery for herself and the active character depending on her attack, which turns her into an all-around support for the improved interaction of Hydro and Electro.
Basic (Active) Skills
With her E-key, she creates a shield and summons a creature that deals damage even when she herself is "in the pocket." Her normal attacks are standard spear swings, and her ultimate is a single, relatively powerful strike.
Cyclonic Duster
- Source of damage: ATK.
Normal attack: deals up to four blows with a spear.
Charged attack: consumes stamina and performs a spinning attack.
Plunging Attack: falls to the ground and hits an area upon landing.
Cleaning Mode: Carrier Frequency
- Source of damage: ATK.
- Shield Absorption: ATK.
- Shield and Birgitta duration: 20 seconds
- Cooldown: 16 seconds
Deals Electro damage to enemies around her once, and summons Optical Flow Shield Barrier and Birgitta. The barrier absorbs Electric damage with 250% efficiency.
Birgitta: If there are enemies around, approaches them once every 2 seconds and fires AoE-charges.
Supreme Instruction: Cyclonic Exterminator
- Source of damage: ATK.
- Cooldown: 15 seconds
- Enegry consumption: 60.
Birgitta strikes in an area, deals Electro damage with her Rocket Punches, and remains on the battlefield. If one Assistant is already on the field, its duration is reset.
Passive Skills
The character has several abilities that do not cost resources to be levelled, they all become available at various stages of ascension.
Overclocking Circuit
If there are thunderclouds created by Lunar-Charged near Birgitta when she deals damage to enemies, she will perform an additional attack that deals 65% of Ineffa's ATK as Electro damage in an area. This damage is considered Lunar-Charged damage.
Panoramic Permutation Protocol
When using Elemental Burst (Supreme Instruction: Cyclonic Exterminator), all characters in your party gain the Parameter Permutation effect: Ineffa's and the active character's EM is increased by 20% of the robot's ATK for 6 sec.
Moonsign Benediction: Assemblage Hub
When party members activate the Charged reaction, it turns into Lunar-Charged, and the base damage of Lunar-Charged is increased by 0,7% for every 100 ATK of Ineffa. Maximum damage increase that can be gained this way is 14%. Further blessings may follow the new moon's rise...
Flavor Synthesis Unit
When the character consumes food, there is a 30% chance of gaining a seasoning ingredient. Also, there seems to be some way to change Birgitta's appearance in Nod-Krai...
Talent Leveling Order
Elemental Skill (E) > Elemental Burst (Q) > Normal Attacks (optional)
- Elemental Skill serves not only as the main source of the off-field damage, but also creates a shield that saves allies from enemies. The E-attack should be levelled up to maximum, since the damage and the durability of the shield depend on the level.
- Elemental Burst is a powerful instant strike that takes out a large amount of enemy health at once, as well as refreshes the duration of the little Assistant. It is important to use it once per rotation to provide the team with buffs.
- Normal attacks are not generally used, so they can be left unlevelled to save on resources.
Constellations
| Name | The effect |
| 1. Rectification processor | When Ineffa deploys Optic Flow Barrier, all nearby party members gain the effect of Current-Carrying Composite for 20 seconds, increasing the damage of Lunar Bolt by 2.5% for every 100 Attack Power Ineffa has, up to a maximum of 50%. |
| 2. Auxiliary cleaning module | After Elemental Blast (Supreme Command: Cyclonic Exterminator) hits enemies, a Decree of Punishment is placed on one of them: after a short period of time or when that enemy is defeated, nearby enemies are dealt AoE Electro damage equal to 300% of Ineffa's attack power. This damage is considered Lunar Charge reaction damage. Additionally, when an Elemental Burst is activated, the active character nearby gains Optical Flow Barrier. |
| 3. Improved emotion emulator | Increases the level of Elemental Skill (Purification Mode: Carrier Frequency) by 3. Max. Level: 15. |
| 4. The path without a sign | When characters in your party activate the Lunar Charge reaction, 5 energy is restored. This effect can occur once every 4 seconds. |
| 5. Overcoming mirror sleep | Increases the explosion level (Supreme Command: Cyclonic Fighter) of elements by 3. Max. level: 15. |
| 6. Dawn morning for you | When Ineffa is under the effect of Current-Carrying Composite (first constellation), she deals 135% of her own attack power as AoE Electro damage to enemies near the active character after nearby thunderclouds strike them with lightning. This damage is considered Lunar Charge reaction damage. This effect can occur once every 3.5 seconds. |
The best constellations of Ineffa are С1, С2 and С6.
- The first constellation — the best option for making the character stronger. This constellation allows you to increase the reaction damage not only after interaction between Hydro and Electro, but also after a simple activation of the E-attack. The constellation gives an additional 50% damage to the reaction if the character has 2000 ATK.
- The second constellation allows you to hit extra enemies after using an ultimate depending on ATK, and also increases the team's survivability due to the fact that the shield is now applied not only by E-attacks, but also by Elemental Burst.
- The sixth constellation provides additional Electro AoE-strikes, which will also receive all the Lunar-Charged buffs from the passive and CXNUMX. This bonus will be active for the entire duration of the fight, since the skill works all the time and maintains the effect of the Carrier Flow Composite.
How to play Ineffa

The character is a standard off-field damage dealer, who enters the battlefield to activate her skills and then leaves the battle again. In addition, Ineffa's skills allow her to act as a buffer and shielder, which is why she will have to appear in battle a little more often to protect her companions from incoming damage.
Keep in mind that the robot plays best only through Lunar-Charged, which she gets instead of Charged, so in other reactions she plays much worse due to the lack of buffs. The girl increases the EM of allies only after her ultimate, take this into account while performing the rotation and leave this buff for the moments when the active ally depends on this stat.
Rotation
Skill Order: E (elemental skill) > switch to other supports and secondary damage dealers > Q (elemental burst) > rotation of the main damage dealer.
The rotation for this character is as follows:
- Use the elemental skill to summon Birgitta, who will deal damage on the battlefield.
- Switch to other supports and secondary damage delaers to distribute buffs and elemental status for the Lunar-Charged reaction.
- If Ineffa has accumulated her ultimate, activate it to refresh Birgitta's effect and increase her allies' EM.
- Switch to the main damage dealer and perform their rotation.
- Update the robot's E-attack if needed.
Is the Character Worth Pulling For?

Ineffa is a versatile secondary damage dealer who isn't limited by her allies' attack types, as all her damage output comes from her assistant, Birgitte, who operates from her pocket. She brings variety to gameplay, swapping the familiar Charged reaction for a Lunar Charge, and her loadout offers a wide variety of weapon options and sets to choose from, simplifying builds on any account.
Due to her role as a sub-DPS, she's not tied to any specific team and can play with all Electro and Hydro main DPS, making her one of the most versatile characters. By combining support and damage, she covers both slots in a team, and with Columbine, they form one of the strongest duos in the game.
What to Choose: C1 or Signature?
Both Ineffa's signature and her first constellation are quite strong and will bring a lot of benefit, but in the absence of extra resources, it is worth paying attention to the following features:
- С1 after each activation of the E-attack, increases the reaction damage by 20% for 50 sec., provided that the character has at least 2000 ATK.
- Polearm Fractured Halo enhances reactions by 40% for 20 sec, additionally increases ATK after using a skill or ult.
Buffing reactions for 40% and ATK increase combined are more profitable than just buffing reactions for 50%. Both investments will give a significant increase in damage from Lunar-Charged and useful stats, but first of all it is worth choosing the signature, and only then pull for the constellation.
Trailers and Bio

Ineffa is a universal humanoid robot from the Clink-Clank Krumkake Craftshop, who serves as a maid for some lady. She is assisted by a small robot named Birgitta. Despite her youthful appearance, the source core that supports life in her has survived a huge amount of time and was only recently activated again.
In ancient times, human-like mechanisms looked much more massive and impressive, but Ineffa, although a more primitive version of them, also works on phlogiston with an engraved consciousness and soul. Unlike ancient machines, the girl was not created to carry out global plans, but to fulfill the role of a companion, which she copes with well, since some call her the best robot in the world.
In the special trailer, you can learn more about her backstory:

How to help Ineffa with a magnet

Sometimes, when visiting the Dzin-Klatz Krumkake Workshop, you can hear a robot saying, "Help." If you look around, you'll see Aino near Lally and Bozena at this moment.

Talk to the girl and you'll learn that she's playing with Ineffa this way. There's nothing you can do about it, as the group is simply having fun—this feature was added to liven up the world and isn't a hidden quest.







Clorinda Ineffa Columbine Berry - is it normal?
Norm
I knocked out Fleance and Ineffa, but I don't have Columbine yet. I have Aino too, but I'm completely unsure how to play her. I also have Xingqiu C6, will it work well?
The squad turns out to be Fleance, Ineffa, Xingqiu and Kazuha
Put the Instructor set on Aino to give her MS, and more cooldowns so she can get her ultimate on cooldown, and that's it. If you have the Natlan sword "Flame-Forged Insight," that's even better; she'll be able to cast V.E.
All Aino needs to do is throw a duckling; she won't do any damage anyway. Ult for her, and then continue down the list with the Sap abilities.
Guys, what's better to get, the Ineffe signal or the C1 for Fleance, considering he already has a signal
C1 Flins, then C2, then Ineffa's signal (if you're looking specifically at his squad, and not at how much benefit Ineffa's signal will provide in the sidecar).
So, no negativity, I got it completely by accident on the 15th spin. Will it work for Odette as a stopper for the role of an electro applicator?
How will the electric plug work?
Guys, in the Prime pack, Ineffa Signa, Kirill Khoma, Bina Signa, Sukharoz is better to give Viridescent Venerer and Memoirs, or another weapon from the fours, which one would be better?
One that will give as much elemental mastery as possible: this will improve the squad's numbers