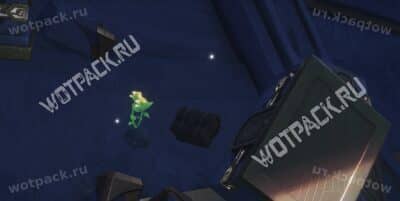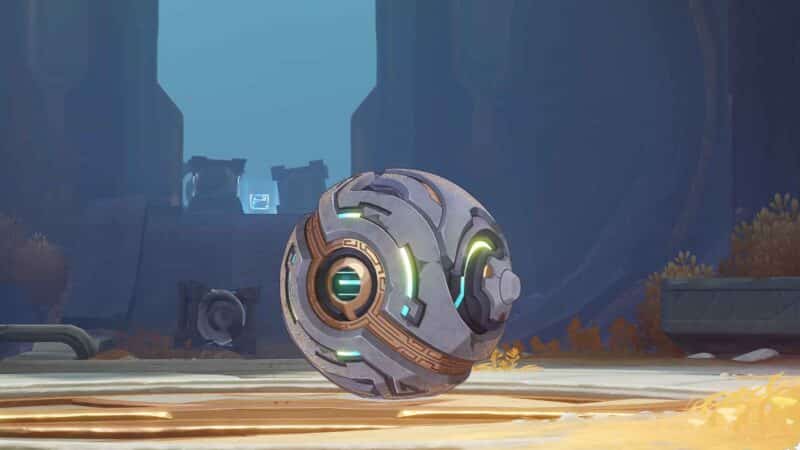
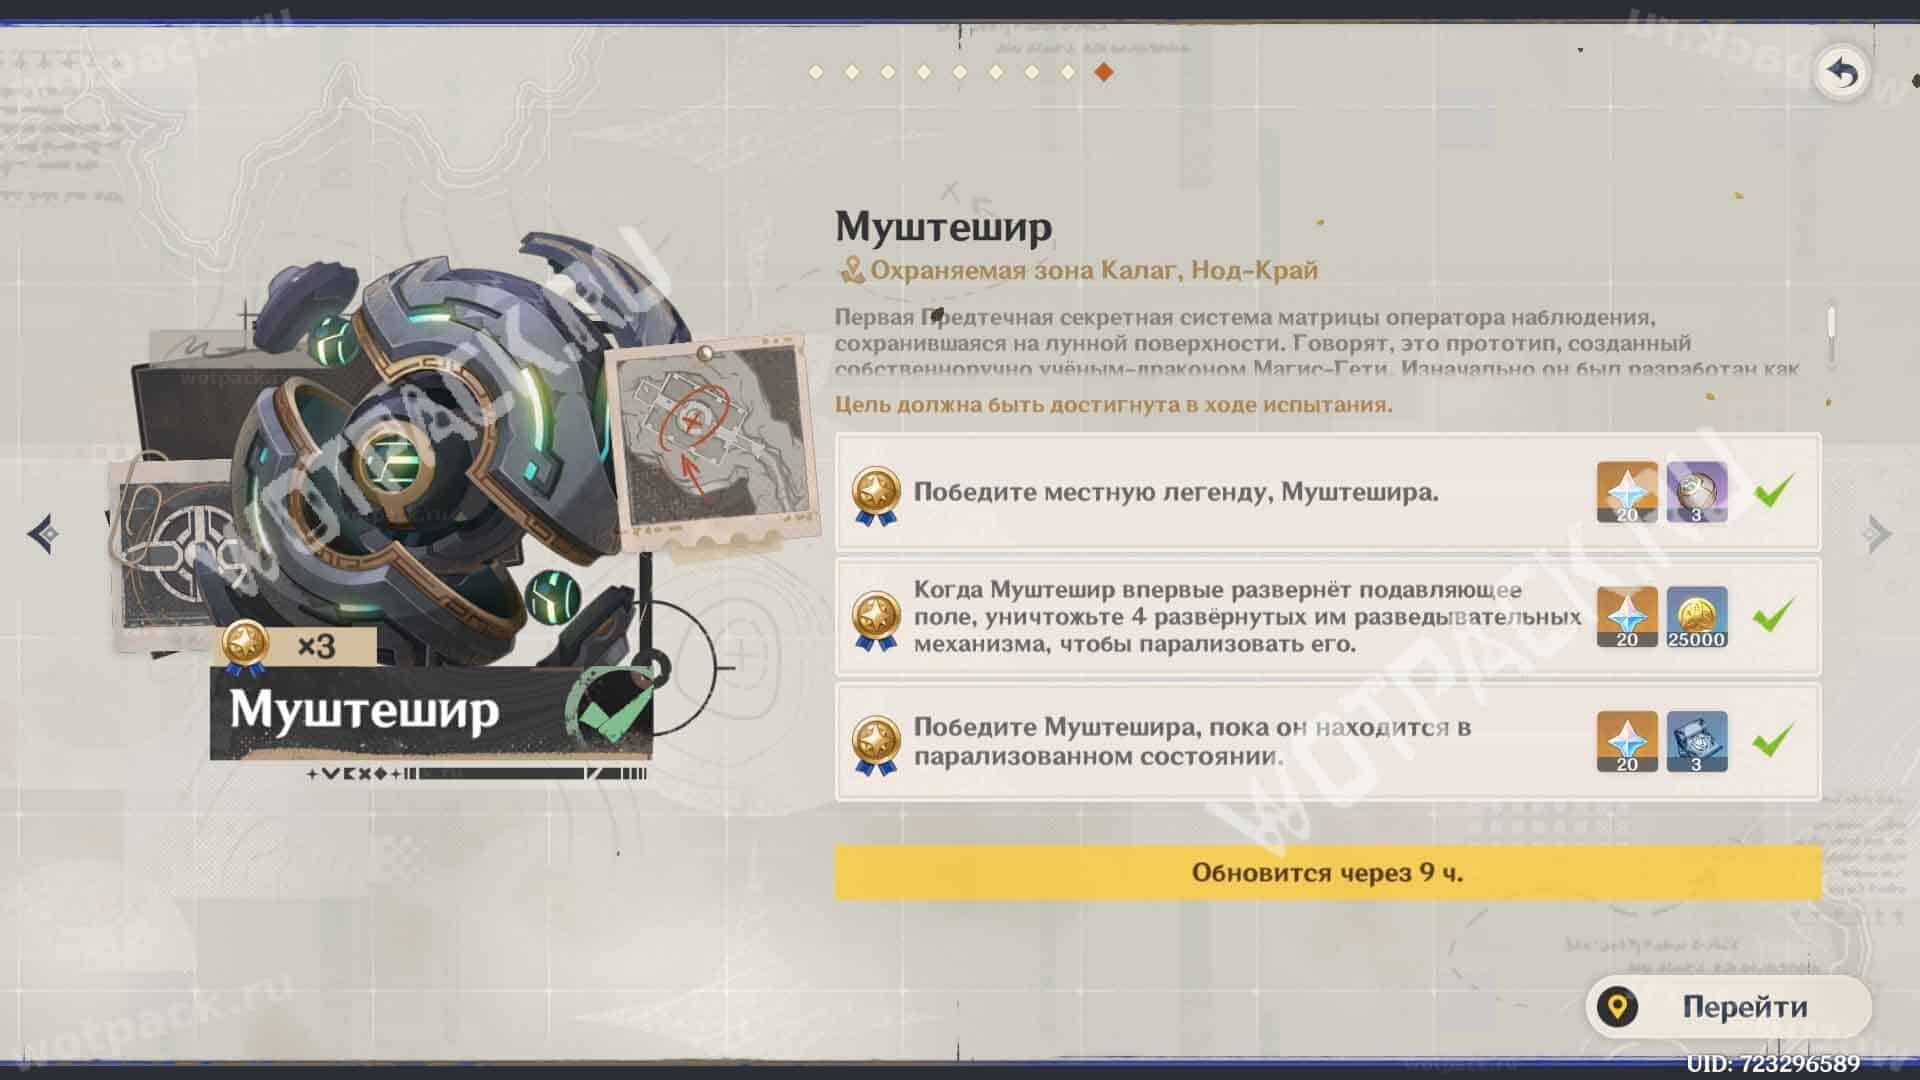
Mushteshiri is a local legend in the form of a spherical mechanism in Genshin Impact, which is located on the territory Frosty MoonThe enemy is immobile and his attacks do not pose much of a threat.
Stargazer Pioneer's base stats lack enhanced elemental resistances, and the entire challenge of the fight lies solely in the hovering devices. Shooting down the hovering devices will stun the miniboss and leave him vulnerable to attack.
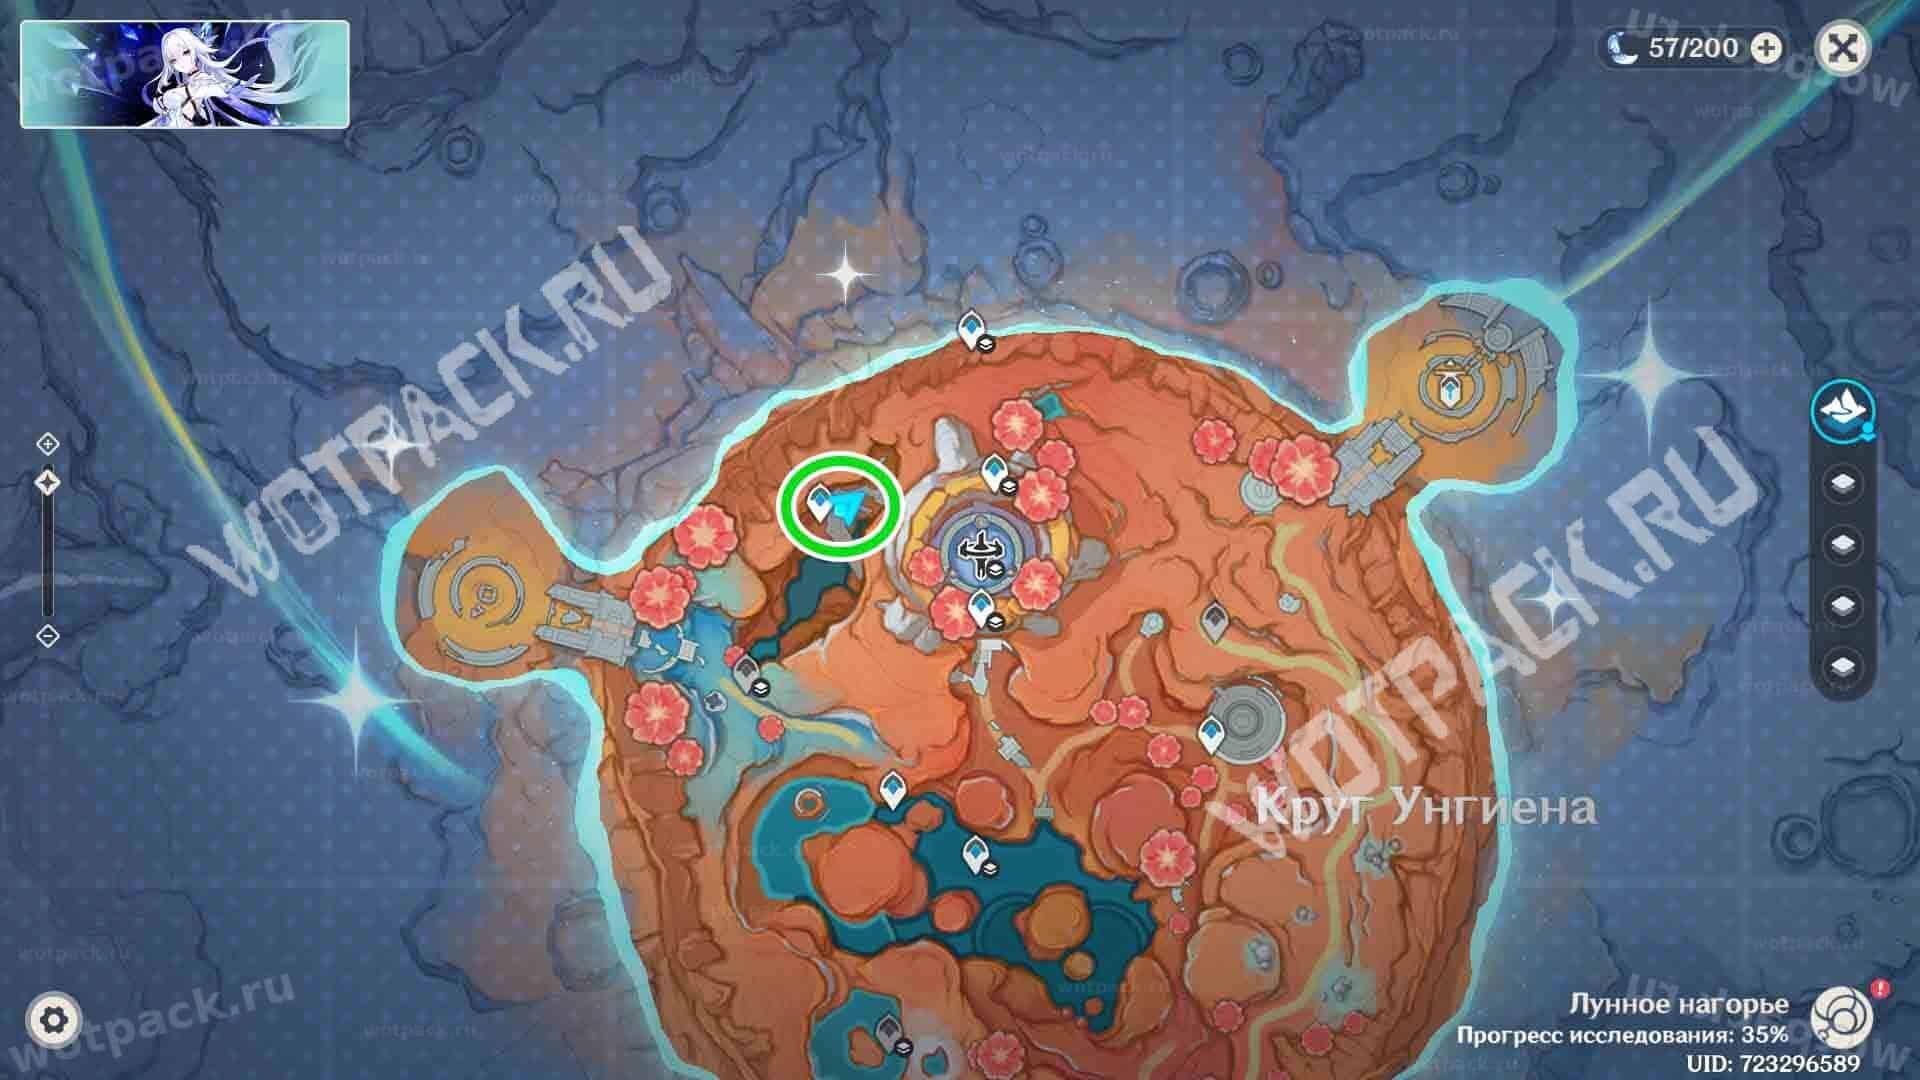
Where to find Mushteshir
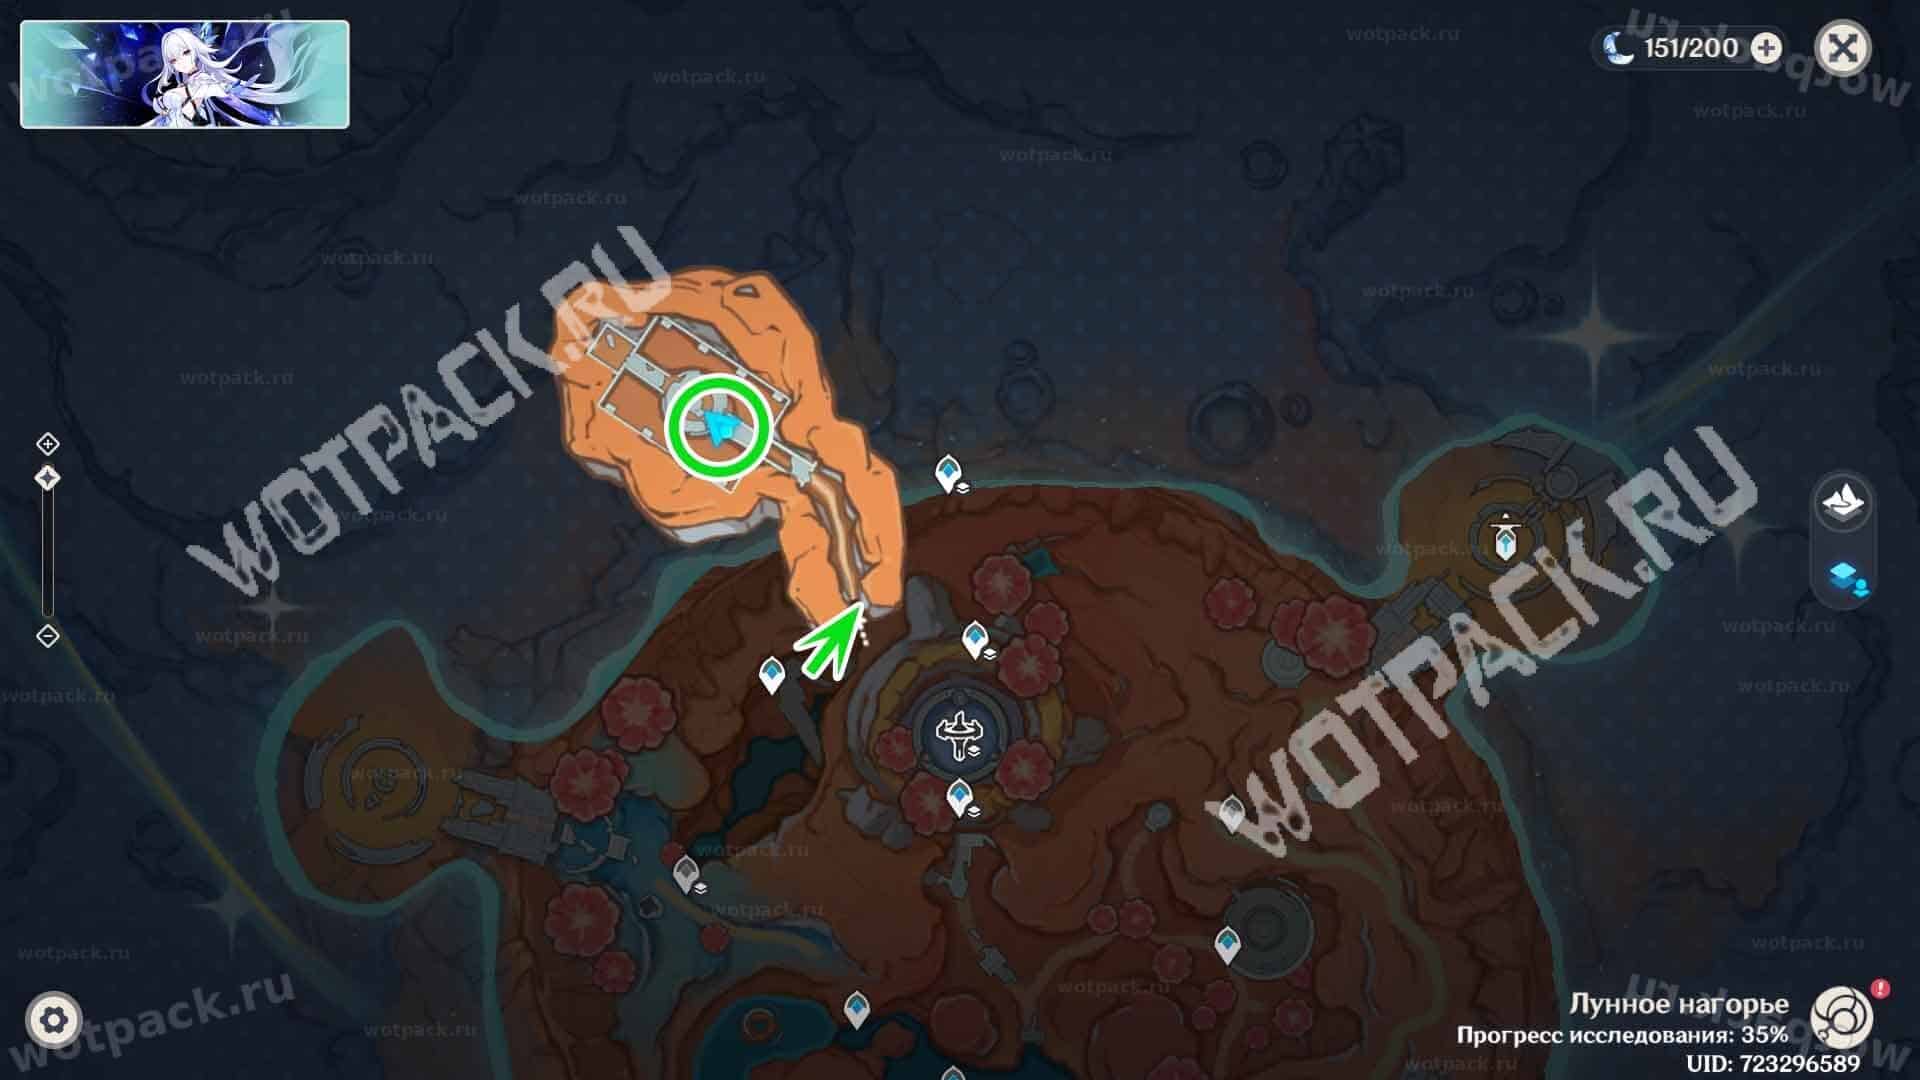
The mechanical ball is in the cave. Lunar Highlands, underground in the Ungyen Circle. The area will open after the quest Guests from the Stars from Moon Gazing.
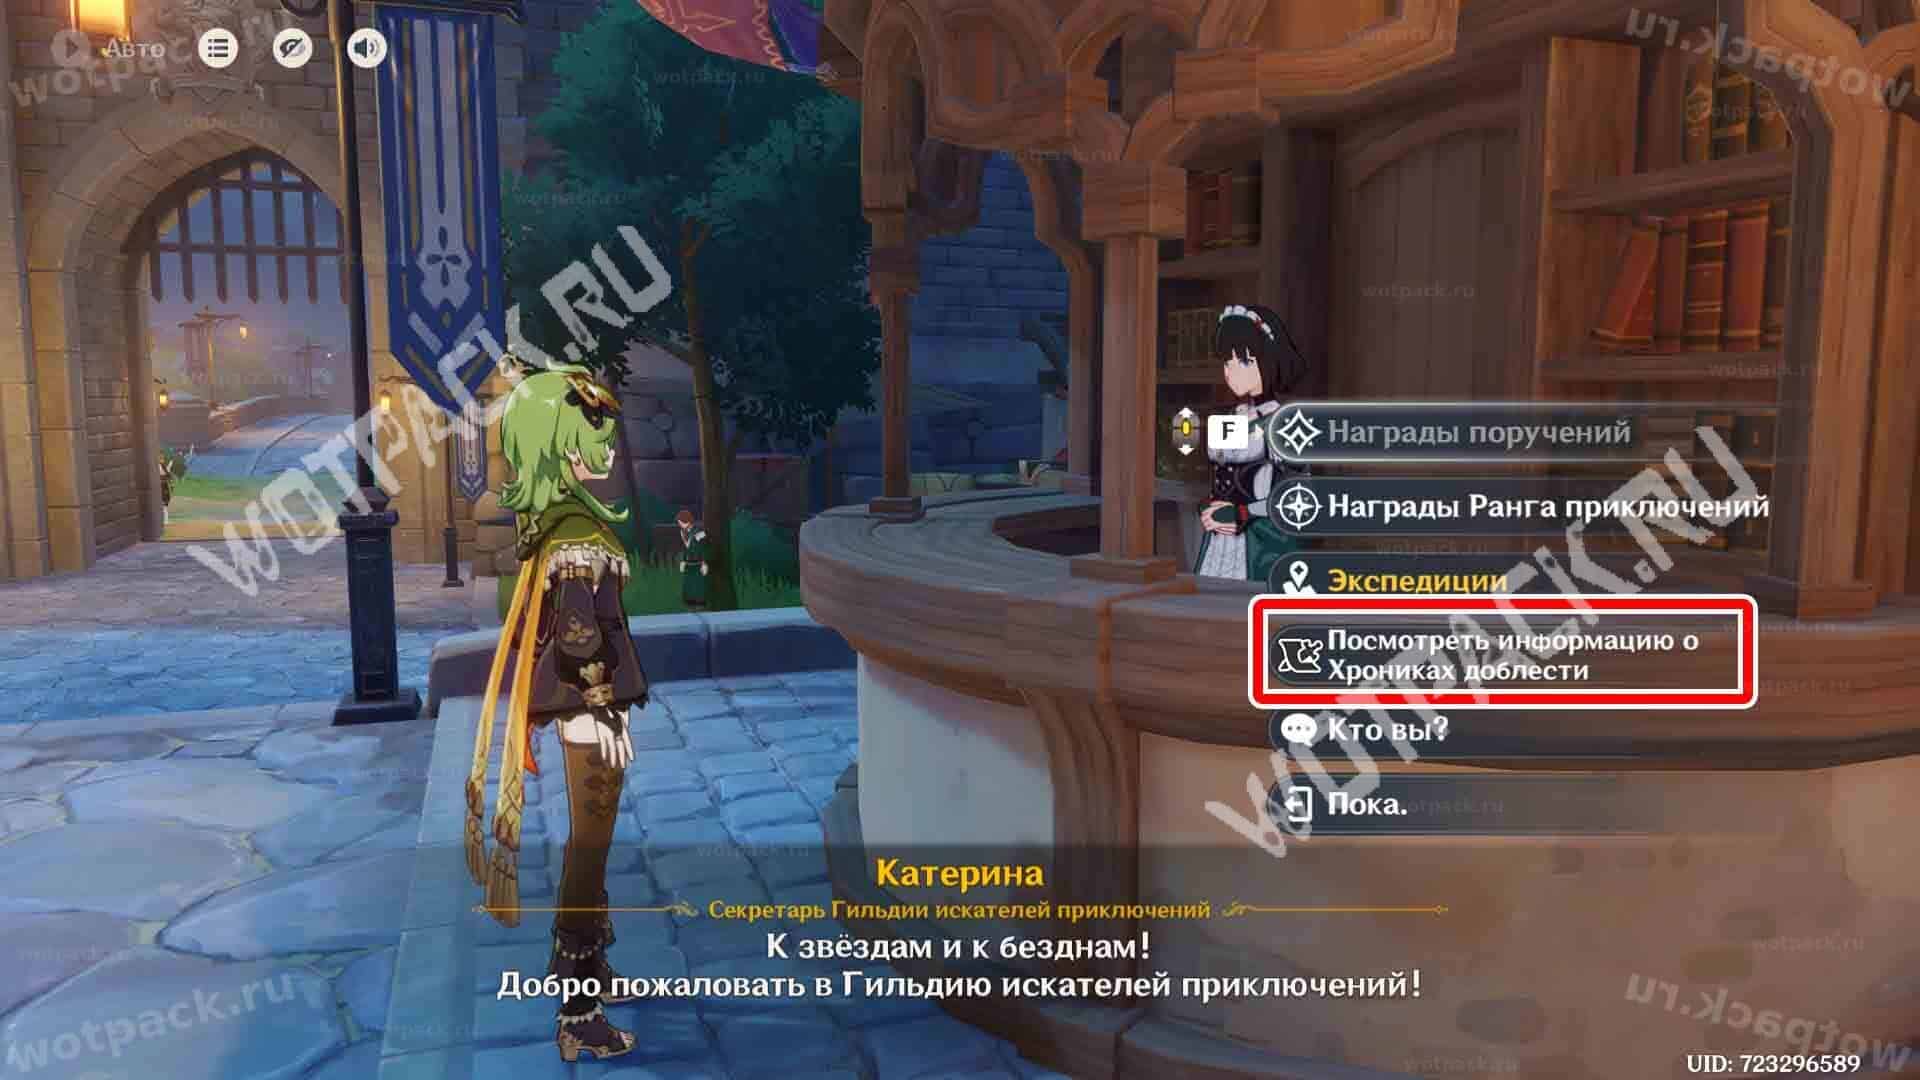
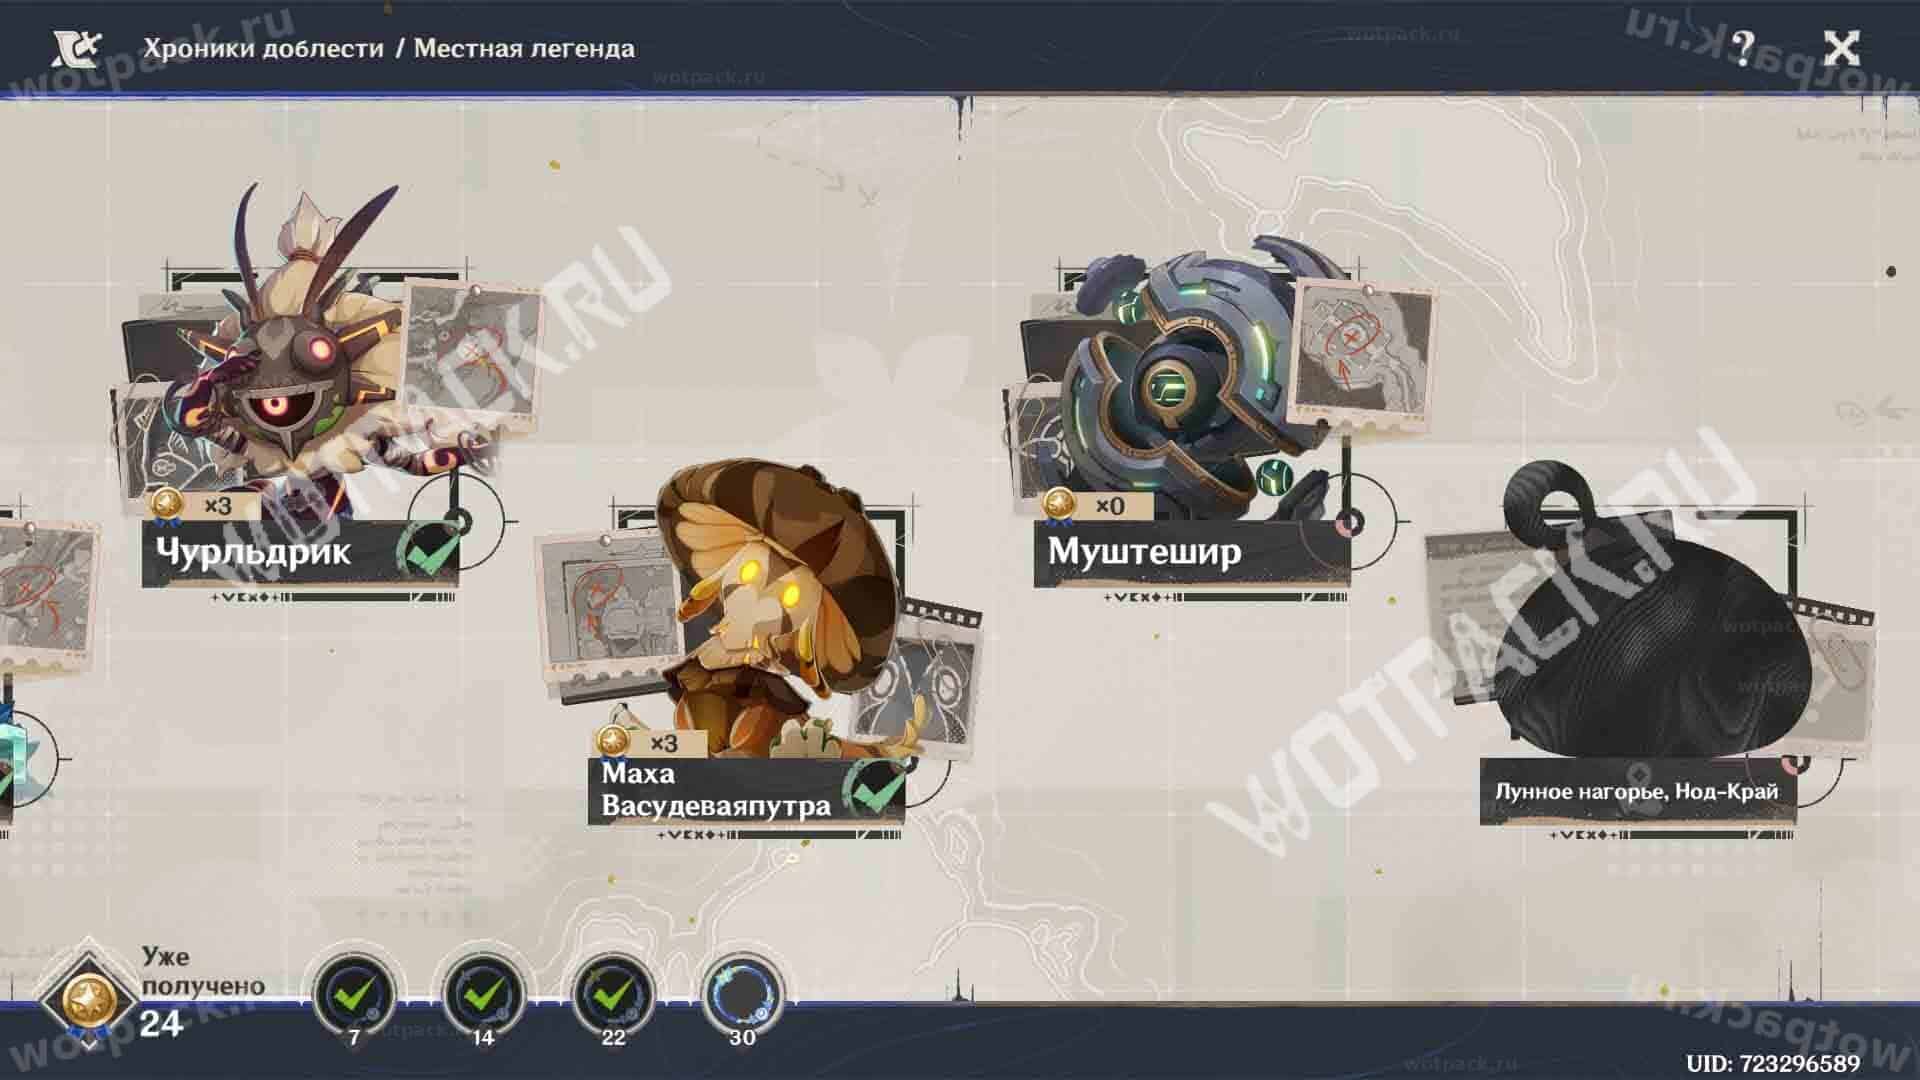
After your first encounter with the legend, you can contact Katerina in any region and check information about the enemy in Chronicles of ValorIn this same menu, you can easily track the progress of achievements related to mini-bosses.
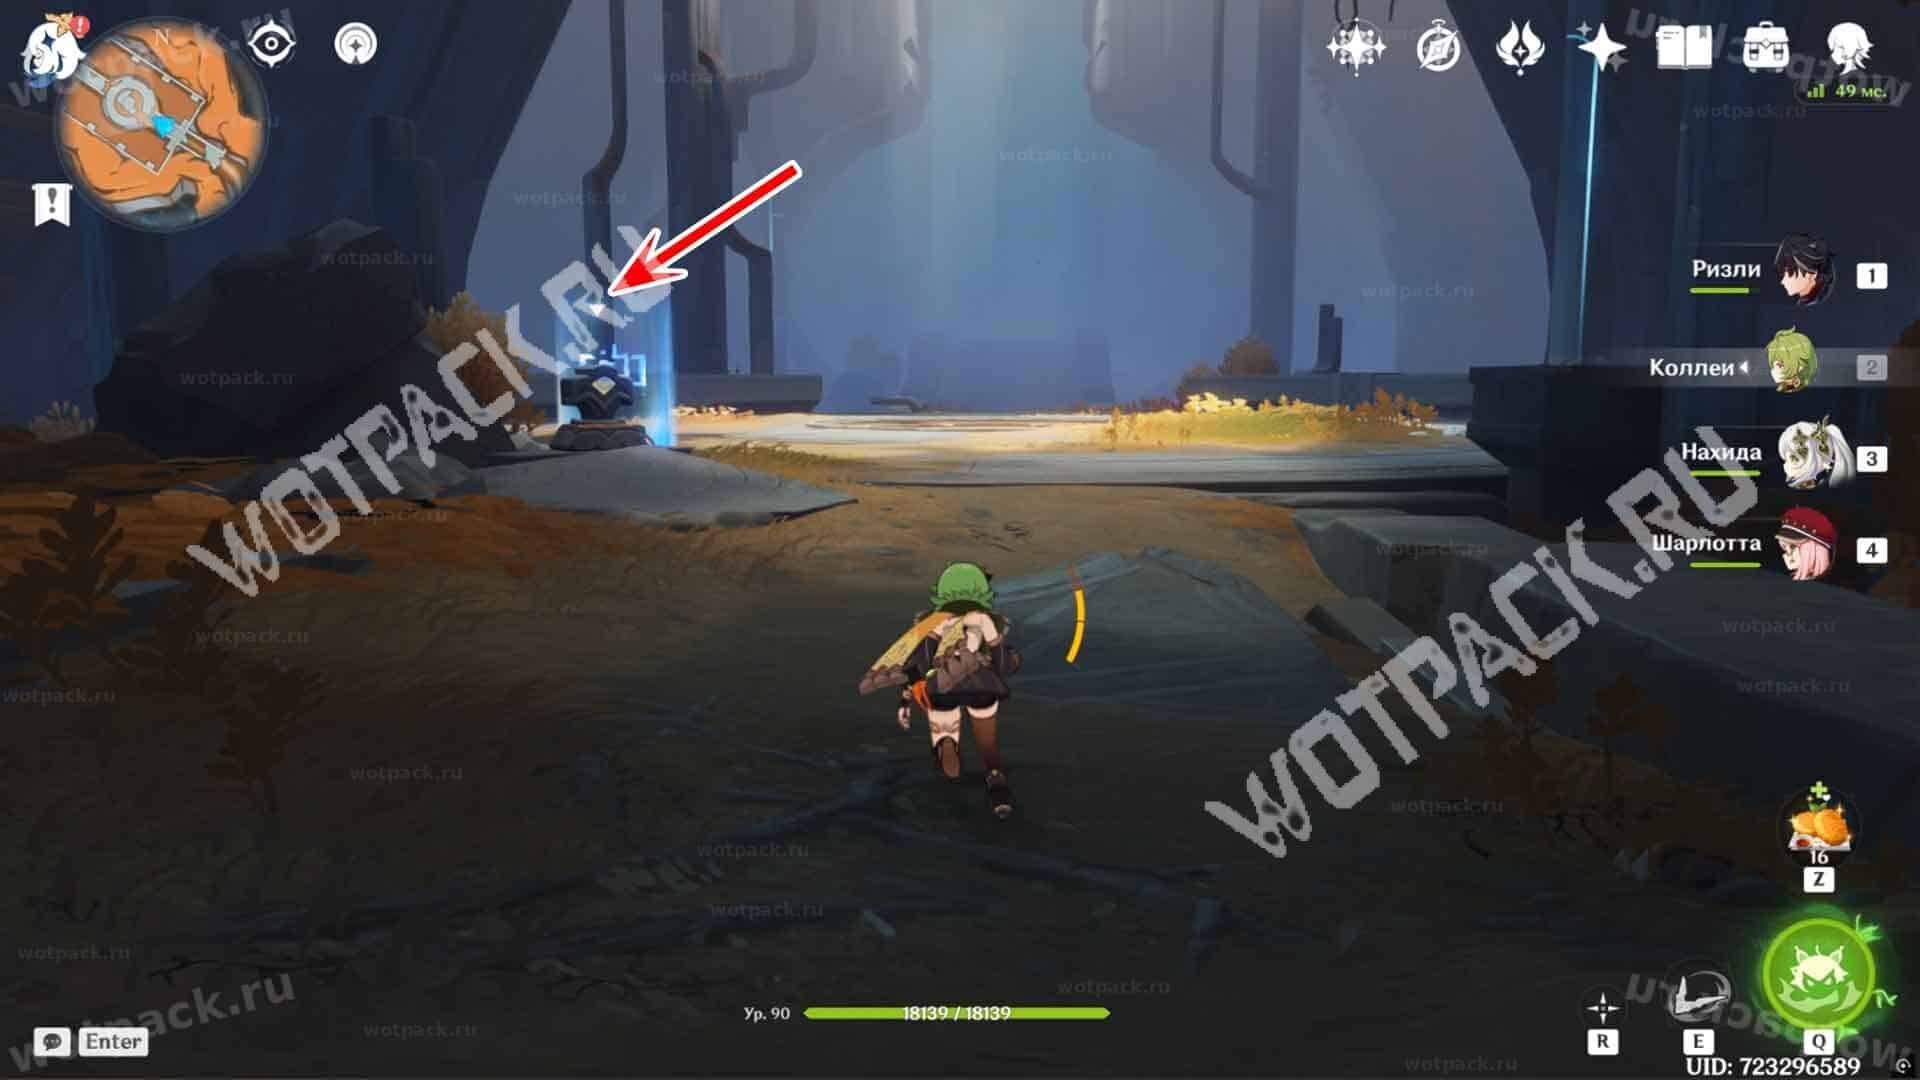
How to get to the Kalag Protected Area
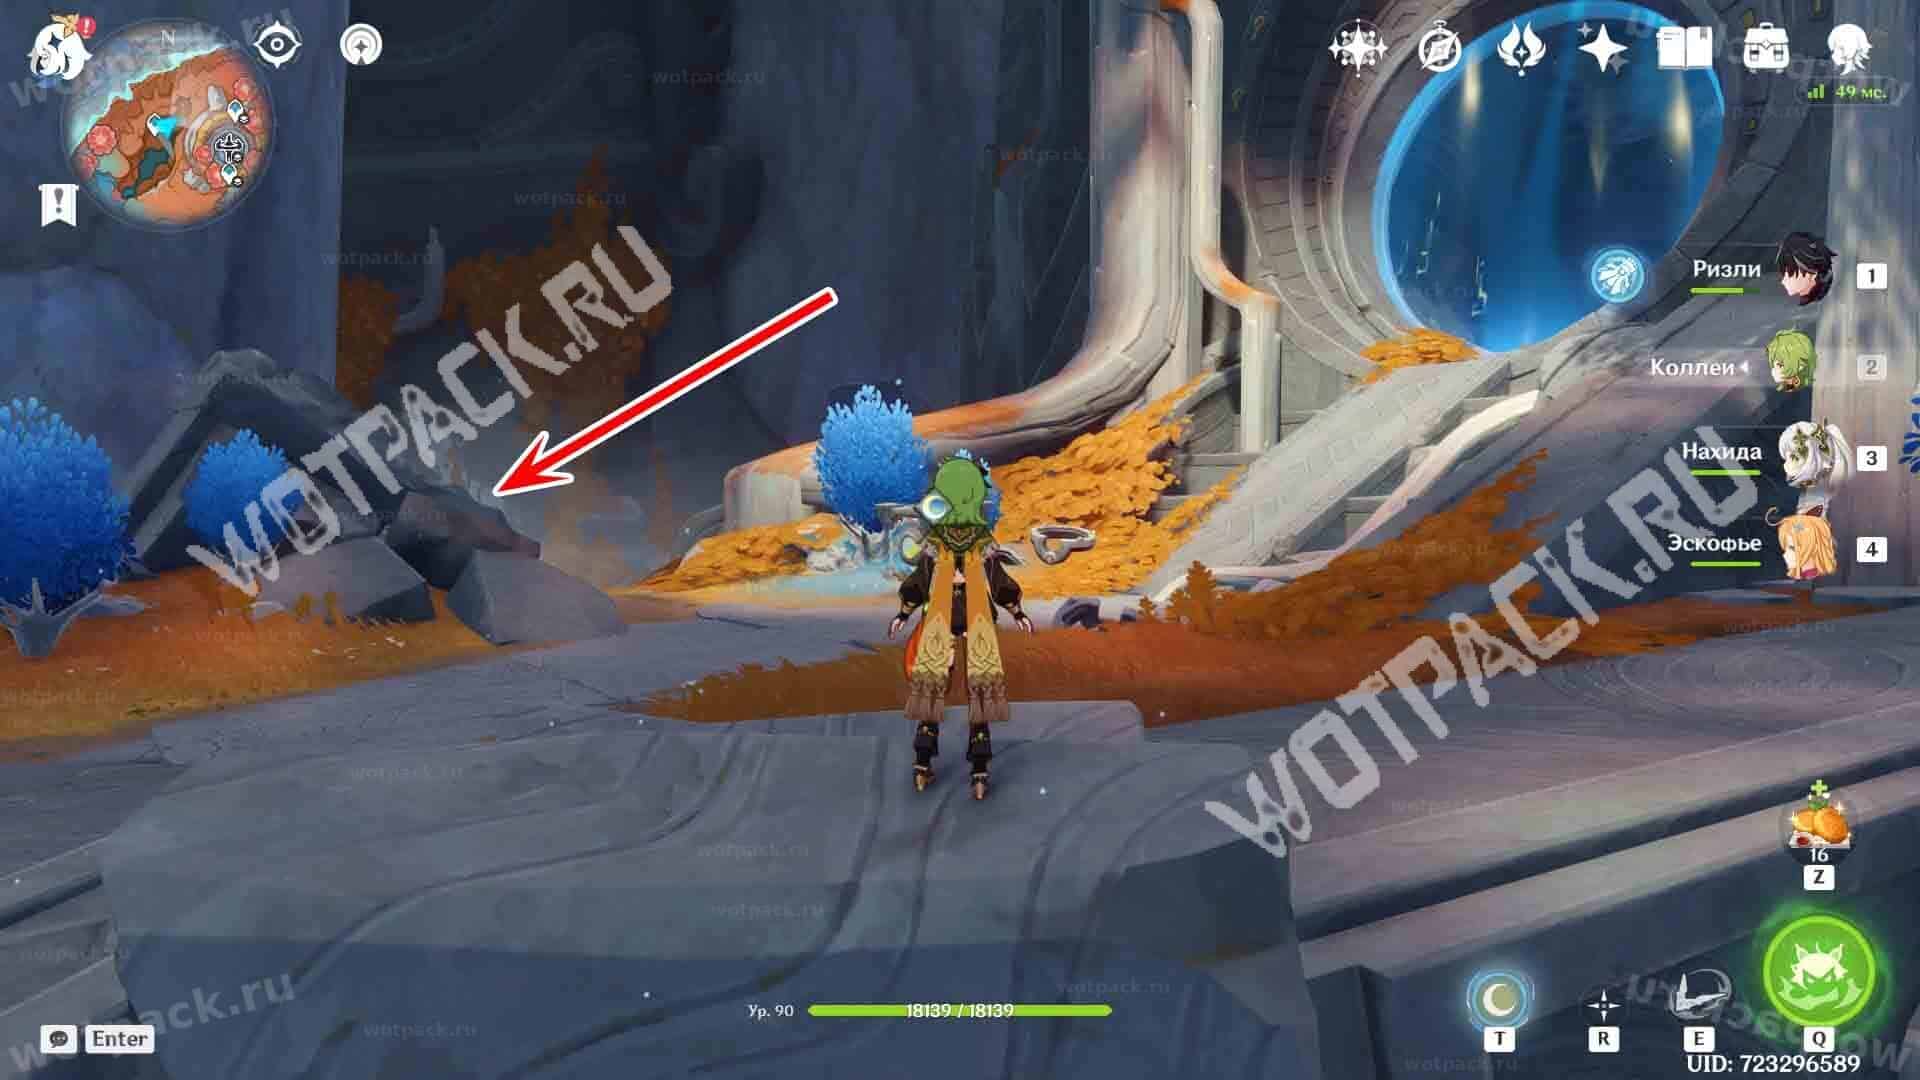
Reach the northwest ground teleporter in the colored zone Frosty MoonWalk forward a little and you'll find a passage blocked by a blue wall. Turn left to enter the inner cave.
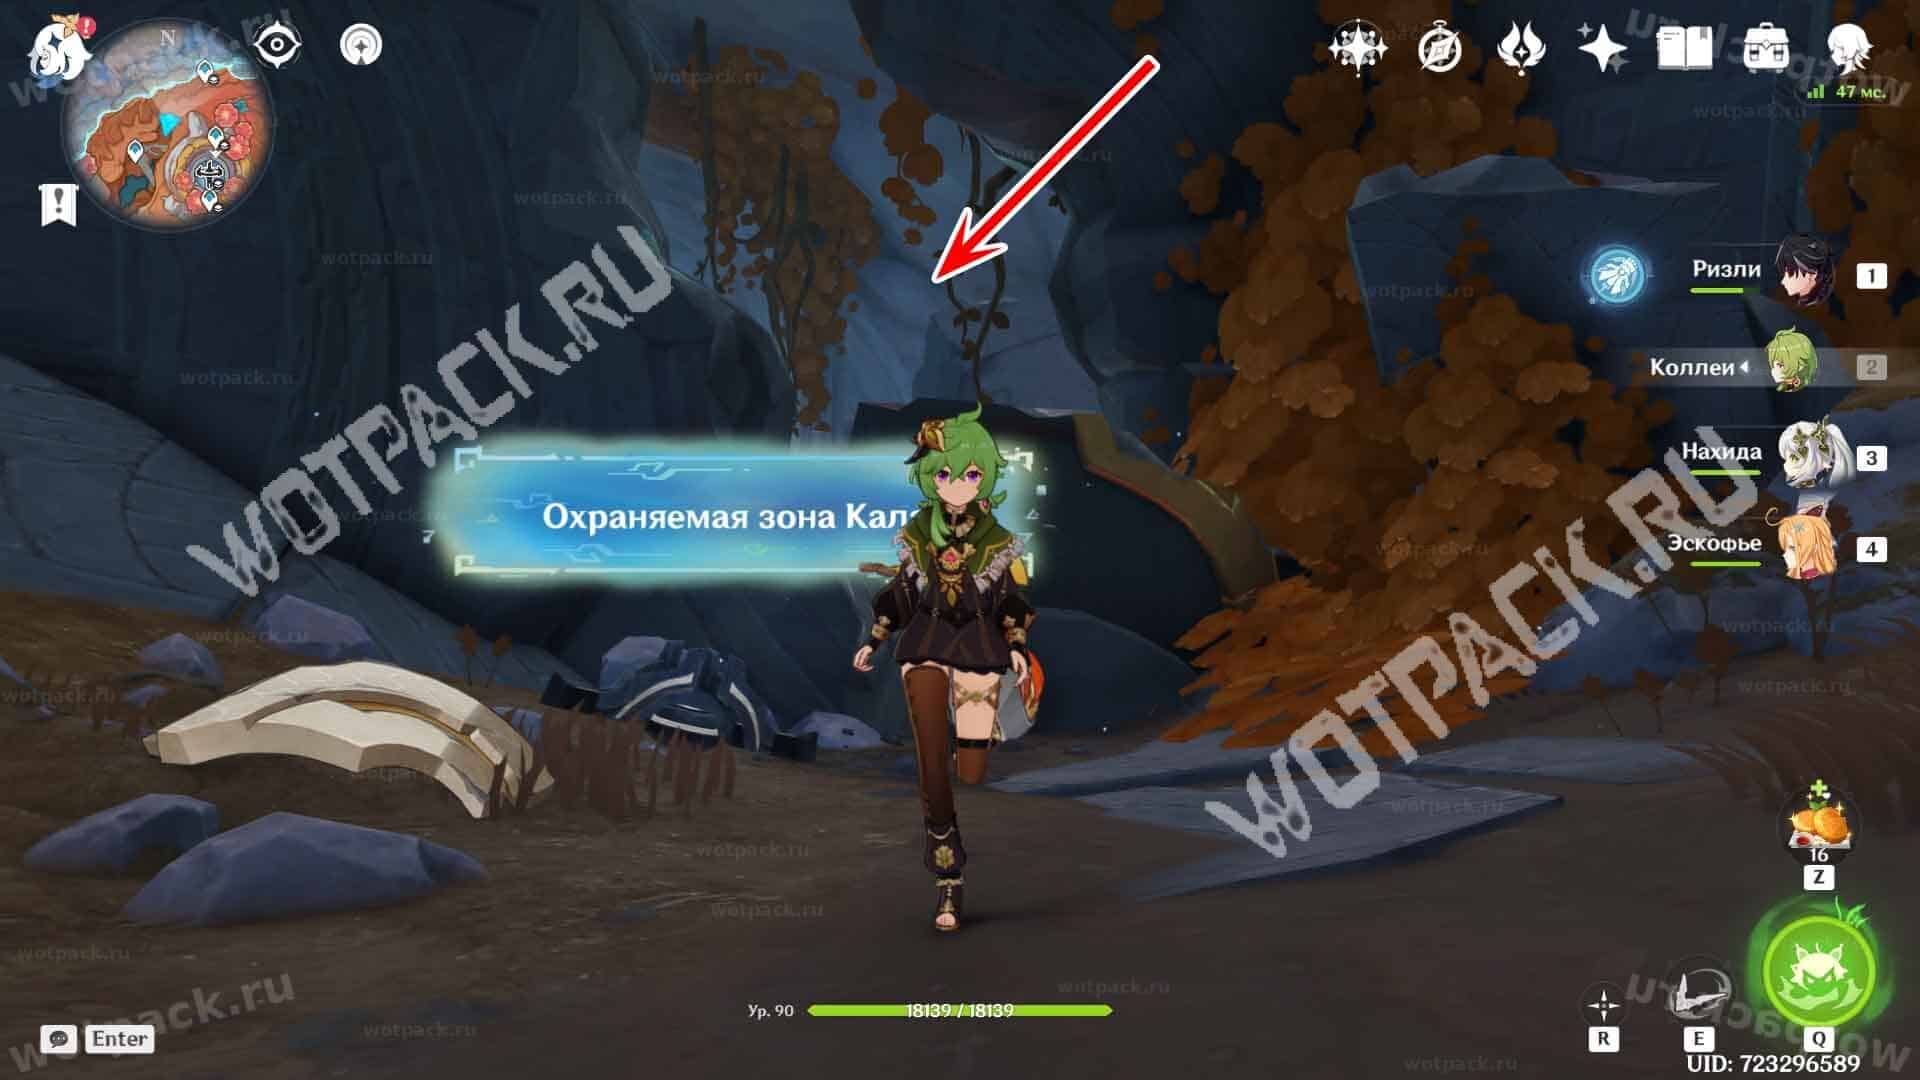

Climb into the crevice and go down the corridor until you reach the arena with the mechanism.

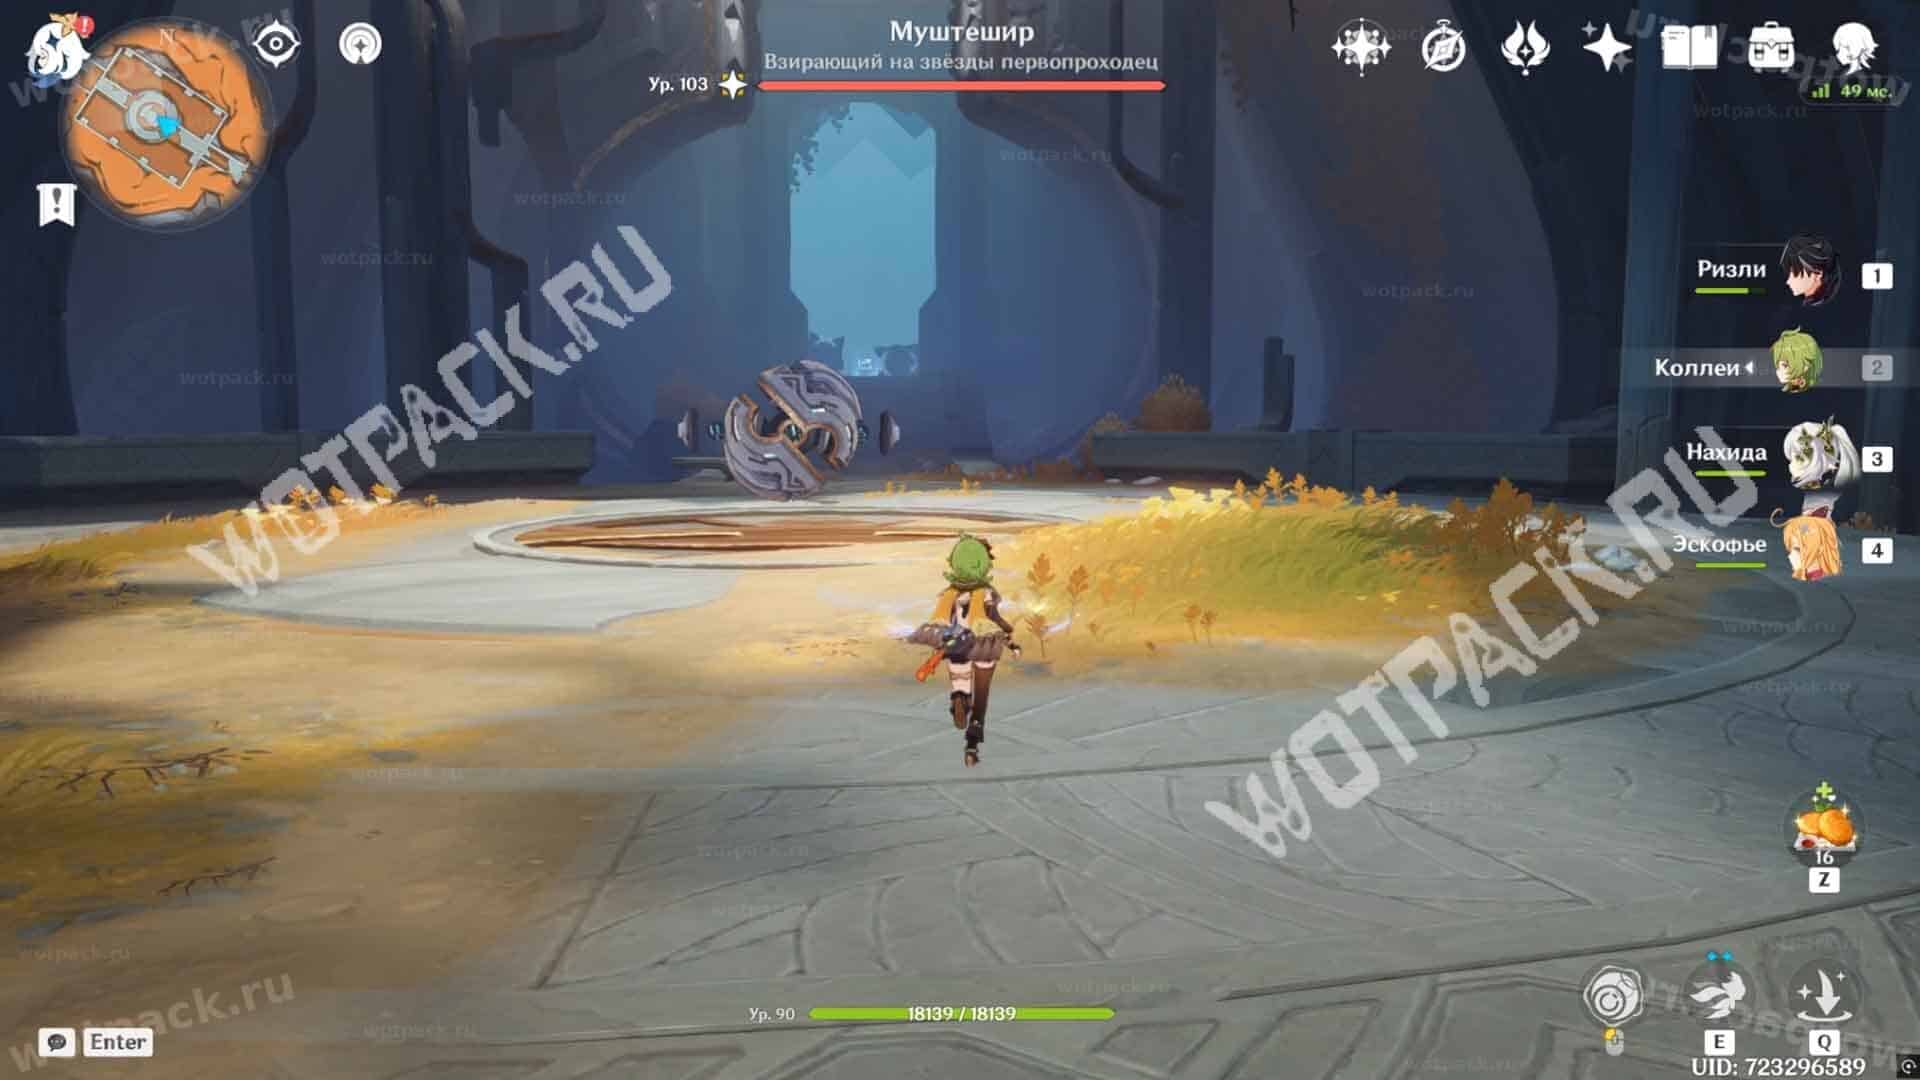
Tap the device to launch the challenge. To trigger the Legend, defeat two waves of Surveillance Operator Matrices, restarting the battle each time through the mechanism near the arena.
How long does it take for the boss to respawn?
The Stargazer Pathfinder appears in his lair once every real-world day. If you see that you're failing to meet one of the combat requirements, teleport to the cave entrance to allow him to regenerate his health. This way, you can try again without having to wait for a server reset.
How to defeat Mushteshir in Genshin Impact

The boss has 10% resistance to all incoming damage. The lower the world level, the lower the enemy's HP and defense. cooperative On the contrary, these indicators are increasing, which is worth considering. If you have difficulties with passing, you can reduce world level.
The difficulty of the Pathfinder fight lies in its ability to summon Hydro Mechanisms that raise a dome and hover in mid-air. Most characters attack from the ground, so not all companion skills and ultimates will be able to reach their targets, so it's important to choose a team with appropriate attacks.
If you don't remove the devices in time, you won't complete one of the achievement's conditions, and the mini-boss will receive a Hydro Shield and increase its defense.
Top Teams
For convenience, it's recommended to avoid Hydro damage dealers. Focus on choosing companions who can reach the upper mechanisms:
- Hydro devices interact best with Dendro reactions, especially Flowering or Lunar Budding through priestess Lauma. Works well too. Stellar superconductor.
- The boss is easy to defeat with Freeze due to its periodically refreshed Water status. For the same reason, Pyro damage dealers like Steam or Melt work well with Cryo sub-DD.
Most of the characters in the table presented can be replaced with analogues available on the account.
| Character 1 | Character 2 | Character 3 | Character 4 | Features |
|---|---|---|---|---|
 Sandrone Sandrone |  Qiqi Qiqi |  Yae Miko Yae Miko Beidou Beidou |  Escoffier Escoffier Diona Diona | Sandrone alone is capable of destroying mechs with a charged attack due to the specific nature of her reaction. The two supports give the group good survivability. |
 Nefer Nefer |  Lauma Lauma |  Columbina Columbina |  Baizhu Baizhu Jahoda Jahoda Nahida Nahida | Lauma is the most important member of the team. When the flying devices appear, use her long E while standing underneath them to shoot them down. For added convenience, you can add Nahida to the fourth slot, but without the C1 priestess and Prototype: Amber It will be more difficult for Columbine to maintain the health of her squad. |
 Kinich Kinich |  Durin Durin |  Nicole Nicole Bennett Bennett | Nahida isn't needed here for the status effect, as her marks don't trigger with pure Burn, but to pin Dendro on the devices by holding down E. Then Durin uses his skill and ultimate to hit them with elemental blasts. If you're having trouble, use his light form and stand under the mechanisms. | |
 Chasca Chasca |  Mavuika Mavuika Xiangling Xiangling |  Shenhe Shenhe |  Citlali Citlali | Chaska's Melting ability is great for breaking devices and damaging enemies. Her bullets periodically apply Freeze to an enemy's Hydro, and then Pyro breaks the Cryo status. Before the devices appear, let her flight cool down to break everything in two rotations, or in one if you have Constellations. Your squad composition can change, but the key is to maintain a consistent combo with Cryo and Pyro allies. |
Destroy 4 deployed reconnaissance vehicles
The devices spawn in pairs at the same location, making them easier to hit with area-of-effect damage. Here are some tips for this phase of the fight:
- If you freeze the Cryo device with a shot and then hit it with Pyro or Electro Catalyst or another suitable hero, you will deal more damage.
- Casting Nahida's E-Shock while aiming down sights allows you to target all four devices at once, and the subsequent Pyro cast will trigger the Blossom effect throughout the chain. Lauma and her skill can be used in a similar fashion.

- Summoned bots periodically fire shots that can throw off archers' aim or kill a character with low HP. Add a shielder to your team or try to dodge the shots.
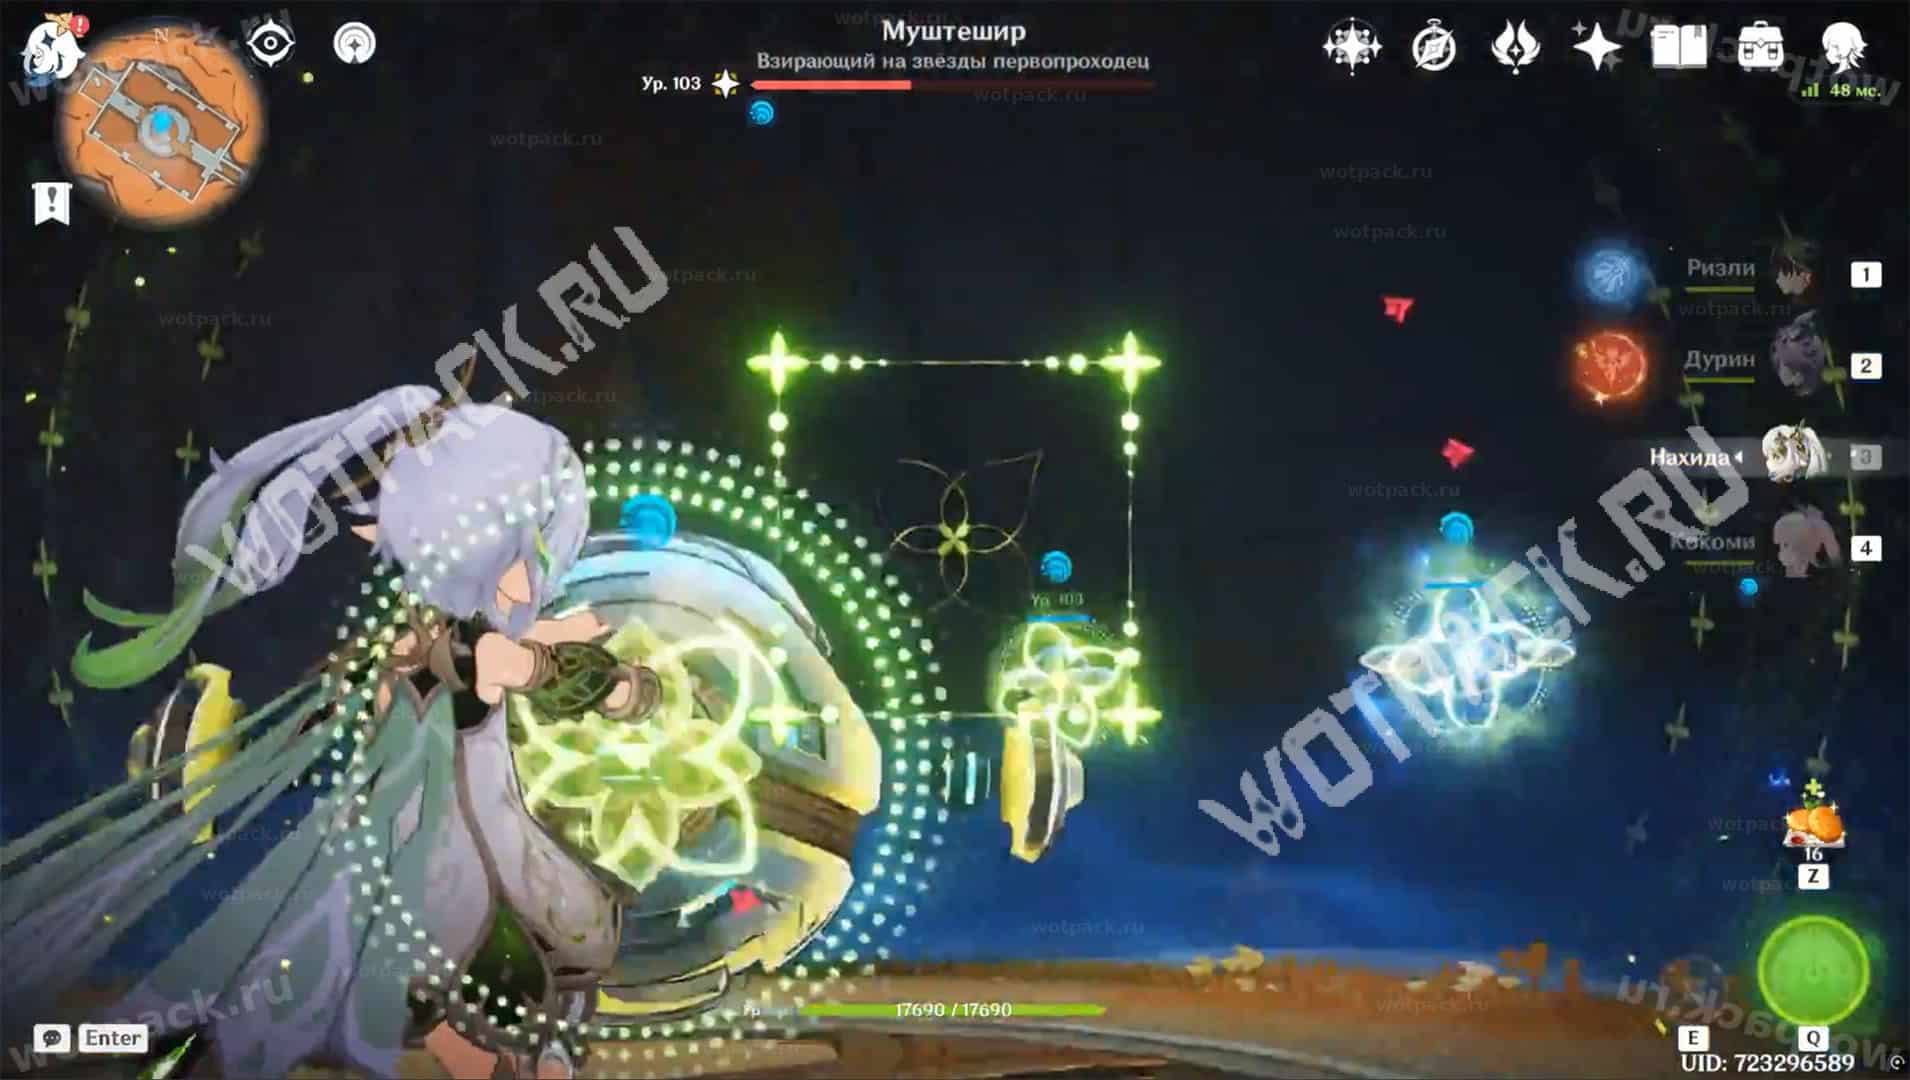
When Mushteshir first deploys his suppression field, destroy his minibots using the tips above. Destroy his devices each time to avoid the Hydro Shield phase.
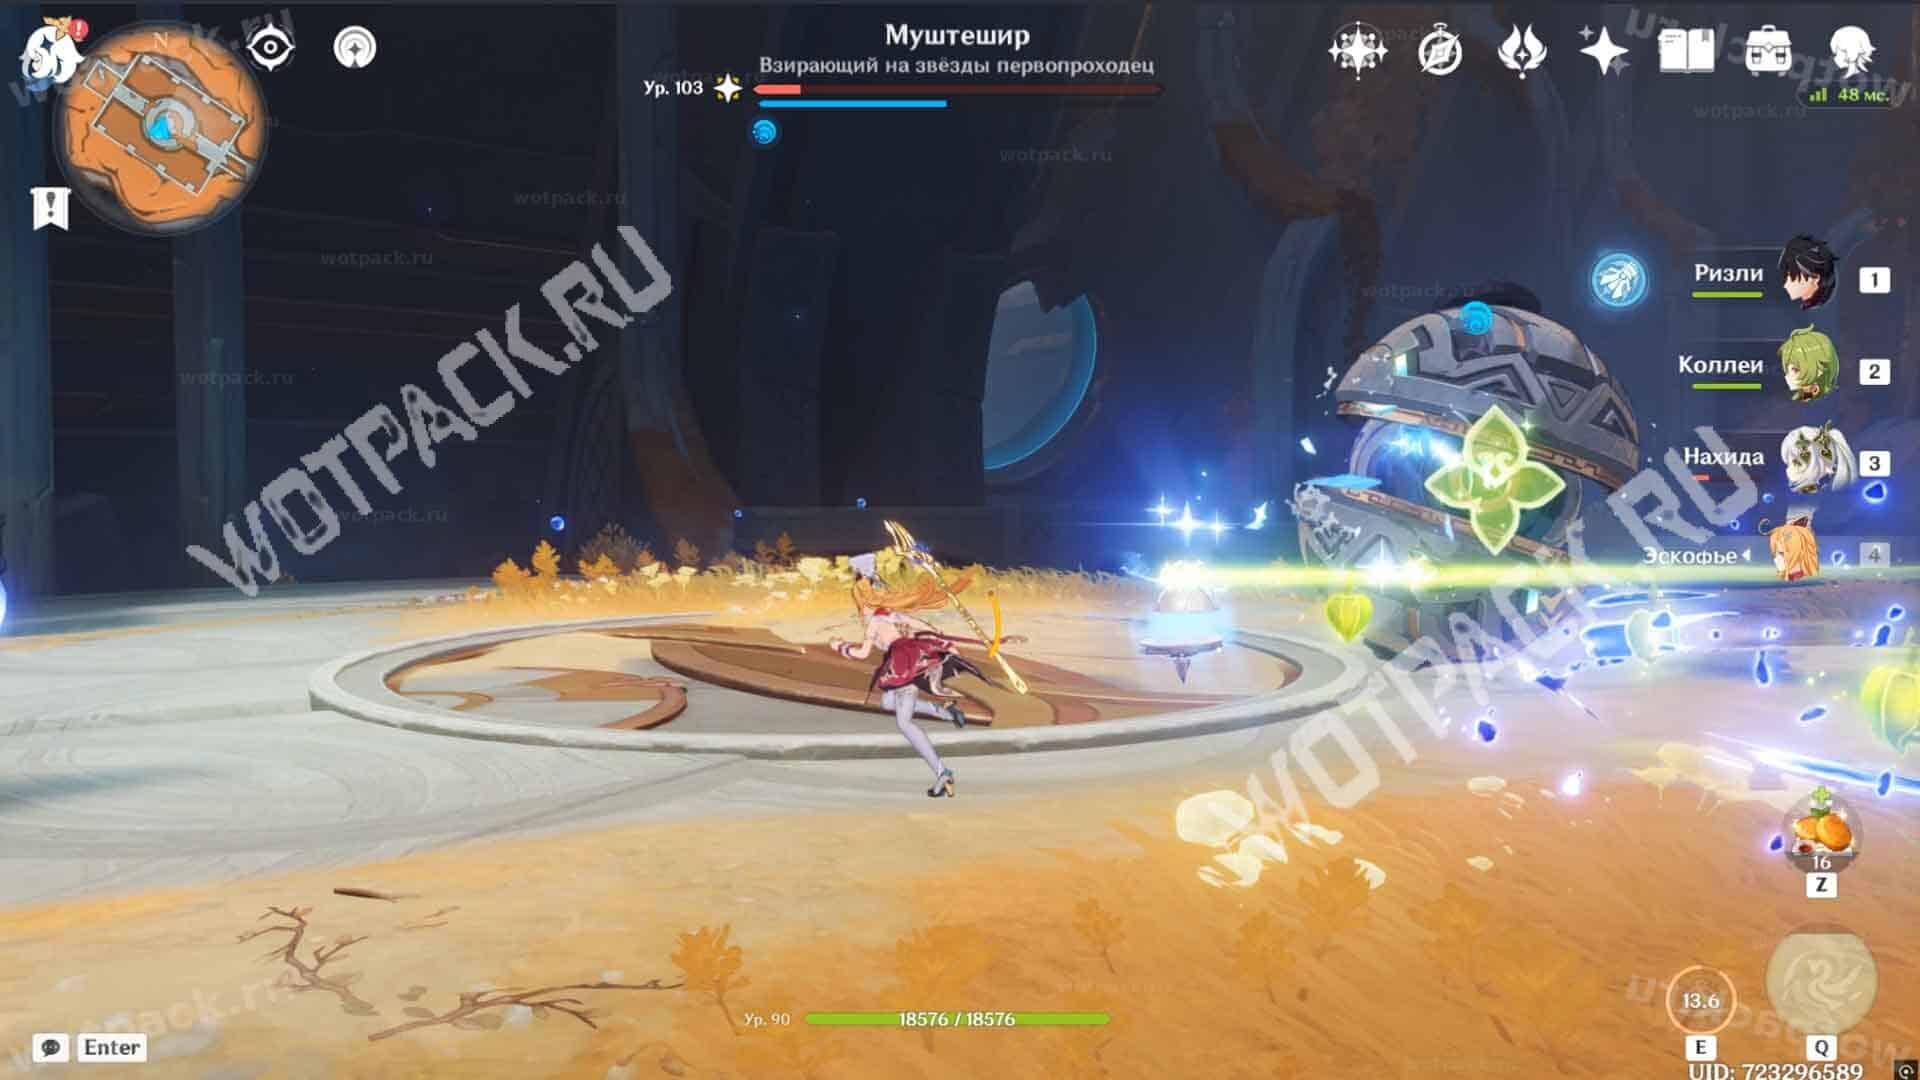
Win while he is paralyzed
The Pathfinder falls after four reconnaissance devices are destroyed. Reduce the boss's HP to a minimum beforehand, and then try to finish him off quickly after he falls. Wait until the device phase, remove them, and immediately switch to the main target.
Rewards
For completing all the points in the Chronicles of Valor you will receive: