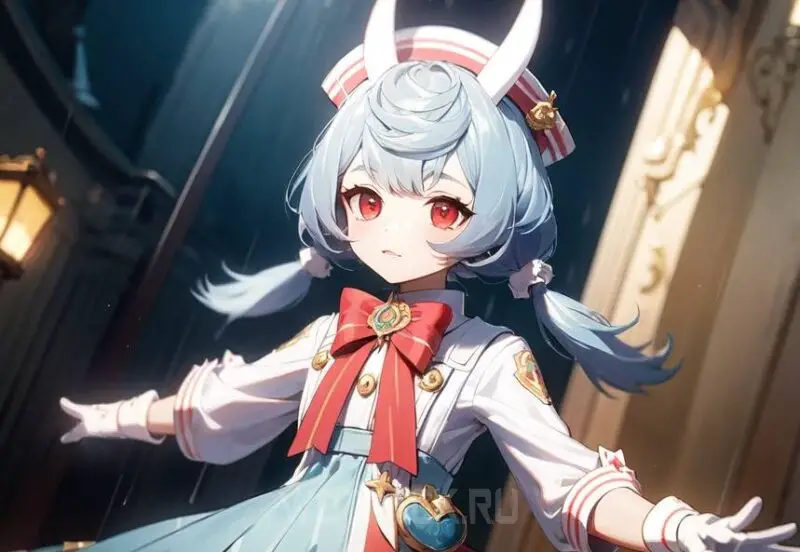
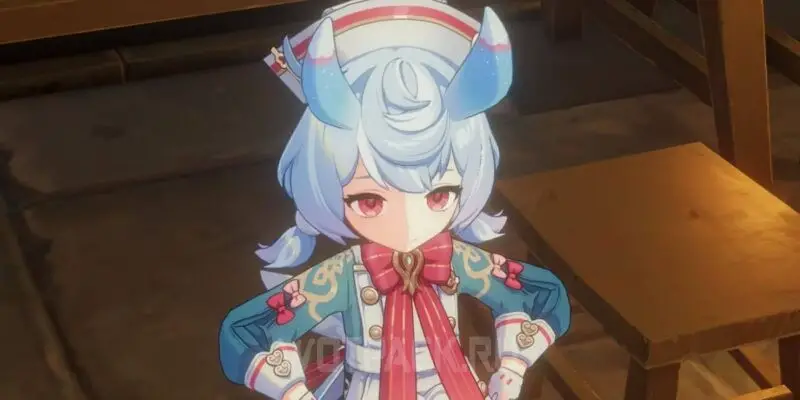
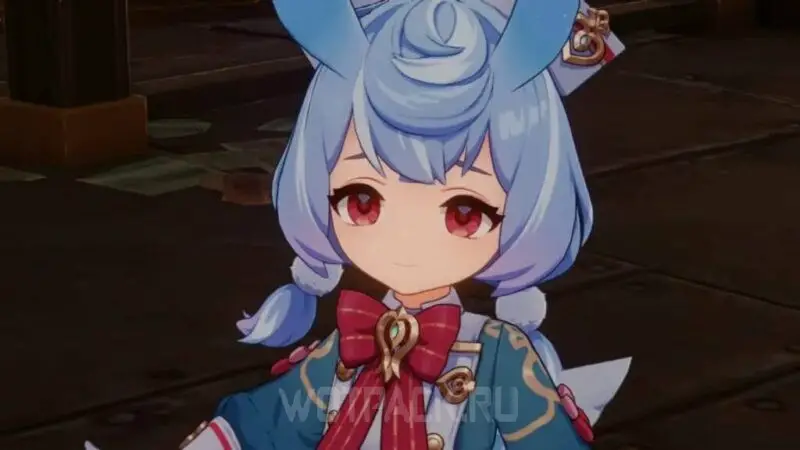
In Genshin impact Hydro Healer Sigewinne uses a bow as a weapon and has health scaling. The heroine has a rare mechanic Bond of Life, which improves her energy recovery and healing of allies, making the game smoother and the character herself easier to build.
The main feature that distinguishes her from other healers is the buff of pocket damage dealers' abilities. This character is aimed at playing in teams with two or three sub-DDs who deal damage with E-types. Such a boost will only be useful for a limited number of allies, so the heroine cannot be called universal, but she works very well in her teams and provides powerful healing.
| Rating | A-position in tier lists |
| Rarity | ⭐⭐⭐⭐⭐ |
| Appeared in-game | June 25, 2024 (patch 4.7) |
| How to get | Character Event Prayer "Romarinian Serenity" |
| Element | Hydro 💧 |
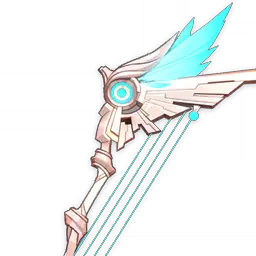
| Weapon | Bow (small weapon) |
| Gender | Female |
| Affiliation | Fortress of Meropide |
| Constellation | Nereid |
| Home region | Fontaine |
| Birthday | March 30 |
| Zodiac sign | Aries |
| Age | over 100 years |
| Height | 134-140 cm |
| Special dish | Balanced diet |
| Voice actors |
|
How to Get the Character
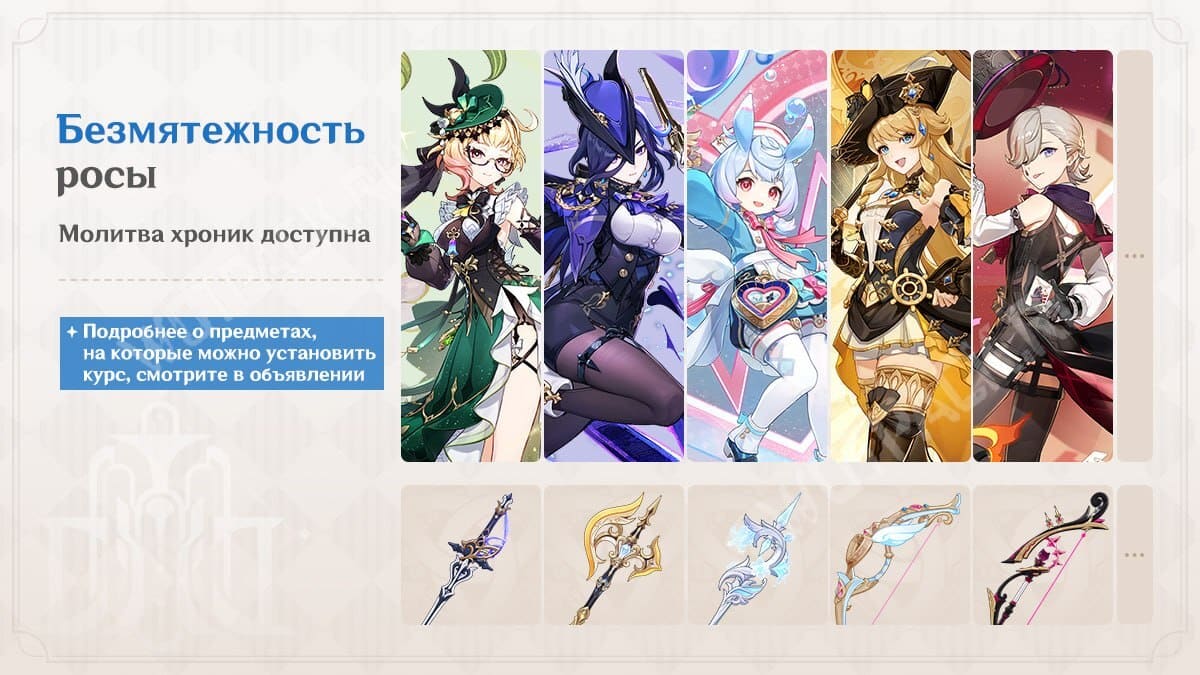
Sidgvin can be obtained through the Fontaine Chronicles prayer. "The Serenity of Dew"The banner is available in the second part. the 6.5 update, April 28 to May 19, 2026.
In order not to miss the rerun of Sigewinne or the appearance of other legendary heroes, stay tuned for updates in our banner schedule.
Strengths and Weaknesses
Before building Sigewinne, it is important to highlight the following positive and negative aspects of the heroine:
| Strengths | Weaknesses |
| Due to the increased base health, she easily gains high maximum HP value through the main stats of artifacts. Thanks to this feature, she is extremely easy to build into a healer. | The Silvershower Heartstrings signature has no alternative for any build variation. The weapon provides a powerful health boost through the main stat and passive, increasing the effectiveness of healing, the Convalescence buff and damage. In the sub-DD build, the equipment also provides an increase in the critical chance for the Super Saturated Syringing skill. |
| Despite the low healing scaling, has a huge total amount of healing for the entire team. The Melusine's skill heals all allies in a group and works at least 5 times per use. | It's difficult to create a sub-dd build without large investments. If you have no signature weapons, you will have to sacrifice a lot of health to balance the characteristics. Accordingly, as the main characteristic decreases, overall damage, effectiveness of healing, and buff value also decrease. |
| Convenience of the Convalescence buff is that is focuses on a clearly defined mechanic: E-damage of inactive companions. Accordingly, characters that do not meet the condition will not be able to spend limited buff stacks. | When built into a healer, does not use the ultimate. The skill is used exclusively for dealing damage and takes time from the main damage dealer. Without the proper balance of Crit Rate and Crit DMG, the elemental burst will be extremely weak, so it will not justify the time spent. |
| Excellent synergy with the popular Furina. The healing of the Bolstering Bubblebalms extends to the entire squad, while the Melusine herself, at the end of the E, replenishes the personal health spent by the participants of the salon. The Requires Appropriate Rest passive talent also provides a damage boost for Furina's E. | Weak Hydro status. The Bolstering Bubblebalms move slowly between opponents and can deal damage a limited number of times, while the ult has a short duration. Accordingly, in teams playing from elemental reactions, she will not be able to act as a source of Hydro status. |
| Doesn't work with heroes that apply a lot of status but deal low damage out of pocket. For example, Mona's will consume several stacks of Recovery over its duration. |
Best Sigewinne Builds in Genshin Impact
The heroine is focused on performing the following functions:
- mass healing throughout the battle;
- buffing allies with certain mechanics;
- inflicting additional damage.
Since the buffs are passive and both healing and damage are done simultaneously, the effectiveness of a given role depends solely on the specific Sigewinne build. Let's look at the specifics of each option:
| Healer | Secondary damage dealer |
| Needs just one stat, health. | All the skills scale off HP, so she goes on to perform basic functions: healing and buffing. |
| Signature weapon is desirable, but can be replaced with a three-star Recurve Bow. | In addition to getting a high HP value, you need to pay attention to Crit Rate and Crit DMG, Hydro bonus and energy recovery. |
| Serves as an alternative healer in any group. | Without a signature bow, it is impossible to compensate for the loss of health while balancing the characteristics, and, accordingly, achieve high damage. |
| Simple rotation, since there is no need to use her elemental burst. |
Recommended Stats
The most valuable characteristic for the Melusine is HP. This stat determines the amount of healing from bubbles, strength of Convalescence and damage of the ultimate skill. Depending on build and team setup, further building focuses on additional characteristics.
Healer
Healer's build needs health only , any sources. You should carefully gain energy restoration, since ult in this build is most often irrelevant, and in some cases it is not recommended to use it at all. For example, absorbing Sourcewater Droplets will negatively affect the rotation of Neuvillette and Hydro Traveler.
| Artifact | Main characteristic | Additional stats |
|---|---|---|
 Flower of Life Flower of Life | HP (fixed) | HP% |
 Plume of Death Plume of Death | Attack Power (fixed) | HP% HP |
 Sands of Eon Sands of Eon | HP% | HP |
 Goblet of Eonothem Goblet of Eonothem | HP% | HP |
 Circlet of Logos Circlet of Logos | HP%/Healing Bonus% | HP%/HP |
Recommended values:
- HP: 48 000 and more. For the maximum Convalescence bonus, 65 000 is required, regardless of constellations;
- bonus healing: 0-35%;
- energy recharge: 100%;
- CRIT Rate: 60% and more when playing with the Favonius Warbow.
Secondary damage dealer
For a secondary damage dealer, the signature weapon Silvershower Heartstrings is highly recommended, as it grants a large increase in health and additional critical chance for the ultimate. It is necessary to balance crits and HP with artifacts. Gaining energy recharge is recommended if the Melusine does not have heroes dependent on the Sourcewater Droplets in her team.
| Artifact | Main characteristic | Additional stats |
|---|---|---|
| Flower of Life | HP (fixed) | HP% Crit Rate CRIT DMG Energy Recharge/Elemental Mastery |
| Plume of Death | Attack Power (fixed) | HP% Crit Rate CRIT DMG HP |
| Sands of Eon | HP% | HP Crit Rate CRIT DMG Energy Recharge/Elemental Mastery |
| Goblet of Eonothem | Hydro Damage Bonus% | HP% Crit Rate CRIT DMG HP |
| Circlet of Logos | CRIT Rate and DMG | HP% CRIT Rate and DMG HP Energy Recharge/Elemental Mastery |
Overall stat values:
- HP: 48-000;
- CRIT Rate: 60% and more when playing off E. With a signature and a focus on damage from the ultimate, 35% is acceptable;
- CRIT DMG: 120% and more;
- energy recharge: up to 150%.
Weapon Selection
Weapons are selected taking into account the priority characteristics for the role of a healer or secondary damage dealer. Let's take a closer look at the equipment options for both positions.
Healer
Although for the Melusine as a healer it is necessary to focus on gaining the main stat, in addition to the signature weapon and an alternative bow for HP%, you can consider support options with buffs for allied heroes:
| Name | Passive | By recommendation |
|---|---|---|
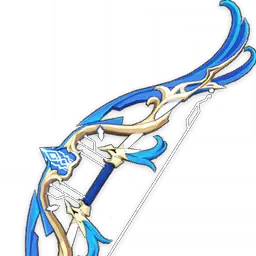
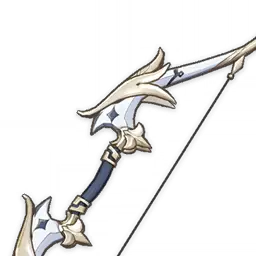
 Silvershower Heartstrings Silvershower Heartstrings⭐️⭐️⭐️⭐️⭐️ Basic attack 44 - 542 Bonus HP 14,4-66,2% | The equipped character can receive the Remedy effect. With 1/2/3 levels of the Remedy their max HP increases by 12/24/40%-24/48/80%. Levels of Remedy can be obtained in the following situations:
| Sigewinne's signature has no counterparts, as it doubles your maximum health. The increase from the main characteristic (66%) works all the time, and in a battle the characteristic naturally increases by an additional 40%. Thanks to the signature, you can gain enough health to enhance Convalescence and effectively heal with bubbles. |
 Recurve Bow Recurve Bow⭐️⭐️⭐️ Basic attack 86 - 354 Bonus HP 18-46,9% | Defeating an enemy restores 8-16% HP. | The amount of healing and, accordingly, the effectiveness of the Melusine as a healer mainly depends on her health reserve. The only available alternative significantly loses to the Signature in the main stat bonus, but is a good replacement that allows you to achieve optimal final stats. |
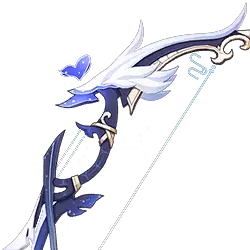
 Elegy for the End Elegy for the End⭐️⭐️⭐️⭐️⭐️ Basic attack 46 - 608 Energy recharge 12%-55,1% | Part of the Millennial Movement that wanders among the winds. Increases elemental mastery by 60-120. When an elemental skill or an elemental burst hits an enemy, the character receives one Sigil of Remembrance. It can occur once every 0,2 seconds, even when the character is off-field. Four collected Sigil of Remembrance disappear, granting nearby party members the Millennial Movement: Farewell Song effect for 12 seconds. Their elemental mastery increases by 100-200, attack power by 20-40%. Within 20 sec. after activating the effect, Sigils of Remembrance will not appear. Millennial Movement: Farewell Song does not stack with effects that affect the same skills. | A universal buffer weapon for energy restoration. The equipment is not equipped with the health bonus that is relevant for the Melusine, but it is a good option for enhancing team elemental mastery and attack power. It is important to note that due to the slow movement of bubbles, it is preferable to use the ult to activate the bow's passive. |
 Favonius Warbow Favonius Warbow⭐⭐⭐⭐ Basic attack 41 - 454 Energy recharge 13,3-61,3% | Critical attacks have a 60-100% chance to create elemental particles that restore 6 Energy. Occurs once per 12 - 6 sec. | A classic option for generating elemental particles. Recommended with the fifth rank of awakening and for team members dependent on their ultimates. For optimal performance, you will need to gain up to 60% critical chance through the sub-stats of artifacts. |
Secondary damage dealer
For a sub-DPS build, it is important to choose weapons with buffs for the main sources of damage, elemental skill and elemental burst. In addition, you will need equipment that grants Crit damage, Crit chance and overall damage.
| Name | Passive | By recommendation |
|---|---|---|
| Silvershower Heartstrings ⭐️⭐️⭐️⭐️⭐️ Base stat: 44 - 542 Bonus HP 14,4-66,2% | The equipped character can receive the Remedy effect. With 1/2/3 levels of the Remedy their max HP increases by 12/24/40%-24/48/80%. Levels of Remedy can be obtained in the following situations:
| Sigewinne's signature is the best option in a sub-DD build. Powerful increases in HP open up more opportunities for boosting additional parameters that affect damage. The passive effect of the weapon is triggered with elemental skill: after the first bounce, the Melusine's bubble gets all stacks of Remedy. |
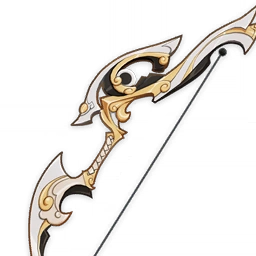
 Aqua Simulacra Aqua Simulacra⭐️⭐️⭐️⭐️⭐️ Base stat: 110 - 542 CRIT DMG 33,9-88,2% | Increases HP by 16-32%. When there are enemies nearby, the damage dealt by a character equipped with this weapon is increased by 20-40%. The effect works even when the character is not on the battlefield. | A legendary crit bow with a small bonus to health and increased damage. The passive skill works from the pocket, but forces the main damage dealer to engage in close combat. Due to the increased Crit DMG in the main stat, it is necessary to focus on carefully gaining Crit Rate, including the circlet, as well as obtaining the optimal amount of HP. |
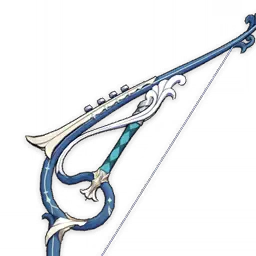 The Stringless The Stringless⭐️⭐️⭐️⭐️ Base stat: 109 - 510 Elemental Mastery 64 - 165 | Increases elemental skill and elemental burst damage by 24-48%. | An epic bow with elemental mastery for the main characteristic. It does not have specific increases to parameters, but has no conditions to increase the damage of the Nurse's main abilities. Elemental mastery is just a nice addition, since the heroine’s bubbles move slowly across the field and rarely trigger any reactions. |
 Fading Twilight Fading Twilight⭐️⭐️⭐️⭐️ Basic attack 119 - 565 Energy recharge 11,8-30,6% | The weapon has 3 states: Evengleam, Afterglow, and Dawnblaze, each of them increasing damage dealt by 6/10/14%-12/20/28% respectively. After hitting an enemy, the state changes to the next one, no more than once every 7 seconds. The state change effect works even when the character is not on the battlefield. | F2P event bow of version 2.7. Its main characteristic is energy recovery, which will be needed for a more stable use of the ultimate skill. The buff, in turn, works for all abilities and is gradually accumulated during the battle. |
| Recurve Bow ⭐️⭐️⭐️ Basic attack 86 - 354 Bonus HP 18-46,9% | Defeating an enemy restores 8-16% HP. | A bow of three-star rarity is the only alternative for a health bonus, so it can also be used in a damage build. The low position of the weapons is determined by its lack of additional effects that could be useful in the considered build option. |
 Skyward Harp Skyward Harp⭐️⭐️⭐️⭐️⭐️ Basic attack 133 - 674 Crit Rate 8,5-22,1% | Increases crit. damage by 20-40%. On hit there is a 60-100% chance to inflict 125% physical damage in a small radius. May occur once per 4-2 sec. | The legendary bow can be used to balance stats, especially with awakenings. However, it is worth considering that the Melusine is not able to use its main advantage of the weapon, high base, due to health scaling. |
To select equipment for other characters, use weapons tier list.
Useful artifacts
Depending on the focus of the build, the range of suitable artifacts also changes. For a healer, it is worth considering support and buffer sets, while for sub-DD, sets for increasing personal damage are of greater value.
Healer
Artifact sets for supports not should be divided so that the powerful passives of the 4 parts work during the battle. For a healer with a large amount of healing and damage from his pocket, sets with additional damage, team buffs and a healing bonus are suitable:
| Name | Description | Recommendation |
|---|---|---|
 Ocean-Hued Clam Ocean-Hued Clam⭐ ⭐ ⭐ ⭐ Five-star | 2 parts: Increases healing bonus by 15%. 4 parts: When healing or being healed, the character creates a Sea-Dyed Foam that registers HP restored when healing for 3 sec. After the effect ends, the Foam explodes and deals damage to surrounding enemies equal to 90% of the healing amount taken into account. A Sea-Dyed Foam can be created no more than once every 3,5 seconds. The Foam can record up to 30 HP restored. This effect applies even if the character equipped with the artifact set is not on the battlefield. | A great set for extra damage. For three seconds, the set records the healing received, after which it hits all monsters in a small radius around the active companion with a physical element. |
 Song of Days Past Song of Days Past⭐ ⭐ ⭐ ⭐ Five-star | 2 parts: Increases healing bonus by 15%. 4 parts: When the equipped character heals squad members, they create the Yearning effect that registers the healing performed (including excess). After 6 sec., Yearning turns into Waves of Days Past: when a normal attack, charged attack, plunging attack, elemental skill, or elemental burst of the active character hits an enemy, the damage dealt is increased by 8% of the total amount of healing registered by Yearning. After 5 activations or after 10 sec. the effect of the Waves of Days Past disappears. One Yearning registers up to 15 HP. Only one Yearning can exist at a time, but it can register healing provided by multiple equipped characters at once. | It is also a good option, but the passive boost applies to the active hero's damage only. Since the requirements for activating the effect are directly opposite to the working conditions of the built-in Convalescence buff, the set is useful for comprehensively boosting packs consisting of pocket DDs playin off their skills and a main damage dealer. |
 Tenacity of the Millelith Tenacity of the Millelith⭐ ⭐ ⭐ ⭐ Five-star | 2 parts: Increases HP by 20% 4 parts: When an elemental skill hits enemies, the ATK of all nearby characters in the party is increased by 20% and their shield durability is increased by 30%. The effect lasts 3 seconds and can occur once every 1 seconds. This effect can be activated even if the character equipped with this set of artifacts is not on the battlefield. | A good buffer option with a simple passive effect activation. Two parts grant bonus health, contributing to the increase in the gain from the Requires Appropriate Rest talent. However, when equipping it, it is important to take into account the main stat of the damage dealers in the team, since the increase in attack is not relevant for everyone. |
Tenacity of the Millelith Vourukasha’s Glow Vourukasha’s Glow | 2 parts: Increases HP by 20%. 2 parts: Increases HP by 20%. | A combination of HP% sets can be used with good stats in artifact parts. It is an average option for leveling up the main stat, and therefore loses to full sets with various additional effects. |
 Maiden Beloved Maiden Beloved⭐ ⭐ ⭐ ⭐ Five-star | 2 parts: Increases healing effectiveness by 15%. 4 parts: Increases the healing received by all party members by 20% for 10 sec. after using an elemental skill or an elemental burst. | The healer starting set increases the healing efficiency and the healing received by squad members. It is worth using if there are serious problems with maintaining the health of the group at a safe level. |
Secondary damage dealer
Artifacts for Sigewinne as a secondary source of damage include Hydro bonus, HP and bonus E damage.
| Name | Description | Recommendation |
|---|---|---|
 Emblem of Severed Fate Emblem of Severed Fate⭐⭐⭐⭐ ⭐⭐⭐⭐⭐ | 2 parts: Increases Energy Recharge rate by 20%. 4 parts: Increases elemental burst damage by an amount equal to 25% of ER. Max bonus is 75%. | The best set for a secondary damage dealer who relies on the ultimate. Since multi-hits count as elemental bursts, the affix will work on them, and the energy recharge will help you gain energy for it faster. |
Tenacity of the Millelith / Vourukasha’s Glow Heart of Depth / Nymph's Dream Heart of Depth / Nymph's Dream | 2 parts: Increases HP by 20%. 2 parts: Gives 15% bonus Hydro damage. | The combination of the HP set and the Hydro bonus is necessary to increase the damage of not only the Bolstering Bubblebalms, but also the Super Saturated Syringing ultimate. To activate the elemental burst more often, you will need a second Hydro element fighter acting as a "battery" or a support with a Favonius weapon. |
| Tenacity of the MillelithVourukasha’s Glow | 2 parts: Increases HP by 20%. 2 parts: Increases HP by 20%. | Health boost sets, although inferior in terms of personal damage to the options above, help maintain the overall level of efficiency. With the drop in parts of relics of high Crit DMG and Crit Rate, the build becomes a durable option, and if desired, 2 parts can be replaced with Golden Troupe. |
 Golden Troupe
Heart of Depth / Nymph's Dream Golden Troupe
Heart of Depth / Nymph's Dream | 2 parts: Increases elemental skill damage by 20%. 2 parts: Gives 15% bonus Hydro damage. | Sets to increase personal damage are recommended exclusively for high increases in health through stats in relic parts. It is worth equipping until you receive the full Golden Troupe set, or until artifacts from HP sets drop for replacement. |
 Nymph's DreamHeart of Depth Nymph's DreamHeart of Depth | 2 parts: Gives 15% bonus Hydro damage. 2 parts: Gives 15% bonus Hydro damage. | Like the previous 2+2 mix, it is a starting combination to increase her own damage and must be replaced as soon as you have the artifacts from better sets. |
| Tenacity of the Millelith / Vourukasha’s GlowGolden Troupe | 2 parts: Increases HP by 20%. 2 parts: Increases elemental skill damage by 20%. | Even though E isn't the main source of damage, you can use both parts at first if they have good stats. |
Teams
Regardless of the build and the position occupied, the archer covers the group's need for healing. In groups, the Melusine can act as an alternative healer or gather special teammates that play from off-field. There is also no high need to use her ultimate, so the nurse fits perfectly into the rotations of many teams.
Due to low Hydro application, the heroine is a flexible ally who will not be able to interrupt the element her damage dealer needs. On the other hand, due to the lack of status, for the Vaporize, Superconduct, Frozen and Blooming commands a good applicator will be required.
Best Characters
Next, we will analyze the best heroes for strong groups with Sigewinne. Due to her talents, her perfect team includes two or three sub-DDs, but not everyone has enough heroes on their account to create a harmonious group. Therefore, in addition to the secondary damage dealers, which are worth paying attention to first of all, we will also analyze the main-DDs that are most often used with the Melusine.
Despite the fact that there are healers playing of ftheir elemental skills in the game (Charlotte, Kuki), it is not advisable to put them in the same squad with Sigewinne. Their E buff does not compensate for the loss of damage caused by the presence of an extra healer in the team.
Secondary damage dealer
Secondary damage dealers that play from the pocket:
| Character | Element | Weapon | Effects |
|---|---|---|---|
 Yae Miko Yae Miko |  Electro Electro |  Catalyst: Catalyst: | An Electro Damage Dealer who places up to three totems on the field, which periodically hit the area. Using her ult, she absorbs those totems for additional charges. |
 Fischl Fischl | Electro |  Bow Bow | As an additional source of status, uses Oz the raven, who is present on the field for 10-12 seconds. One of the best epic partners for the Melusine. |
 Hydro Hydro |  one-handed one-handed | Creates a special synergy with the Melusine, as they are mutually beneficial to each other due to the received healing and the E buff. With her elemental ability, Furina summons members of the Salon Solitaire onto the field, who absorb the health of party members to deal damage. With the help of an elemental burst, gains Fanfares for every 1% of HP lost or restored. | |
 Dehya Dehya |  Pyro Pyro |  Two-handed Two-handed | Creates an area on the field where allies' attacks are supplemented by Pyro ticks from Dehya. Also acts as a tank, diverting a certain portion of damage received by allies. |
 Mavuika Mavuika | Pyro | Claymore | While Mavuika is most often played as a main DD, in some teams her role is reduced to secondary off-field E-damage. In these cases, the Pyro Archon will benefit from buffs. |
 Chiori Chiori |  Geo Geo | one-handed | Attacks from the pocket using her Dolls, which are created by an elemental skill. The heroine's damage depends simultaneously on the strength of attack and defense, thanks to which a variety of buffers and supports can be used. |
 Albedo Albedo | Geo | one-handed | Creates a sunflower on the battlefield that hits Geo in the area at a certain interval along with the active character's attacks. Increases the elemental mastery of the heroes in the party with his elemental burst. |
 Dendro Dendro | Catalyst: | Long press of her skill puts her into targeting mode to mark monsters and create links between them. When activating the reaction with Dendro on one enemy, all linked opponents receive damage from Tri-karma Purification. Due to her element, the nurse will be able to increase the duration of the dome from Nahida. | |
 Citlali Citlali |  Cryo Cryo |  Catalyst: Catalyst: | Citlali deals most of her damage through E, so despite having interchangeable roles in the squad, she enjoys her company due to the Melusine's buff. |
Main DPS
Companions who must be present on the field at all times:
| Character | Element | Weapon | Effects |
|---|---|---|---|
 Clorinde Clorinde | Electro | one-handed | Electro damage dealer that works well with healers. Converts healing received into Bond of Life, allowing you to hit with Infusion. The presence of the debuff, in turn, will increase the effectiveness of healing of the Melusine through the passive talent Detailed Diagnosis, Thorough Treatment. |
 Raiden Raiden | Electro |  Polearm Polearm | Main-DD and driver of the Electro element with a dependence on the energy recovery characteristic. Attacks with E together with allies, with the help of the ultimate skill goes into an enhanced stance and recharges energy for burst of the elements of allies. |
 Cyno Cyno | Electro | Polearm | Main damage dealer, spending the vast majority of his time on the field. The young man's damage depend on his elemental mastery, and his teams often play off the Quicken and Aggravate elemental reactions. The duration of his ult coincides with the cooldown of the nurse's skill, so the heroes fit well into each other's rotation. |
 Neuvillette Neuvillette | Hydro | Catalyst: | The main damage dealer, playing off charged attacks. The speed of accumulation of charge for a strike depends on the number of absorbed Sourcewater Droplet, which the character creates with the skill and ultimate. In a team with the Melusine, who can also pick up drops, you will have to play more carefully and monitor the location of the valuable resource on the field. |
 Ayato Ayato | Hydro | one-handed | In combat, he relies on stance strikes and is further strengthened by his ultimate ability. He is good at inflicting Hydro status over a large area. |
 Tartaglia Tartaglia | Hydro | Bow | Main damage dealer with two ult modes. Using his skill, activates a stance in which he receives water blades for melee combat. |
 Wriothesley Wriothesley | Cryo | Catalyst: | Cryo Catalyst that spends his own health when performing attacks. Needs to keep the HP bar above half to deal enhanced damage. |
 Ayaka Ayaka | Cryo | one-handed | Elemental damage dealer with infusion on normal attacks. After sprinting, colors attacks in Cryo for a short time, and damages the area with her elemental burst. |
 Diluc Diluc | Pyro | Two-handed | Typical fire elemental damage dealer. With the help of his ultimate, he colors his normal attacks in Pyro, and with his skill, he can perform up to three consecutive attacks. |
 Klee Klee | Pyro | Catalyst: | Elemental Pyro Catalyst with powerful normal and charged attacks. In teams playing from elemental reactions, requires a lot of status from the pocket. For this reason, packs powered by the Vaporize reaction will require a second Hydro applicator. |
 Yanfei Yanfei | Pyro | Catalyst: | Attacks through the Seals mechanic. Normal attacks accumulate up to 4 stacks, which reduce the stamina consumption of a charged strike and increase damage. |
 Navia Navia | Geo | Two-handed | Two-handed weapon wielder, playing from the Crystallize reaction. During battle, collects nearby elemental shards to fire shrapnel at a small area. Thanks to the high duration of the ult, can act as a sub-dd playing off her skill and ultimate. |
 Tighnari Tighnari | Dendro | Bow | A Dendro elemental character who relies on charged attacks. The skill releases an illusion at enemies, distracting opponents from the active hero. The ultimate skill hits with multiple Dendro arrows. |
Effective teams
With all the heroes considered, the following Sigewinne teams can be set up:
| Character 1 | Character 2 | Character 3 | Character 4 | Features |
|---|---|---|---|---|
| Clorinde | FischlDehyaMavuika |  Sigewinne Sigewinne | A group with damage dealers playing with the Bond of Life debuff. Clorinda hits hard with the Fanfare buff and converts the Melusine's healing into additional Bond of Life. Fischl or Dehya/Mavuika along with Furina get the Convalescence buff. Sigewinne gets the healing bonus from the talent and constantly heals the group members. | |
| NeuvilletteAyato | FischlYae Miko |  Kazuha Kazuha Sucrose Sucrose | Sigewinne | A squad with a Hydro damage dealer. Neuvillette or Ayato play in a comfortable rotation. Yae Miko or Fischl apply elements throughout the battle area. Kazuha is needed for crowd control and buffing, but can be replaced by Sucrose with similar functions. Sigewinne acts as a healer and creates additional Sourcewater Droplet for Neuvillette. |
Raiden Keqing Keqing | Yae MikoFischl | Sigewinne | A squad that relies on damage from the pocket. As long as Raiden is on the field, her E does not consume levels of Convalescence. Nahida is a powerful source of Dendro status and simultaneously deals high damage. Fischl or Yae cover Electro Resonance and attack while off-field. | |
| Cyno |  Collei Collei Dendro MC Dendro MC | Sigewinne | Quicken group. Cyno spends most of his time dealing damage as an active character. Nahida and Dendro Applicator apply status and also activate resonance. Bolstering Bubblebalms rarely trigger reactions and do not disrupt the team's rotation. | |
| WriothesleyAyaka |  Xingqiu Xingqiu Yelan Yelan |  Shen He Shen He Rosaria Rosaria | Sigewinne | Frozen squad. The team must have sources of stable Hydro status Xingqiu/Yelan, attacking together with the main DD. If you use Ayaka, do not forget to add normal attacks to the rotation. Shenhe buffs Cryo and activates Resonance, but you can consider a budget Rosaria instead. |
| MavuikaKleeYanfei | KazuhaCitlali | Sigewinne | Vaporize team that also needs the help of a sub-DD in the form of Furina and a cut of resistances from an Anemo support or Citlali. Pyro damage dealers perform attacks on enemies and constantly trigger the elemental reaction. The Hydro Archon plays the role of a buffer and pocket DD, and Sigewinne provides the damage dealer with a boost and healing for the entire squad. | |
| Navia | XingqiuYelan | ChioriAlbedo | Sigewinne | Navia's group with one pocket damage dealer. For a comfortable game, the girl needs the status on enemies, which Xingqiu and Yelan offer in large quantities. Chiori or Albedo help with the Crystallize reaction. The Melusine's passive talent increases the damage from the Geo construct. |
| Tighnari | Collei | FischlYae Miko | Sigewinne | A squad with main-DD Tighnari, where the second hero of the Dendro element helps with damage and triggers the resonance. As an additional source of damage, Yae Miko and Fischl are good, inflicting increased damage from the elemental interaction of Quicken. |
 Nahida Nahida | Yae MikoFischl | Sigewinne | A team of Hyperbloom and Quicken. It is better to keep Sigewinne as the active character to increase the damage of all other squad members. Instead of Furina, you can add Yelan or Xingqiu, but then the rotation becomes inconvenient, and overall damage decreases. | |
| Chiori | Albedo | Yae MikoFischl | Sigewinne | Team with Geo Resonance. Chiori can be used as a driver or as a pure sub-DD dealing damage with her dolls. Fischl or Yae Miko deal Electro damage under the Nurse's buff. One of the Geo characters can wear the Archaic Petra set if the Electro sub-DD is well leveled. |
 Amber Amber |  Xiangling Xiangling |  Lynette Lynette | Sigewinne | None of the free heroes deal primary damage with their elemental skill, so Sigewinne can be placed in any team that just needs healing. However, if you want to squeeze out maximum damage from the very beginning of the game, it is recommended to add Ember and Xiangling to the squad, as their abilities can deal damage passively. |
Extra Stats For Leveling
The main characteristic is a percentage bonus to HP. As you level up, the basic parameters of defense, HP, and attack power also increase. You can see more specific values in the table below.
| Level | Base HP | Basic attack | Base DEF | Bonus HP |
| 1 | 1039 | 15 | 39 | 0% |
| 20 | 2695 | 39 | 101 | 0% |
| 40 | 5366 | 77 | 201 | 0% |
| 50 | 6902 | 100 | 258 | 7,2 % |
| 60 | 8659 | 125 | 324 | 14,4 % |
| 70 | 10213 | 147 | 382 | 14,4 % |
| 80 | 11777 | 170 | 441 | 21,6 % |
| 90 | 13348 | 193 | 500 | 28,8 % |
At the maximum level, the bonus to HP reaches 28,8%, and the total health reserve without artifacts and weapons is 17 192 .
Leveling
In the section below we will consider what resources are needed to upgrade the Melusine and all her talents to the maximum level.
Ascension
Source: genshin.honeyhunterworld
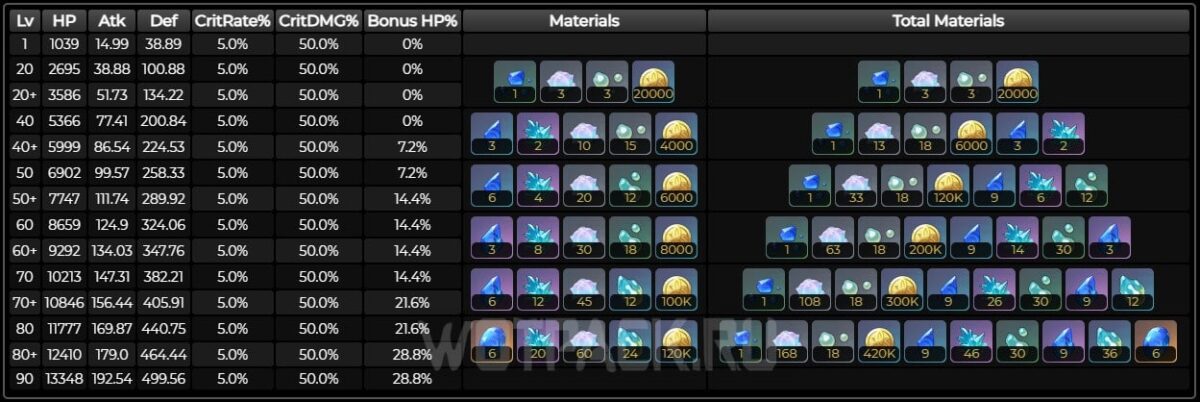
To level up to 90, the following components are required:
- Water That Failed To Transcend - awarded for defeating the world boss Hydro Tulpa in the Beryl Region.
- Transoceanic Pearl, Transoceanic Chunk, Xenochromatic Crystal - components that are dropped by various creatures defeated on land and underwater, Fontemer Aberrants.
- Slivers, chunks, fragments and gemstones of Varunada Lazurite — Hydro character ascension material, awarded for defeating world and weekly bosses: Oceanid, Hydro Hypostasis, Primo Geovishap, Aeonblight Drake, Iniquitous Baptist, Hydro Tulpa, Solitary Suanni, Stormterror, Childe, Azhdaha, Shouki no Kami, All-Devouring Narwhal.
- Romaritime Flower — Fontaine specialty, can be obtained while exploring underwater space.
- 420 000 Mora and 421 Hero's Wit.
Talents
Source: genshin.honeyhunterworld
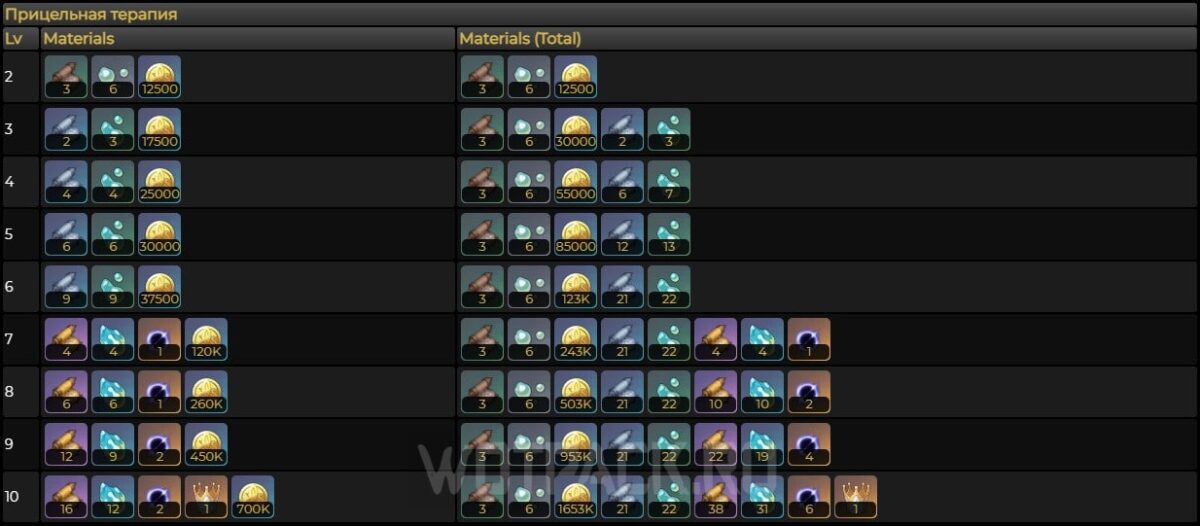
To upgrade talents you will need the following consumable resources:
- Teachings/guides/philosophies of Equity - books of various rarity, farmed in the dungeon Pale Forgotten Glory on Monday, Thursday и Sunday.
- Transoceanic Pearl, Transoceanic Chunk, Xenochromatic Crystal.
- Lightless Eye of the Maelstrom — one of the three materials dropped by the weekly boss Shadow of Another World.
- Crown of Insight — an item for leveling talents up to 10.
- 1 653 000 Mora.
Skills
The Nurse is a strong healer with decent AoE healing and built-in buffs for allies with certain mechanics. The Melusine's main skill, Elemental Skill, works out of pocket and periodically heals allies, as well as provides a small Hydro status. Elemental Burst, in turn, is aimed at hitting an area for a short period of time.
As a buffer, the Senior Nurse increases the damage of E for pocket damage dealers, such as Tri-Karma Purification by Nahida or Salon Solitaire by Furina. The Melusine is also equipped with the Bond of Life mechanic and receives a good healing bonus in groups with damage dealers playing with this debuff.
Read our guide on how the mechanics of Bond of Life works.
Basic (Active) Skills
Next, we will take a closer look at how Sigewinne's abilities work and analyze the abilities that are of priority for leveling. We will separately consider all the passive talents and the best constellations of the senior nurse of the Fortress of Meropide.
Targeted Treatment
Normal attack: Up to 3 consecutive strikes.
Charged attack:: Focuses the Hydro element on the tip of the arrow and periodically releases slow-moving Mini-Stration Bubbles. The released arrow hits with the Hydro element.
Plunging attack: dives down to the ground, dealing damage to all enemies in her path. Upon landing, minor physical damage is dealt to the area.
Rebound Hydrotherapy
When the skill is activated, 2 Sourcewater Droplet are created nearby, granting her Bond of Life equal to 10% of her health. For every 2 Bond of Life repaid, 000 energy is restored, up to a maximum of 1 energy.
Short press: Blows a Bolstering Bubblebalm, which bounces between nearby enemies, hits Hydro and heals the party based on their maximum health.
Hold: Enters targeting mode and blows out a bigger Bolstering Bubblebalm with improved properties. Depending on the duration of holding, the bubble's level is increased up to two times, with each level increasing damage and healing by 5%. When bouncing, the bigger Bolstering Bubblebalm loses levels until it turns into a normal one. Hitting a weak enemy will immobilize them.
Bolstering Bubblebalm: Normal bubbles trigger 5 times, large ones trigger 2 times until they turns into normal. Each jump restores the health of all characters in the squad except for the Melusine. When the effect ends, the bubble disappears and heals the Melusine by 50% of her max HP. If there are no enemies on the field, the bubble jumps nearby. There can only be 1 Bolstering Bubblebalm on the field, created by the heroine herself.
Arkhe: Ousia : After being hit by the Bolstering Bubblebalm, an Ousia-aligned Hydro Surging Blade is periodically created.
Super Saturated Syringing
Releases Hydro waves in an area for 2,5 seconds, absorbing 2 Sourcewater Droplets created by the Nurse or another character.
Talent Leveling Order
Elemental Skill (E) > Elemental Burst (Q) > Normal Attack
It is recommended to invest consumable resources into skills in the following order:
- The elemental skill is the highest priority ability, serving as the only source of healing. When leveling up, the scaling of Bolstering Bubblebalms increase, which will allow you to deal more damage and heal your team more effectively.
- An elemental burst is a source of area damage. It is recommended for leveling up in a sub-DD build, where optimal crit mass is gained along with health and bonus Hydro. Otherwise, the investment will not be worth it.
- Normal attack is the least priority skill in any build variation. You don't have to waste resources on upgrading it.
Passive Skills
| Emergency Dose | Underwater, heals your active character over 2,5 seconds if their HP is below 20%. Healing is proportional to 50% of his max HP. In addition, this character's elemental and physical resistances are reduced by 10% for 10 sec. The effect can occur once every 20 seconds. |
| Requires Appropriate Rest | By activating Rebound Hydrotherapy, Sigewinne receives the effect of Semi-Strict Bedrest: she receives an 18% bonus to Hydro Damage and 8 levels of Convalescence. When the elemental skills of nearby inactive characters in your party (excluding Sigewinne) deal damage, 10 level of Convalescence is consumed and the damage of that elemental skill is increased. For every 1 Max HP over 1000 Sigewinne's max HP damage increases by 30. The damage of an elemental skill used in this way can be increased by no more than 000. |
| Detailed Diagnosis, Thorough Treatment | When Sigewinne heals characters, the healing increases according to the total current Bond of Life of all characters in the party: for every 1000 healing increases by 3%. The amount of healing can be increased this way by no more than 30%. |
Constellations
| "Can the Happiest of Spirits Understand Anxiety?" | Rebound Hydrotherapy's Bolstering Bubblebalm gains 3 additional bounces, and the large Bolstering Bubblebalm does not get smaller on the first three bounces. The passive talent Requires Appropriate Rest receives a boost:
The damage increase from Convalescence changes as follows:
Damage can be increased this way by no more than 3500. |
| "Can the Most Merciful of Spirits Defeat Its Foes?" | When using her elemental skill Rebound Hydrotherapy and elemental burst Super Saturated Syringing, Sigewinne creates a bubble shield equal to 30% of max HP. In addition, after Rebound Hydrotherapy's Bolstering Bubblebalm or Super Saturated Syringing hits an enemy, their Hydro Resistance is reduced for 8 seconds by 35%. |
| "Can the Healthiest of Spirits Cure Fevers?" | Increases the level of the elemental skill Rebound Hydrotherapy by 3, max level - 15. |
| "Can the Loveliest of Spirits Keep Decay at Bay?" | The duration of Super Saturated Syringing is increased by 3 seconds. |
| "Can the Most Joyful of Spirits Alleviate Agony?" | Increases the level of the Super Saturated Syringing ultimate by 3, max level - 15. |
| "Can the Most Radiant of Spirits Pray For Me?" | By healing characters, Sigewinne increases critical chance and critical damage of her Super Saturated Syringing proportionally to her max HP: for every 1000 of max HP critical chance increase by 0,4%, and crit. damage by 2,2% for 15 sec. Maximum increase in critical chance that can be achieved in this way is 20%, in crit. damage - 110%. |
The best constellations of Sigewinne are С1, С2 и С6.
- The first constellation generally increases the character's potential as a healer-buffer. The additional bounces of Bolstering Bubblebalms increase the overall healing and begin to provide bonuses to the amount of Convalescence status procs. Additionally, each Convalescence effect provides pocket damage dealers with a buff with increased limits.
- The main advantage of the second constellation lies in reducing the Hydro resistance of monsters that were hit with an E or ultimate. Regarding the first part of the constellation, at the moment of using her abilities, the heroine protects herself with a shield that prevents damage and interruption.
- Getting the sixth constellation significantly simplifies the build into a full damage dealer playing off the ultimate. All collected health points are converted into Crit Rate and Crit DMG with good values. Accordingly, the balance of parameters is easily achieved through the sub-stats of artifacts.
How to play Sigewinne
In battle the head nurse of the Fortress of Meropide focuses on performing the basic functions of buffing and healing, additionally dealing damage and inflicting small amount of status. All of the above tasks are accomplished by using an elemental skill to launch Bolstering Bubblebalms. The skill has a long duration and a long cooldown, so it is extremely easy to include it into team rotation.
Considering that there can only be one Bubblebalm on the field, and when it disappears, the Melusine receives energy points and restores HP, it is necessary to always wait for the ability to fade. Elemental burst, in turn, is not a priority skill, taking up time from the main damage dealer.
Rotation
Skill Order:
E (elemental skill) > sub-dd > main-dd
Let's take a closer look at the rotation:
- Long press an Elemental Skill to create a Large Bubblebalm and gain 10 stacks of Convalescence.
- Switch to team sub-dds and use their skills.
- Bring your main damage dealer onto the field and attack while the sub-DD's abilities are active.
- If the Melusine is built into damage, use her Elemental Burst when the talents of all companions in the group are recharging.
Is the Character Worth Pulling For?
Sijwin is a Legendary-rarity Hydro Archer who serves as a support damage dealer in Genshin Impact. Her primary focus is healing all allies over time and providing boosts to her damage dealers through her elemental skill. With sufficient investment, she can act as a secondary source of damage and briefly enter the battlefield to trigger an elemental explosion.
The Melusine has low skill scaling and strict requirements for activating the passive talent Requires Appropriate Rest. For this reason, it is necessary to approach the heroine's leveling with special care and collect health bonuses from all available sources, including weapons. At the moment, she is dependent on her signature, which replenishes the need for a high HP value and has no analogues.
Which is better: Signature or C1?
Sigewinne's signature Silvershower Heartstrings and the first constellation are roughly equal in value, but they enhance different aspects of the character. The Nurse's Bow greatly simplifies the build and opens up the possibility of having another option with a combination of damage, healing and buffs.
The first constellation is more beneficial if you have gained the optimal amount of health and need to increase the damage boost effect of Convalescence. With an unlocked constellation, each bounce of Bolstering Bubblebalm adds 1 buff trigger, which gives a total of 20 stacks of Convalescence for using E with a long press. The total amount of damage and healing at C1 slightly increases, only 3 additional bounces are added.
History (biography)
Sigewinne is the manager of the infirmary in the Fortress of Meropide, the Fontaine prison for convicted criminals. The head nurse takes a responsible approach to her craft and heals even the most notorious scoundrels, but always reminds the rescued of the inevitability of punishment. The Melusine is especially popular among criminals serving time because she treats everyone with kindness and shows a lot of care.
Her story is perfectly described in the following legendary storyline: Nereides: The Warmth of Lies.
Trailer
The heroine's personal trailer on VKontakte:


Holy shit, the Sidgewin sign just dropped from the Chronicles banner on my third spin. I've never spun that banner before.
Now I don't know whether to knock out the sijvin itself
Hello! Unless you're desperately in need of a healer, don't bother. This isn't a situation where you've dropped a powerful damage dealer weapon, so you can just pull it out. I wouldn't go for Sidgwin if I were you. Her weapon, especially since it's practically a freebie, isn't worth the extra expense.
Can I give her a scarlet feather? (signa chaski)
Damn, if I have a squad of Aino, Laila and Skirk, will Sidjvin fit in there?
In theory, yes
Is it worth putting Sijivin with Fleance, Columbine and Linnaea?
By the way, it wasn't mentioned in the article, but you can put the event Cadence of Solitude on the small stuff (if you screwed up the three-star bow for HP like I did), if you don't want to sacrifice the universal Aqua