

Lacrimosa is a member of the TOI-4 task force from the "Anomaly Control Bureau" and a heroine of the "chaos" attribute in Neverness to EvernessShe specializes in damage-over-time mechanics—inflicting the Nightmare status effect with all active abilities during combat, and can also copy the appearances and skills of any enemy. This trait makes this tomato jelly lover a unique fighter.
Its main advantage is its freedom from role locking: a mouse can be a powerful hyper-carry or a stable driver who buffs allies with frequent Esper cycles. However, each position has a different stat priority in the build, which can be a challenge for an unprepared account.
| Rating | S+ position in tier lists |
| Rarity | S-rank |
| Appeared in-game | June 3, 2026 (Patch 1.1) |
| Attribute | Chaos |
| How to get a mouse | Limited board Fading Dreams |
| Type | Liquid |
| Role | Damage |
| Esper ability | Requiem |
| Date of birth | 26 June |
| Faction | Bureau for Combating Anomalies, TOI-4 |
How to Get the Character

Lacrimosa can be obtained from the exclusive "Fading Dreams" Faire. The "Skin Bonuses" event is active for the board, where you'll receive a new glider and a unique skin for Transport and a costume for the "mouse" itself for 60, 120 and 200 rolls of hard dice.
Strengths and Weaknesses
The TOI-4 employee is a powerful combat unit with a damage-over-time mechanic. In combat, she actively inflicts Nightmare and can also transform into enemies and use their abilities. She interacts with characters of the Enchantment and Psychic types, and with them, creates powerful Esper cycles.
| Strengths | Weaknesses |
| Shows high damage to areas and single targets thanks to active spells and the DoT status "Nightmare". | Lack of good alternatives among weapons, unless you consider "Childish fantasy", which is primarily intended for heroes with the Destruction mechanic. |
| An excellent driver for Nova, Burn, and Dissonance reactions. With awakenings, it makes it even easier to form Esper cycles (E6). Morning Spell). | Before the spin-off Tomato Jelly Rage: Live Report! Some combat features will be locked. |
| Can copy enemies with their combat techniques thanks to the redirection skill The Devil's Gift. | A unique bestiary for "Varieties" You need to fill it out yourself. |
| Makes open world exploration easier: similar "Tiger" Nunally, has a unique spell - can turn into a bat. | In the form of a bat, it cannot hover over water. |
| Thanks to everyday skill Muscular privileges increases the amount received Fons and coins-paws at bank robbery. |
The Best Lacrimosa Build in Neverness to Everness

In NTE, Lacrimosa's build emphasizes attack boosts, attribute bonuses, and crits, while also increasing chaos and pure damage. are valued higher, than K/Sh and K/U, because the critical damage of AoE spells is a fixed 50%.
Cycle intensity can also be useful where the girl becomes the trigger for the esper's cycles. Stimulation will be very important if you take a const. Morning Spell.
Which arc to use
The Signature Disk, as well as the S-Weapon, which can be obtained at level 30 of the Elite Hunter Supplies Pass, are ideal equipment for the BBA "mouse":
- The Last Rose meets its mechanics and covers basic needs;
- "The Fluff of Agility" Increases ATK and critical rate well.
Among the F2P options, the following stand out: Childish Fantasies (due to its belonging to the mechanics of destruction, it is often given bodyguard Daffodil) and "Brilliant Days"However, the four-star arc is used as a "plug" and works well only against already broken through enemies.
| Arc | The effect |
|
Signa Lacrimosa The Last Rose (5⭐) |
ATK + 14-28%. Grants 1 stack of Chaos Thorn each time the wearer deals damage over time.
Extends the enemy's broken state by 3 seconds when dealing damage (cannot occur more than once per destruction effect). |
|
Fluff of Fleetness (5⭐) |
Boosts attack on 5-9% for 1 sec. when the wearer is an active character (stacks up to 5 times, resets when moving to the "pocket"). |
|
Youthful Fantasy (5⭐) | F2P option |
Break Intensity +60-88. Allows you to use the unique ability "Black Volume":
Every 5 seconds the creature marks one enemy:
|
|
Shiny Days (4⭐) | F2P option |
Break Intensity +48-84. Increases damage by 10-18% against broken enemies. |


Choosing a cartridge for the console
The role in the group and belonging to chaos force one to pay attention to the core from the anomaly zone Rabbit Hole: Clock Tricks.
| Cartridge and the effect | Recommendation |
|
Diabolos × 2: chaos +10%. × 4: A character equipped with this perk ignores 12% of the enemy's chaos resistance. When participating in Nova and Scorch reactions for 20 seconds, they ignore an additional 24% of resistance. |
A signature variant of the primary equipment, increasing attribute damage and allowing the ability to ignore enemy resistances. For the second passive to function correctly, it's important that Lacrimosa's group be able to activate Nova (Chaos + Psychic) or Scorch (Magic + Chaos) at least once every 20 seconds. |

Alternatively, you can use Shadow Creed, which gives +10% to ATK directly and another +25% increase in battle if the activation condition is met.
Recommended attributes in modules
The core and tetramino for the console should provide increases to these indicators:
| Console parts | "Upper" stats | "Lower" stats |
| Cartridge | Chaos Bonus > Critical Value > Cycle Intensity > ATK% | Damage Bonus % > Critical Value > Cycle Intensity > ATK % |
| Modules | ATK and HP are constant |
At max ascension level, aim for the following stat values:
- OZ — 20,000+;
- ATK — 2,000-2,600+;
- crit chance. strike — in the range of 50-80%;
- CRIT DMG — from 100% (out of combat);
- damage bonus — 10% and more;
- chaos bonus — 50% and more;
- cycle intensity - 200+ if Lacrimosa acts as a driver (in other positions it doesn’t matter).
How to place modules

Empty compartments of the console are filled with figures type III, which provide additional increases to the attribute's damage.
Lacrimosa Squads in NTE

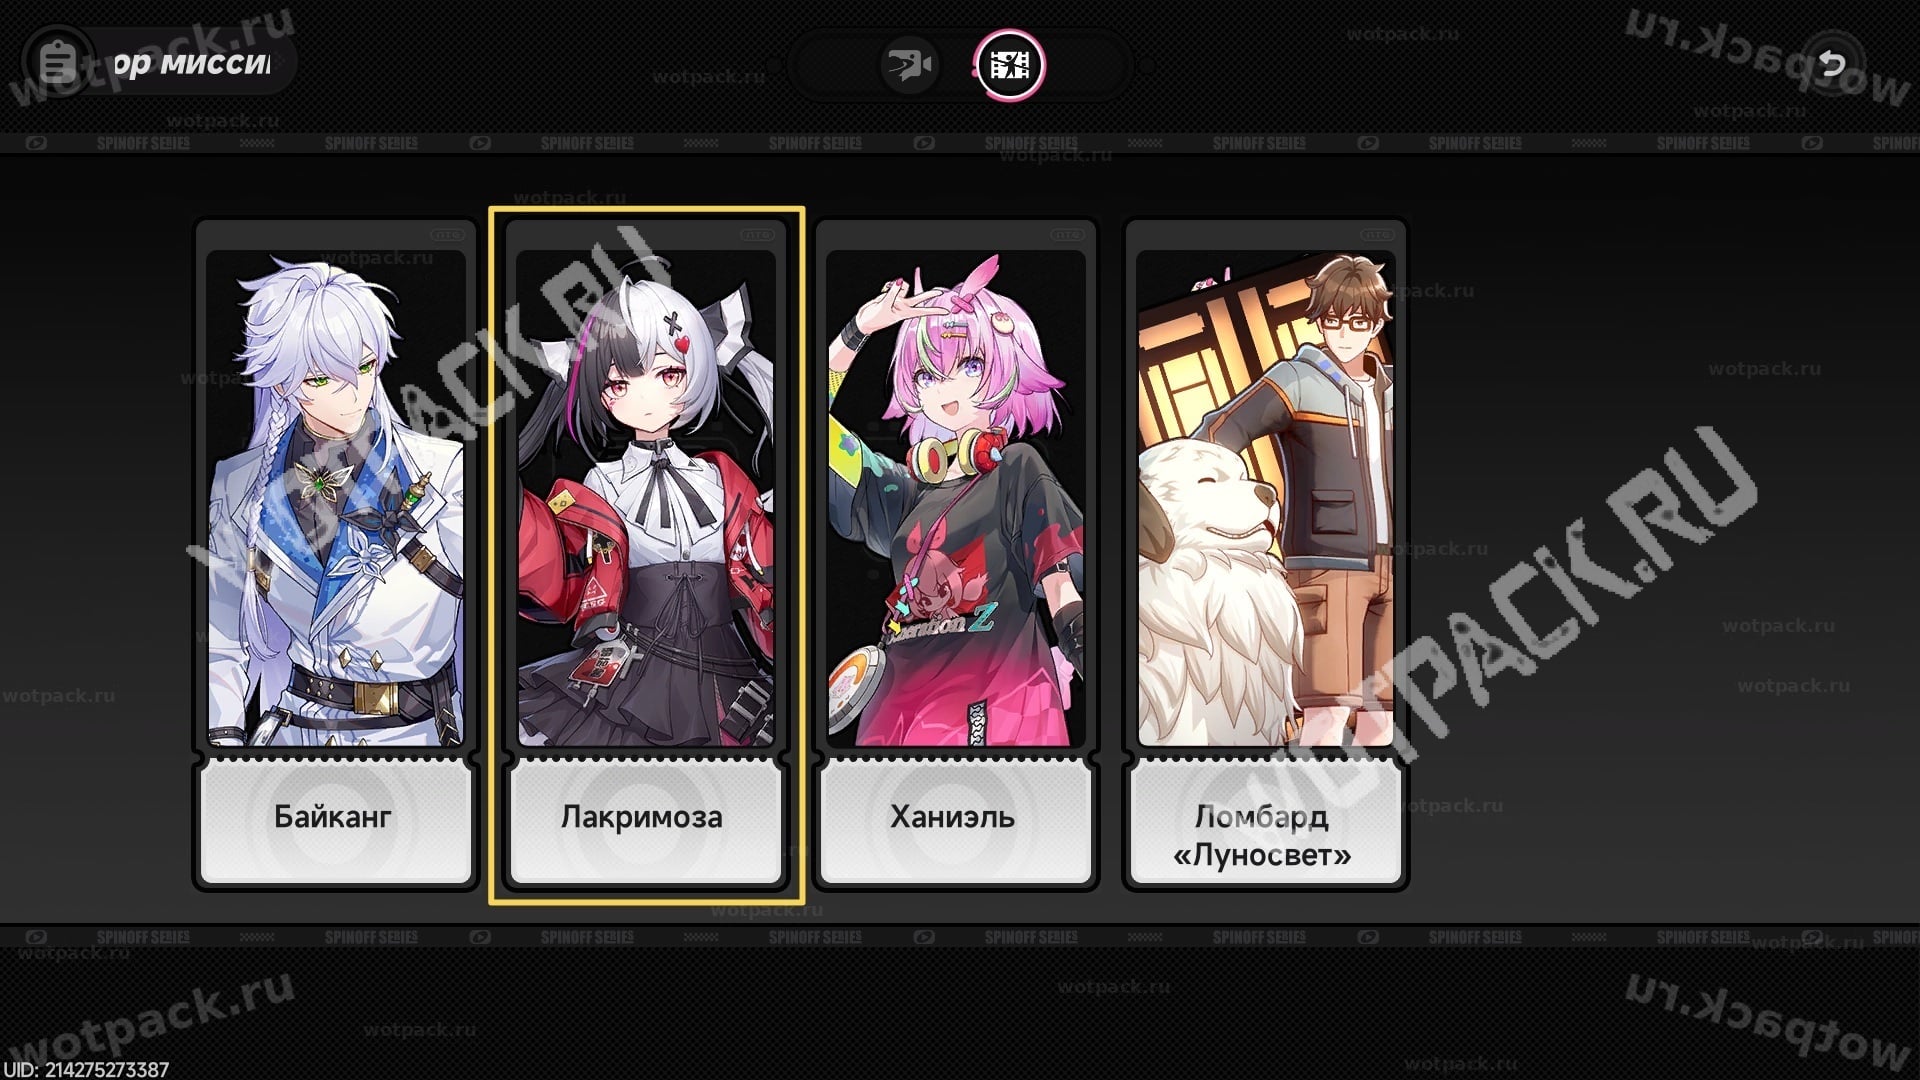
The TOI-4 employee plays the role of hyper-carry in the team, but can also be a position two fighter. Her attribute chaos combines favorably with charms и psyche - such a mixture of elements reveals the game of reactions Dissonance, new и BurnThey can be combined with each other, providing additional buffs for allies and applying various debuffs to enemies.
The following can be compiled group options with Lacrimosa as the main and support damage dealer:
|
Lacrimosa |
|
Sakiri |
Haniel |
|
Lacrimosa |
|
Sakiri |
Haniel
Fadia |
|
Baicang |
Lacrimosa |
Sakiri |
Fadia |
|
Lacrimosa |
Haniel |
Adler |
Sakiri |
| F2P build | |||
|
Lacrimosa |
Aurelia |
Skia
|
Haniel |


How the skills work

The BBA representative is the owner of the periodic damage mechanic, which is implemented through the effect "Nightmare" (Stacks up to 10 times). This DoT status is applied by all active abilities and deals 1 instance of Chaos damage every second.
To unlock some active talents, including the Resonance effect for six awakenings, it's important to complete the heroine's spin-off mission, "Tomato Jelly Fury: Live Report!" This mission becomes available after reaching achievement 8. hunter level and after completing the chapter "A good business is the best treasure".
Let's look at each ability separately:
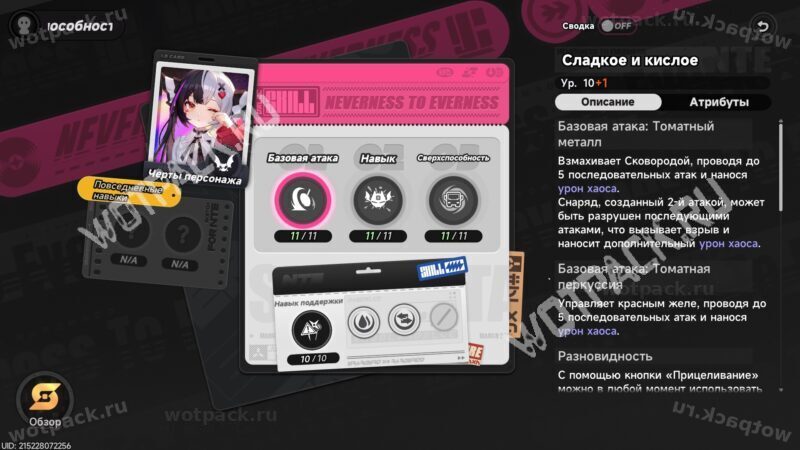
- Basic attack Sweet and sour — a series of attacks and the main source of DoT status.
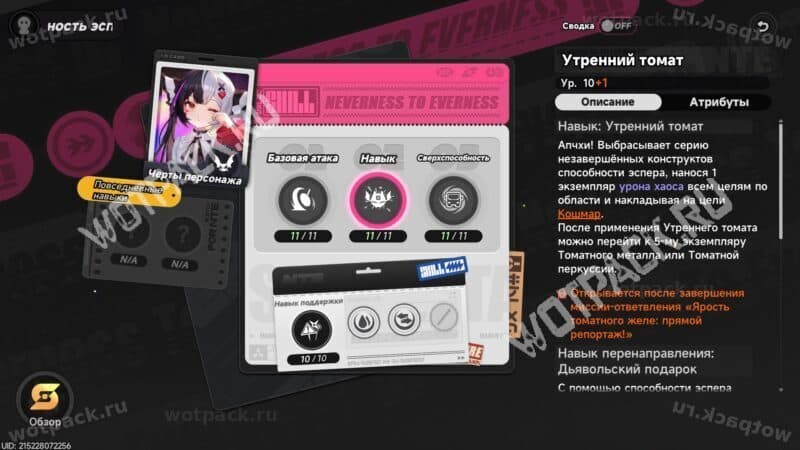
- Skill Morning Tomato - AoE move with "Nightmare", upon activation you can immediately go to 5th copy b/a.
- Redirection skill The Devil's Gift — transforms into an anomalous creature and copies its spells. While active, it prevents the heroine from moving.
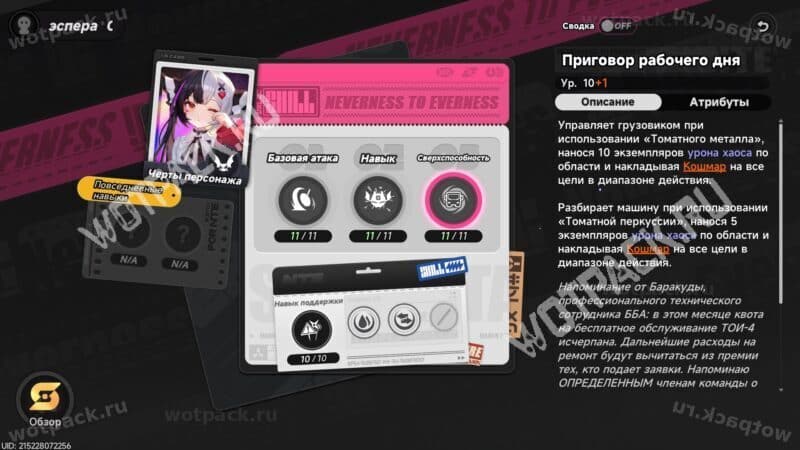
- Ultimate "Workday Sentence" (120 energy units) - controls the truck when Tomato Metal, while Tomato Percussion dismantles the car. Each move deals a lot of damage and imposes "Nightmare" within a large radius.
- Support skill Micro-Awakening — AoE area attack.
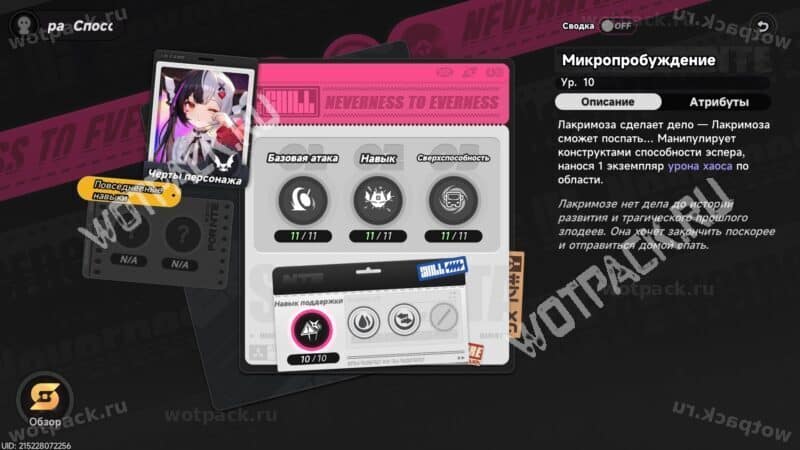
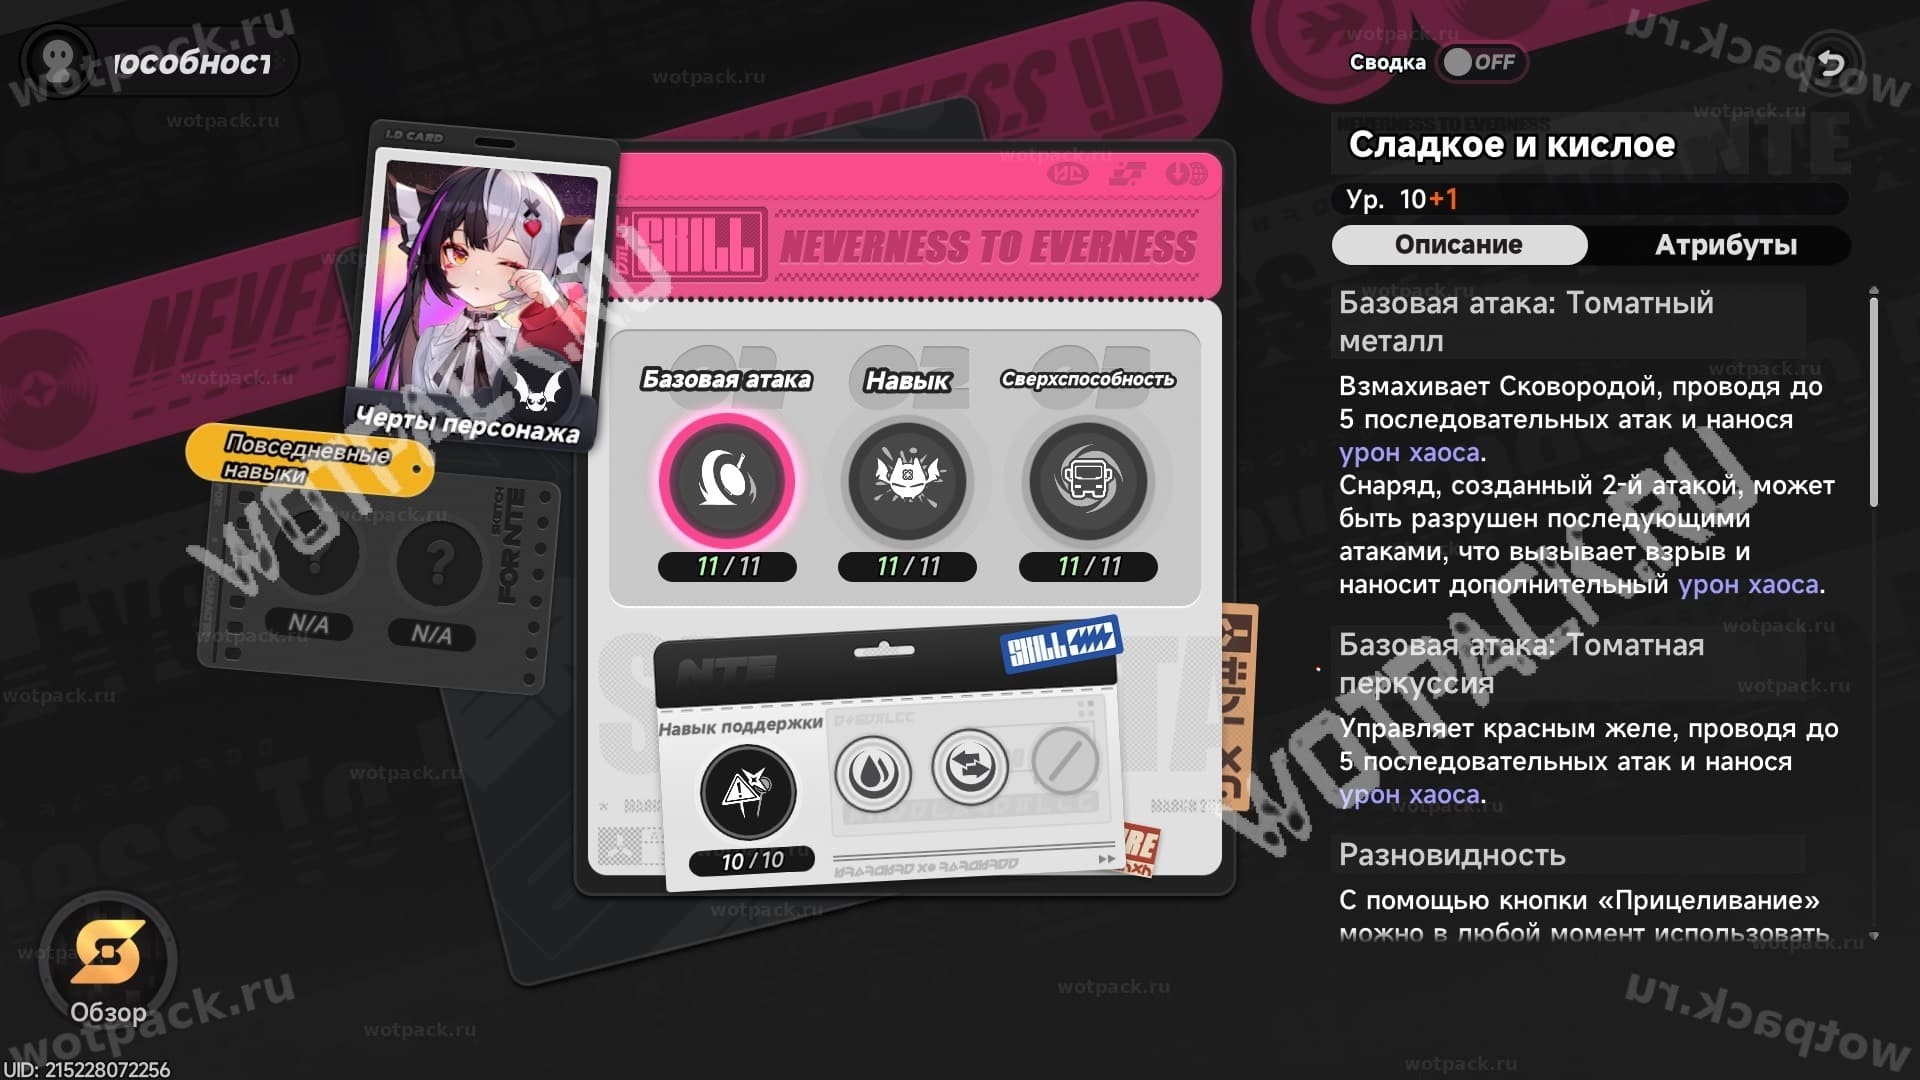
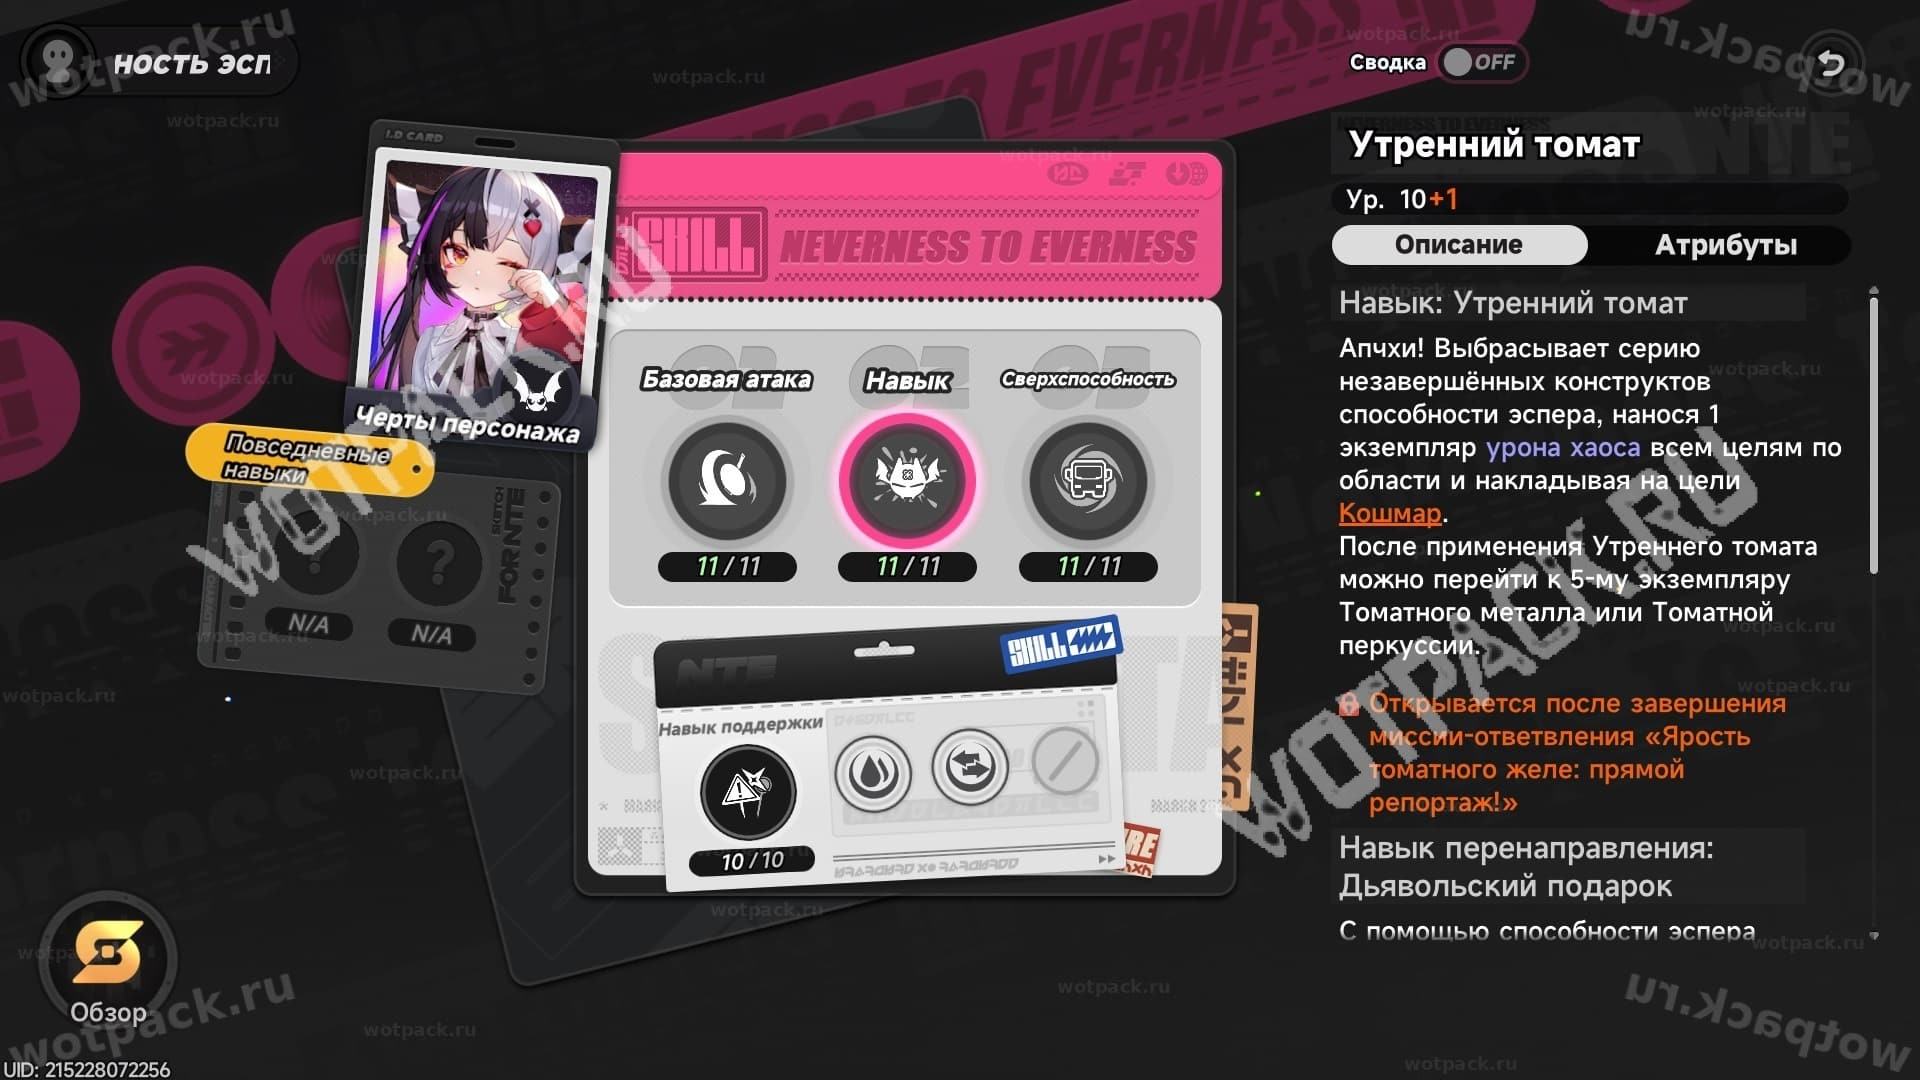
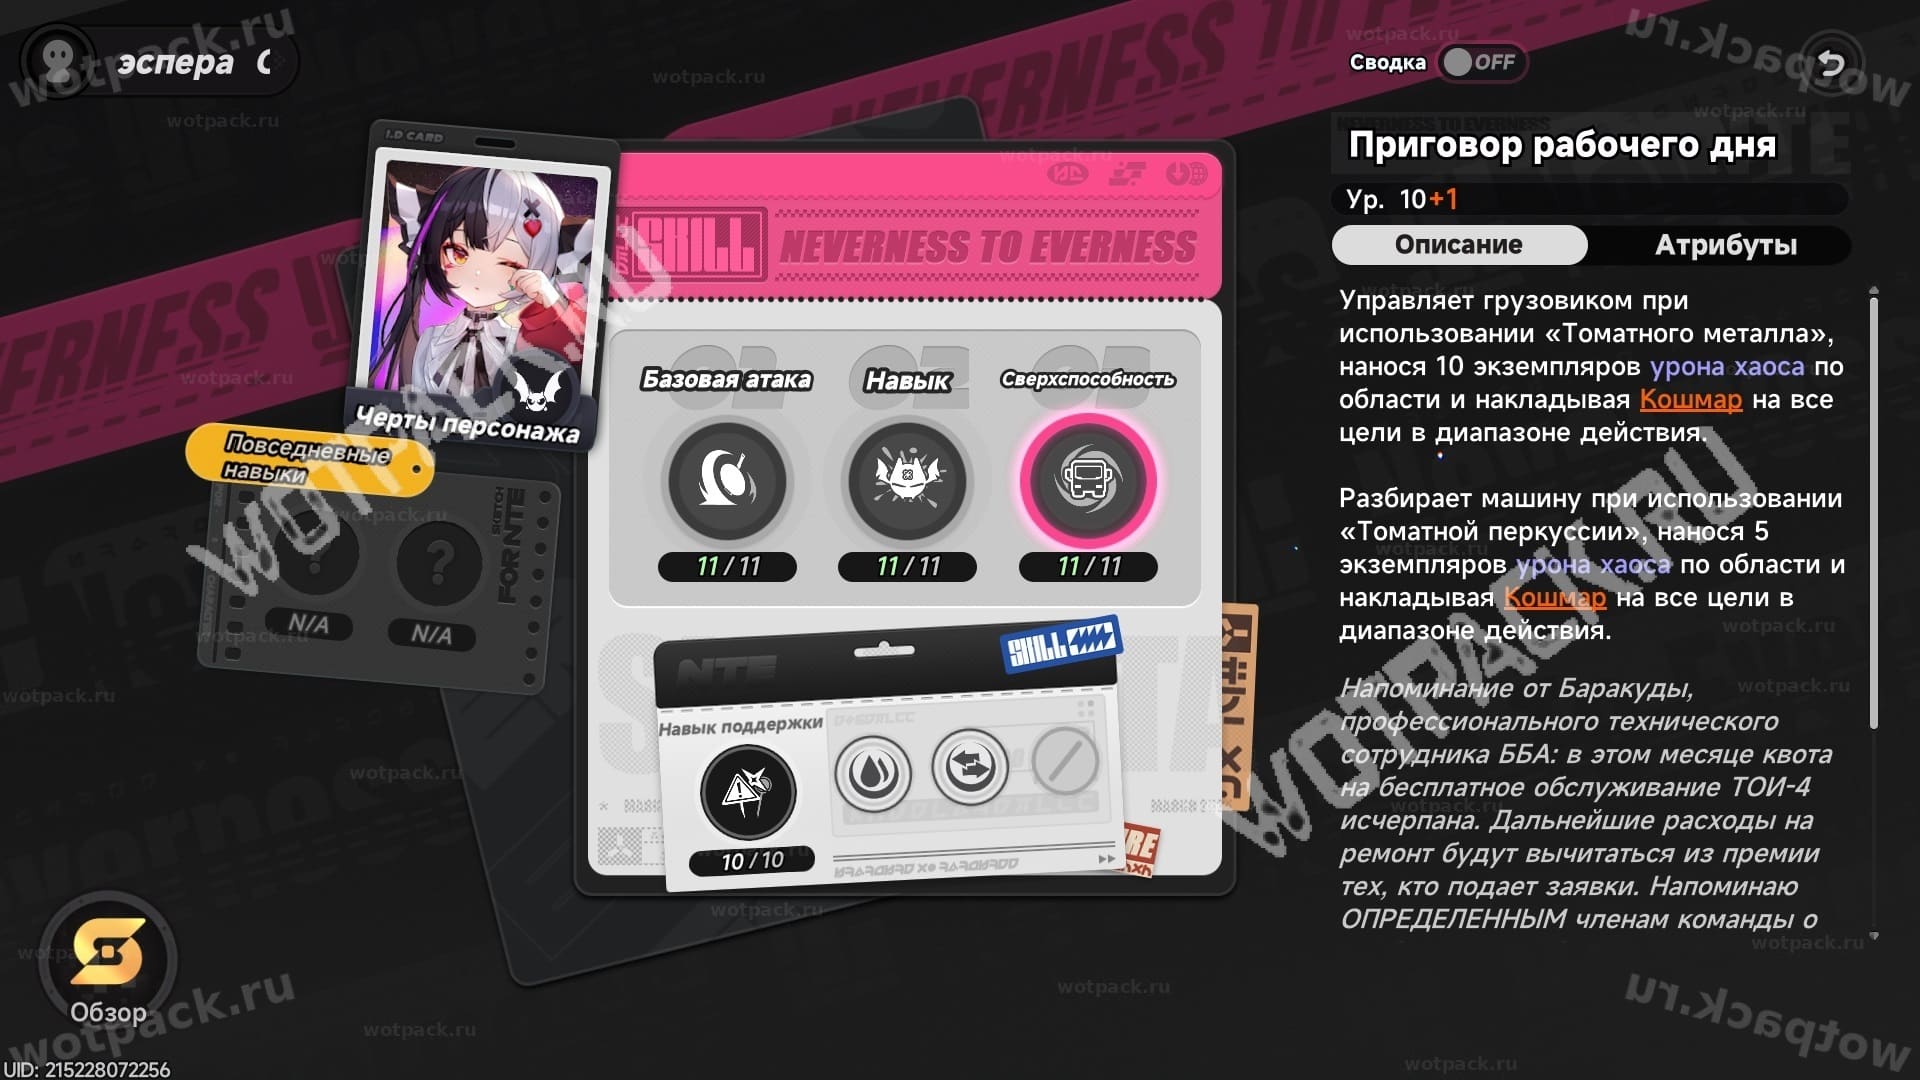
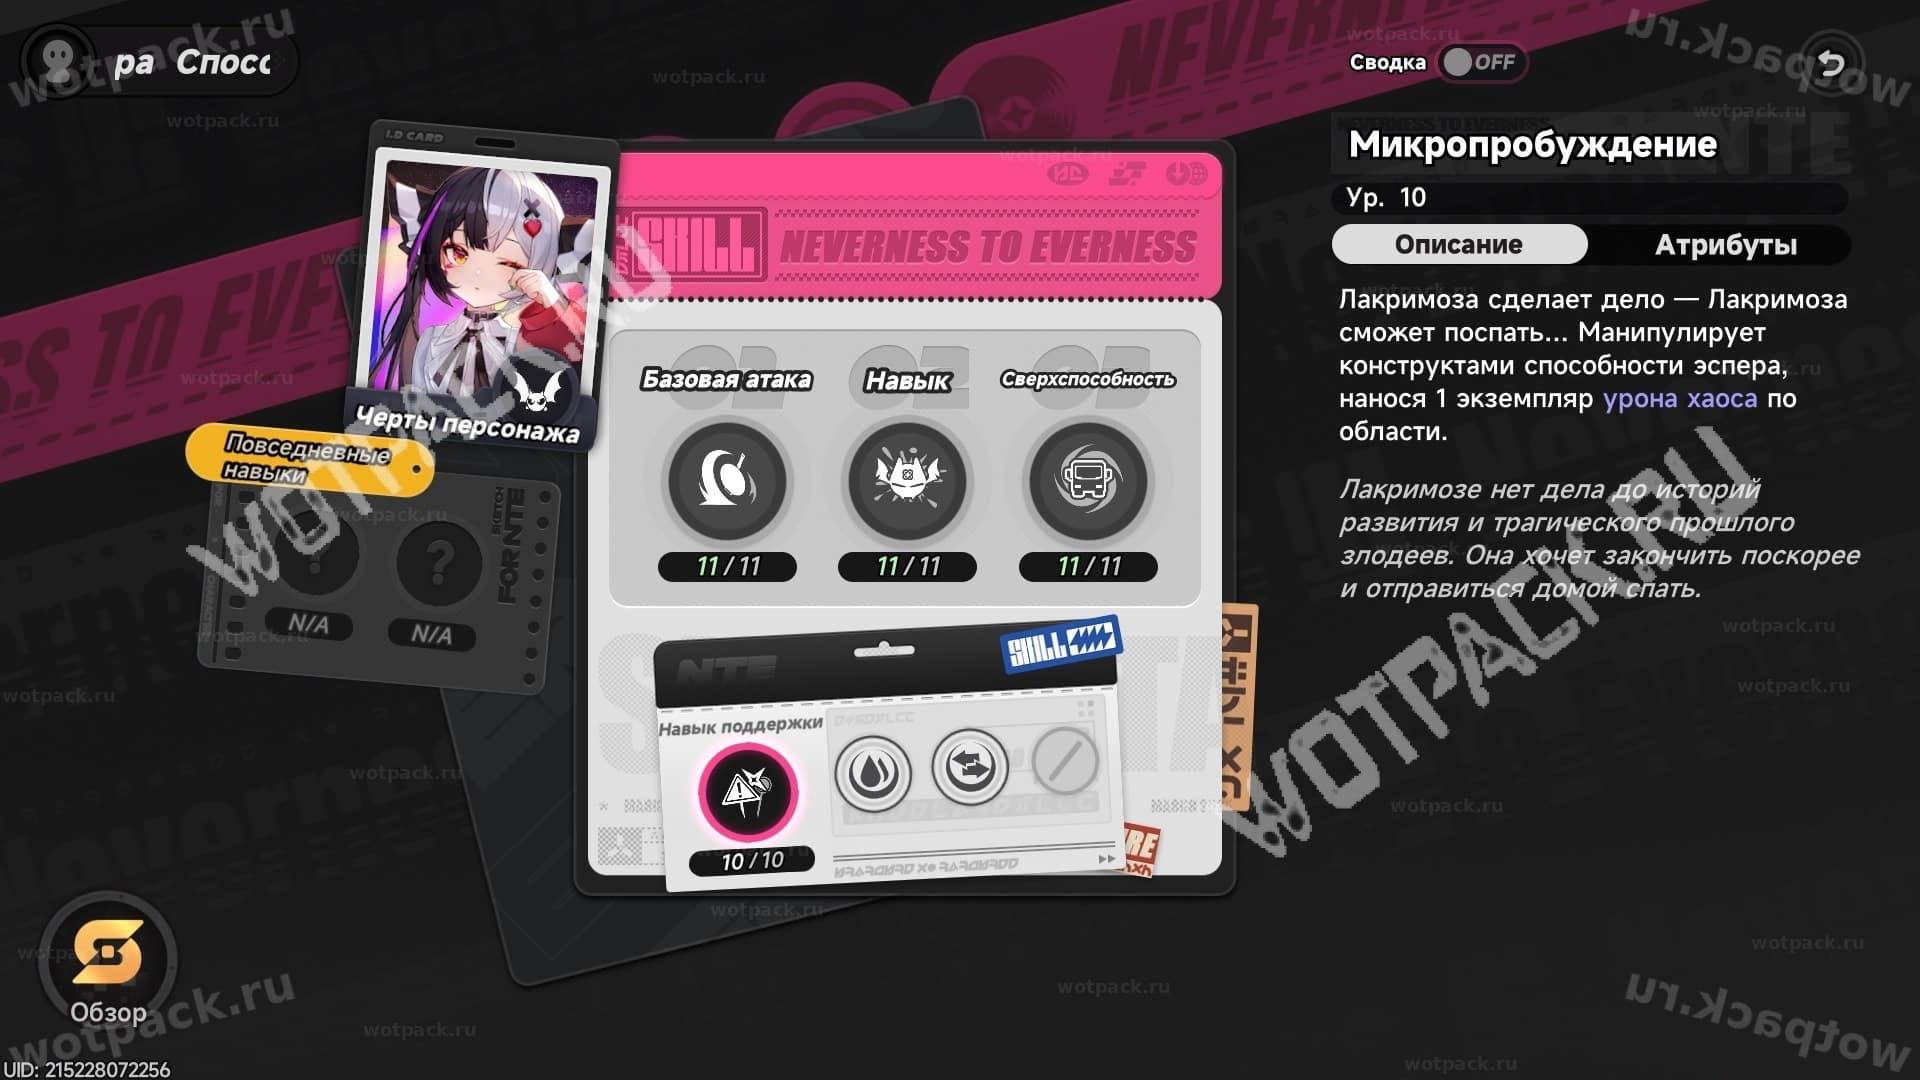
The list of hidden talents includes:
- Passive Tomato Banquet (Dissonance Boost) - If the target is destroyed, it takes additional damage.
- Passive The Long Sleep - Resets E-skill if it is on cooldown after using b/a Tomato Metal и Tomato Percussion 5 times.
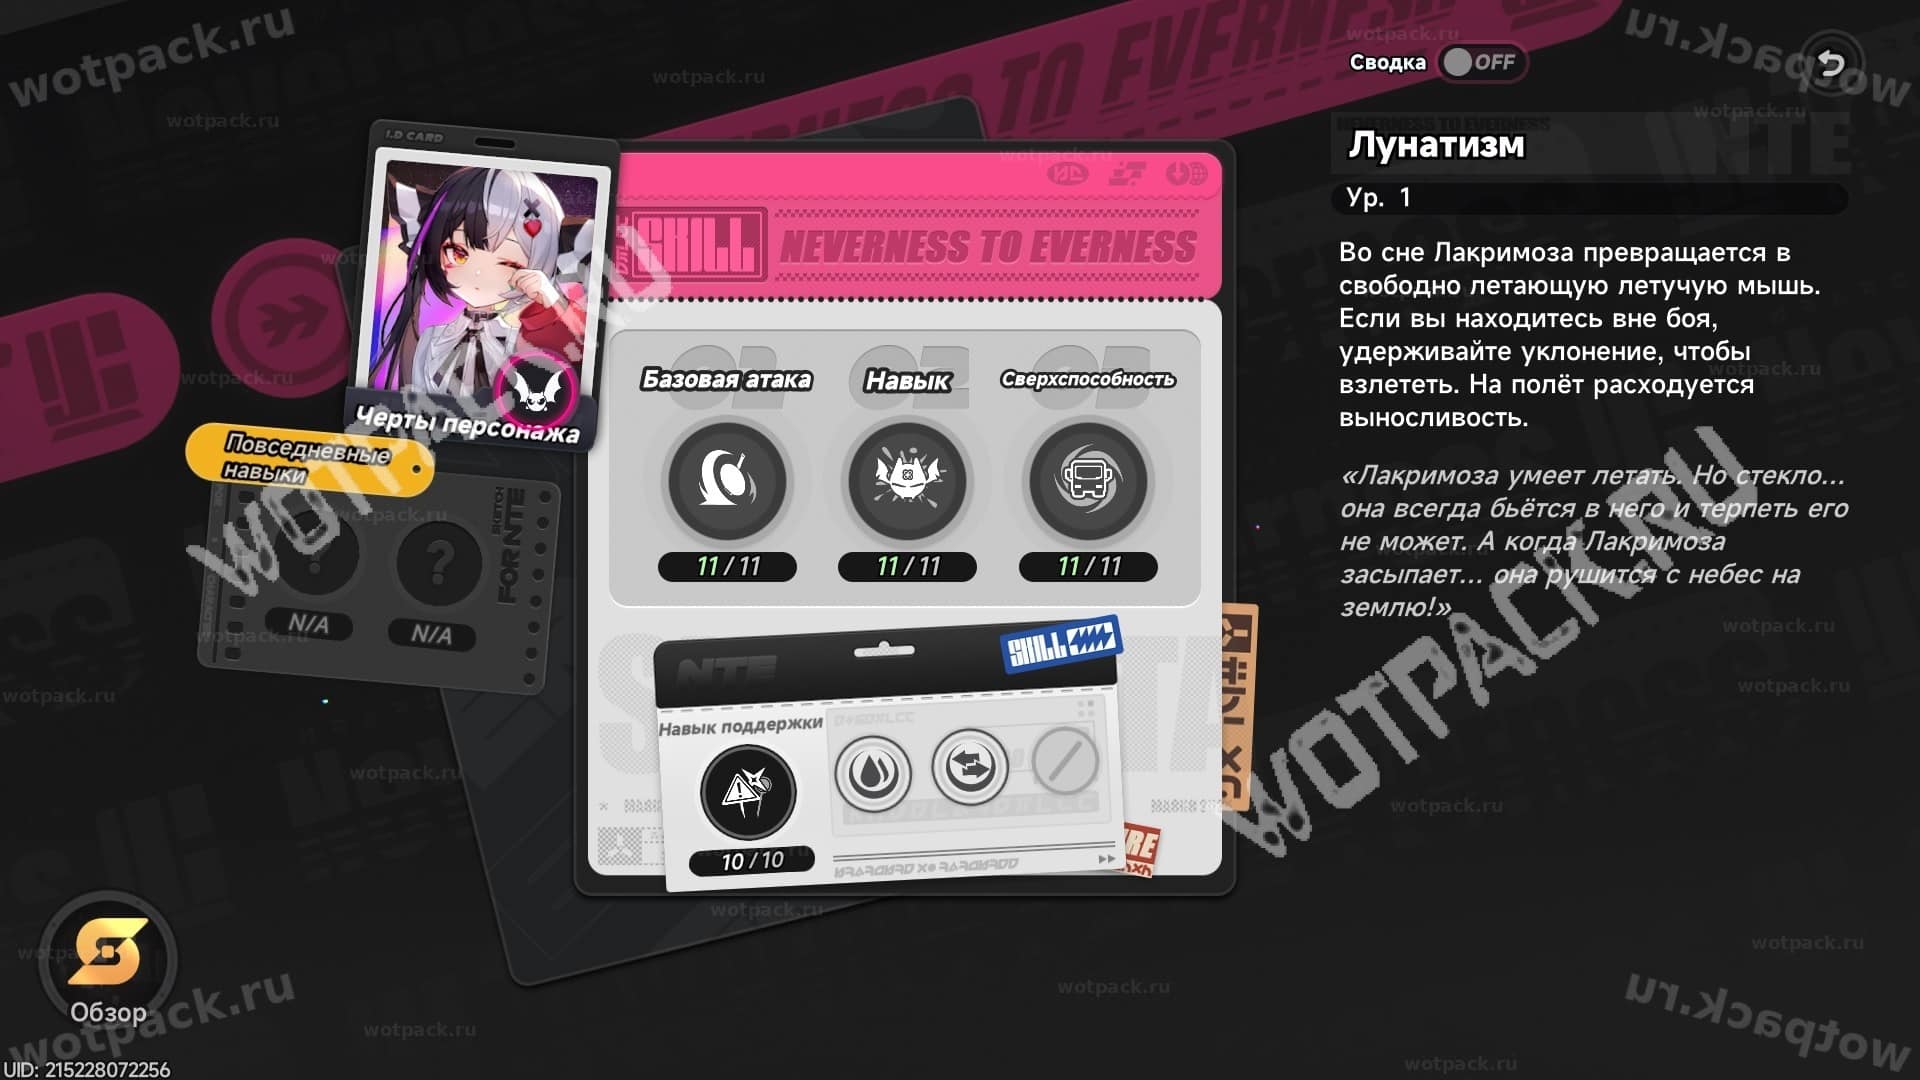
- Character trait "Sleepwalking" - outside of combat, turns into a bat.
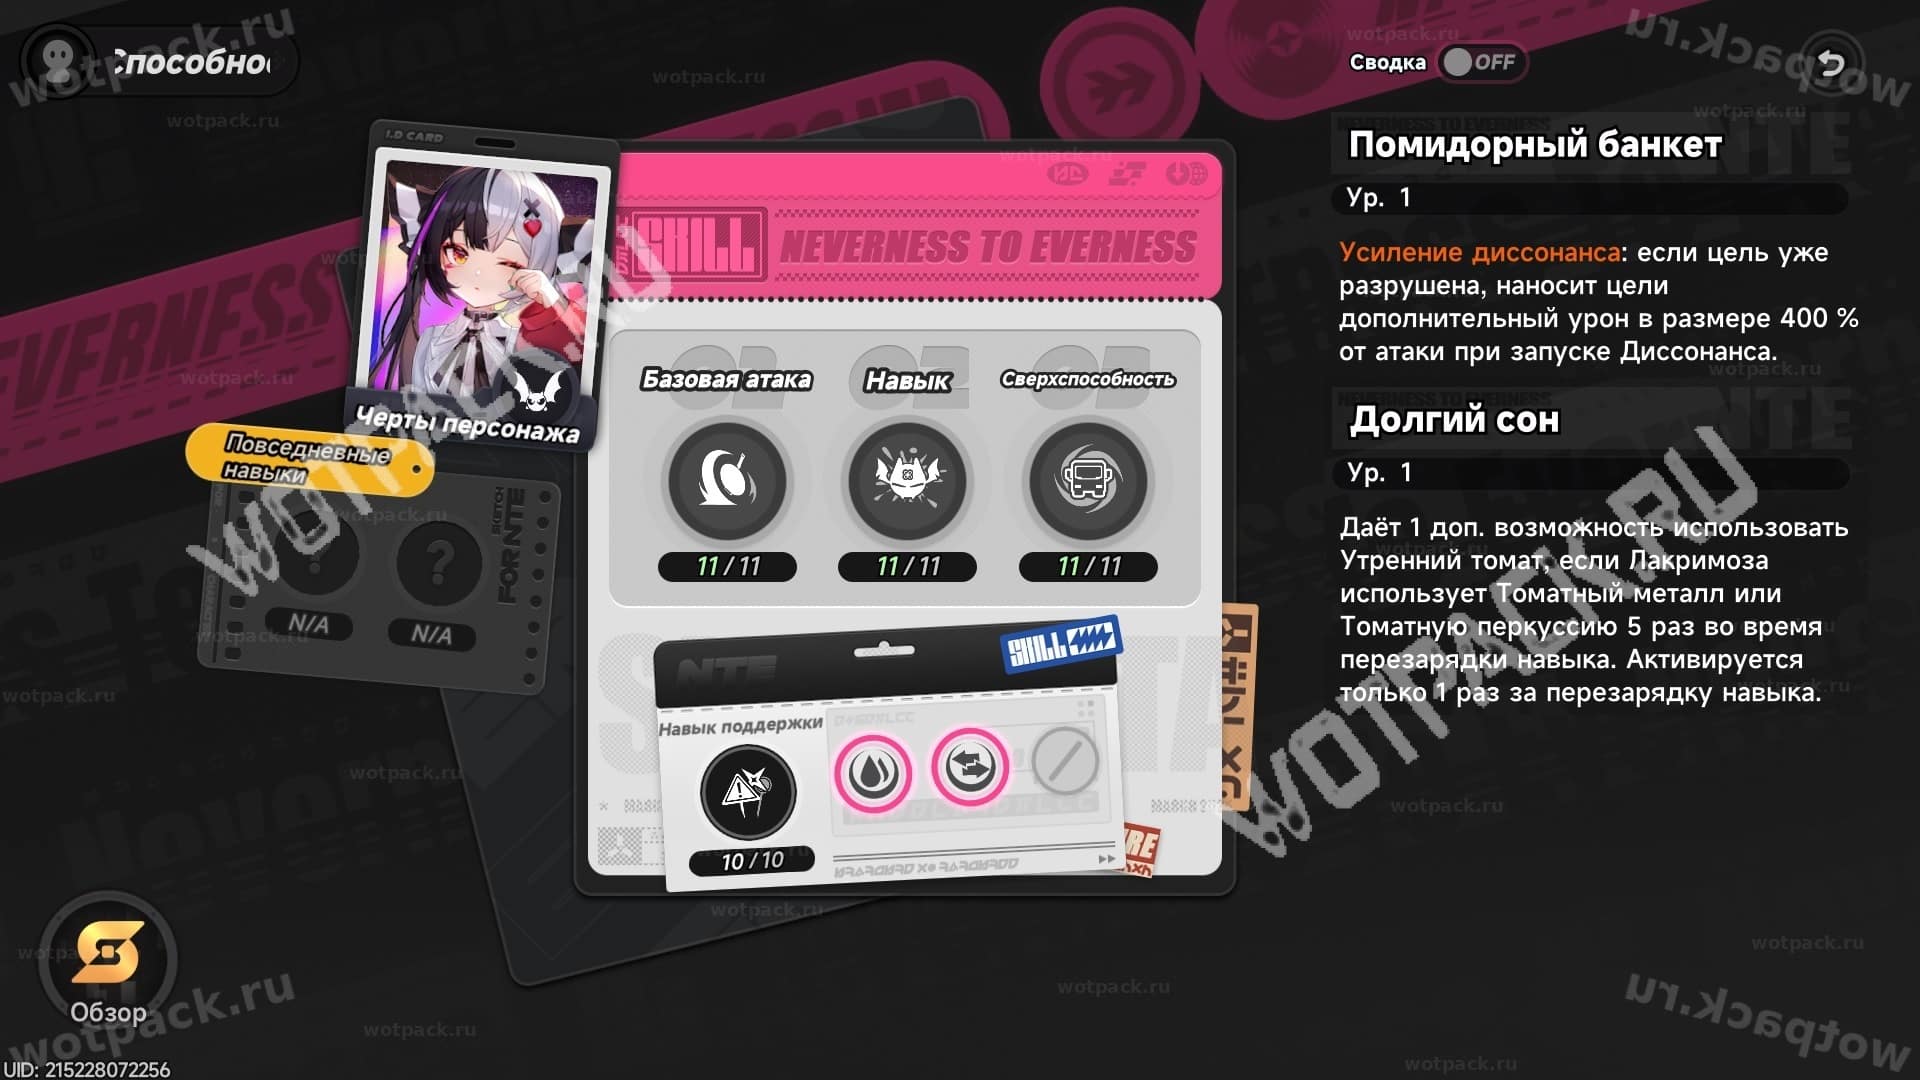
Everyday skill "Chef Tomato" simplifies business operations at the Origen cafe and expands the list of dishes for sale at the hobby Owner's Selection:
| 1 и 5 | Increases item prices by 1% and 1.5% for each dessert tag. |
| 2 и 4 | Reduces the consumption rate of ingredients by 1% and 1%. |
| 3 | In the Owner's Picks mode, a special treat called "Special Tomato Juice" appears, which is prepared by pouring tomato juice into a glass. |
Another feature is talent Muscular privileges - increases the number of received fons and paw coins from the results Pink Paws robberies, when the heroine is in the squad.
Leveling Order
Basic attack = passive talents > skill ≥ ult > support skill
A series of blows Sweet and sour — the main source of damage and the periodic Nightmare status, so upgrading it should be your first priority. Then, upgrade your E-ability and Ultimate.
Once you reach Ascension level 2 and 4, learn talents. Tomato Banquet (important for groups from Dissonance) and The Long SleepThe support skill is not a priority: its activation in the rotation is relegated to the background, especially in those packs where the Esper cycle is rarely activated.
Which awakening effects to choose?

E6 Morning Spell > E4 The Almighty Tomato Lord > E1 Delayed Mercy > E5 Tempered Glass Verdict > E2 Rise and Shine > E3 Melted Ice Cream
The sixth, fourth и the first one consts are the best for Lacrimosa:
- Morning Spell Simplifies rotation by automatically starting the Esper cycle with the mouse. The key is to plan for allies for Nova, Scorch, or Dissonance reactions. If you take it, the support skill is better. pump up equally with other skills.
- The Almighty Tomato Lord Increases the duration of DoT status.
- Delayed Mercy Directly increases the damage dealt by Nightmare.
We recommend prioritizing E4/E1 over E6 if the heroine is not in signature squads or is a solo core.
Other awakenings are also powerful, as they significantly boost a character's effectiveness on the battlefield. Depending on your Lacrimosa requirements, you can experiment with the bonuses and find the perfect one for you.
How to use Variation and copy an enemy
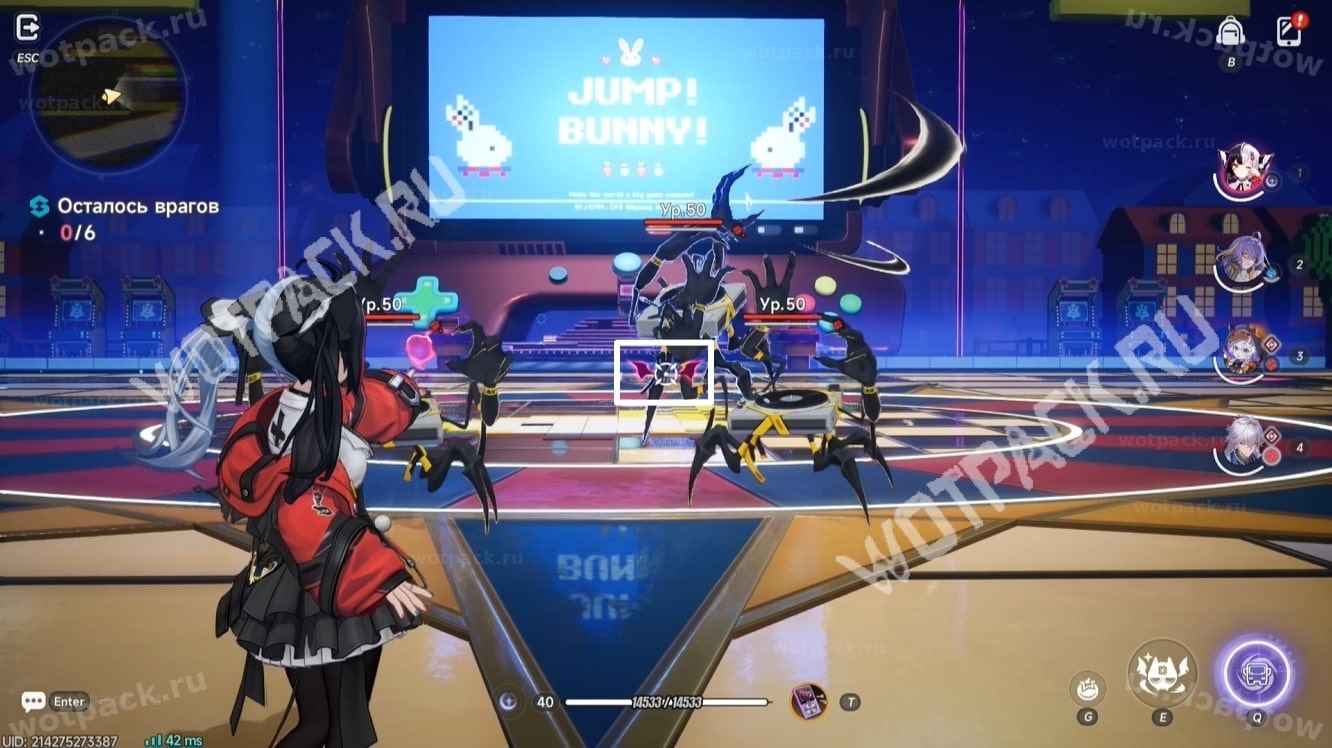
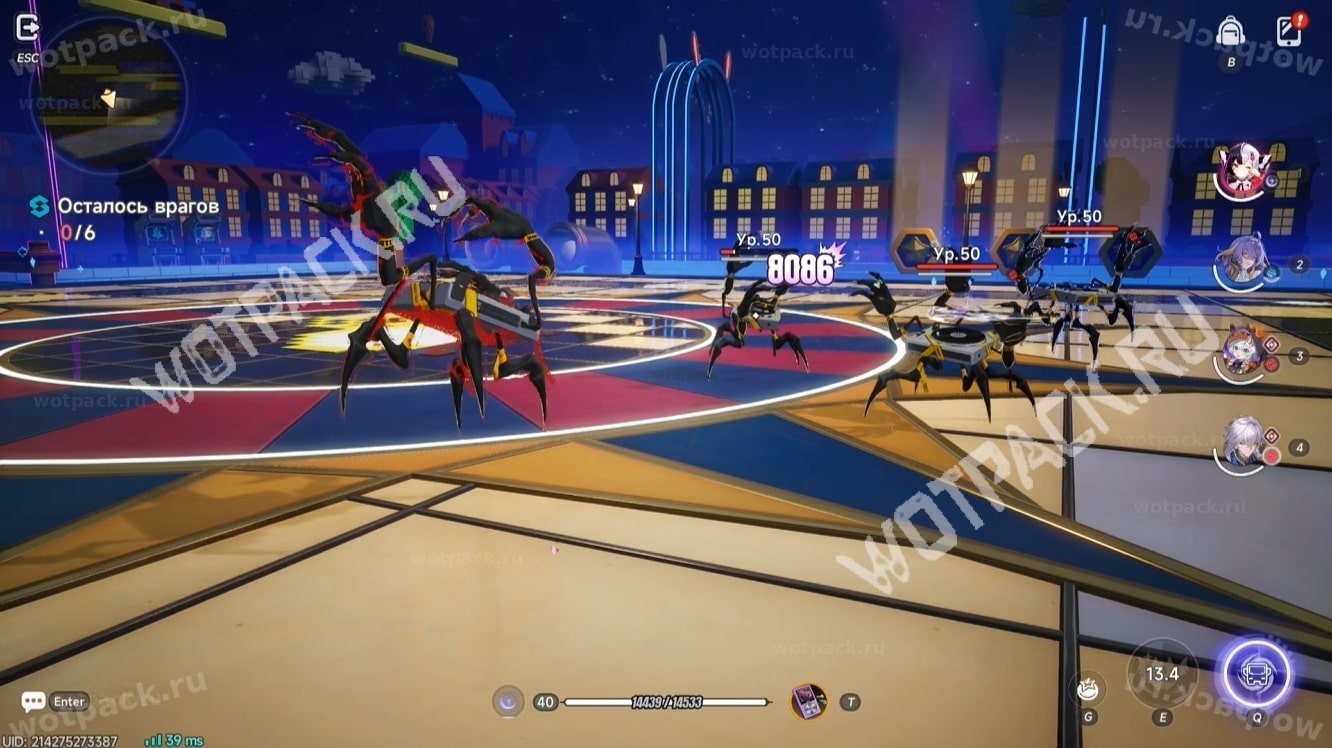
The tomato jelly lover's unique ability is that she can copy and use her enemies' abilities. To do this, she uses hold down the basic attack button and aim your crosshair at the desired anomaly. Then use the E-skill.

This works not only against normal monsters, but also against larger opponents, including elites and bosses.
How to replace a creature in the redirection skill "Devil's Gift"
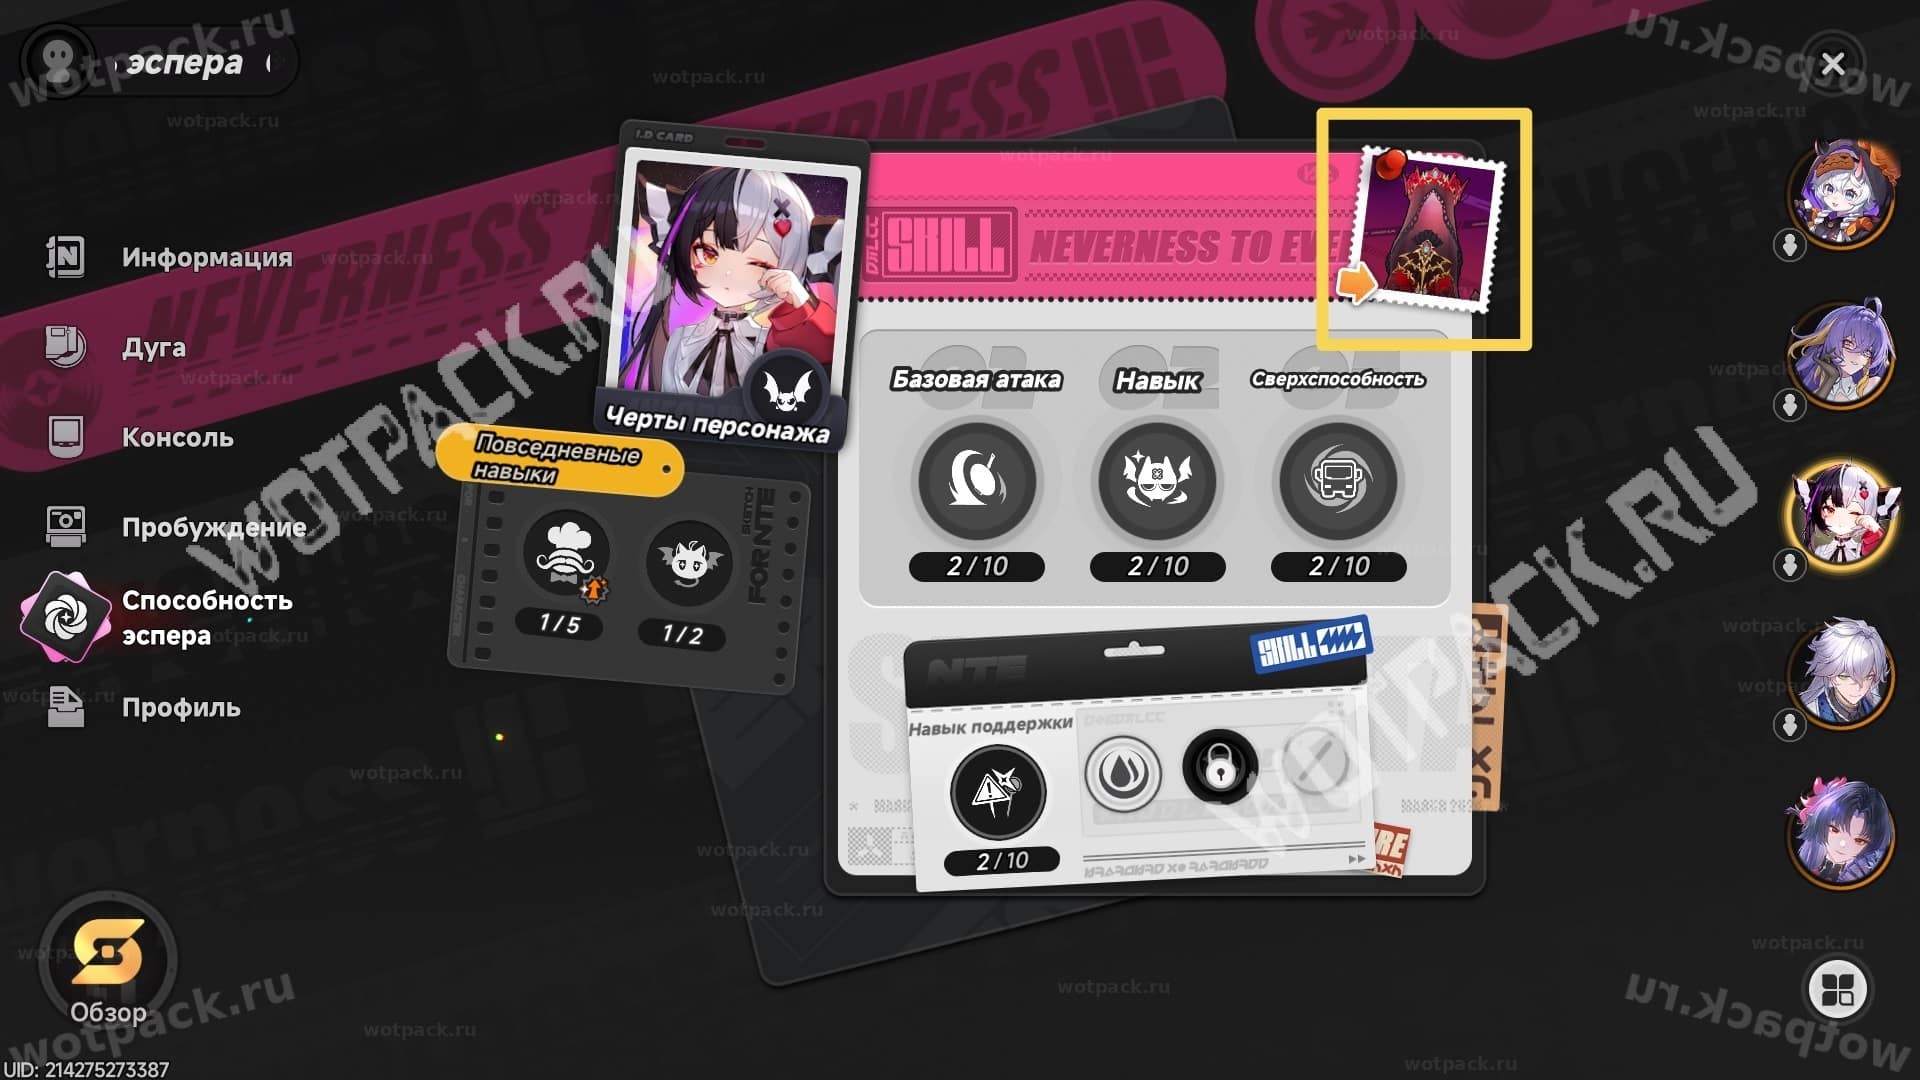
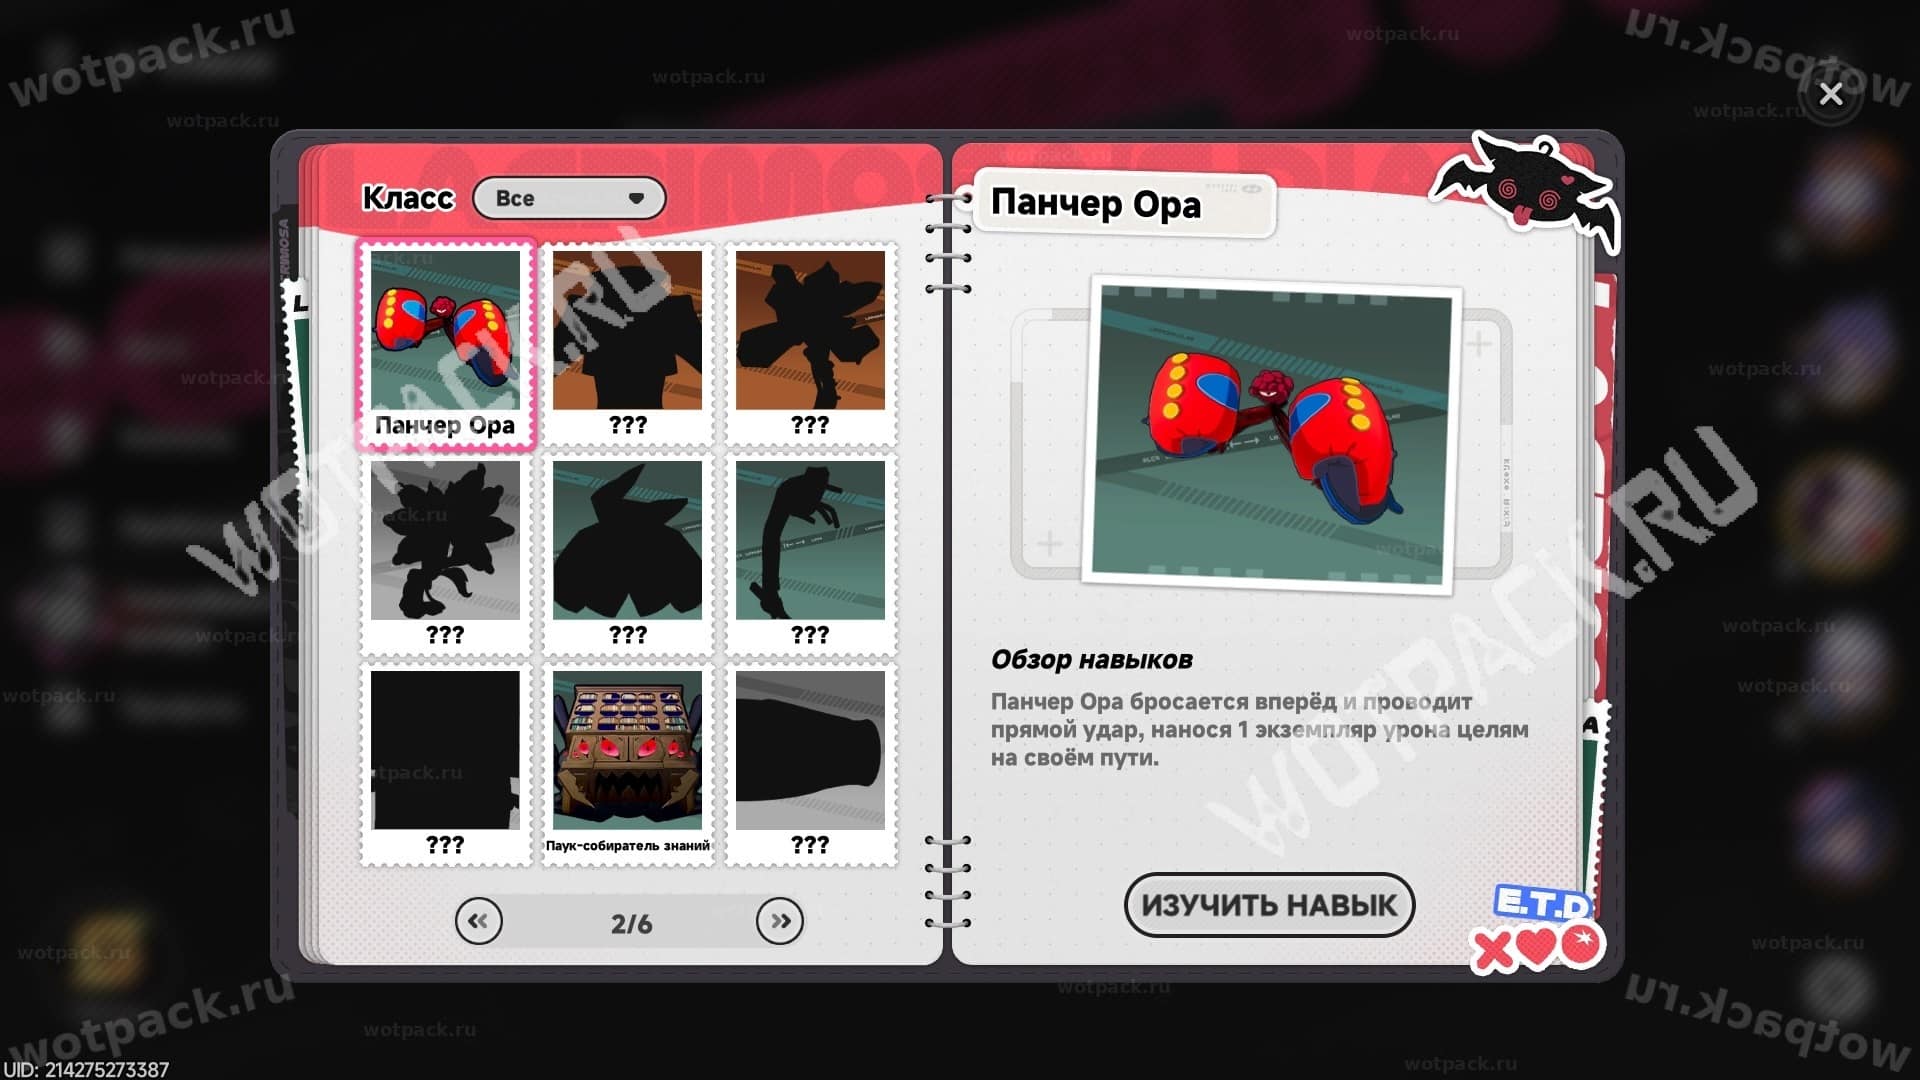
Open the Esper Ability section in Lacrimosa's profile and expand the bestiary, located above the active move icons. From the list provided, select any monster you've unlocked.
This booklet needs to be filled out independentlyTo do this, in battles with different monsters, capture them by holding down the b/a key.
If you want to change The Devil's Gift back to Morning Tomato, just click on "Forget the skill".
Rotation

Lacrimosa excels in high mobility and comfortable attack range. In combat, it's crucial to timely deploy and refresh the "Nightmare" damage-over-time effect. It stacks up to 10 times, is unique to each enemy, and is applied by these abilities:
- b/a "Sweet and sour" - any technique from the series;
- skill "Morning Tomato";
- ulta "Working Day's Sentence".
Rotation for her is very simple, but the button priority may vary depending on which team she's on and what position she occupies. Some key points include:
- In battle, the mouse uses two weapons: a frying pan (close range) and red jelly (mid/long range). To switch between them, press "G" (default).


- The weapon you choose changes some of your attacks—basic attacks and super abilities.
- "Workday Sentence" — Lacrimosa's explosive damage. The amount of damage dealt depends on the attack type assigned before the Q skill is used: "Tomato Metal" (Frying Pan) — 10 copies chaos damage, and Tomato Percussion (red jelly) - 5 copies.


Is the Character Worth Pulling For?

The Bat from TOI-4 is a strong Damage specialization hero, whose effectiveness is comparable to the leading damage dealers of the first update. Nanally и HotoriShe perfectly complements teams with standard Legendaries that counter reactions like Dissonance, Scorch, and Nova. She can lead the group or support an equally powerful hero (for example, Baikangu against the Scorch DoT).
Awakenings and signature arc are optional, especially if Childish Fantasies They're not occupied by another character, but the build must be carefully considered depending on your allies and the role you play. This can be a challenge when farming cartridges and attachments. However, any investment will be worth it, as the end result will be an effective damage dealer for any type of content.









How well does Zanka replace Daffodil?
If Zanku has one awakening on A5 with guaranteed penetration, then it's much better than Daffodil, but Daffodil is worse in terms of damage and reaction time. If you take Lacrimosa, Zanku, Sakiri, and any other character (preferably a Psychic, support healer, or shielder), Lacrimosa's Nightmare damage increases by 75% (100% with Adler) when burned thanks to Sakiri's passive, which buffs up to 100% for various types of damage over time. With Daffodil, it's a maximum of 50% (or 75% with Adler) because she doesn't have damage over time compared to Zanku. But if Zanku is without a signal and without A1, and Daffodil has one awakening (for additional damage, enemy stamina penetration), she might be better.
Burst units like Lacrimosa, Hotori, and Haniel Sakiri don't work? Or are they worse than using Dafodil instead of Hotori?
Thank you so much for the guide. I was really looking forward to your guides. I hope you'll continue reviewing NTE.
Anyone in the tank, please tell me, if resources are limited for a given character (and in general), what's best to level up first to maximize damage—Arc, character level, skills, or modules/cartridges? Or is it character-specific?
Will there be a guide for Baikang, Juyuan, and Fadia?
We might release it on Baikanga, but I can’t make any promises about the others yet.