

Harumasu Guide in Zenless Zone Zero with an explanation of the "Electric Prison" effect and an analysis of the mechanics for creating electric quivers on the battlefield. We will demonstrate the optimal rotation for realizing the full combat potential of a mobile archer from Sections 6. Let's take a look at all of Asaba Harumasa's basic attack statuses to understand his gameplay.
Let's give some examples of the best banbu и detachments with the hero for effective play and make up drive-disc assemblies, highlighting the most priority set of artifacts for making up the build. We will tell you about Harumasa's signature amplifier, and also select suitable alternatives. We will analyze the priorities in pumping up the agent's skills and indicate everything that Harumasa needs for pumping up.
Asaba Harumasa is an agent from the elite FIST unit "Section 6" led by Hoshimi Miyabi. At first, the guy gives the impression of a person who likes to shirk work, but later turns out to be a responsible and strong young man. As a combat unit of the squad, the guy actively uses a bow and daggers to inflict electrical damage on the target.
| Rating | A-position in tier lists. |
| Rarity | ⭐⭐⭐⭐⭐ |
| Appeared in-game | December 18, 2024 (patch 1.4) |
| How to Get the Character | Event banner "Dedicated channel". |
| Specialty [class] | Attack |
| Attribute [element] | Electric |
| Impact type | Penetrating |
| Role in the team | Main damage dealer |
| Faction | Section 6 |
| Height | 173 сm |
| Voice Actors |
|
How to Get the Character

The opportunity to knock out Asaba and the Zanshin First Aid Kit will arise in the second half. 3.1 version, which will take place on time 19 from August to September 8 2026.
Bookmark the updated banner schedule, so as not to miss Harumasa's rerun.
Stats
Increasing the agent's level will increase the value of key stats, which include health, defense, and attack power. These parameters affect the agent's survivability during battle and the damage inflicted on enemies. The table below shows the exact value of the parameters at each level:
| Level | Health | ATK | DEF |
| 1 | 595 | 132 | 48 |
| 10 | 1731 | 251 | 139 |
| 20 | 2947 | 378 | 238 |
| 30 | 4164 | 530 | 337 |
| 40 | 5381 | 658 | 436 |
| 50 | 6597 | 810 | 535 |
| 60 | 7405 | 915 | 600 |
When pumping up the inclinations, the value also increases Crit chanceBy fully unlocking all the slots of the agent's main passive skill, this stat can be raised from 5% until 19,4 %.
Basic skills

Asaba Harumasa is a damage dealer who actively fights at close and long range thanks to a weapon in the form of a bow and at the same time dual blades. His gameplay uses various auxiliary effects that make combat and movement on the field more dynamic, and also help to inflict damage with electricity. In addition to direct damage with abilities, the young man uses electric quivers, conducting joint attacks when conditions are met.
An important component of the gameplay for such a damage dealer are his abilities, which help to receive buffs and internal statuses - during the fight, Harumasa relies on numerous dash attacks to deal damage to targets with the effect "Electric Prison". In addition to arrows, the agent also uses electric daggers and has several abilities to deal area damage. However, the guy has great potential for dealing damage to a single target and small groups of opponents. In the following paragraphs, we will consider how Harumasa's skills work.
Basic Attack "Through the Clouds"
Performs up to five piercing attacks using electrical and physical damage. When the fifth attack hits the target, two electric quivers. When Harumasa next hits the enemy for the fifth time after a chain of attacks, he will receive six at once. electric quivers.
Basic Attack "Through the Clouds - Drift"
During a normal attack, push the joystick or hold the movement control button to make Harumasa fire an arrow that deals physical damage and move in the target direction.
Basic Attack "Falling Feather"
After the fifth basic hit from the Cloud Smasher chain, special attack, EX skill, or attack chain, hold skill buttonto perform a slashing strike in front of you with electrical damage. Hold basic attack buttonto fire a shot from the Falling Feather bow while aiming.
Basic attack "Ha-Oto no Ya"

When hitting enemies or the ground with skills, Harumasa generates electric quivers:
- 2th hit of basic attack "Cloud Piercer" - XNUMX quivers;
- Enhanced Special Attack - 6 quivers;
- chain of attacks - 6 quivers.
If there are no quivers on the battlefield and any squad member casts an attribute anomaly, 6 quivers are created. The effect can occur once every 12 seconds, and up to 6 quivers can exist at a time.

When the Falling Feather shot hits an enemy, all existing quivers activate and perform Ha-Oto no Ya on the target. Ha-Oto no Ya applies Electric Prison to enemies, stacking up to 8 times and lasting for 10 seconds. New levels of the effect refresh its duration. If the target has at least two stacks of Electric Prison, they are marked with the Targets mark.
Dodge "Flash"
Makes a quick dash in the specified direction. The character becomes invulnerable until the skill ends.
Dash attack "Hiten no Tsuru"
Fires a couple of times in front of itself, dealing physical damage.
Dash attack "Hiten no Tsuru - Slash"
If there is an enemy on the field that has a Target from the skill "Ha-Oto no Ya", then Harumasa enters the "Awakened" state, and "Hiten no Tsuru" is strengthened to the skill "Hiten no Tsuru - Slashing":
- While in a stance, activate a basic attack while dodging to dash to the nearest Targeted monster and deal a powerful slash that deals Electric Damage.
- In Awakened state, immediately activate a Basic Attack after Falling Feather to instantly perform Hiten no Tsuru - Slash.
When the attack hits the target, it consumes two stacks of "Electric Prison". If there are less than two stacks left on the enemy, the X-Mark is automatically removed. Before the mark disappears, constantly use Basic Attack to repeatedly cast "Hiten no Tsuru - Slash". Harumasa will leave the awakened state when there are no enemies left with "Target". During activation, Interrupt Resistance is increased and damage taken is reduced by 40%.
Counterattack "Unremarkable Talent"
After a perfect dodge using a basic attack, deals piercing electrical damage to enemies with shots.
Special Attack "You Can't Hide"
Fires an arrow forward, dealing electrical damage to the target.
Enhanced Special Attack "You Can't Get Away"
If Harumasa has enough energy, when activated, she will fire daggers and a powerful arrow at the target, applying electric damage. When the powerful arrow hits enemies or the ground, six quivers are created at once.
Kai-Hanare Attack Chain
During the attack chain, fires a bow. The upgraded arrow fired will hit a large area and create six electric quivers.
Superpower "Zanshin"
Harumasa unleashes a powerful bow attack, dealing electrical damage to enemies in a large area in front of her.
Quick Help "Bowstring"
When quickly switching to Harumasu, the agent attacks enemies in front of him with a bow, dealing electric damage. The character becomes invulnerable until the skill expires.
Help in the defense of "Yugamae"
Changing the active hero that is about to be attacked will allow Harumasa to enter the field and deflect the enemy's attack. This attack will accumulate a large amount of stun points on the enemy target.
Assistance in additional attack "Yugamae - Slashing"
When pressing attack after Defensive Assist, Harumasa will release multiple electric attacks at enemies in front of him.
Main Passive Skill "Dawn"
The critical chance for the dash attack of "Hiten no Tsuru - Slashing" is increased by 10-25%, and when this attack deals a critical hit, Harumasa gains level 1. "At the forefront of attack". Up to three stacks can be obtained per use of the ability, and the effect can be stacked up to 6 times. The duration is 5 seconds, and gaining new levels refreshes the duration. Each stack of "On the Edge of Attack" increases the critical damage of "Hiten no Tsuru - Slashing" by 6-12%.
Additional ability "Overclock"
If there is a class hero in the squad intimidation or Anomalies, Harumasa's damage to enemies in a stunned state or under an abnormal status is increased by 40%. When the skill "Falling Feather" hits enemies in one of these states, they are additionally inflicted with 2 charges of the "Electric Prison" effect.
The order of leveling skills
Basic Attack = Evasion = Prowess > Special Attack (EX) = Chain Attack (QTE) > Help
Since Harumasa is a classic Attack class damage dealer, the priorities in skill development should be distributed as follows:
- Basic attacks и evasion should be leveled evenly, as their progress will directly affect the percentage of damage dealt. Mainly through various types of normal attacks, Harumasa exhibits a key mechanic with electric quivers and the "Electric Prison" status on the enemy, which he absorbs when dashing, which counts as evasion.
- Buildup inclinations will be reflected in the critical chance and damage buff that applies to Harumasa's Hiten no Tsuru - Slashing skill.
- Special Attack и attack chain act as a tool for summoning electric quivers and AoE damage. The EX skill is of great value for compiling a rotation, allowing you to create 6 quivers on the battlefield, which will be used in Harumasa's rotation to inflict the bulk of the damage on the target.
- Help is pumped last.
How to Play Harumasu: Rotation

Playing for Harumasu is an active movement across the field between enemies marked with "Target" marks. Like any classic damage dealer, he is very dependent on the support of allies, allowing him to create space for the implementation of the archer's combat potential. The young man receives some of the buffs when attacking enemies in a state of stun and anomaly, for which it is imperative to allocate time in the team rotation.
After creating Electric Quivers on the field through the use of skills, performs a targeted shot "Falling Feather" to activate scattered bombs and apply up to eight stacks of "Electric Prison" to enemies for 10 seconds. At the same time, he enters the "Awakened" stance, in which he can immediately begin performing dash attacks "Hiten no Tsuru - Slashing", consuming two stacks of "Electric Prison" in one hit. After the effect levels are used up, he is forced to regenerate Electric Quivers and perform the skill "Falling Feather".
Asaba Harumasa's rotation during a fast-paced fight against a single target or group of enemies should look like this:
- Start the fight as an Intimidation character to build up enough stun on the enemy.
- Before starting the chain attack, bring Harumasu to the field and use the enhanced special attack to generate six electric quivers. After creating the bombs, hold the basic attack to aim, shoot an arrow at the enemy, and start the chain attack.
- After the chain attack, perform multiple Hiten no Tsuru - Slashing dash attacks until the enemies run out of Electric Prison stacks.
- Hold the basic attack button again and shoot the monster to activate the six quivers created by the chain attack. Continue pressing the basic attack to continuously chain "Hiten no Tsuru - Slash".
- Once the enemy is out of the stun state, repeat the rotation.
The best eidoses
When six duplicates fall out, Harumasa's mental picture will be fully revealed, and the character will receive a lot of buffs. A list of all possible passives can be found in the table below:
| M1: Soulful Impulse | The max stacks of Electric Prison from the basic attack Ha-Oto no Ya are increased to 14. Activating two Electric Quivers will result in two Ha-Oto no Ya attacks. |
| M2: Languid look | During a chain attack or ult, Harumasa gains 7 stacks of Electro Blitz, up to a maximum of 7 charges. The Electro Blitz effect increases the damage of the dash attack of Hiten no Tsuru - Slash by 50%, consuming 1 charge. |
| M3: A Lie for the Good | +2 to Chain Attack, Basic Attack, Dodge, Assist, and EX skill level. |
| M4: Short-term fuse | The effect of "Electric Prison" lasts up to 20 seconds. When the dash attack of "Hiten no Tsuru - Slashing" hits an enemy, Harumasa accumulates 30 decibel points once per use of this skill. After using the ultimate, all enemies are given the maximum number of "Electric Prison" stacks. |
| M5: Obscurity | +2 to Chain Attack, Basic Attack, Evasion, Assist, and EX skill level. |
| M6: Insight | After Ha-Oto no Ya hits a stunned target or one affected by an attribute anomaly, Harumasa will ignore 15% Electricity damage resistance for 12 seconds during attacks. Every 12 hits on the same target by Ha-Oto no Ya, an electromagnetic explosion will be released, dealing Electricity damage equal to 1500% of Harumasa's attack power. |
Asaba Harumasa's best cons to increase single target and AoE skill damage are: the first one, the second one и sixth.
- M1 Increases the maximum number of stacks of the Electric Prison effect to 14, and also increases the number of times each quiver can be activated to two times, allowing up to six attacks to be made in the Hiten no Tsuru - Slashing dash with one activation of six quivers.
- M2 Opens up the possibility for active gameplay with even more damage to targets affected by Harumasa's marks. During combat, the agent often uses dash attacks to deal damage and activate their statuses. The improved dash attack "Hiten no Tsuru - Slashing" will deal significantly more damage, allowing you to deal with the target earlier.
- M6 will allow you to ignore a significant percentage of the target's resistance to attacks, which will significantly increase the damage dealt. In addition, due to the diverging electrical damage with a significant scale from Harumasa's attack power, the potential for causing mass damage will be significantly increased.
For F2P players, it's worth focusing on the second part of the mental picture.
Strengths and Weaknesses

Having considered all the active and passive skills of the agent, as well as his mental picture, we can highlight the following pros and cons of Asaba Harumasa:
| Strengths | Weaknesses |
| High mobility. Due to the nature of the rotation, which requires active use of dash attacks, Harumasa actively moves around the battlefield and gets closer to enemies to deliver damaging attacks. | Although the agent has skills that deal AoE damage, he may not cope as well with crowds or paired mobs. It is also necessary to monitor the presence of "Targets" and update them in time, which makes it difficult to control the situation on the field when fighting several monsters. |
| High damage on single targets. Due to the "Electric Prison" status, the agent focuses all of his damage on one enemy. This effect will help when passing the Defense of Shiyu and similar modes with difficult combat content, where you need to quickly catch up and eliminate a small number of "dense" enemies. | Requires proper rotation between quiver-generating abilities, Falling Feather, and dash attacks to make use of the limited-time stacks of Electric Prison. |
| Thanks to the built-in auxiliary guidance, the aiming mechanic does not burden the skill set with a difficult to perform attack. When holding the basic attack button, the skill automatically guided on one of the targets. |
Leveling

All materials for leveling up Harumasa are provided in the table:
| Leveling | Materials | Cost |
|---|---|---|
| Level |  ×4 Entry Level Attack Token  ×32 Top Level Attack Token  ×30 Pioneer Token |  ×800 000 |
| Skills |  ×25 Basic Shock Chip  ×75 Advanced Shock Chip  ×250 Specialized Shock Chip  × 5 Pass to the Hamster Cage | ×2 491 000 |
| Makings |  ×60 High-Dimensional Data: Thunder Dragon  ×9 Cast of Fanaticism | ×405 000 |
Best Harumasa Builds in Zenless Zone Zero

Asaba Harumasa is a classic Assault agent who uses normal attacks to deal damage to targets. The agent's power peaks when his allies create a stun window or when attacking an enemy under an abnormal status. In the limited time that all the effects are in effect, the young man must perform a personal rotation in the Awakening stance and deal as much damage as possible.
When compiling an assembly, it is worth paying attention to such characteristics as:
- CRIT damage/chance - try to balance 2 to 1 for stable and high critical attacks on enemies.
- ATK - all key abilities depend on this characteristic.
- Electrical Damage Bonus - affects the damage of the agent's main attribute.
Among other characteristics, we can highlight the penetration percentage, which will allow you to ignore part of the enemy's defense. Next, we will provide Harumasa's build in ZZZ: the rating of amplifiers for the hero, examples of drive disk sets and optimal values of characteristics to demonstrate stable damage in battle.
The best amplifier
The best weapon for Harumasa is the Signature Amplifier "Zanshin First Aid Kit", which in addition to internal boosts to critical damage and chance gives a boost to dash attacks. The best amplifiers among alternatives will be those models that are aimed at increasing critical damage or chance, damage from dash attacks and attack power. As a temporary option, you can consider weapons with energy recovery, if the passive effect can give Harumasa a corresponding buff to key attacks or damage type.
| Amplifier | The effect |
|
Man-made heart (5⭐) Basic ATK 48-713
|
Increases k/w by 15-23%When the owner deals damage with a non-lethal or enhanced special attack, they gain 1 boost charge. Each charge increases the owner's electrical damage by 12,5-20% , stacks up to 2 times. Each charge lasts 40 seconds, and the duration is calculated separately. While both charges are active, damage from non-lethal attacks and super abilities is ignored. 20-32% of the target's defence. |
 Zanshin First Aid Kit (5⭐) Base ATK: 48-713 |
Crit chance increases by 10-16%, and the electrical damage for dash attacks gets a bonus of 40-64%. When any squad member casts an attribute anomaly or stuns an enemy, the weapon owner's critical chance increases by another 10-16% for 15 sec. |
 Strings of Night (5⭐) Base ATK: 48-713 |
CRIT damage increases by 50-80%When the owner enters the battlefield, activates a chain attack, or activates a super ability, they gain 1 stack of "Heartstrings." This effect can stack up to 2 times. Each stack allows you to ignore 12.5-20% resistance to fire damage to the target during hits from a chain of attacks or the ultimate. The buff lasts for 30 seconds, and repeated activations refresh the duration. |
 Sulfur (5⭐) Basic ATK 46-684
|
If a basic attack, dash attack, or counterattack after dodging hits an enemy, the attack power of the agent with this item increases by 3,5-7% for 8 sec. Stacks up to 8 times, fires once every 0,5 sec. The duration of each effect level is calculated separately. |
|
Marcato reverb (4⭐) Base ATK: 40-594 |
Whenever an enhanced special attack or chain attack hits an enemy, the agent with this item gains increased attack power by 8 sec. 6-9,6%. Attack power is increased by an additional 6-9,6%, if the target is in an attribute anomaly state. |
|
Star Engine (4⭐) Basic ATK 40-594
|
When performing a counterattack after dodging or quickly assisting, the attack power of an agent with this item increases by 12-19,2% for 12 sec. |
|
Artillery Rotor (4⭐) Basic ATK 40-594
|
Increases ATK by 7,5-12%. When a critical hit hits an enemy target, it deals additional damage equal to 200% of the Agent's attack power. This boost will trigger no more than once every 8-6 seconds (depending on the awakening rank of the amplifier). |
|
Goldenflower (4⭐) Basic ATK 40-594
|
Attack power is increased by 6-9,6%, and the damage from enhanced special attacks is 15-24%. |
|
Drill - red axis (4⭐) Base ATK: 42-624 |
While using an EX skill or chain attack, normal attacks and dash attacks will increase electrical damage + 50-80% for 10 seconds. The effect will work no more than once every 15 seconds. |


The special manual indicated all amplifiers and who they are suitable for.
Best Drive Disks
When choosing artifacts for Harumasa, try to balance crit chance and damage, using not only the characteristics of the disks themselves, but also the effects of parts 2 and 4. Boosts for electrical damage or attack power increases in percentages will not be superfluous.
| Set and its effects | Features |
|
Thunderous heavy metal 2-Piece Bonus: Electrical damage +10%. |
To fully utilize the kit, it's best to consider mono-electric commands to quickly trigger the Shock status effect. This status will increase Harumasa's ATK, which will impact all damage dealt. |
|
Harmony of shadows 2-Piece Bonus: Aftershock and dash attack damage +15%. |
A good set, suitable for the gameplay of dashes, but will be better revealed with the presence of M1. As the battle progresses, the levels of enhancement will be gained, which will increase the attack power and crit. chance. |
|
Dyatlokor-electro 2-Piece Bonus: Crit. chance +8%. |
The best set for those who don't want to play through the Shock reaction. In a dynamic fight with Harumasu, it's not too difficult to get and maintain at least two stacks of the set's ATK buff. Two discs increase Critical Chance, which helps balance out the stats. |


Recommended "halves" of sets for raising the necessary stats:
- "Astral Voice" or "Hormone Punk" — attack power +10%;
- "Dyatlokor-electro" — critical chance +8%;
- "The Song of the Branch and the Blade" — critical damage +16%.
Find out more about drive-disks in ZZZ in a special guide. The guide also analyzed which agents are best suited to different sets.
Recommended Stats
When compiling a Harumasu assembly, you should find similar values in different parts of the disks:
| Position | Parameter |
| 1 | Health (permanent) |
| 2 | Attack Power (fixed) |
| 3 | Protection (permanent) |
| 4 | CRIT damage/chance |
| 5 | Electric Damage Bonus - a priority; attack power or penetration - alternative |
| 6 | ATK |
The final value of Asaba Harumasa's stats to demonstrate consistent damage to targets should look like this:
- HP — 10 and more;
- ATK — 2-600 and more;
- CRIT Rate - no more than 75% (without the “On the cutting edge” buff);
- CRIT DMG - 150-190%.
Best Banbu
When considering a Banbu for Harumasa, it is worth highlighting the helper bunnies that offer help in dealing damage or accumulating an attribute. In a mono-electro group, it is worth considering Electroba, Pluggerba or Agent Gulliver. In some teams, faction Banbu for the two remaining members of the squad or support-type robo-bunnies are more suitable.

Agent Gulliver |

Stekerbu |

Elektrobu |
Applejack |

Mrs. Esme |

Knighthood |

Barobu |

You can find out more about agent companions in a special guide. on banbu with tier list of the best.
Teams

Asaba Harumasa in Zenless Zone Zero takes the place of the main damage dealer in the squad and can rarely be moved to the position of auxiliary DPS agent. The guy uses all the time provided on the battlefield to implement a rotation with dash attacks on the enemy under the stun or abnormal status. Due to the conditions of the inclinations that give a significant internal buff to Harumasa, teams with him should include agents of Anomaly or Intimidation. Support characters will also be useful, capable of increasing attack power or imposing a debuff on enemies, lowering the percentage of the target's defense.
Best Characters
Characters that can support the Section 6 Archer in combat:
| Character | Features |

|
Despite being an Assault specialty, Snake stuns enemies "out of the pocket" at the level of Intimidation agents. Additionally, it buffs damage and damage, and allows you to ignore a percentage of your resistance to electrical damage. |

|
Reveals his potential when paired with another Assault agent. Also offers increased ATK, critical damage, and energy regeneration. |

|
It has high stun multipliers, extends enemy stuns, and allows for more frequent Ultimate activations. Among other agents in its class, Harumasa is the best fit. |

|
A pocket-sized stunner with high personal damage. It also extends the enemy's stun duration and can trigger an additional attack chain. |

|
Thanks to the constant application of Erosion, a wind anomaly, it can help with collecting quivers. It also increases critical damage, draws enemies into tornadoes, and prolongs the stun. |
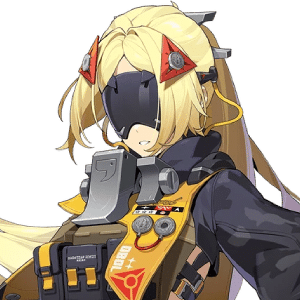
|
A stun and sub-DD character with a pocket playstyle. In a build with Harumasa, he is more suitable as a support-buffer than a single Intimidation character. |

|
A hero for stunning opponents and increasing the target's vulnerability multiplier. Will complement mono-electro squads or teams with a sub-DD in the form of an electric Anomaly. |
|
|
Lycaon will look great in classic squad builds with Supportive Supports. The agent performs rapid attacks on targets during combat and places a debuff on enemies that increases the vulnerability multiplier when stunned. It is recommended to combine with Sokaku or Rina to activate an additional passive skill. |

|
An alternative agent of Intimidation that creates a stun window for its damage dealer. Unlike other members of the class, it increases the damage of the chain of attacks, which is not a priority for Harumasa. |

|
An F2P fighter that is good at stunning targets, Enby will do well in both early game and advanced combat content, stunning targets for Harumasa and stacking Shock on enemies. |

|
Fulfills the Propensity requirements, which activates both heroes' secondary abilities. The heroine acts as a pocket-sized sub-damage dealer, dealing damage from her "pocket" while simultaneously filling the enemy's stun meter. She doesn't take up much time on the battlefield. |

|
A legendary anomaly hero who inflicts fiery effects on enemies. Bernice's passive ability works instantly. She doesn't take up much time on the battlefield, increases the effectiveness of damage dealt to enemies, and helps quickly dispatch groups of enemies. |

|
Grace should be considered a support damage dealer, applying Shock to enemies with her EX skill and shots, as well as her Ultimate. |

|
Piper can be considered for a sub-DD role when dealing with groups of enemies. She can easily deal area-of-effect damage, leaving stronger, more "dense" targets for Harumasa. |

|
Significantly increases the ATK of Assault agents and, while inside his etheric curtain, increases the stun multiplier for the entire squad. His ultimate can also restore a small amount of health to allies. |

|
Astra Yao's abilities work off the field and allow agents to seamlessly swap in and out using the "Quick Aid" combat technique. Her buffs are team-wide, long-lasting, and easily refreshed, making her suitable for any squad. |

|
An anomalous support that provides ATK and restores energy to the entire squad. Allows the Electric attribute to build up faster on targets and triggers "Quivers" for the main damage dealer. |

|
A strong penetration buffer with an electric attribute, Rina should be considered as a support in a mono-electro team or in a group with Lycaon. |

|
An excellent and accessible companion for increasing attack power. Despite long attacks, Sokaku is good at controlling groups of enemies and provides a significant buff to one ally. |
|
|
A fiery support that increases the attack power of the entire squad and deals decent damage. Suitable for teams with representatives of the Sons of Calydon faction or for general reinforcement of a group with two DDs. |

|
Nicole excels at cutting down enemy defenses and can pull enemies into one spot for easy use of Harumasa's few AoE attacks, including her chain attacks and ultimate. |

|
Caesar applies thick shields that protect against any type of damage and provide the active character with an ATK boost. With proper skill, he can fully replace Intimidation heroes and stun targets no less effectively. |
|
|
Shielder, which is best realized inside the squads with representatives of the Anomaly. The set can impose debuffs on opponents and give buffs to allies, which will speed up the process of applying the attribute status to the enemy. In addition, it can call for quick help to change the active agent and impose a shield on him. |
|
|
Activates an ethereal curtain, slightly increasing allies' HP and attack power while inside. Can be used in a support slot if no other options are available. |


Best Teams with Harumasa
Let's look at the best units for Harumasa:
| Character 1 | Character 2 | Character 3 | Features |
|---|---|---|---|
 Harumasa | Dialing | SannaAster | Currently the strongest unit for an archer. Dialin quickly stuns enemies, and Sanna can offer buffs for Assault agents. |
| Harumasa | SidCissia | TriggerQingyi | Another option for a mono-electric squad. Cissia helps fill the stun meter and allows him to ignore the percentage of protection against electric damage. A squad with Snake and Trigger will also allow the young man to spend more time on the battlefield. |
| Harumasa | QingyiEnby | RinaAsterTrigger | A mono-electro team with effective Shock on targets. The squad looks good both with Enbi as a stunner and with Qingyi. Thanks to the buffer Rine, Harumasa will be able to kill enemies faster, ignoring a significant percentage of the targets' defense, with Astra he will deal more damage with bonuses to crits and attack power, and Trigger will give him an additional stun multiplier on targets. |
| Harumasa |  YanagiGrace | YuzuhaRinaAster | A variant of squads with Anomaly heroes. When Yanagi is included in the group, you can choose Gulliver's banba as an alternative to the usual Elektroba and Shtekerba. The squad is played from the imposition of Shock on enemies, which will have a better effect in the battle against mechanical opponents. |
| Harumasa | 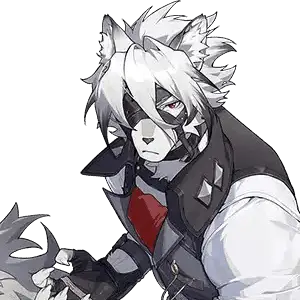 LycaonKolyada | Sokaku Lucy | The game principle of the two team variants does not have any special differences, except for the attribute. Depending on the chosen Intimidation hero, it is worth substituting the appropriate support, capable of giving a buff to the main DD. As a banbu, you can consider a free Knight or Packet. |
| Harumasa | BernicePiper | CaesarLucy | Harumasa can be a good damage dealer for a team with Sons of Calydon. In a group with Bernice, Asaba will be able to accumulate the necessary attribute anomaly without leaving the field. Piper, in turn, spends more time in the arena to spend energy. To increase ATK, it is worth putting Lucy, and if there is a lack of survivability during the battle, take Caesar in the remaining squad slot. |
| Harumasa | Enby | Nicole | A free squad option with available characters. Nicole is good at cutting down enemy resistances, and Enby effectively fills the stun gauge and the electrical anomaly indicator. |
In a separate guide you can find the best teams in ZZZ.
Is The Character Worth Pulling?

Asaba Harumasa is an Electric Assault agent, good for dealing damage to 1-2 elites and small groups of weak mobs. He has great mobility and an active playstyle that involves frequent use of dash attacks. The agent mainly fights when the enemy is stunned, which opens up a window for using all abilities one after the other. He has many internal buffs aimed at increasing damage and critical hit efficiency.
To activate an additional passive skill, it is enough to put a hero of Intimidation or Anomaly in the squad, which guarantees not only a vulnerability multiplier for targets and damage, but also a bonus to damage of 40%. In turn, the style of play with the need to control "Marks" can cause many difficulties at the stage of getting used to the character and during a battle with a large group of opponents.
Which is better: M1 or signal
The signature amplifier "Zanshin First Aid Kit" will be the optimal investment for Harumasa. The signature will increase crit. chance and crit. damage, and also provide a bonus for dash attacks, in total, increasing the hero's strength through the main characteristics. As for the first part of the mental picture, it does not contain bonuses to damage, and in general, the process of applying stacks is simplified. The value of M1 is reduced by the fact that even without it, the archer does not experience serious problems using passives in battle.
As a result, the first const gives Harumasa more comfort in the game, but slightly increases damage due to the increased number of stacks per rotation. On the other hand, the signal offers a volume increase in critical mass and a bonus to the damage of the main attack type, which is ahead of other weapon options.
Trailers
Agent combat information:

Demo "The Crows Have Arrived":

We hope this guide helped you put together the best build for Asaba Harumasa in Zero's Zenles Zone. If you have any questions about how agent skills work and builds, be sure to leave a comment. comments, so that the author or other players can help. In the special section of our site, see builds in ZZZ on all characters.






It wouldn't hurt to update or supplement it in connection with its edits.
Will the Sid (Man-Made Heart) signature suit him, and how well does he play with Sid herself?
Sid's Ashka buffs normal attacks and his ult, and the local Archer deals damage with dash attacks. So it's not much use. It's better to give it to Anton.
Will Harumas/(Qingyi/Gashetka)/Dialin's squad come in? Or should he just take out Astra?
He is my wizard, he is my treasure, the most delicious chocolate.
Harumasa + Trigger + Astra = Complete Combat Content
Learn to play as Haru, then he will start to deal huge damage