

В Genshin Impact Nekomata courier Kirara plays a pure support role in most squads, providing the team with decent shield strength and can also serve as an additional Dendro element applicator, assisting the secondary damage dealer with status inflictions. With constellations, she gains some buffering functions and improves her ability to apply reaction effects.
Due to her leaf elemental nature, the delivery worker is most effective with allies of the same element, through synergies with Hydro and Electro, as this will provide not only protection but also resonance with the elemental mastery. However, if desired, she can play on any team as a shielder.
| Rating | B-position in tier lists |
| Rarity | ⭐⭐⭐⭐ |
| Appeared in-game | Patch 3.7 |
| How to Get the Character | Standard and event banners |
| Element | Dendro |
| Weapon | Sword |
| Gender | Female |
| Affiliation |
|
| Constellation | Arcella |
| Home region | Inazuma |
| Birthday | 22 January |
| Zodiac sign | Aquarius |
| Age | 19-25 years old |
| Height | 158-164 cm |
| Special dish | Energizing Bento |
| Voice Actors |
|
How to Get the Character
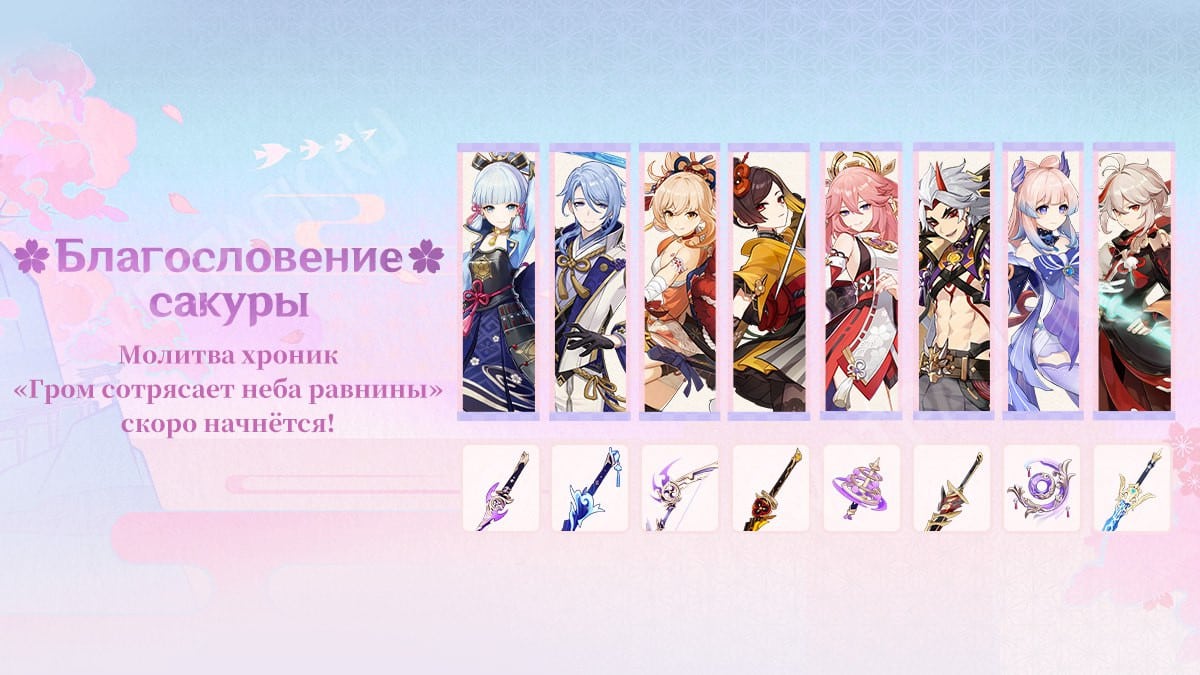
It is accessible from Inazuma Chronicled Wish , second half of the 5.6 updatewhich took place from May 27 to June 17 2025. Nekomata can be obtained at any time from the standard "Wanderlust" prayer with a small chance. To unlock the heroine's constellations, you need to obtain copies of her.
Follow the character release schedule in our banner schedule.
Strengths and Weaknesses

Nekomata is a good, inexpensive support in a Dendro team, making her friendly for newcomers, but her element limits the number of possible teammates. Since she's solely responsible for shield generation and ultimate reset, Kirara should be built with only two stats in mind.
| Strengths | Weaknesses |
| Has simple skills, and is also not too dependent on constellations. | When building your heroine, you'll have to choose between shield strength and damage, as shields scale with HP, while damage from your ultimate and skill scales with attack power. Kirara won't be a true hybrid, despite her passive. |
| Very easy to build, HP-dependant, good for beginners. In addition, this stat grows with ascension, which makes her even easier to build. | As a playable character, she is suitable for beginners due to the simplicity of her mechanics, but she is difficult to level up for players who do not have access to Inazuma and Sumeru. |
| An inexpensive shield for teams using a plant element. The shield is applied via a skill, so it doesn't require constant ult activation. | The ability to deal damage from the pocket only appears with the presence of the 4th constellation, and also does not appear very often. |
| The duration of the shield is greater than or equal to the cooldown of the skill, which lets the shield to work all the time. | The character is highly specialized, as it is only suitable for commands through reactions Budding, Lunar Budding, Vegetation, Stimulation, Combustion, and Blooming. |
| Has a passive that allows you not to startle small animals. This is useful for those who like to farm meat in the open world. | |
| With constellations, she will be able to attack from the pocket, as well as give buffs to the entire team. |
The Best Kirara Builds in Genshin Impact

Nekomata is a support hero who provides shields to the team and deals moderate elemental damage. When used correctly, she can easily serve as an additional attacker for reactions. Kirara can also be used as a sub-damage dealer, although her shield is less powerful in this case.
Recommended Stats
The support build is entirely dependent on the shield strength generated by the elemental skill. Since its strength scales with HP, so you need to focus on it. In addition, if necessary, you can pay attention to energy recharge, crit и attack power, if you need damage from Kirara.
Characteristics to look for in artifacts:
| Artifact | Main characteristic | Additional stats |
|---|---|---|
 Flower of Life | HP (fixed) | HP% Energy Recharge% CRIT Rate/DMG Elemental Mastery |
 Plume of Death | Attack Power (fixed) | HP% Energy Recharge% CRIT Rate/DMG Elemental Mastery |
 Sands of Eon | HP% ATK% | HP Energy Recharge% CRIT Rate/DMG Elemental Mastery |
 Goblet of Eonothem | HP% Dendro Damage Bonus% | HP Energy Recharge% CRIT Rate/DMG Elemental Mastery |
 Circlet of Logos | HP% CRIT Rate / DMG | HP Energy Recharge% CRIT Rate/DMG Elemental Mastery |
Optimal stat values for Kirara:
- HP: about 30.000-40.000 HP.
- Energy recharge: 160-180%.
- Crit Rate and Crit DMG: should be in a ratio of 1:2 (for example, 60 crit. chance and 120 crit. damage).
- ATK In artifacts, it's only necessary to increase damage from skills and ultimates (for example, if you have the 4th constellation). If it's needed, it should be kept around 1500-1800.
- Since Kirara only plays in Dendro teams, EM will also be a part of the build, but it’s not worth chasing it on purpose - it’s enough to gain 100-150 only.
Top weapons
Weapons should be selected based on the characteristics needed. It is best if they meet her needs in HP or energy recharge.
| Name | Description | Recommendation |
|---|---|---|
 Key of Khaj-Nisut ⭐⭐⭐⭐⭐ Base ATK: 44-542 HP: 14,4%-66,2% | Increases HP by 20%-40%. Elemental skill hits for 20 sec. create a Grand Hymn that increase the elemental mastery of the character equipped with this weapon by 0,12%-0,24% of their max. HP no more than 1 every 0,3 sec, stacking up to 3 times. After reaching 3 levels or refreshing the duration of level 3, the elemental mastery of all characters nearby will increase by 0,2% - 0,4% of max. HP of the character equipped with this weapon for 20 sec. | The best option for Kirara, who plays in teams based on reactions. This sword provides a lot of health for the nekomata and also provides buffs to MS. However, it's worth noting that the passive ability won't work from the pocket. |
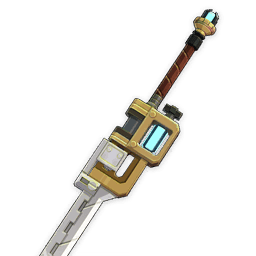 The Dockhand's Assistant ⭐️⭐️⭐️⭐️ Base ATK: 42-510 HP: 9.0%-41.4% | When the equipping character heals or receives healing, they gain Stoic's Symbol 30 seconds. You can get up to 3 Symbols in total. When an elemental skill or elemental burst is activated, all Symbols are consumed and the Roused effect is granted for 10s. For each Symbol spent, elemental mastery increases by 40-80 .In 2 sec. after activating the effect, each spent Symbol restores 2-4 . energy. The Roused effect can occur once every 15 sec. The character receives Symbols even if they are not on the battlefield. | A four-star alternative to the sword above. Unlike the Key of Khaj-Nisut, it can gain stacks of passives while the character is in the pocket, provided that the team has a healer who heals the entire squad at once. |
 Freedom-Sworn ⭐⭐⭐⭐⭐ Base ATK: 46-608 Elemental Mastery: 43-198 | Increases damage dealt by 10 %-20 %. Triggering a reaction grants the character one Sigil of Rebellion every 0.5 seconds, even when the character is in a squad but not active. Two collected Sigils of Rebellion disappear for 12 sec. granting nearby party members Millennial Movement: Song of Resistance, which increases the damage dealt by normal attacks, charged attacks, and plunging attacks by 16 %-32 %, and attack power by 20 %-40 %. Within 20 sec. after activating the effect, Sigils of Rebellion will not appear. Millennium Movements with effects that affect the same skills does not stack. | A good weapon for Elemental Mastery that also increases damage and buffs allies. Suitable for a limited number of teams using Dendro Reactions, for example, useful in teams where the main damage dealer is a character who needs attack power. |
 Xiphos’ Moonlight ⭐⭐⭐⭐ Base ATK: 42-510 Elemental Mastery: 36-165 | Every 10 sec. the wearer's energy recovery increases by 0,036 %-0,072 % For each point of Elemental Mastery, you gain 12 seconds of this effect. Nearby squad members gain 30% of this effect. If other allies also wield this weapon, the effect stacks and works even outside of combat. | A decent sword for energy restoration and elemental mastery. Suitable if you need energy for reactions and have at least 300 MS. It's recommended to only pick this sword up if you have Awakening 5. |
 Favonius Sword ⭐⭐⭐⭐ Base ATK: 41-454 Energy recharge: 13,3%-61,3% | Critical attacks have a 60 %-100 % chance to create elemental particles that restore 6 Energy. Occurs once per 12-6 sec. | A versatile sword for supports. It will provide energy to both the hero and the entire team. This sword requires 50-60 critical strike chance to be comfortable to use. |
 Sacrificial Sword ⭐⭐⭐⭐ Base ATK: 41-454 Energy recharge: 13,3%-61,3% | When an elemental skill deals damage, there is 40 %-80 % chance of resetting its cooldown. May occur once per 30-16 sec. | Provides significant energy recovery to the Nekomata. The skill's instant cooldown allows you to activate the shield in emergency situations. |
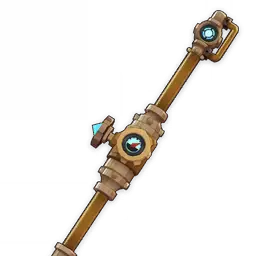 Fleuve Cendre Ferryman (F2P) ⭐⭐⭐⭐ Base ATK: 42-510 Energy recharge: 10-45,9% | Increases the critical chance of elemental skills by 8-16%. In addition, after using an elemental skill, energy recharge is increased by 16-32% for 5 sec. | Although the courier can only realize the increased critical chance by long-pressing the weapon, it's still suitable for frequently activating the ultimate. This will allow you to gain more HP in your artifacts. |
 Sapwood Blade ⭐⭐⭐⭐ Base ATK: 44-565 Energy recharge: 6,7%-30,6% | Triggering Dendro Reactions creates a Leaf of Consciousness next to the character that lasts 10 seconds. The Elemental Mastery of the character who picks it up is increased by 60-120 for 12 sec. A Leaf of Consciousness can spawn every 20 sec. This effect triggers even if the equipped character is not on the battlefield. The Leaf of Consciousness is not cumulative. | A good weapon for restoring energy, giving additional elemental mastery to the team. Suitable if there are no better options. |
 Primordial Jade Cutter ⭐⭐⭐⭐⭐ Base ATK: 44-542 CRIT Rate: 9,6%-44,1% | Increases HP by 20%-40%. Also grants an ATK bonus equal to 1,2%-2,4% of max HP of the character equipped with this weapon. | A HP weapon that provides a decent attack bonus based on health, further increasing the heroine's personal damage. It also increases critical chance and simplifies the balance of stats in artifacts. However, this sword could be considered overpowered, as it's much more beneficial to use it on damage dealers. |
 Skyward Blade ⭐⭐⭐⭐⭐ Base ATK: 46-608 Energy recharge: 12%-55,1% | Increases crit chance by 4%-8%. An elemental burst awakens the power of the heavens, increasing movement and attack speed for 10 %, and normal and charged attacks deal additional damage when hitting, equal to 20 %-40 % of attack power. All effects last 12 seconds. | It will increase energy regeneration, but for a support role, the passive is useless, other than the additional critical chance. |
You can find out about other equipment and its demand in weapon tier list.
Choosing Artifacts
Kirara's artifacts are selected using the same principles as weapons. Also consider whether your team has a Resonance character and whether your squad needs an attack power buff, elemental mastery, or other bonus.
| number | Name | Effects |
|---|---|---|
| 2 |  Tenacity of the Millelith ⭐⭐⭐⭐ ⭐⭐⭐⭐⭐ | 2 parts: Increases HP by 20%. 4 parts: When the skill hits enemies, the attack of all nearby characters in the party is increased by 20%, and their shield strength is increased by 30%. The effect lasts 3 seconds. and can occur once every 1 sec. This effect can be activated even if the character equipped with this set of artifacts is not on the battlefield. One of the best options, but she can't maintain the full set effect permanently with a short press of the skill. The full set will only activate when entering the Neko Urgent Delivery state. |
| 3 |  Noblesse Oblige ⭐⭐⭐⭐ ⭐⭐⭐⭐⭐ | 2 parts: Elemental burst Damage +20%. 4 parts: Activating an elemental burst increases the attack power of all party members by 20% for 12 seconds. The effect does not stack. A versatile set for supports that increases elemental burst damage and buffs the entire team. Significantly increases damage with a fourth constellation. |
| 4 |  Deepwood Memories ⭐⭐⭐⭐ ⭐⭐⭐⭐⭐ | 2 parts: Increases Dendro damage bonus by 15%. 4 parts: Hitting an enemy with an elemental skill or elemental burst lowers enemy's Dendro resistance by 30% for 8 seconds. This effect works even if the character equipped with these artifacts is not on the battlefield. A good option for squads with a damage dealer of the corresponding element, if there is no wearer of this set yet. |
| 5 |  Instructor ⭐⭐⭐ ⭐⭐⭐⭐ | 2 parts: Increases Elemental Mastery by 80. 4 parts: Triggering an elemental reaction increases the elemental mastery of all party members by 120. within 8 sec. A good option in commands through Dendro reactions, for example, with Nilou or Cyno. |
| 1 | Tenacity of the Millelith Vourukasha’s Glow ⭐⭐⭐⭐ ⭐⭐⭐⭐⭐ | 2 parts: Increases HP by 20%. A mix of two pieces from each set to increase the maximum HP and shield strength. |
| 6 |  Emblem of Severed Fate ⭐⭐⭐⭐ ⭐⭐⭐⭐⭐ | 2 parts: Energy recovery +20% 4 parts: Increases elemental burst damage by an amount equal to 25% of the amount of energy regeneration. The effect can be increased to a maximum of 75%. A good set for activating elemental burst on cd. Suitable if there are no better options. |
| 7 | Tenacity of the Millelith / Vourukasha’s Glow Deepwood Memories ⭐⭐⭐⭐ ⭐⭐⭐⭐⭐ | 2+2 mix, which can be used if you cannot get a full set or have good HP pieces. |
This team is sometimes called
Kirara's teams should consider that Nekomata is a support, so she can easily fit into any team with a Dendro Reaction that requires a shielder. Therefore, she can play with most Hydro, Electro, Pyro, and her own elemental heroes, but it's best not to team her with other shielders or healers, as she can easily defend the team on her own.
Recommended characters
List of heroes that are best suited for squad composition:
| Character | Element | Weapon | Effects |
|---|---|---|---|
 Alhaitham |  Dendro |  Sword | When Al-Haytham is the main damage dealer in the squad, the Nekomata will block Dendro's Resonance and also give him a shield. |
 Kaveh | Dendro |  Claymore | A main damage dealer who benefits more from a shield as support than a healer, so pairs well with a cat courier. |
 Dendro Traveler | Dendro | Sword | Grants elemental mastery and deals area damage. |
 Raiden |  Electro |  Polearm | Can be played both in a hypercarry build thanks to his own stats, and as an Electro hero, detonating cores from Vegetation. |
 Kuki | Electro | Sword | Nekomata-based squads don't need extra protection, but Cookie is especially useful in Vegetation-based teams, where she's needed for detonating cores rather than healing. |
 Tighnari | Dendro |  Bow | Like Alhaitham, needs shields and resonance. Since he is an archer who uses aiming mode, he needs a strong shield. |
 Nahida | Dendro |  Catalyst | An all-purpose Dendro sub-dd that can distribute elemental mastery to the entire team. |
 Lauma | Dendro | Catalyst | The best option for "pure" budding, vegetation and flowering. |
 Cyno | Electro | Polearm | An electro damage dealer that relies heavily on Dendro reactions to deal a lot of damage. |
 Keqing | Electro | Sword | Uses normal and charged attacks under Electro Infusion. She is constantly in close combat, so she needs a shield. |
 Yae Miko | Electro | Catalyst | Can be as a full-fledged damage dealer, as well as a sub-DD attacking from off-field. Deals a lot of damage with her ult. |
 Fischl | Electro | Bow | Versatile Electro sub-dd that deals a lot of damage from the pocket. |
 Nilou |  Hydro | Sword | Hydro damage dealer for the Hyperbloom teams that need only Dendro and Hydro heroes. |
 Xingqiu | Hydro | Sword | A versatile Hydro sub-DD that attacks with his ult from the pocket. |
 Yelan | Hydro | Bow | Works the same as Xingqiu, but increases damage dealt by the team with her elemental burst. |
 Tartaglia | Hydro | Bow | A hydro damage dealer that deals damage while on the battlefield. |
 Kokomi | Hydro | Catalyst | Can deal damage with her ult when needed and provide Hydro status. Useful in the absence of other Hydro heroes, if you use her as a driver. |
 Klee |  Pyro | Catalyst | A Pyro damage dealer that can play in Burgeon. |
 Xiangling | Pyro |  Polearm | Will deal a lot of damage while not on the field. Good for the squads with a second Pyro hero, since it is difficult for Xiangling to gain energy to explode the elements alone. |
 Dehya | Pyro | Claymore | Built for EM , will allow you to explode Dendro cores, it is also possible to play through the Burning reaction. |
Optimal Teams
Examples of squads using the listed companions:
| Character 1 | Character 2 | Character 3 | Character 4 | Features |
|---|---|---|---|---|
| Nilou | LaumaNahida |  Kirara | Kokomi | A Bud formation using Hydro and Dendro characters. Nahida/Lauma and Kirara will provide the element for reactions, Nilu will create her buds, and Kokomi will heal if needed. |
| Nilou | KavehXingqiu | Kirara |  Yaoyao  Barbara | Cheaper setup with Nilou. Barbara or Yaoyao will heal, and Kaveh or Xingqiu will apply additional elemental status. |
| CynoKeqing | Yae MikoFischl | Kirara | NahidaDendro MC | Aggravate Squad with Electro damage. Kirara and the second Dendro will give resonance, and the second Electro will deal damage from the pocket and restore the energy of the main-dd. |
 Raiden | LaumaNahida | Kirara | XingqiuYelan | An example of a Hyperbloom team with Raiden. Nahida and Kirara will give Dendro resonance, and the Hydro character will be able to create blooms by attacking from the pocket. The second Electro is optional here, since Raiden imposes enough status of this element. |
| Kaveh | Yae MikoFischl | Kirara | XingqiuYelan | Hyperbloom team using Dendro damage. The principle of operation is the same as in the previous example. |
| AlhaithamTighnari | Yae MikoFischl | Kirara | Dendro MC Collei | Aggravate team with Dendro-DDs. For the fourth character, choose any Dendro sub-dd that is capable of dealing damage from the pocket. |
| Klee | XingqiuYelan | Kirara | Nahida | Burgeon Squad. Yelan, together with the Dendro heroes, creates Dendro cores, and Klee blows them up. At C6, Kirara will be able to further boost Klee with the Pyro element bonus. |
Tartaglia Ayato | Nahida | Kirara | Dehya | Tartaglia or Ayato deals Hydro damage to enemies while on the field. Kirara and Nahida trigger Dendro resonance and create bloomss that Dehya will explode with her E ticks. |
 Lisa | Collei | Kirara | Barbara | A squad of standard characters with Kirara. Lisa acts as the main damage dealer here, and also distributes an Electro element with her ult. Collei will provide Dendro status. Barbara will heal and create blooms. If desired, Collei can be replaced with Dendro Traveler. |
| Lisa | Xiangling | Barbara | Kirara | Another f2p squad of standard characters. This team contains different elements without resonances, so it can trigger a lot of reactions, as well as clear any game content and remove various shields from opponents. |
Extra Stats For Leveling
The main characteristic of the heroine is – HP%In addition to this, the character's HP increases, ATK и defense. More exact values of the characteristics can be found in the table.
| Level | Base HP | Basic attack | Base DEF | HP% |
|---|---|---|---|---|
| 1 | 1021 | 19 | 46 | 0 |
| 20 | 2623 | 48 | 118 | 0 |
| 40 | 5072 | 93 | 227 | 0 |
| 50 | 6458 | 118 | 290 | 6% |
| 60 | 8024 | 147 | 360 | 12 % |
| 70 | 9409 | 172 | 422 | 12 % |
| 80 | 10794 | 198 | 484 | 18 % |
| 90 | 12180 | 223 | 546 | 24 % |
Leveling
Let's take a closer look at all the materials needed to upgrade your companion and her talents, as well as where to find resources.
Ascension

Source: honeyhunterworld.com
What is needed for elevation:
- Nagadus Emerald - dropped by Jadeplume Terrorshroom, Dendro Hypostasis. Also created in alchemy with other stones and Dust of Azoth.
- Amakumo Fruit - Inazuma specialty, growing only on the island of Seirai.
- Spectral Husk, Spectral Heart, Spectral Nucleus - dropped by Specters.
- Evergloom Ring - dropped by Iniquitous Baptist.
- 420.000 Mora and 421 Hero's Wit.
Talents

Source: honeyhunterworld.com
To level up your talents you will need:
- Teachings, guides, philosophies of Transience - books of talents that can be obtained in the dungeon Violet Court в Monday, Thursday and Sunday.
- Spectral Husk, Spectral Heart, Spectral Nucleus - dropped by Specters.
- Everamber - dropped by the weekly boss Guardian of Apep's Oasis.
- Crown of Insight for upgrading talents to the maximum level.
- 1.650.000 Mora.
Skills

Kirara uses a one-handed sword and also applies Dendro status with her skills. The Nekomata is able to create shields, protecting the characters in her team, as well as deal area damage with her ult. In addition, she can enter a special Urgent Neko Parcel mode, which speeds up her movement and climbing.
Basic (Active) Skills
All abilities, their recharge times and effects.
Boxcutter
- Source of damage: ATK.
Normal attack: makes four quick sword strikes.
Charged Attack: Quickly attacks three times with claws, costing stamina.
Plunging Attack: Flies to the ground, attacking all enemies in its path and dealing physical damage over an area upon landing.
Flying Cat Strike
- Cooldown: 8-12 seconds.
- Source of damage: ATK.
- Shield source: HP.
The skill has tap and hold modes.
Tap: Leaps into the air, dealing elemental damage in an area and creating a Safe Transportation Shield, which grants Kirara the Dendro effect. This type of damage is absorbed 250% more effectively. The amount of damage the shield can absorb depends on Kirara's max HP. When a new shield is created, its durability stacks with the previous one, and its duration is refreshed.
Hold: Creates a Shield of Safe Transport and enters the Urgent Neko Parcel state.
Urgent Neko Parcel:
- If it hits enemies, it deals Dendro damage every 0.5 seconds.
- Increases movement speed, climbing speed, and jump height. Stamina consumption, in comparison with the character's normal climbing, is slower.
- As soon as the duration of the skill expires or is refreshed due to repeated activation, deals Dendro damage in an area.
- Nekomata can remain in this state for up to 10 seconds, but the longer it remains in this state, the longer the skill's cooldown. This state can also be broken by sprinting or completing a climb.
Secret Art: Surprise Dispatch
- Cooldown: 15 seconds
- Enegry consumption: 60.
- Source of damage: ATK.
Throws a Special Delivery Crate, dealing elemental damage in an area. The crate explodes, scattering Catnip Seeds that deal area damage after a delay or upon impact with an enemy.
Passive Skills
Special talents unlocked upon ascension.
| Talent | Effect |
|---|---|
| Bewitching, Betwitching Tails | When Kirara in the Urgent Neko Parcel state crashes into enemies, she gains one level of Reinforced Packaging that occurs every 0.5 seconds and can stack up to 3 times. When the Urgent Neko Parcel state ends, each stack of Reinforced Packaging will create 20 Shield of Safe Transport for Kirara. The shields that are created this way will have XNUMX% of the DMG absorption that the Shield of Safe Transport produced by Meow-teor Kick would have. If Kirara is already protected by a Shield of Safe Transport, its DMG absorption will stack with these shields and its duration will reset. |
| Pupillary Variance | For every 1000 HP of Kirara, her elemental skill damage is increased by 0.4% and ultimate damage is increased by 0.3%. |
| Cat's Creeping Carriage | When Kirara is in a a team, animals and birds that produce meat will not be startled when party members approach them. |
Talent Leveling Order
The order of pumping: Elemental Skill (E) > Elemental Burst (Q).
The heroine is a support who provides the team with shields, and also gives some amount of elemental status and damage.
- The source of the shield is E-attack, which is worth pumping first.
- If necessary, if it is also required to deal damage in addition to the status, you can increase the level superpower.
- Normal attack It is not necessary to download Kirara.
Constellations
| number | Name | Effects |
|---|---|---|
| 1 | Material Circulation | When activated, Kirara creates 8000 Cat Grass Cardamom for every 1 of her HP. You can create up to 4 Cardamoms this way. |
| 2 | Perfectly Packaged | When Kirara in Urgent Neko Parcel crashes into allies, they gain a Critical Transport Shield, absorbing damage equal to 40% of the Shield of Safe Transport created by the elemental skill. Dendro damage is absorbed with 250% efficiency. This shield lasts 12 seconds. and can occur on each character once every 10 seconds. |
| 3 | Universal Recognition | Increases elemental skill level by 3. Max. level: 15. |
| 4 | Steed of Skanda | When Kirara's normal, charged and plunging attacks hit enemies, the nekomata makes a joint attack with Cat Grass Cardamoms, dealing damage equal to 200% of her attack power. Such damage is considered elemental burst damage. The effect occurs every 3.8 seconds and is shared by all party members. |
| 5 | A Thousand Miles in a Day | Increases elemental burst level by 3. Max. level: 15. |
| 6 | Countless Sights to See | When Kirara uses a skill or ult, all characters in the squad gain a 12% bonus to damage with all elements for 15 seconds. |
Best constellations of Kirara are С4 and С6:
- The fourth constellation Increases Kirara's effectiveness as a reactor, dealing damage to Dendro and inflicting status effects on Elemental Reactions.
- The sixth constellation Provides a significant buff to all elemental damage, increasing the overall damage output of the entire party. Kirara's skill duration and cooldowns allow this bonus to be used almost constantly.
How to play Kirara
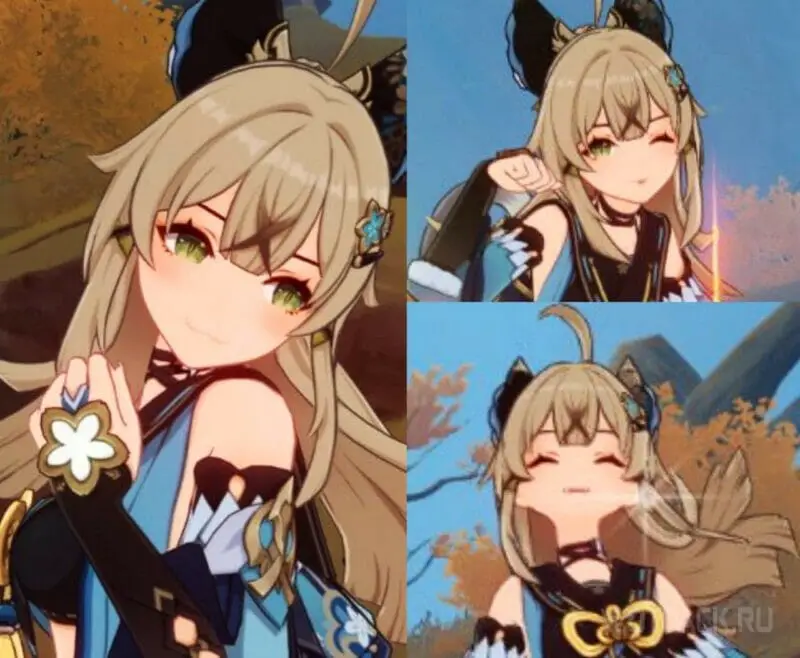
Kirara's abilities make her a fully-fledged support, capable of shielding, dealing damage, and applying effects to reactions from her ultimate. Like other supports, she enters the field not only as part of her rotation, but also in critical moments. Furthermore, her rotation can change depending on the situation or weapon (for example, if she's equipped with Sacrificial Sword, in which case her E always needs to be activated twice).
Rotation
Rotation shielder is as follows:
- Activate the shield and use the elemental burst.
- Switch to other supports to trigger buffs and reactions based on the Dendro status that Kirara applied.
- Switch to the main-dd and deal damage.
- As the abilities cool down, return to Kirara and renew your shield. Drop the Nekomata's Ult as it's ready, since it is an additional source of Dendro, which is never superfluous.
- After activating the shield, repeat everything from the beginning as the abilities become available and the elemental burst is accumulated.
While using the hold mode , the rotation changes a bit:
- Use a long E and get 3 stacks of Reinforced Packaging.
- Activate Kirara's ultimate and switch to other characters.
- Reset their skills, then attack for the main damage dealer.
- Repeat everything from the beginning when the abilities are available.
Character Summary
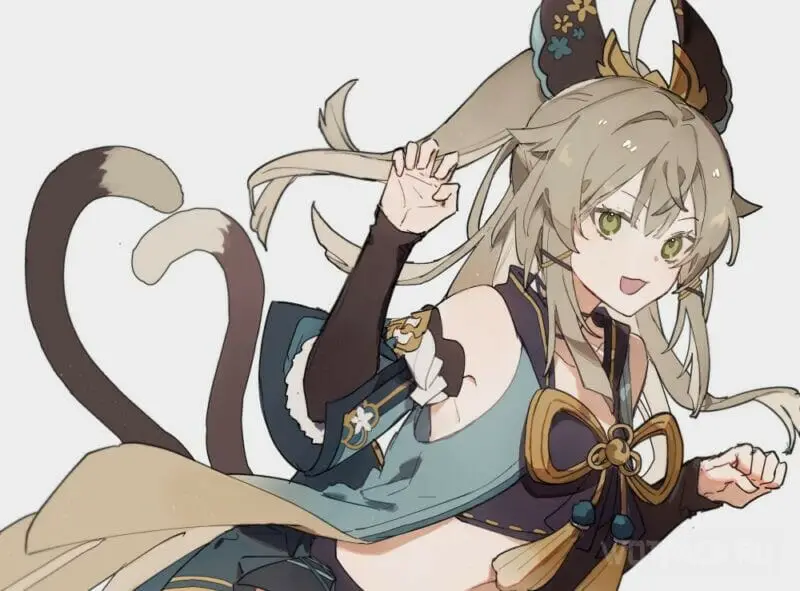
Kirara is an excellent shield support in the Dendro team, which works well due to the low competition among similar supports in Genshin Impact. Nekomata's skills allow her to maintain her shield for the entire duration, right up until the cooldown. Despite some inconvenience when used as a sub-DD, her potential in this area is unlocked with constellations. Nevertheless, Nekomata doesn't require constellations and is quite playable in C0, and is also very beginner-friendly.
Trailer
Official video with Kirara:








Will Nefer join the squad? I wanted to put it there for survivability.
Comrades, are Bennett, Syanka, Kirara, and Kinich okay? Should she be given Millelita or a Dendro-resistance set?
If I understand your idea correctly, you want a team with Kinich as the main damage dealer through burning? Yes, Kirara would be a good second Dendro, especially with C6. She'll also provide some shield protection. Millelith on her is a very questionable choice, as she doesn't activate the 4-art bonus from her pocket, and she shouldn't linger on the field.
Simply giving her Millelita + Vurukashi is possible, but a strong shield isn't the most useful thing in the game. However, Dense Forest is ideal—attacks through Kinich's E-class will constantly trigger Kirara's C4, which, in turn, will trigger the bonus from the full set.
Will Kirara's 6th Constellation buff be extended to Nefer during Lunar Budding?
How awesome Xiphos looks in this cat's hands...
When will the Inazuma Chronicles be out? I skipped them, but I want Kiraru.
Well, you probably already know, but she'll be in the banner with Lauma and Nefer.