
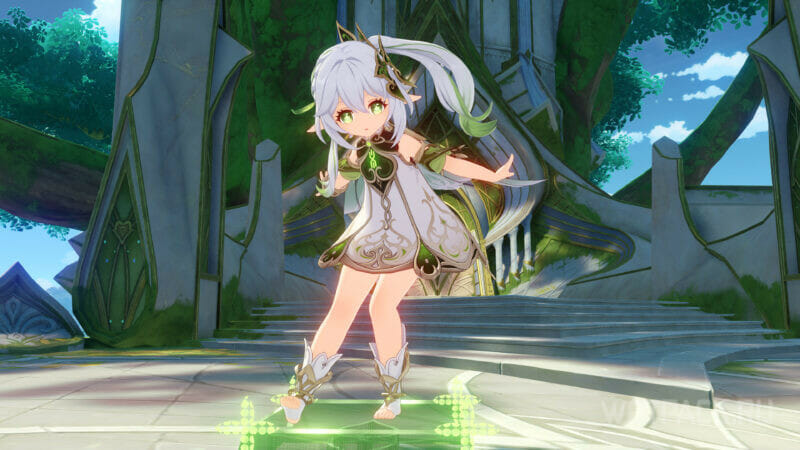
In Genshin impact Nahida, the Archon of Grass and Flowers, is rightfully considered the best sub-DD of her element. Not only does she deal huge damage with her E while in the pocket, but she also increases the active character's Elemental Mastery stat.
The Lesser Lord Kusanali has mixed scaling with ATK and EM, but the emphasis should be on the latter characteristic. Her passive ability that increases the critical chance makes it easier to balance the characteristics and not be so strict in the selection of artifacts. The heroine is also quite friendly to the selection of equipment: her weapons have many good epic options, and among the sets there is no strict binding to 4 pieces, and a decent result can be obtained even with a mix.
| Rating | S-position in tier lists |
| Rarity | ⭐️⭐️⭐️⭐️⭐️ |
| Appeared in-game | November 2, 2022 (patch 3.2) |
| How to get | The Moongrass' Enlightenment |
| Element | Dendro🍃 |
| Weapon | Catalyst: |
| Gender | Female |
| Affiliation |
|
| Constellation | Sapientia Oromasdis |
| Home region | Sumeru |
| Birthday | October 27 |
| Zodiac sign | Scorpio |
| Age | 500 years |
| Height | 140-146 cm |
| Special dish | Halvamazd |
| Voice Actors |
|
How to Get the Character

Nahida can only be pulled for in the character event banner Physic of Purity, which took place in the second half of the patch 5.1, 29 October to 19 November 2024. All the constellations can only be unlocked during the banner period.
For the schedule of new companion releases and Nahida's rerun, follow our banner schedule.
Strengths and Weaknesses
Considering the specifics of her skills and gameplay style, her strengths include:
- Increased damage from all Dendro reactions (Aggravate, Spread, Burning, Burgeon, Hyperbloom) when using her E.
- Perfectly interacts with the heroes of Electro, Pyro and Hydro elements.
- Elemental Skill - Applies strong status, has no inner cooldown, provides full resistance to interruption.
- Receives bonuses depending on the elements in the team: Hydro - increases the duration of the ult, Pyro - gives a bonus to pure damage, Electro - reduces the interval of the elemental skill.
- Basic damage depends on EM, this stat also increases with ascension, making it easier to achieve the required value.
- The passive talent Compassion Illuminated provides up to +250 EM to a teammate in the ultimate zone, if the conditions are met.
- With her elemental skill, she can gather specialties and read the minds of some NPCs.
Disadvantages:
- No interaction with Cryo, Geo and Anemo, which limits potential team setups.
- Extremely powerful buffs unlock only with the second constellation. In particular, Burning and Bloom get the ability to crit, and Vaporize reactions get a 30% bonus to damage.
- Dependence on allies and elemental diversity in the squad - different elements give certain effects.
The Best Nahida Builds in Genshin Impact
The Archon is able to perfectly fit into Dendro reactions and strengthen them with her skills, talents and constellations. In a team, she is most effective in the role of a sub-DD and support-buffer. Although, with the presence of certain weapons and stats in artifacts (or at C6), she can take the position of the main damage dealer/driver of the group.
Recommended Stats
Damage scales with EM, so this stat is a priority in any build on Nahida, especially in Bloom. At the same time, it is important to take into account that the heroine needs to gain a minimum of 200 for her passive talent Compassion Illuminated to work.
If you are playing in Quicken (Dendro + Electro) and managed to gain enough EM without a goblet or circlet, it is advisable to replace one of the artifacts with Dendro or Crit Rate/DMG. In this case, it is worth starting with the current EM value.
For example, if you have all the artifacts with EM, and the current value exceeds 1000, you can change any artifact to crits or elemental damage, that is, make a step towards a hybrid build. Your damage will only increase, since beyond this value the increase is no longer so significant.
Also if your Archon is a main dd, any other support can have those 1000 EM for the buff from Kusanali's passive talent to work. Of course, a perfectly balanced mixed build will be stronger, but it is much more difficult to achieve. Therefore, we recommend, first of all, paying attention to the stats of the heroes in the squad and the role of the Archon.
Characteristics to look for in the role of a sub-dd:
| Artifact | Main characteristic | Additional stats |
|---|---|---|
 Flower of Life Flower of Life | HP (fixed) | Elemental Mastery ATK % CRIT DMG Crit Rate |
 Plume of Death Plume of Death | Attack Power (fixed) | Elemental Mastery ATK % CRIT DMG Crit Rate |
 Sands of Eon Sands of Eon | Elemental Mastery | ATK % CRIT DMG Crit Rate Energy Recharge % |
 Goblet of Eonothem Goblet of Eonothem | Elemental Mastery | ATK % CRIT DMG Crit Rate |
 Circlet of Logos Circlet of Logos | Elemental Mastery | ATK % CRIT DMG Crit Rate Energy Recharge % |
Stats for a sub/Main DPS:
| Artifact | Main characteristic | Additional stats |
|---|---|---|
| Flower of Life | HP (fixed) | Elemental Mastery ATK % CRIT DMG Crit Rate |
| Plume of Death | Attack Power (fixed) | Elemental Mastery ATK % CRIT DMG Crit Rate |
| Sands of Eon | Elemental Mastery | ATK % CRIT DMG Crit Rate Energy Recharge % |
| Goblet of Eonothem | Dendro Damage Bonus % | Elemental Mastery ATK % CRIT DMG Crit Rate |
| Circlet of Logos | CRIT damage / CRIT Rate | Elemental Mastery CRIT damage / CRIT Rate ATK % Energy Recharge % |
Optimal stat values:
- ATK: 1200 and more. ATK is less important than EM.
- Elemental mastery: 700-850. Ideally, we are trying to achieve 1000. However, if you already have another hero with 1000 EM in your squad, you can put more emphasis on attack power and crits.
- Crit Rate and Crit Damage: ratio 1:2 (60 rate and 120 dmg).
- Energy recharge: 110-120 and more. ER is not a priority, since the ult is inexpensive, and the energy particles from using the elemental skill are enough for a full charge, especially if there is a 2nd companion of the same element in the squad.
Weapon Selection
The weapon, first of all, must meet the following parameters: have bonuses to elemental mastery and elemental damage. These are the main stats that affect damage for any build.
You can find all types of equipment and their positions in weapon tier list.
Primary, secondary DPS
In reactions with Electro or in the position of the main dd, critcatalysts will do. However, EM is still an important stat, so it is necessary to maintain a balance between EM and other stats to increase your own damage. Among the catalysts, we recommend the following:
| Name | Description | Recommendation |
|---|---|---|
 A Thousand Floating Dreams A Thousand Floating Dreams⭐️⭐️⭐️⭐️⭐️ Base stat: 44 - 542 Elemental Mastery 58 - 265 |
| Nahida's signature weapon, which fully matches her gameplay. It is perfectly implemented in any build, showing a stable result. |
 Reliquary of Truth Reliquary of Truth⭐️⭐️⭐️⭐️⭐️ Base stat: 44 - 542 Critical Damage 19,2 - 88,4 | Critical hit chance increases by 8/10/12/14/16%When the elemental skill is activated, the equipped character gains the Secret of Lies effect: Elemental Mastery increases by 80/100/120/140/160 ед. for 12 sec. Whenever the equipped character deals damage to an enemy with Lunar-Bloom, they gain the Moon of Truth effect: Critical damage is increased by 24/30/36/42/48% for 4 sec. When Secret of Lies and Moon of Truth are active simultaneously, the effect of both effects is increased by 50%. | The third part of the passive, related to Lunar Budding, cannot be activated due to the impossibility of dealing such damage, but the first two bonuses will significantly increase damage. Considering the native stats, the gear increases all three stats important for Kusanali. |
 Kagura's Verity Kagura's Verity⭐️⭐️⭐️⭐️⭐️ Base stat: 46 - 608 Critical Damage 14,4 - 66,2 | Using an elemental skill grants the character equipped with this weapon the Kagura Dance effect, which increases the damage of their elemental skill by 12%-24%. This effect lasts for 16 seconds. and can stack up to 3 times. At level 3 of the effect, the character gains a 12%-24% bonus damage with all elements. | Gives an extremely high percentage of crits and increases the elemental to 36%, which is quite a lot. This catalyst is a little worse in a team game, but shows itself well at 3 stacks. |
 Skyward Atlas Skyward Atlas⭐️⭐️⭐️⭐️⭐️ Base stat: 48 - 674 ATK 7,2-33,1% | Increases elemental damage bonus by 12-24%. When hitting with a normal attack, there is a 50% chance to gain a blessing of clouds that attacks nearby enemies for 15 seconds and deals 160-320% of ATK damage. May occur once every 30 seconds. | If you don't have the above weapons, but you do have Atlas (especially with awakenings), it will be a good option for the main or secondary DD position. But it is worth considering that, similar to Kagura and Prayer, this catalyst is designed exclusively to increase your own damage. |
 Lost Prayer to the Sacred Winds Lost Prayer to the Sacred Winds⭐️⭐️⭐️⭐️⭐️ Base stat: 46 - 608 Critical Damage Chance 7,2-33,1% | Increases movement speed by 10%. During combat, every 4 seconds grants an 8-16% bonus elemental damage, stacking up to 4 times, and ends when the character dies or leaves the battlefield. | In terms of damage, it is inferior to Kagura, but is approximately equal to Skyward Atlas. And although it also increases elemental damage, it has more conditions for bonuses to work. In particular, when switching characters, all effects end, which means Kusanali will have to be on the battlefield most of the time - not bad for the main DD, but critical in playing with reactions. |
 The Widsith The Widsith⭐⭐⭐⭐ Base stat: 42 - 510 Critical Damage 12% ~ 55,1% | When switching to the character, a random melody plays for 10 seconds. The effect works every 30 seconds:
| At 5th awakening, Lost Prayer to the Sacred Winds and Skyward Atlas win in efficiency. Gives a large amount of crits and good bonuses. Although their usefulness depends on the specific build, team and role, in general, this is a rather compromise option for both personal damage and the playing from reactions. |
 Mappa Mare (F2P) Mappa Mare (F2P)⭐️⭐️⭐️⭐️ Base stat: 44–565 Elemental Mastery 24 - 110 | After invoking an elemental reaction for 10 sec. increases elemental damage bonus by 8-16%. Stacks up to 2 times. | Free craftable weapons that are available from the start of the game. The Archon values the bonuses that equipment provides. |
 Solar Pearl Solar Pearl⭐⭐⭐⭐ Base stat: 42 - 510 Critical Hit Chance 6%-27,6% | Hitting with a normal attack increases the damage of elemental skill and elemental burst by 20-40% for 6 seconds. Vise versa, hitting with elemental skills and elemental burst increase normal attack damage by 20-40% for 6 seconds. | The passive effect does not quite match the gameplay of Kusanali, but if you have this weapon at least at the 3rd awakening, it can be used in the driver position, where the heroine is the core of the squad. |
 Fruit of Fulfillment (F2P) Fruit of Fulfillment (F2P)⭐⭐⭐⭐ Base stat: 42 - 510 Energy recharge 10%-45,9% | Triggering an elemental reaction grants the character an effect that increases elemental mastery by 24 - 36 , but reduces attack power by 5%. The effect can occur once every 0,3 seconds. and stacks up to 5 times. If not triggerring elemental reactions, every 6 sec. lost by one effect level. This effect triggers even if the equipped character is not on the battlefield. | The weapon bonuses are quite average, since the heroine does not need energy restoration that much. However, at 5 stacks and max awakening, the catalyst still gives a significant increase to EM, which will not be superfluous when playing from 1st order reactions, in particular, Bloom. |
 Magic Guide Magic Guide⭐️⭐️⭐️ Base stat: 38 - 354 Elemental Mastery 41 - 187 | Increases by 12%-24% damage against enemies affected by Hydro or Electro elements. | If you can't craft the Mappa Mare or pull for other higher-level weapons, the 5th Awakening Magic Guide is a great choice for Electro and/or Hydro teams. Despite the low base, the catalyst gives a lot of EM, which is a priority over ATK. |
Fruit of Fulfillment and Solar Pearl are roughly equal in terms of output. However, depending on the group, one becomes more important than the other. For example, the Fruit is stronger in a team playing through Bloom and Burning. The Pearl is better revealed in a group through Quicken.
Support
This build assumes gaining a lot of EM. It will allow you to maximize this characteristic, which means more efficient reactions and higher damage from Tri-Karma Purification (elemental skill). Among the catalysts, we will highlight the following:
| Name | Description | Recommendation |
|---|---|---|
| A Thousand Floating Dreams ⭐️⭐️⭐️⭐️⭐️ Base stat: 44 - 542 Elemental Mastery 58 - 265 |
| Provides all necessary bonuses, and also passively increases the squad's stat. Almost completely solves the issue of gaining mastery to the key 900-1000 points and allows you to find crits in stat artifacts if necessary. |
 Sacrificial Fragments ( Sacrificial Fragments (⭐️⭐️⭐️⭐️ Base stat: 41 - 454 Elemental Mastery 48 - 221 | Hitting an enemy with an elemental skill has a 40-80% chance to instantly reset the cooldown of this ability. The effect works every 30-16 seconds. | The weapon gives a useful stat in the form of EM and allows you to use E twice. Not a bad alternative. However, if the memoir is not 5th awakening, the Magic Guide will be more effective. |
 Wandering Evenstar Wandering Evenstar⭐⭐⭐⭐ Base stat: 42 - 510 Elemental Mastery 36 - 165 | Every 10 seconds, increases the attack power of the active character by 24%-48% of his EM for 12 seconds. Nearby party members receive 30% of this bonus. The effect of multiple weapons stacks and triggers even if the equipped character is not on the battlefield. | The catalyst will increase the damage from the elemental skill due to the bonus to EM and ATK, which will affect the damage of Tri-Karma Purification (the effect of the electric skill, activated by reactions). The weapon will also give a bonus to ATK to the rest of the squad. Best used in Quicken squads. |
| Mappa Mare (F2P) ⭐️⭐️⭐️⭐️ Base stat: 44–565 Elemental Mastery 24 - 110 | After triggering an elemental reaction, increases elemental damage bonus by 10-8% for 16 seconds. Stacks up to 2 times. | A free craftable weapon that can be used for both Sub-DD and Full Support builds. It is great for pocket gameplay where the Archon does not need to be on the battlefield most of the time. |
| Magic Guide ⭐️⭐️⭐️ Base stat: 38 - 354 Elemental Mastery 41 - 187 | Increases by 12%-24% damage against enemies affected by Hydro or Electro elements. | The weapon is quite easy to obtain, as it is a 3⭐️ and drops in large quantities in any banners. In the main stat, it gives a large amount of EM and allows you to hit outside the field when interacting with Hydro and Electro. A good option for playing through Bloom and Quicken. |
| Fruit of Fulfillment (F2P) ⭐️⭐️⭐️⭐️ Base stat: 42 - 510 Energy recharge 10% -45,9%. | Triggering an elemental reaction grants the character an effect that increases elemental mastery by 24 - 36 , but reduces attack power by 5%. The effect can occur once every 0,3 seconds. and stacks up to 5 times. If not triggerring elemental reactions, every 6 sec. lost by one effect level. This effect triggers even if the equipped character is not on the battlefield. | Although the weapon is directly related to Dendro reactions, it loses to all others even at R5 in terms of damage. Mainly due to the too high bonus to energy recovery, which the heroine does not need in such quantities. However, the passive buff will give her an increase in any case - 180 EM (at the last awakening), which is still not bad. Moreover, the catalyst is free, and it can be easily crafted if you have forms. |
 Starcaller's Watch Starcaller's Watch⭐⭐⭐⭐⭐ Base stat: 44 - 542 Elemental Mastery: 58 - 265 | Increases Elemental Mastery by 100 - 200 . When the wielder creates a shield, once every 14 sec. the Mirror of Night effect is activated for 15 sec.: the active character's damage is increased by 28%-56%. | The catalyst gives a lot of valuable stats, but has no other bonuses. You can put it if you want to get the maximum value of this characteristic, but you shouldn't specifically pull for it as an alternative to the signature. |
So the best weapons depending on rarity are:
- 4⭐ catalysts - The Widsith (DPS) and Sacrificial Fragments (support).
- 5⭐ catalysts - A Thousand Floating Dreams (sub-dd, support) or Kagura's Verity (DPS).
- F2P option - Magic Guide (R5).
Artifact variants
Artifacts for Nahida should be selected based on her build:
- In the support position, sets that increase EM are suitable for creating more powerful reactions and synergy with the team.
- Elemental sets will also be useful as a primary/secondary DPS, as Lesser Lord Kusanali wields a catalyst and has infusion by default.
| The set is | Rarity | Effects |
|---|---|---|
 Deepwood Memories Deepwood Memories⭐️⭐️⭐️⭐️ ⭐️⭐️⭐️⭐️⭐️ | 2 Piece: +15% Dendro damage. 4 Piece: Hitting with an elemental skill or elemental burst reduces enemy Dendro resistance by 30% for 8 seconds. The effect works even if the character is not on the battlefield. | The full set gives a bonus to Dendro and reduces resistance to this element, that is, it additionally increases damage by another 30%. Top 1, if no one in the team has the set. If it is already used by some character, it is better to give preference to Gilded Dreams. One way or another, in a group with Kusanali, the presence of this set is mandatory. |
 Golden Troupe Golden Troupe⭐️⭐️⭐️⭐️ ⭐️⭐️⭐️⭐️⭐️ | 2 Piece: Increases elemental skill damage by 20%. 4 parts: Increases elemental skill damage by 25%. In addition, when the character is not on the battlefield, the damage of the elemental skill is additionally increased by 25%. After 2 sec. after entering the battle, the effect disappears. | The best choice if there is a wearer of the Deep Forest Memories set in the squad. Suitable for both sub-DD and driver roles: the set provides powerful skill boosts, and the heroine's ultimate and regular attacks practically do no damage. |
 Gilded Dreams Gilded Dreams⭐⭐⭐⭐ ⭐⭐⭐⭐⭐ | 2 Piece: Elemental Mastery +80 4 Piece: For 8 sec. after trigerring an elemental reaction, the equipping character receives the following buffs, depending on the elements of their team members:
| Considering the bonuses of the ult and its overall gameplay from reactions, this set of artifacts is top 2 and top 1 in overall value (if Memories of the Deep Forest is on another squad member). Even with at least two heroes of another element, the Archon gets +180 EM. |
 Flower of Paradise Lost Flower of Paradise Lost⭐⭐⭐⭐ ⭐⭐⭐⭐⭐ | 2 Piece:Elemental Mastery +80 4 Piece: Increases the damage dealt by Bloom, Hyperbloom, and Burgeon by 40% on the character equipped with this set. If the wielder triggers these reactions on their own, the effect will increase by another 25%. Each summation lasts 10 seconds. The effect stacks up to 4 times, occurs once every 1 seconds, and activates even if the character is not active. | Situational, but a working option if the heroine plays through Bloom and at the same time activates the reaction, that is, the status is imposed on the Hydro by Dendro. Can be considered in any variation of the detachment with Nilou, Kokomi or Barbara. This set is designed for a specific build and should only be used if there is no one else to wear it, but you want to increase the damage from the cores. In any case, the two previous sets are more versatile and effective. |
  ⭐️⭐️⭐️⭐️ ⭐️⭐️⭐️⭐️⭐️ | 2 Piece: 15% Dendro damage 2 Piece: +20 elemental mastery | A transitional option with +15 Dendro damage and +80 EM until you manage to farm a full set of Memories of the Deep Forest or Gilded Dreams. |
 Instructor Instructor⭐️⭐️⭐️ ⭐️⭐️⭐️⭐️ | 2 parts+80 EM. 4 Piece: Trigerring an elemental reaction increases EM of the entire party by 120 for 8 sec. | A great early game option with a high EM bonus. Drops from elite and normal enemies with some chance. |
Teams
Teams below are composed based on the principle of synergy with other elements. At the same time, her mechanics assume a certain number of elements (1 or 2) to receive bonuses from the ult. Dendro, Hydro, Pyro and Electro companions are best suited for her.
Recommended characters
Speaking about the role in the group, Kusanali can play both as a sub-dd and as a driver. Depending on the build and specific tasks, she is used with heroes of all positions. Below we present a list of possible allies on the basis of which strong compositions are created.
Main DD
An ally who plays the active role and is constantly present on the field. In squads with these companions, Kusanali is in the pocket and hits mainly with an elemental skill.
| Character | Element | Weapon | Effects |
|---|---|---|---|
 Tighnari Tighnari |  Dendro Dendro |  Bow Bow | Dendro resonance and the main damage dealer. |
 Lauma Lauma |  Dendro Dendro |  Catalyst: Catalyst: | Although the Priestess and Archon perform similar combat functions, they work well together. The driver role in this case is best given to Lauma. |
| Dendro |  Claymore Claymore | Main-dd demanding a lot EM and energy. The Archon does a great job of acting as a battery and boosting EM, so she will significantly strengthen Kaveh. | |
| Dendro |  One-handed sword One-handed sword | A good ally who benefits from the buff from Kusanali. The only downside to the interaction is the long stance, during which you won't be able to switch to the heroine for additional activation of the elemental skill. | |
 Yae Miko Yae Miko |  Electro Electro | Catalyst: | Due to her element, will reduce the interval of the Tri-Karma Purification. She will fit well into the team as a DD and Sub-DD thanks to totems that can hit with electricity. |
 Cyno Cyno | Electro |  Polearm Polearm | The max duration of Cyno's ult is 18 sec. The duration of Tri-Karma Purification is 25 sec. (without Hydro). Thanks to this, Cyno will be able to deal increased damage during the entire stance by activating Aggravate. |
 Raiden Raiden | Electro | Polearm | She can attack with her ult and also perform joint electric attacks with the active character. |
 Keqing Keqing | Electro | One-handed sword | Electro infusion, area damage, fast skill cooldown - thanks to this, she fully uses all the enhancements from the Archon. |
 Nilou Nilou |  Hydro Hydro | One-handed sword | The perfect synergy to play through Bloom. |
 Ayato Ayato | Hydro | One-handed sword | Uses normal attacks in his stance, and uses his ult to release drops over a large area. |
 Mavuika Mavuika |  Pyro Pyro |  Claymore Claymore | Suitable both as a sub-DD in Hyperbloom and Burning, and as a main damage dealer. |
 Hu Tao Hu Tao |  Pyro Pyro | Polearm | Like other Pyros, increases the damage of Tri-Karma Purification during her ult. During E, receives a fire infusion and additionally increases her own damage. |
 Yoimiya Yoimiya | Pyro | Bow | The gameplay principle is similar to Hu Tao - she also uses a stance and receives infusion. But she can shoot from a distance. |
 Diluc Diluc | Pyro | Claymore | Strikes with Pyro during his elemental skill and hits several enemies at once with his ult. Moreover, even if the enemies are thrown back, the radius of the dome should still be enough for his buffs to work. |
 Dehya Dehya | Pyro | Claymore | Well suited for play from Burning and Blooming, can fight without being on the field. |
 Clorinde Clorinde |  Electro Electro | One-handed sword | Kusanali will provide not only an increase in damage to Clorinde, who plays in Quicken, but also a stable activation of the passive ability due to the constant Dendro status from ticking marks. |
Sub-DD
Heroes that hit without being on the field. Depending on the specific team, the heroine can either act as a driver or be a sub-DD.
| Character | Element | Weapon | Features |
|---|---|---|---|
 Dendro Traveler Dendro Traveler | Dendro | One-handed sword | Increases Elemental Mastery with her Resonance and Passive Talent. |
 Collei Collei | Dendro | Bow | In terms of efficiency, she is slightly inferior to other Dendro heroes, but still helps to trigger the resonance, and on the 4th constellation increases EM by 60. |
 Fischl Fischl | Electro | Bow | Secondary dd with good elemental skill damage, which is on the battlefield, even if Fischl is inactive. |
 Beidou Beidou | Electro | Claymore | Second Electro sub-dd, playing off her ult. A great ally for Quicken teams. |
 Xingqiu Xingqiu | Hydro | One-handed sword | A large amount of Hydro status, additional damage. |
| Hydro | One-handed sword | Summons special water minions and grants a buff with her ultimate. | |
 Yelan Yelan | Hydro | Bow | The ult allows you to deal Hydro damage together with the active character. |
 Mona Mona | Hydro | Catalyst: | Can use her E and go into the pocket, while dealing Hydro damage. Increases all damage done by allies with the help of the ult. |
 Xiangling Xiangling | Pyro | Polearm | Applies a lot of Pyro with her elemental skill and ultimate. |
 Pyro MC Pyro MC | Pyro | One-handed sword | Doesn't provide too much Pyro status outside of combat, but it's enough to keep Burning or activate Bloom stably. |
Supports
Buffers, healers and shielders. Needed for comfortable play and strengthening of allies.
| Character | Element | Weapon | Features |
|---|---|---|---|
 Yaoyao Yaoyao | Dendro | Polearm | Will heal, give a bonus to Dendro on C1 and trigger the resonance. A great option for any team. |
 Baizhu Baizhu | Dendro | Catalyst: | Applies shields and heals, increases the bonus of reactions. |
 Shinobu Shinobu | Electro | One-handed sword | The electric ring created with her E damages enemies in close combat and also heals. |
 Dori Dori | Electro | Claymore | Heals and restores energy. Better to use in Quicken than Bloom due to the low amount of Electro status. |
 Kokomi Kokomi |  Hydro Hydro | Catalyst: | Grants a Hydro buff that increases the duration of the Archon's ult. Provides nearly constant healing. |
 Thoma Thoma | Pyro | Polearm | Shield and periodic Pyro status. |
 Bennett Bennett | Pyro | One-handed sword | Will increase attack power and heal. For Kusanali herself, he is not a key character, but together with her, he will significantly strengthen their common allies. |
 Sucrose Sucrose |  Anemo Anemo | Catalyst: | Gives a boost to EM, which is extremely important for the Archon. But it is worth considering that depending on the team, it is preferable for her to wear different sets: In Burning and Bloom teams - Deepwood Memories. In Quicken squads - Viridescent Venerer. |
Examples of strong teams
The squads in which the Archon plays can be divided by reactions:
- Quicken - most often, she plays the role of a pocket damage dealer to strengthen the main DD.
- Bloom and its derivatives - Hyperbloom и Blossom- these are the teams combining Dendro, Hydro and Pyro heroes. Kusanali is used in them to create grass cores, which are later detonated by the Pyro or Electro companion.
More on that in our guide: how Dendro reactions work.
Below we will list the squads, dividing them according to different interactions.
Quicken Teams
Groups that focus on combining Dendro and Electro elements.
| Character 1 | Character 2 | Character 3 | Character 4 | Features |
|---|---|---|---|---|
 Cyno Cyno | Yae Miko |  Zhongli Zhongli | Aggravate Squad with Cyno and maximum reduction of the Tri-Karma Purification interval:
| |
| Fischl | Yae Miko | Sucrose | The Archon driver option is full Quicken (Aggravate, Spread), resonance and decreasing the interval for the elemental skill. Sucrose in this team buffs EM. | |
 Kazuha Kazuha Sucrose Sucrose | RaidenFischl | ShinobuDoriZhongli | Quicken Squad, where Nahida is the main dd/sub-dd:
| |
| Yae Miko | Raiden | Dendro MC | Quicken team with minimum Tri-Karma Purification interval:
| |
| Fischl | Dori | A team with two resonances:
| ||
| Yae Miko | Raiden | Baizhu | Very expensive but strong team. Works on the revolver principle:
| |
| FischlBeidou | ShinobuDori | Dendro MCCollei | Quicken Team minimizing the interval of Tri-Karma Purification:
|
Bloom and Hyperbloom Teams
Teams for creating Blooms and exploding them by applying the Electro element.
| Character 1 | Character 2 | Character 3 | Character 4 | Features |
|---|---|---|---|---|
| Nilou | Kokomi | Lauma | One of the strongest groups from Budification with Nil. It's best to choose Kokomi as a driver, as otherwise, Hydro status won't be enough to consistently detonate cores. | |
| Lauma |  Yelan Yelan Xingqiu Xingqiu |  Kuki Kuki | It's best to choose a Priestess as a driver, but it's not critical. In this composition, use a set on Lauma. Memories of the deep forest, and put it on the Archon Golden Troupe. | |
| Nilou | Kokomi | TighnariDendro MCCollei | Bloom Team with Nilou and maximum duration of Nahida's ult due to two Hydro:
| |
| Cyno | Kokomi | Dori | Aggravate/Bloom Team with bonuses that reduce the interval of Tri-Karma Purification (electronic skill) and increase the effect of Nahida's ult:
| |
| Thoma | Xingqiu | ShinobuDoriBeidouYae Miko | A squad with increased damage from Tri-Karma Purification. The Archon acts as a squad driver, where under the shield of Thoma, swords from Xingqiu's ult and pocket Electro abilities, he hits with basic attacks and other skills on cooldown. | |
| Xingqiu | Dendro MCCollei | Shinobu | Bloom/Hyperbloom Squad with a decrease in the interval of Tri-Karma Purification and an increase in the duration of the ult:
| |
Fischl Lisa Lisa | Kokomi |  Mona Mona | Hyperbloom Team:
| |
| Xingqiu | Shinobu | Expensive Hyperbloom Team.
|
Burgeon amd Burning Teams
Setups for exploding Blooms through Pyro and Burning teams.
| Character 1 | Character 2 | Character 3 | Character 4 | Features |
|---|---|---|---|---|
 Klee Klee Yanfei Yanfei | Mona |  BennettKokomi BennettKokomi | Burning and Burgeon Team with increased damage from Tri-Karma Purification:
| |
| Hu TaoYoimiyaDiluc | XingqiuYelan | Dendro MCCollei | Burning/Burgeon team with increased damage from Tri-Karma Purification and increased duration of the ult:
| |
Ayato Tartaglia Tartaglia |  XianglingPyro MC XianglingPyro MC | Bennett | Squad through Bloom/Burgeon with increased damage from Tri-Karma Purification and increased duration of elemental burst:
| |
| Ayato |  Thoma Thoma Mavuika Mavuika | Lauma | A variation of Blossom with Lauma. If you're using Mavuika, it's important to have an open C1 on the Priestess for healing, as Mavuika can't protect the group. | |
| Dehya | XianglingPyro MC | Bennett | Burning Team with Dehya and increased damage from the Archon's elemental skill:
| |
| Dehya | Yelan | Yaoyao | Burgeon Team with Dehya:
|
Using the heroes listed above, you can create your own groups. Companions that are missing can be replaced by similar gameplay/element/mechanics, etc.
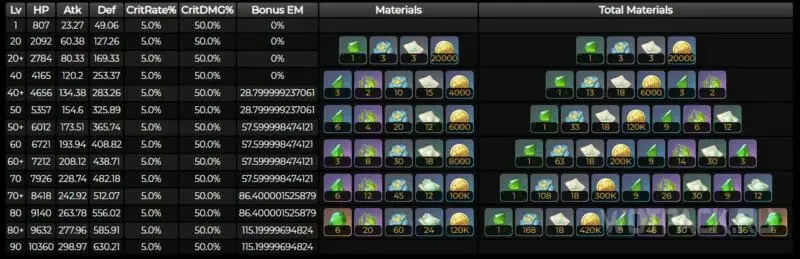
Extra Stats For Leveling
The additional stat that increases with the heroine's level is Elemental Mastery. Along with it, HP, attack power, and defense increase. The exact values are shown in the table.
| Level | Base HP | Basic attack | Base DEF | Elemental Mastery |
|---|---|---|---|---|
| 1 | 807 | 23 | 49 | 0 |
| 20 | 2784 | 80 | 169 | 0 |
| 40 | 4656 | 134 | 283 | 28 |
| 50 | 6012 | 173 | 365 | 57 |
| 60 | 7212 | 208 | 438 | 57 |
| 70 | 8418 | 242 | 512 | 86 |
| 80 | 9632 | 277 | 585 | 115 |
| 90 | 10360 | 298 | 630 | 115 |
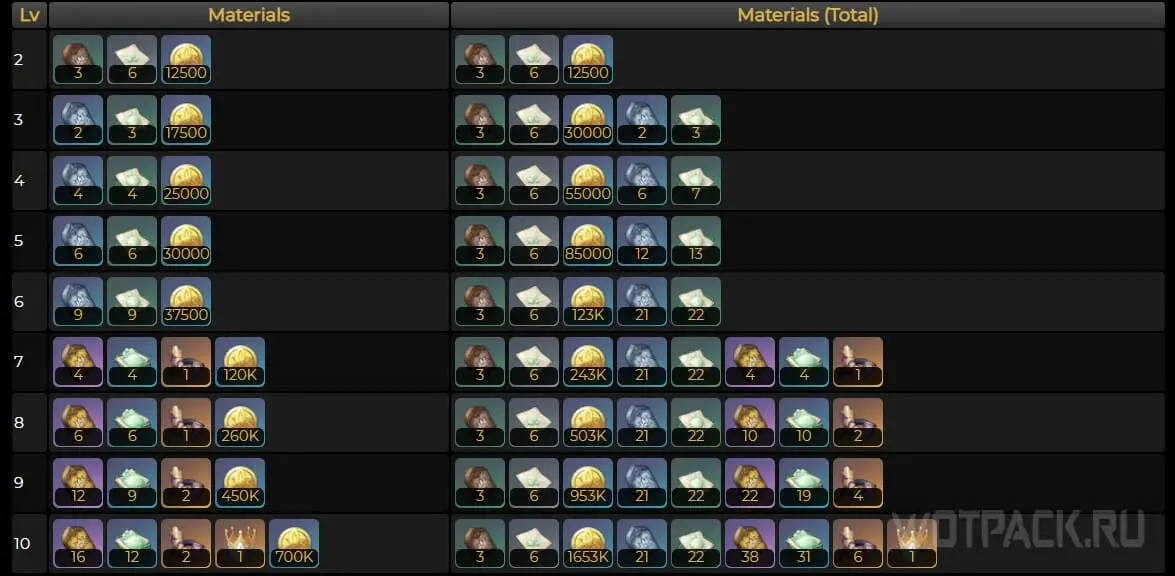
Leveling
This section shows the total amount of materials that you need to collect to level Nahida up to 90.
Ascension
Source: https://genshin.honeyhunterworld.com
The following resources are required for full ascension:
- Nagadus Emerald gemstones, which are dropped by Jadeplume Terrorshroom и Dendro Hypostasis. Minerals can also be crafted at the alchemy table with other stones and Dust of Azoth.
- Quelled Creeper - material dropped by the world boss Dendro Hypostasis.
- Fungal Spores, Luminescent Pollen, Crystalline Cyst Dust - dropped by Fungi, defeated by any element except Pyro and Electro.
- Kalpalata Lotus is a Sumeru specialty that grows in the mountains of the region.
- 420.000 Mora and 421 Hero's Wit.
Talents
Source: https://genshin.honeyhunterworld.com
To upgrade talents, in addition to materials dropped by Fungi, you will need:
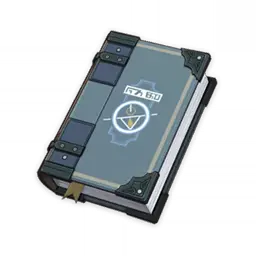
- Teachings/Guides/Philosophies of Ingenuity - Dungeon Talent Books from Steeple of Ignorance, available on Tuesday, Friday and Sunday.
- Puppet Strings - material from the weekly boss Shouki no Kami (Scaramouche).
- Crown of Insight (up to 3 pieces) for each 10th level of talents.
- 1 650 000 Mora.
Skills
Thanks to wielding a catalyst and the peculiarities of the skills, Nahida plays best in reaction teams. For example, her elemental skill marks enemies, hit Dendro and are strengthened by interaction with other elements. And when she uses her ult , she activates a dome that gives the heroine buffs that depend on the type of allies.
Basic (Active) Skills
Below we will take a closer look at how skills work and in what order it is best to upgrade them.
Akara
During a normal attack, she performs up to 4 strikes in front of herself.
When charged, casts a spell that costs stamina and deals damage in a small radius.
Performing a plunging attack, she quickly flies to the ground and hits all enemies in her path.
All Schemes to Know
- Tap cooldown time: 5 seconds.
- Hold cooldown time: 6 seconds.
Tap: Deals Dendro damage in an area where up to 8 enemies hit are marked with Seed of Skandha.
Hold: enters aiming mode, which allows you to select multiple enemies in a specific area.
While aiming:
- The interruption resistance is significantly increased.
- Enemies receive the Seed of Skandha.
- The mode lasts up to 5 seconds, and up to 8 enemies can be selected while it's active.
Skandha Seed:
- Establishes links among enemies at a certain distance.
- If marked enemies take damage from any Dendro reactions (including cores from Burgeon, Hyperbloom, and the normal Bloom explosion), the Archon releases Tri-Karma Purification. Its strength depends on her EM and ATK.
- The Tri-Karma Purification interval is 2,5 seconds.
- The duration of the Seed of Skandha is 25 seconds.
Illusory Heart
- Base duration: 15 seconds.
- Cooldown time: 13,5 seconds.
- Energy consumption: 50.
Creates a dome, the Shrine of Maya, which provides the following effects when in it, depending on the elements represented in the team:
- Pyro (Damage Bonus): Increases the damage of Tri-Karma Purification (elemental skill).
- Electro (Activation Cooldown Reduction): Decreases the Tri-Karma Purification interval.
- Hydro (Sanctuary Extension): Increases the duration of the elemental burst.
If there are 2 or more heroes of the corresponding element on the team when Shrine of Maya is activated, the effect is strengthened. Allies receive the buff even if Kusanali is not on the battlefield.
Passive Skills
| On All Things Meditated | When activating All Schemes to Know (elemental skill), Nahida gains the following effects:
|
| Compassion Illuminated | An active character in the Shrine of Maya (Elemental burst) area of effect receives the following bonuses:
For example: if some member of the squad (not necessarily Nahida) has 1000 EM, the character's skill in the dome area increases by 250 (1000 x 0,25 = 250). That is, to get maximum buff, it is advisable to have at least one hero with 1000 EM in the squad. |
| Awakening Elucidated | Each point of Elemental Mastery above 200 grants +0,1% Damage and +0,03% Critical Chance for Tri-Karma Purification (elemental skill).
|
Talent Leveling Order
Recommended upgrading priority: E -> Q -> NA (normal attack).
When upgrading abilities for the support and sub-DPS positions, keep in mind that her main source of damage are her Ult and elemental skill.Therefore, these skills should be leveled in the first place, upgrading them to the maximum (level 9-10). Normal attacks in this case are not used, so they can be left at the 1st level.
If the Archon is the main damage dealer/driver, the priority on E and ult remains the same - it is still the largest part of damage. But since in this case she is on the battlefield most of the time, it is also recommended to level normal attacks to at least level 8.
Constellations
| 1. The Seed of Stored Knowledge | When activating the Shrine of Maya (ult), maximum bonus is given without an additional character of a certain element. For example, before unlocking the constellation for max. Elemental Skill Tri-Karma Purification Interval Required 2 Electro heros. At C1, it is enough to have just one.. |
| 2. The Root of All Fullness | Enemies afflicted with Seeds of Skandha (Elemental Skill) get the following effects:
|
| 3. The Shoot of Conscious Attainment | Increases the level of All Schemes to Know (elemental skill) by 3. Max. Lvl: 15 |
| 4. The Stem of Manifest Inference | +100/120/140/160 to Nahida's Elemental Mastery when 1/2/3/4 or more enemies are affected by Skandha Seeds (Elemental Skill) marks. |
| 5. The Leaves of Enlightening Speech | Increases the level of Illusory Heart (Elemental Burst) by 3. Max. Lvl: 15 |
| 6. The Fruit of Reason's Culmination | When Nahida hits enemies marked with Seeds of Skandha with normal or charged attacks in her ult zone, she inflicts Karmic Oblivion on them:
The effect ends after 10 seconds. or after 6 activations of Karmic Oblivion. |
Best constellations of Nahida are С1 and С2.
- The first constellation removes one of the conditions for receiving buffs from her ult. Now, for the bonus, only one Electro, Hydro or Pyro hero can be added to her team, instead of two. Thus, she will be able to receive the maximum buff from three elements at once.
- The second constellation partially changes the mechanics of Dendro reactions and allows Burning and Bloom to crit, albeit with fixed Crit Rate and Crit DMG values (20/100). In addition, the defense of enemies under the influence of Quicken is reduced by 30%. In other words, C2 increases the damage of these reactions by 30%.
We should also highlight С4 and С6. The fourth constellation increases EM to 160. The sixth allows Hahida to be a main DD.
How to play Nahida
Due to the mechanics of her abilities, she can distribute a large amount of status, which makes her a great support/driver in Quicken and Bloom teams. At the same time, her gameplay is focused on interaction with the elements - Electro, Hydro and Pyro. They not only give bonuses to the heroine herself during the ult, but also allow her to hit harder when activating Tri-Karma Purification (elemental skill).
When playing the Archon of Wisdom, it is necessary to start with the role she occupies, although the principles of the game are basically similar - for maximum damage it is important to trigger reactions.
Rotation for a driver
Thanks to her wielding a catalyst and her skills, she does a great job of effectively setting the direction for the entire squad. In this position, she can act as both a primary and secondary damage dealer. The rotation in this case looks like this:
- Kusanali activates her ult и applies marks (Seeds of Skandha) on enemies (up to 8).
- After this, the rest of the team comes out and activates abilities that hit from the pocket: the Es of Fischl, Kokomi, the ult of Xingqiu and so on.
- Nahida enters the battlefield again. She refreshes her elemental skill and uses normal attacks, while the skills of the rest of the team members are active.
- After the effect of the abilities fades, repeat starting with step one.
Rotation for a pocket damage dealer
In this case, the rotation is as follows:
- The Archon places her dome (ultimate) and uses a hold version of her elemental skill, activating marks.
- Other allies come out, gaining permanent status and the ability to perform reactions.
You can refresh her E once 5-6 seconds and ult once 13.5 seconds. In general, when playing the heroine in any position, the most important thing is to mark and activate the ult on cooldown, constantly prolonging the effects of all skills.
Is the Character Worth Pulling For?

Nahida is a unique gameplay element in Genshin Impact that significantly enhances certain builds. Specifically, the Dendro element synergizes with Electro, Hydro, and Pyro, so teams can utilize Reactions. Burn, Catalyze и Bloom She is practically irreplaceable.
Despite the fact that the Archon of Wisdom is currently one of the best characters in Dendro squads, for players who do not play through these reactions, the hero is still of little use. One way or another, the heroine occupies a worthy place in her niche.
Which is better: C1 or signature?
It is worth noting that C1 does not have such a big impact on damage, it is rather an intermediate step to C2. The approximate order of pulling is as follows:
- First of all, get Nahida's signature. It will suit her perfectly in any build and will provide the team with a buff.
- If you plan to pull for C2 one day, get your C1. If you are willing to invest into only one constellation of the Dendro Archon, it is better to save wishes and spend them on another character with a more important first constellation. Without C2, C1 itself is not worth the wishes spent on it.
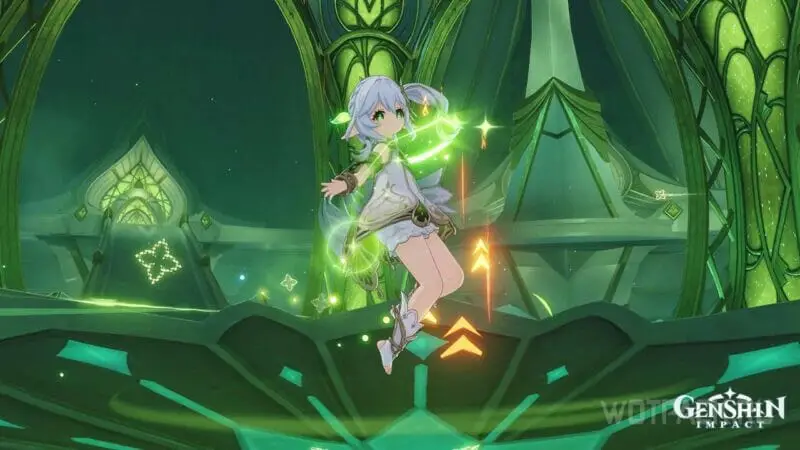
Trailer
In the official trailer, the developers revealed the heroine's story:


I have a squad with Nahida, Shinodu, Columbine, and 4 free characters, which are occupied by several characters depending on the need. Aino, Ineffa, Raiden, Yaoyao, Furina, and Mona... I'm still thinking about who to permanently fill the 4th slot. 🤔 Nahida DPS, if anything.
Oh, and sometimes Bennett.
How does the Blackheart Lantern weapon look on her for the Lunar Budding at Columbine in the squad that allows for this reaction?
Tell me who would be better at playing with Kinich through burning: Nahida or Emilia.
Emilia
In the pack Nahida-SinQiu-DendroGG-Kuki, if the dendro set is on GG, and Gilded Dreams is on Kuki, which set should I put Nahida in as a driver?
I think the Flower of Paradise Lost set would be great. I think that's what it's called. It also buffs MS and increases damage, vegetative stimulation, etc. But you could also swap the sets for Shinobu and Nahida if you have Shinobu in MS.
Will the lightweaver's lute be normal?