

В Genshin Impact Mahamatra General Saino is a spearman who serves as the primary Electro damage dealer in squads. His ultimate summons a spirit wolf, which he uses to perform melee attacks while infused, and therefore prefers to spend as much time on the field as possible. This style of gameplay requires pocket sub-DPS and supports for quick bursts and elemental effects.
It is primarily used to close reactions and works well with Dendro and Hydro characters, but after unlocking the buff it will be best in groups of Star Guide With Cryo allies. The young man is usually built as a classic hyper-carry, focusing on elemental damage and crits. Shutting down reactions also requires elemental mastery, but the general most often gains this stat himself by entering the Sworn to Lead the Way state, and also receives it from his supports.
| Rating | S+ position in tier lists |
| Rarity | ⭐️⭐️⭐️⭐️⭐️ |
| Appeared in-game | September 28, 2022 (patch 3.1) |
| How to Get the Character | Twilight Arbiter Prayer |
| Element | Electro⚡️ |
| Weapon | Polearm (spear) |
| Ascension Stat | Crit damage% |
| Gender | Male |
| Affiliation |
|
| Constellation | Lupus Aureus |
| Home region | Sumeru (Dendro region) |
| Namecard | Peace of mind |
| Birthday | 23 June |
| Zodiac sign | Cancer |
| Age | 18-20 years old |
| Height | 160-162 cm |
| Special dish | Duel Soul |
| Voice Actors |
|
How to Get the Character


Reran Saino will be held in patch 6.7, in a special Prayer of Light.
To avoid missing the replay, stay tuned for updates. banner schedule.
Strengths and Weaknesses
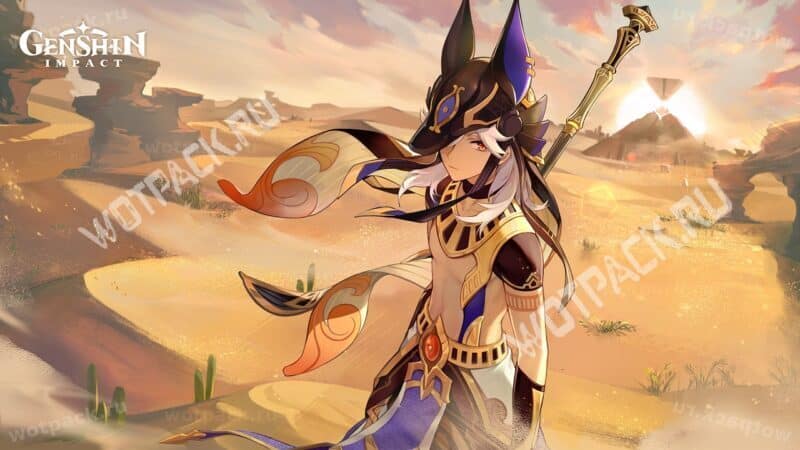
The General is the primary damage dealer for his ultimate, which is quite convenient for gameplay, but complicates team selection due to the ultimate's duration. Despite his versatility thanks to his Electro element and the ability to play with different reactions, he currently shines only in Star Conductor.
| Strengths | Weaknesses |
| Strong Electro Main-DD, which has simple gameplay from its ultimate, making it ideal for players who don't want to spend a lot of time figuring out complex rotations. | because of duration of superpowers Not all sub-DDs and supports can maintain Mahamatra throughout its entire rotation. Therefore, you'll either have to adjust your group around it or cut off the ultimate as soon as the buffs wear off. |
| Copes well with both bosses and crowds of opponents, attacking the areaAdditionally, the elemental skill allows him to briefly enter the Sworn to Lead the Way state, allowing him to continue dealing high damage even without his ultimate active. | Does not have a Star Wedge, so to play fully, it needs supports from Snezhnaya who can convert and enhance reaction. |
| Independently increases your elemental mastery, allowing you to forgo buffers for this stat. It also increases interrupt resistance, allowing you to skip the shielder and use only a healer. | Has a high ultimate cost (80 units), forcing you to add energy recovery to your build, which without ideal artifacts can negatively impact your damage output. |
| If you have the necessary support heroes can summon Star Conductor, which fits it into a new meta, in addition to the usual groups from Stimulation and Vegetation. | Requires a signature to simplify the build, as the Staff of Crimson Sands spear allows you to focus entirely on Elemental Mastery, rather than trying to balance that stat with ATK. |
Best Cyno Builds in Genshin Impact

A build for Saino should focus on maximizing his damage output, as his ultimate's duration makes him the core of the team, focusing all gameplay around him. He requires several different stats, such as ATK и EM, when constructing his build, it is worth paying special attention to balance.
Recommended Stats
The main characteristic of the Mahamatra general is ATK, however, the passive makes it significant and EM, which increases damage in the Sworn to Lead the Way state. These stats should be looked for in both the hours and secondary stats. Like other damage dealers, it requires Kritah. Choose the crown based on what exactly is missing - K/U or K/Sh. Don't forget about energy recharge In sub-stats. More emphasis on MS is worthwhile if he has a signature spear; otherwise, his ATK will be slightly better.
Pay special attention to the cup you need to take:
- For Electro damage or EM when playing with Dendro and Hydro allies through Vegetation or Stimulation.
- For attack power or EM, if the group is built through the Star Conductor. In this case, the element bonus does not work to damage by reaction.
| Artifact | Stats |
 Flower of Life Flower of LifeMain Stat: HP (fixed) |
|
 Plume of Death Plume of DeathMain Stat: ATK (does not change) |
|
 Sands of Eon Sands of EonMain Stat: MS or ATK% |
|
 Goblet of Eonothem Goblet of EonothemMain Stat: Electro%, MS or ATK% bonus |
|
 Circlet of Logos Circlet of LogosMain Stat: CRIT DMG or CRIT Rate |
|
Recommended values:
- Attack power: 1500 and more.
- Elemental Mastery: 250 and more.
- CRIT Rate: approximately 75%-90% after receiving all the buffs. When using the set Disenchantment in Deep Shadow You shouldn't look for more than 70% of this stat.
- K/U: must be in a ratio of 1:2 to K/W or more.
- Energy recharge: approximately 120%-160% depending on the squad and their equipment.
Effective weapon
For General Mahamatra, the best option is his signature, Staff of Crimson Sands, which allows him to prioritize Elemental Mastery over Attack Power. Alternatively, options with crits, and spears with Elemental mastery и ATKThe main requirement is to increase the character's personal damage, not support for allies.
| Weapon | The effect | Recommendation |
 Staff of the Scarlet Sands Staff of the Scarlet Sands⭐️⭐️⭐️⭐️⭐️ Base ATK: 44-542 CRIT Rate: 9,6%-44,1% |
Increases the wearer's ATK bonus by 52-104% from his elemental mastery. Hitting an enemy with an elemental skill grants the Dream of Crimson Sands for 10 seconds: the wearer's ATK bonus is increased by 28-56% of EM. The effect stacks up to 3 times. | A character's signature spear, providing all the necessary stats. Its relatively low base power is compensated for by its passive, allowing you to focus on gathering MC in artifacts. Equipping the signature spear also changes the general's rotation: before activating your ultimate, trade one Eshka to gain one stack of the effect. |
 Staff of Homa Staff of Homa⭐️⭐️⭐️⭐️⭐️ Base ATK: 46-608 CRIT DMG: 14,4%-66,2% |
Increases HP by 20-40%. Also gives an ATK bonus equal to 0,8-1,6% from the max HP of the character equipped with this weapon. When the hero's health drops below 50%, his ATK is additionally increased by 1-1,8% of their max HP. | A versatile weapon that increases attack power and damage per second. Combined with the general's primary stat, critical damage will be quite high, so prioritize damage per second in artifacts. Note that there's no need to specifically increase HP. |
 Primordial Jade Winged-Spear Primordial Jade Winged-Spear⭐️⭐️⭐️⭐️⭐️ Base ATK: 48-674 CRIT Rate: 4,8-22,1% |
Increases ATK by 3,2-6% for 6 seconds. The effect can stack up to 7 times and appears no more than once every 0,3 seconds. At level 7, damage dealt is increased by 12-24%. | A second versatile spear that's practically on par with the Homa Staff. Its only drawback is the need to stack its attack power, which takes some time. |
 Fractured Halo Fractured Halo⭐️⭐️⭐️⭐️⭐️ Base ATK: 46-608 CRIT DMG: 14,4%-66,2% |
After activating E or ult, ATK increases by 24% –48% for 20 sec. If the owner creates a shield during this time, then for 20 sec. they gain the effect of Electrifying Edict: the reaction damage of the Lunar Charge of all squad members nearby is increased by 40% –80%. | Although the second part of the passive doesn't work, the first part, combined with a high base and critical damage, will be useful for the general. The weapon isn't much worse than the previous options, but it can be used without Ineffa. |
 Calamity Queller Calamity Queller⭐️⭐️⭐️⭐️⭐️ Base ATK: 49-741 ATK: 3,6%-16,5% |
Gives 12-24% bonus for all elements. Launching an elemental skill applies Enhancement for 20 seconds, increasing ATK by 3,2-6,4% per second. Can stack up to 6 times. When a party member equipped with this weapon is not on the battlefield, the ATK bonus from Consummation is doubled. |
A good alternative for maximizing attack power, for example, in Star Conductor squads. The hero is almost always on the battlefield and doesn't attack from the "pocket," so the bonus won't be doubled, but it's already quite high. |
 Disaster and repentance Disaster and repentance⭐⭐⭐⭐⭐ Base ATK: 48-674 CRIT Rate: 4,8%-22,1% |
After using E-ka, the wearer receives Path of Discord for 17 seconds, as well as the effects of Unforgivable and Irreparable for 3 seconds, which can occur once every 18 seconds.
While Path of Conflict is active, whenever a normal or charged attack hits an enemy, Irreparable is extended by 1 second. When an enemy is hit by a skill or elemental burst, Unforgivable is extended by 1 second. Each effect occurs every 0,1 seconds. Both statuses are removed when Path of Xonflict ends or the equipped character leaves the battlefield. Witchcraft: Arcane Rite: Damage buff to Irreparable and Unforgivable increased by 75%. |
Mahamatra is the only possible wielder of this weapon, other than the signature wielder. His ultimate lasts 18 seconds, allowing him to fully utilize the effects of Path of Discord, as well as refresh the effect every 3 seconds during the cooldown of his skill. However, he is not a Witchcraft character and will not be able to enhance the buff's effect. |
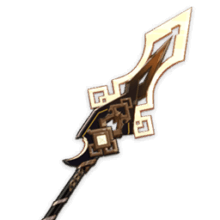 Vortex Vanquisher Vortex Vanquisher⭐️⭐️⭐️⭐️⭐️ Base ATK: 46-608 ATK: 10,8%-49,6% |
Increases shield durability by 20-40%. When hit, increases ATK by 4-8% for 8 seconds, the effect stacks up to 5 times and occurs once every 0,3 seconds. While under shield, the ATK bonus is increased by 100%. | A decent option that's only fully effective with shielders in your party. If you play without them, the spear's usefulness is significantly reduced. It provides significant attack power, but requires stacking the effect with hits. |
 Song of the Vigil Song of the Vigil⭐⭐⭐⭐ Base ATK: 44 - 565 Elemental Mastery: 24 - 110 |
After activating an Elemental Reaction, the equipped hero gains 4-8 energy. The effect occurs once every 9 seconds. If Star Conduit or Star Dispersion is activated, the wearer's attack power is additionally increased by 20-40% for 12 sec. The effect is triggered even if the owner is not on the battlefield. | One of the best epic options related to crafted weapons of Snow. Replenishes the need for two key stats at once: ATK and MS. |
 Deathmatch Deathmatch⭐️⭐️⭐️⭐️ Base ATK: 41-454 CRIT Rate: 8%-36,8% |
If there are 2 or more enemies nearby, ATK and defense increase by 16-32%; if there are less than 2 enemies nearby, ATK increases by 24-48%. | The best epic weapon in the BP, but requires P5 to compete with legendary alternatives. It's most effective when fighting two or more opponents, but it also provides many useful stats against bosses. |
 Ballad of the Fjords Ballad of the Fjords⭐️⭐️⭐️⭐️ Base ATK: 44-510 CRIT Rate: 6%-27.6% |
If there are at least 3 characters of different elements in the squad, the MS increases by 120-240 . | The best option when playing with Vegetation due to its different elemental requirements or, for example, when you have a support of a different element. Otherwise, the spear will only provide base ATK and a small amount of critical chance, making it inferior to other gear. |
 Missive Windspear Missive Windspear⭐️⭐️⭐️⭐️ Base ATK: 42-510 ATK: 9%-41,4% |
Within 10 sec. after activating an elemental reaction, ATK is increased by 12-24%, and elemental mastery by 48-96 . | Free weapon that could be obtained as part of the main event in the patch 3.1The General always plays based on reactions, so he can utilize a passive that provides all the required stats. He's somewhat inferior to previous variants due to his lack of critical hits, but this is compensated for by a good artifact build. |
 Kitain Cross Spear Kitain Cross Spear⭐️⭐️⭐️⭐️ Base ATK: 44-565 Elemental Mastery: 24-110 |
Elemental skill power increases by 6-12%When successfully attacking an enemy with E-shka, the hero loses 3 units of energy, but at the same time restores 3-5 Energy every 2 seconds for 6 seconds. This effect can only occur once every 10 seconds, even when the character is not on the field. | A crafted spear from Inazuma with a good base, a bonus to MS, and a passive energy boost. Increases the damage of the elemental skill, which the hero uses quite often, and also solves the problem with the long-cooling ult. |
 Skyward Spine Skyward Spine⭐️⭐️⭐️⭐️⭐️ Base ATK: 48-674 Energy recharge: 8%-36,8% |
Increases critical chance by 8-16% and attack speed by 12%. When you hit with a normal or charged attack, there is a 50% chance to activate an intangible blade that deals 40-100% damage in a small radius. Can occur every 2 sec. | It's not recommended to equip a spear with a high base and passive S/H stat, but this option compensates for the hero's lack of stats with a high base and S/H passive. It will also periodically perform an additional blade strike. However, without high awakenings, the weapon doesn't provide as much benefit as alternatives and is used more for stat balance. |
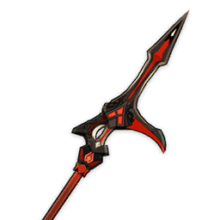 Blackcliff Pole Blackcliff Pole⭐️⭐️⭐️⭐️ Base ATK: 42-510 CRIT DMG: 12-55,1% |
Defeating an enemy grants additional 12-24% to ATK. Lasts 30 seconds and can stack up to 3 times. The duration of these added effects is independent of the others. | A free spear from the Starlight shop. Despite the good stat boost, it's only competitive with other options at level 5. To receive the buff, you must defeat an enemy, which isn't ideal in the Abyss or when fighting bosses. |
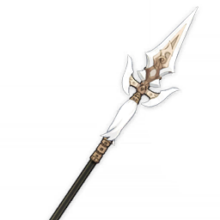 White Tassel White Tassel⭐️⭐️⭐️ Base ATK: 39-401 CRIT Rate: 5,1%-23,4% |
Increases normal attack damage by 24%-48%. | One of the best early game spears with a bonus to auto attacks, which the hero actively uses in the ult. The spear can be obtained for free by opening chests in the Liyue region. |
Suitable Artifacts
Artifacts for Saino are selected with an emphasis on his build and gameplay:
- When playing from Star Guide It's worth considering a set tailored to this reaction or universal options for MS and ATK.
- If you prefer to play with the old build with Dendro characters, Thundering Fury will do for Electro damage.
In both cases, you can get by with stat-based kits, but keep in mind that elemental damage bonuses do not work with Star Conductor.
| Name | The effect | Recommendation |
 Disenchantment in Deep Shadow Disenchantment in Deep Shadow⭐⭐⭐⭐ ⭐⭐⭐⭐⭐ |
2-Piece Bonus: + 18% to ATK. 4-Piece Bonus: The Superconductor's reaction damage is increased by 80%, and the Star Conductor's by 40%. When the wearer attacks an enemy with the Superconductor or Star Conductor status, the critical chance of that attack is increased by 16%. |
The best set for General Mahamatra after the buff. Increases both the primary stat and reaction damage. Due to the bonus to Critical Hit Rate, pay more attention to the critical hit balance to avoid overdoing this stat. Also, remember that the hero can only summon Star Conductor when in a group with Wedge characters. |
 Gilded Dreams Gilded Dreams⭐️⭐️⭐️⭐️ ⭐️⭐️⭐️⭐️⭐️ |
2-Piece Bonus: Elemental Mastery +80 4-Piece Bonus: For 8 sec. after trigerring an elemental reaction, the equipping character receives the following buffs, depending on the elements of their team members:
|
A versatile kit that can be used in any build due to its bonuses to both MS and ATK. The desired stats can be controlled by squad composition. If a signature weapon is available, it's best to use the general in groups with different elements, although this isn't critical. |
 Thundering Fury Thundering Fury⭐️⭐️⭐️⭐️ ⭐️⭐️⭐️⭐️⭐️ |
2-Piece Bonus: +15% Electro damage. 4-Piece Bonus: Increases the damage of Overload, Charged, Superconductor, and Vegetation reactions by 40%. Damage from Intensify, Lunar Charge, and Star Conductor reactions is increased by 20%. Activating these reactions or the Stimulate reaction reduces the cooldown of your elemental skill by 1 second. This effect can occur once every 0,8 seconds. |
Increases elemental damage and enhances all reactions involving Electro. Activating these reactions reduces the cooldown of the Electro skill, but this isn't a significant bonus since the elemental skill itself has a fairly short cooldown (7.5 seconds without the ultimate and 3 seconds with the ultimate). |
 Gladiator’s Finale Gladiator’s Finale⭐️⭐️⭐️⭐️ ⭐️⭐️⭐️⭐️⭐️ |
2-Piece Bonus: +18% attack power. 4-Piece Bonus: +35% normal attack damage if the character uses one-handed, two-handed or polearms. |
If you don't have one of the previous options, you can use Gladiator’s Finale, which increases ATK and enhances the normal attacks used by Mahamatra in her ultimate. It doesn't boost skill or reactions in any way, so it's inferior to the previous sets, but it's easier to build with good stats. |
 Wanderer's Troupe/Gilded Dreams/Flower of Paradise Lost/Night of the Sky's Unveiling/Moonlit Offering’s Opulent Dream Wanderer's Troupe/Gilded Dreams/Flower of Paradise Lost/Night of the Sky's Unveiling/Moonlit Offering’s Opulent Dream |
2-Piece Bonus: Elemental Mastery +80 2-Piece Bonus: +80 Elemental Mastery |
2+2 sets for MS. Recommended as a transitional option until you've farmed the parts of a full set from the list above. |
 Martial Artist Martial Artist⭐️⭐️⭐️ ⭐️⭐️⭐️⭐️ |
2-Piece Bonus: Increases attack power by 18%. 4-Piece Bonus: Increases Normal and Charged Attack Power by 25% for 8 sec after using an Elemental Skill. |
A good set at the start of the game and can be effectively used until rank 45 or until you get your first legendary artifacts. |
Teams
Saino's teams are built around his mastery of Electro God's Eye, which allows him to synergize well with Dendro to great effect. CatalyzeBut there are other ways to build squads depending on the other players. If the buff has been unlocked and the account has allies with Star Blade, the general can be combined with Cryo heroes to create his strongest squads.
If you have Hydro heroes at your disposal, you can use the Charged reaction in Taser squads with Hydro or Overload with Pyro, but this option will be noticeably weaker.
Optimal heroes
Mahamatra is best paired with the following characters:
| Character | Element | Weapon | Features |
|---|---|---|---|
 Odette Odette |  Cryo Cryo |  Sword Sword | A signature sub-DD for groups from the Star Conductor. He applies Cryo from his pocket, converts the reaction with his Wedge, amplifies it, and also deals damage himself. |
 Alyosha Alyosha |  Electro Electro |  Polearm Polearm | A secondary damage dealer with healing functions. Primarily used to cast Hunter's Mark, which increases the Star Guide's ATK and damage. At the sixth constellation, it increases MS. |
 Yae Miko Yae Miko | Electro |  Catalyst Catalyst | A secondary Electro DPS for the team, he brings additional passive damage from elemental skill totems, and if there is a const and a wedge hero in the squad, he also hits with Star Conductor and buffs it. |
 Qiqi Qiqi | Cryo | Sword | A budget-friendly, strong support for Star Conductor, which increases reaction damage, provides a good amount of Cryo status, and passive healing. |
 Sandrone Sandrone | Cryo |  Claymore Claymore | While they both occupy the main damage dealer position and compete for field time, Sandrone opens the door for him to use a very strong reaction, Star Conductor. |
 Cryo Traveler Cryo Traveler |  Cryo Cryo | Sword | In Cryo-Electro combinations, Traveler also plays the role of main damage dealer, so use them together only in situations where there is no Odette or another hero with Star Blade on the account who could activate the Mahamatra General's passive. |
 Escoffier Escoffier | Cryo | Polearm | A convenient pocket-sized sub-DD for effective Cryo casting. It will reduce your own resistance to this element and provide a lot of healing for the general. |
 Nahida Nahida |  Dendro Dendro | Catalyst | The best ally when playing with Stimulate or Vegetate. It significantly increases Dendro's reactions and grants a large amount of "strong" elemental status for 25 seconds. This lasts for the entire duration of Saino's ultimate, allowing him to deal increased damage throughout the stance. |
 Lauma Lauma | Dendro | Catalyst | If you're playing Vegetation rather than Stimulation and are primarily focusing on Bud Burst, it might make sense to consider Priestess over Nahida. |
 Columbina Columbina |  Hydro Hydro | Catalyst | Transforms the Charged reaction into Lunar Charge. The hero is focused on Elemental Mastery, making him an excellent choice for Lunar teams, where this stat is crucial. |
 Ineffa Ineffa | Electro | Polearm | Like Columbine, it turns Charged into Moon Charge, but serves a different purpose in the squad, placing a shield to protect against incoming damage. |
Secondary damage dealer
Characters for applying status from the pocket:




 Dendro GG (One-handed sword)




Supports
Companions for buff activation and support:





Top Teams
Ideally, teams for Saino should be built around Star Conductor, where he excels. In such teams, the most important thing is to provide him with sufficient status and reaction or stat buffs, as elemental buffs will be useless.
If you don't have any allies with a wedge or plan to use them with Snezhnaya heroes, the general is also good in squads with Dendro characters and Hydro. Saino can also be used in Overload, but it can be tricky to use, as it will scatter enemies in all directions.
Star Superconduct
Examples of groups with the Snezhnaya reaction:
| Character 1 | Character 2 | Character 3 | Character 4 | Recommendation |
|---|---|---|---|---|
 Cyno Cyno | Yae Miko | QiqiAlyosha | Odette | The strongest team is Cryo's synergy with Electro and General Mahamatra, where he deals damage alongside Yae Miko. Both Qiqi and Alyosha can be used as supports if they have a high constellation count. Odette is a key hero needed for reaction conversion. |
| Cyno | Yae Miko Beidou Beidou |  Diona Diona | Odette | If desired, Yae Miko can be replaced with Beidou, who won't deal damage but will boost her reaction time and reduce her resistances. Diona is the support. If she has C6, she will also provide a lot of MS for the hero. |
| Cyno | Beidou Fischl Fischl | Diona | Odette | A more budget-friendly version of the squad, where the sub-DD can be replaced by Fischl for faster energy boosting of the Mahamatra. Diona and Odette, together, increase the overall damage output. |
| Cyno | Yae MikoBeidou | QiqiAlyosha | SandroneCryo Traveler | If you don't have Odette on your account, you can use Sandrone or Cryo GG to convert Star Conductor. Since both Marionette and Traveler act as main damage dealers in this reaction, they won't be very useful and are only needed to activate Saino's passive ability. |
Stimulation and Vegetation
Examples of groups with Dendro and Hydro allies:
| Character 1 | Character 2 | Character 3 | Character 4 | Recommendation |
|---|---|---|---|---|
| Cyno |  Xingqiu Xingqiu Yelan Yelan | LaumaNahida |  Baizhu Baizhu Yaoyao Yaoyao | A group with Hyperbloom, where the main focus is not on the general's personal damage, but on the cores detonated by his Electro attacks. Dendro Resonance will increase the entire group's Elemental mastery, and Hydro sub-DD will provide stable status. |
| Cyno | Nahida |  Kokomi Kokomi |  Dendro MC Dendro MC Collei Collei | Aggravate/Hyperbloom team:
|
| Cyno | Nahida | Fischl Kuki Kuki Dori Dori | Yaoyao | Aggravate team with Dendro and Electro resonances:
|
| Cyno | Fischl | Collei |  Dendro MC Dendro MC | Aggravate team with Electro and Dendro resonances:
The only problem with this build is the lack of healing or defense. |
| Cyno | Dendro MCNahida |  Sucrose Sucrose | KukiDori | Another variation of an Aggravate squad:
This will also make it easier to rotate and activate Aggravate rather than Spread. If you wish, you can return to 2 + 2 (Dendro and Electro). |
| Cyno | YelanXingqiu | NahidaDendro MC |  Zhongli Zhongli | An analogy of the previous build, but without specific resonances and with more emphasis on security and stability. Zhongli will also lower the elemental resistance of enemies. |
| Cyno | NahidaYaoyao |  Yun Jin Yun Jin | Zhongli | Team that buffs Cyno's normal attacks used while his ult is active:
|
| Cyno | Nahida |  Albedo Albedo | ZhongliYun Jin | A variant of the squad through Aggravate, where DD with the help of supports gets a good bonus to elemental mastery and Electro damage. In the last slot you can put a Geo character for resonance and additional buffs. For example, Zhongli (with Tenacity of the Millelith) or Yun Jin. |
Charged
Squads with Hydro and Electro:
| Character 1 | Character 2 | Character 3 | Character 4 | Recommendation |
|---|---|---|---|---|
| Cyno | Columbina Aino Aino | Ineffa | Sucrose | Although the general doesn't have any special buffs, thanks to the MC scales, he fits perfectly into the concept of Lunar Charge groups. In such a composition, he'll receive all the necessary bonuses from his allies and deliver a decent performance. |
| Cyno | YelanXingqiu | Ineffa | Sucrose | An alternative to the previous command. If you don't have Columbine, you can replace it with Hydro Sub-DD, since attacks under Mahamatra's ultimate are considered normal attacks. |
| Cyno |  OroronFischlBeidou OroronFischlBeidou | Kokomi |  KazuhaSucrose KazuhaSucrose | Standard build via reaction Charged:
|
| Cyno |  Raiden Raiden | YelanXingqiu | Kokomi Barbara Barbara | Alternative command via reaction Charged:
|
| Cyno | Yae Miko | YelanXingqiu Sara Sara | KazuhaSucrose | Squad option via mono-Electro with Swirl/Charged
|
Overload
The team using the combination of Pyro and Electro, although less effective in comparison with all the others, has the following effect if desired:
| Character 1 | Character 2 | Character 3 | Character 4 | Recommendation |
|---|---|---|---|---|
| Cyno |  Durin Durin |  NicoleFischl NicoleFischl | KazuhaSucrose | A squad with Witchcraft Resonance, which can use both Nicole for an ATK buff and Fischl for additional status and energy. Be sure to bring an Anemo character for the draw. |
| Cyno | Durin Xiangling Xiangling |  Chevreuse Chevreuse | FischlKuki Thoma Thoma | Group with Overload and Chevreuse to reduce resistance to Pyro and Electro. If she's not healing enough, you can use Cookie or Toma in the last slot instead of Fischl. |
| Cyno | Xiangling |  Bennett Bennett | Sara | In this case, with Sarah's C6, the main damage dealer will receive a significant boost to overall damage. However, positionally, this group is also difficult to implement due to the frequent movement around the battlefield and, therefore, the need to escape Bennett's circle. |
Stats
In addition to the main stats like base HP, ATK, and defense, as a hero ascends, their K/U stat increases. Since the hero is heavily dependent on MS and plays primarily on reactions, it's essential to level them up to level 90, after which you can consider leveling them up to levels 95 and 100 using Wandering fortune.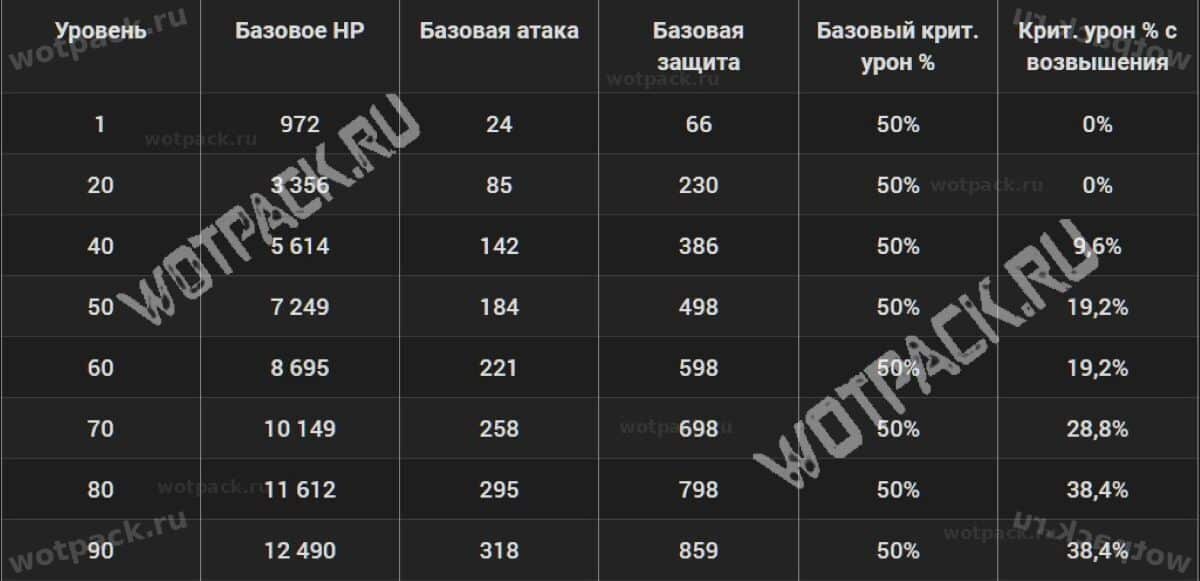
Leveling
To raise the level of Mahamatra, you will need resources and materials primarily from the territories of Sumeru.
Ascension
The following materials are required for leveling:
| Resource | Where to find it |
 Slivers, fragments, chunks and gemstones of Vajrada Amethyst Slivers, fragments, chunks and gemstones of Vajrada Amethyst |
Drops after defeating world and weekly bosses. |
 Divining Scroll ×18 Divining Scroll ×18Sealed Scroll ×30 Forbidden Curse Scroll ×36 |
Material that drops after the death of Shamachurls throughout Teyvat. |
 Thunderclap Fruitcore × 46 Thunderclap Fruitcore × 46 |
Item dropped by world boss Electro Regisvine |
 Scarab × 168 Scarab × 168 |
A Sumeru curiosity, found mainly in the desert area. |
 Experience Books ×421 Experience Books ×421 |
Awarded for quests, events, chests in the open world, and clearing the earth's arteries. |
 Mora ×1 653 000 Mora ×1 653 000 |
Any gaming activities. |
Talents
To level up your talents you will also need:
| Resource | Where to find it |
 Teachings on the "Instructions" ×3 Teachings on the "Instructions" ×3Instructions on the "Instructions" ×21 Philosophy of the "Instructions" ×38 |
Farmed on Monday/Thursday/Sunday in the dungeon Steeple of Ignorance in Sumeru |
| Divining Scroll ×6 Sealed Scroll ×22 Forbidden Curse Scroll ×31 |
Drops from Shamachurls. |
 Mudra of the Sinister General ×6 Mudra of the Sinister General ×6 |
Item from the weekly boss The Shogun. |
 Crown of Insight ×1 Crown of Insight ×1 |
A rare item for leveling talents to 10. Available through the offering system and in events. |
| Mora ×1 653 000 |
Any gaming activities. |
Skills
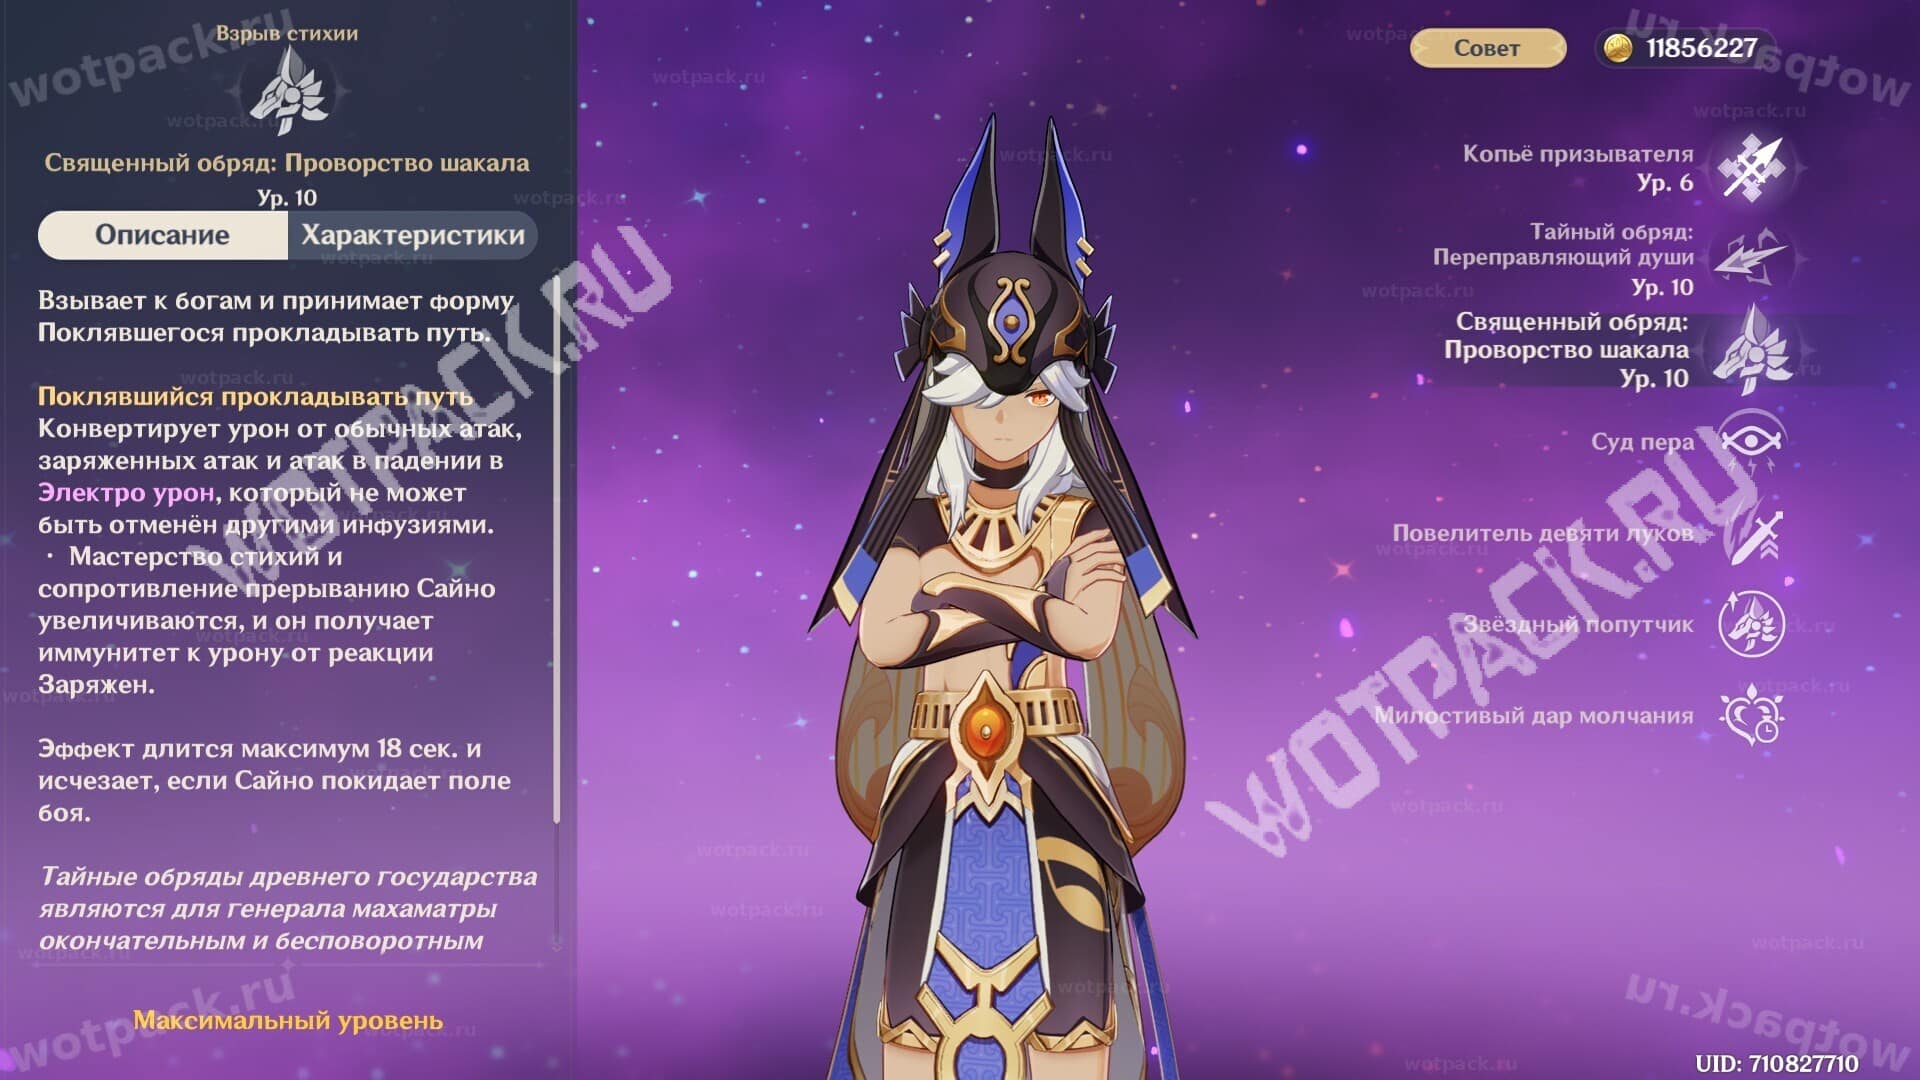
Saino is a main damage dealer who primarily uses elemental damage. His primary ability is his ultimate, which puts him into a special infusion stance. During his ultimate, the general can use an enhanced skill that can damage the Star Guide, provided there's a Lodestar Reach on the field.
Basic (Active) Skills
All of Mahamatra's abilities are aimed at constantly inflicting elemental damage and buffing himself.
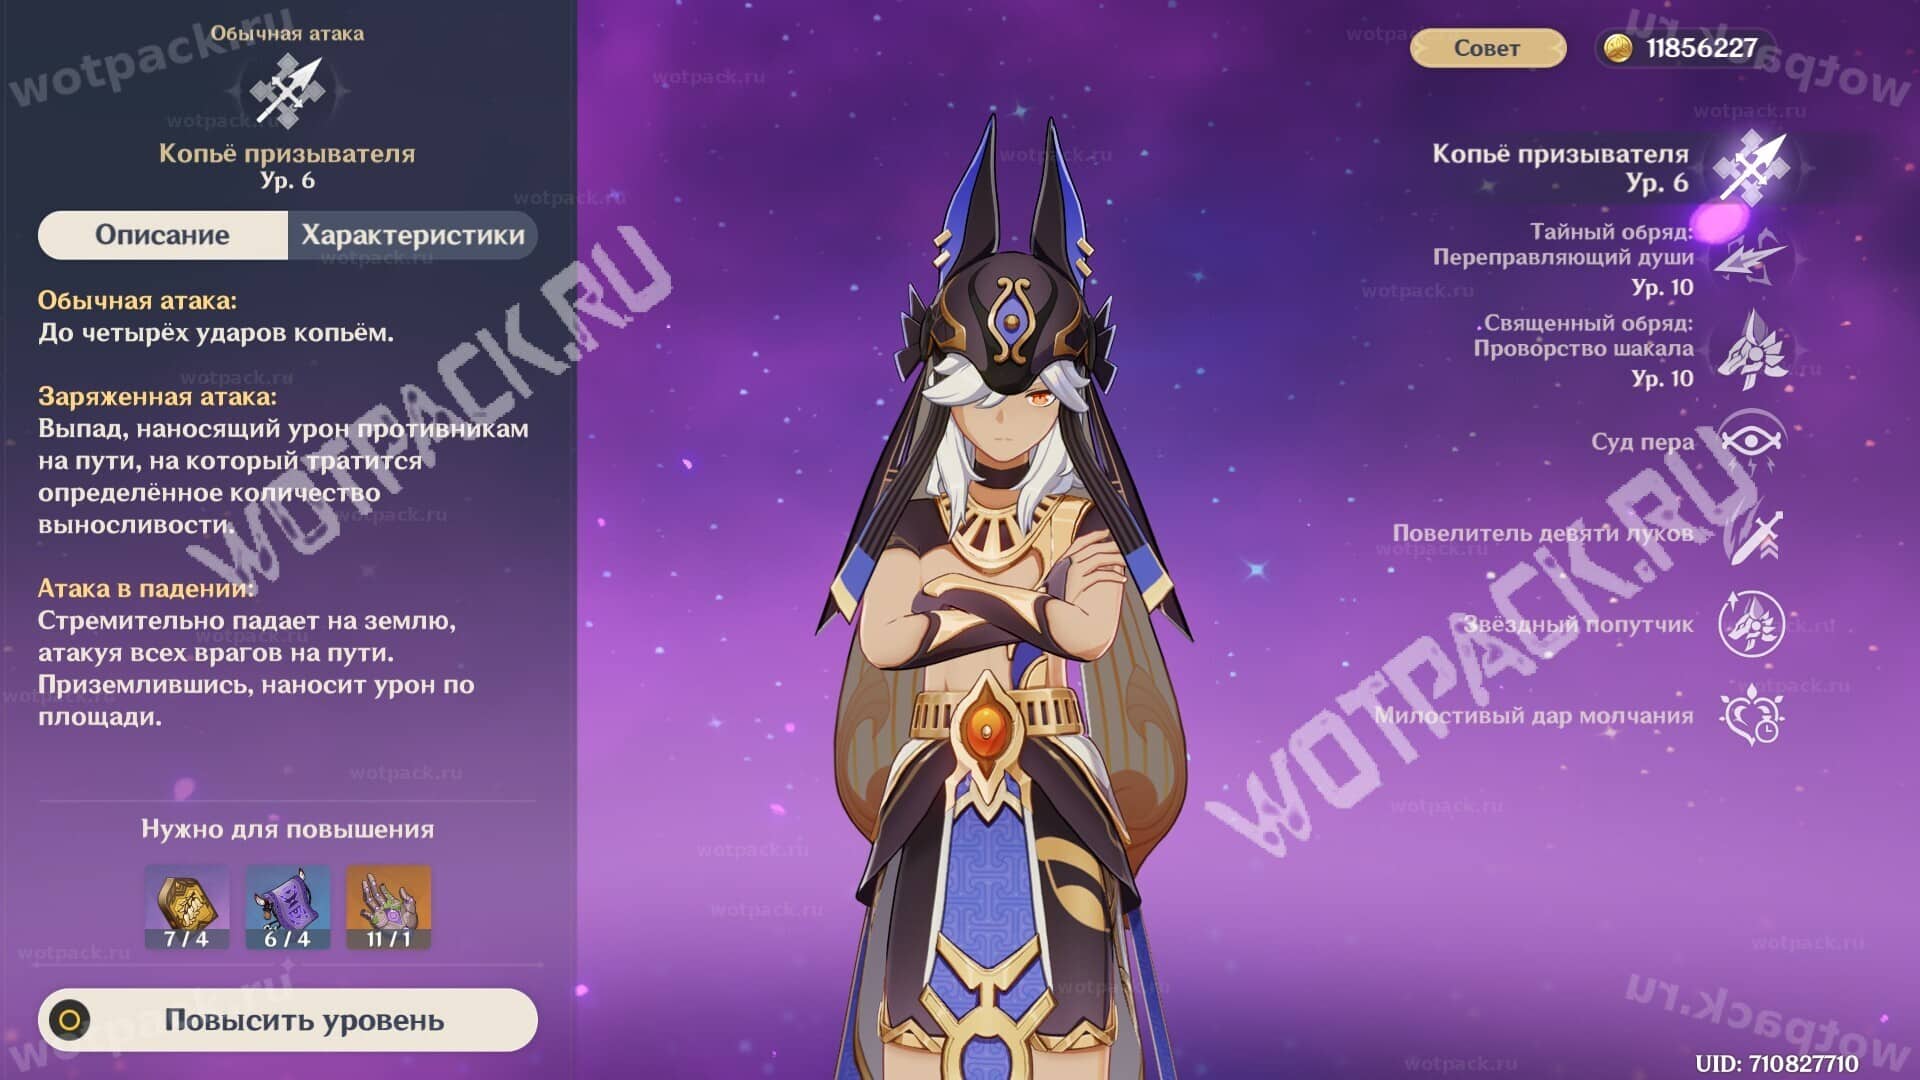
- Source: URN: ATK.
When performing auto attacks, deals up to 4 spear strikes.
When charging, charges forward, consuming stamina. With a plunging attack, flies down rapidly and deals area damage to all enemies in his path.
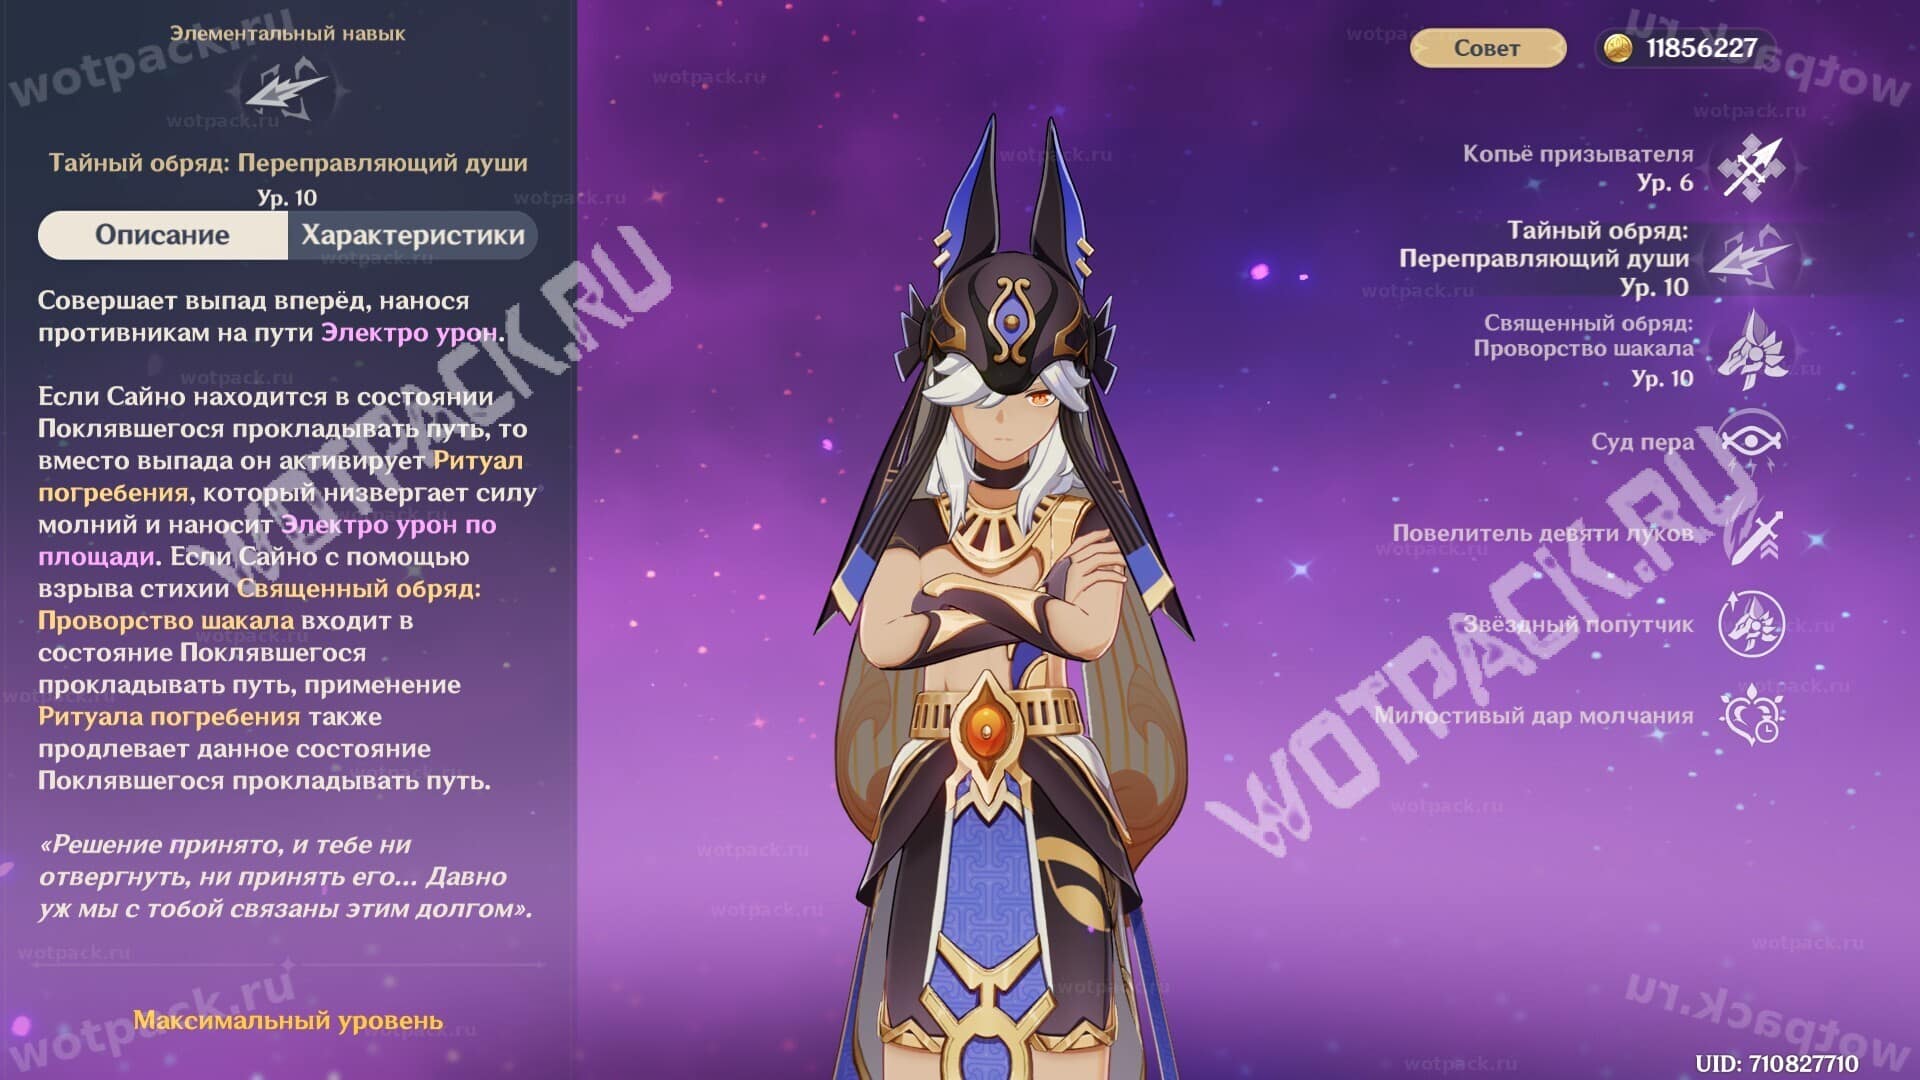
- Source: URN: ATK.
- Cooldown: 7.5 seconds
- Burial Ritual rollback: 3 seconds
Dashes forward, dealing Electro damage. If he's in the state triggered by his ultimate, instead of lunging, he activates an enhanced E-skill, dealing Electro an area-of-effect damage. During the ultimate, press the enhanced skill when the eye symbol appears on the screen to increase damage and extend the ultimate's duration to 18 seconds.
- Source: URN: ATK.
- Basic duration: 10 seconds
- Maximum duration: 18 seconds
- Cooldown: 20 seconds
- Enegry consumption: 80
Transitions to a stance during which the general receives Electro Infusion. He also receives the following effects:
- Increases Elemental Mastery by 100.
- Increasing resistance to interruption.
- Gains immunity to Electro-Charged DMG.
The effect lasts for 18 seconds and disappears when you switch characters.
Passive Skills
Mahamatra's passive talents further increase his damage output and allow him to play through Star Conduit.
The Gift of Silence
Gains 20% more rewards when dispatched on a Sumeru Expedition for 25 hours.
Featherfall Judgment
While Sworn to Lead the Way is active, Saino periodically enters the Witness to Truth state. Activating Arcane Rite: Soul Ferry in this state triggers the Sentence effect, which increases the damage of the current Arcane Rite: Soul Ferry by 35% and unleashes 3 Lightning Bolts of Calamity, dealing Electro damage equal to 100% of Saino's ATK. The damage dealt by the Lightning Bolts is considered elemental skill damage.
Radiance - Star Conductor: When activating Judgement, he instead fires 3 Disaster Lightning: Star Union bolts in front of him, dealing Electro damage equal to 200% of his Attack Power. This damage is considered Star Conductor's reaction damage.
Authority Over the Nine Bows
Increases Cyno's following damage based on his Elemental Mastery:
- While in Sworn to Lead the Way, Normal Attack damage is increased by 150% of his Elemental Mastery.
- The damage of Lightning of Disaster from the Ascension talent Judgment of the Feather is increased by 250% of his Elemental Mastery. The damage of Lightning of Disaster: Star Alliance from the Ascension talent Judgment of the Feather is increased by 600% of his Elemental Mastery.
Star Companion
After Saino uses the elemental skill Secret Rite: Soul Ferry while not in the Sworn to Lead the Way state, he enters this state for 6 seconds.
In addition, while in the Limit of the Guiding Star, Saino enters the state of Radiance - Star Guide.
Talent Leveling Order
Elemental Burst > Elemental Skill > Normal Attacks (Optional)
Upgrade priority:
- Ult — is the character's main damage, so it needs to be developed first and foremost and to the maximum.
- During his superpower, he constantly uses skill, so raise his level second.
- Since the scales of hits under infusion are prescribed in Q, then on normal attacks You don't have to waste resources from your hand, since only physical damage will increase without the ult.
Constellations
| Name | Effects |
| 1. Testament: Unceasing Vigilance | After activating Sacred Rite: Jackal's Nimbleness, Saino's normal attack speed is increased by 20% for 10 seconds. If the Judgement of the Feather ascension talent is activated while using Secret Rite: Soul Ferry, the duration of this effect is refreshed. Requires unlocking the ascension talent Judgement of the Feather. Radiance - Star Guide: When Saino enters Pathsworn, he also gains Sunrise: Elemental Mastery is increased by 200. If Saino switches to another character during this time, the new character gains Sunrise for the remaining duration. |
| 2. Ceremony: Seeing off the souls | Hitting an enemy with a normal attack increases Saino's Electro damage bonus by 10% for 4 seconds. This effect can occur no more than once every 0,1 seconds and stacks up to 5 times. Additionally, when a character under the effects of Sunrise hits an enemy with a normal or charged attack, their Star Conductor reaction damage is increased by 16%. This effect can occur once every 0,1 seconds, stacks up to 5 times, and lasts until Sunrise ends. |
| 3. Decree: Execution of punishment | Increases elemental burst level by 3. Max. level: 15. |
| 4. Strict Measure: The Guardian of the Ban | Saino, when activating the Charged, Moon Charged, Superconducted, Star Conducted, Overloaded, Stimulated, Aggravated, Vegetated, or Electro Dispersed reactions during the Sworn to Lead the Way Holy Rite: Nimbleness of the Jackal, restores 3 Energy to all nearby party members (except Saino himself). This effect can be activated up to 5 times during the same Holy Rite: Nimbleness of the Jackal. After another character under the effect of Sunrise activates the listed reactions, Saino also restores 20 Energy. This effect can occur once every 18 seconds. |
| 5. Burial: Fading Starlight | Increases elemental skill level by 3. Max. level: 15. |
| 6. Pen Ceremony: Scales of Justice | Using the Sacred Rite: Jackal's Nimbleness or activating the Judgement of the Pen ascension talent grants Saino 4 stacks of Jackal's Sacrifice. Hitting an enemy with a normal attack consumes 1 stack of Jackal's Sacrifice and releases one Lightning of Disaster. If Saino is affected by Sunrise, he releases one Lightning of Disaster: Star Union instead. Jackal's Sacrifice lasts 8 seconds and stacks up to 8 times during a single Sworn to Lead the Way state. Upon completion of Sworn to Lead the Way's Sacred Rite: Nimbleness of the Jackal, the effect ends. Lightning of Disaster or Lightning of Disaster: Star Union can only be released this way once every 0,4 seconds. Requires unlocking the ascension talent Judgement of the Feather. |
Best constellations of Cyno are C1, C2 and C4:
- The first constellation A great addition to the hero, especially if you plan to use him as your main core. Increases attack speed while using the ultimate, increasing overall damage and refreshing the duration of Judgement (the passive talent "Judgment of the Pen") when activated.
- The second constellation Provides a bonus to Electro damage when using basic attacks. Furthermore, the effect stacks, allowing for up to 50% additional damage.
- The fourth constellation Replenishes energy for the squad if Saino activates Elemental Reactions during his ultimate. In groups with a Star Conductor, the consta solves the general's own energy issues, allowing him to effectively build up his ultimate while he's in the pocket.
How to play Cyno

The character can play both from reactions in builds through EM, and rely on your own numbers with maximum crits, attack power, and support buffs. The pikeman's primary ability is the Elemental Burst. He'll spend most of his time in the ultimate stance. Therefore, the main goal is to quickly build up energy for the ultimate, activate all available buffs, and then use the ultimate while remaining under its effect (as the effect is lost when switching).
Since the stance deactivates after switching to an ally, try to use all your squad members' abilities before Saino's rotation begins. It's especially advisable to use short buffs at the very end so they catch most of his Q. When switching to Mahamatra during the stance, watch out for eye-shaped symbols on the screen. As soon as you see one, use a skill that will deal increased damage.
Additionally, pay attention to the signature gameplay. Signature Spear grants three stacks of ATK after using the E-key. To more efficiently obtain the buffs, use one skill before the ultimate ability—this action will grant one stack, and the skill will have time to cool down before the first "eye" appears.
Rotation
Skill Order: buffer and sub-DD abilities > E (elemental skill) > Q (elemental explosion) > normal attacks + E every 3 sec.
The full rotation is as follows:
-
- Start the battle with your allies' skills that will give you buffs and status effects.
- If the general has a signal, use E once. You can also press it if you haven't built up your ultimate.
- Press Q and enter Infusion Stance. Attack enemies with normal attacks until the symbol appears on the screen after 3 seconds. Use your hero's skill and continue attacking with your fist.
- Continue this action until your team members' superpowers or buffs run out.
Is the Character Worth Pulling For?
After receiving buffs, Saino has become capable of standing alongside the game's strongest damage dealers, though he remains highly situational. Currently, he performs best with Star Conduit, so if an account lacks suitable allies, he's significantly less effective. He can still be used in Dendro groups, but be prepared for the fact that without investment, he won't deliver high damage output.
What to Choose: C1 or Signature?
The choice must be made based on the following criteria:
- C1 is a strong constellation, but it's most often used as an intermediate to C2. If you're definitely considering the second constellation, for example, for The Long Journey of Perfection, then it's better to prioritize the first.
- If you only have enough spins for C1 and there are no other weapons, then it's better to take the Signa - it provides a good boost to stats and allows you to fully build your character in MS, which is especially good in the Star Conductor.








Squad: Saino, tsitsi, cryo gg, Alyosha. Is it normal or not?
There's nothing to buff the cryo gg with, the conductor itself is DD, its current is dissipated.
s6 alosha or s6 baida? Team, sayno, oddeta, diona.
Is the craft stick from Snow suitable for him or is it better to keep the White Brush?
You mentioned a loud roar of rage.
>Increases elemental damage and enhances all reactions involving Electro, except Star and Moon
Currently, the bonus buffs Star Conductor and Lunar Charge. The set description and recommendation probably need to be corrected, as the set is now generally playable for ZP.
Hello! Thanks for your comment, we've fixed it.
Hello,
Will C6 work without his ult? After the buff, Saino enters his ult state after pressing E. Will that count?