

In Genshin impact Skirk the Sinner's Pupil is the main damage dealer, able to enter a special stance after using an elemental skill. At that time, she deals normal infused blows. What makes her skillset unusual is that the activation of the ult does not depend on energy, but requires stacks of Serpent's Subtlety. In addition, playing the character, you will have to get many other different effects for her personal damage.
The Swordswoman of the Abyss is a Cryo character, but unlike other characters of this element, her signature reaction is considered to be exclusively Frozen with no Anemo support, since the passive assumes having a team of Cryo and Hydro allies only. Otherwise, she is a standard damage dealer playing off ATK and crits, which somewhat simplifies the build, allowing you to ignore energy recharge.
| Rating | S+ position in tier lists with Escoffier, S-position without her |
| Rarity | ⭐⭐⭐⭐⭐ |
| Appeared in-game | June 18, 2025 (patch 5.7) |
| How to Get the Character | Character Event Prayer "Coming of the Void Star" |
| Character Assignment | "Whispers between the stars and the darkness" |
| Element | Cryo |
| Weapon | Sword |
| Gender | Female |
| Affiliation | Cosmic Calamity |
| Constellation | Crystallina |
| Home region | The Lost Planet |
| Birthday | November 5 |
| Zodiac sign | Scorpio |
| Age | 500-15 years |
| Height | 160-165 cm |
| Special dish | "Abyssal Bounty" |
| Voice actors |
|
How to Get the Character

Reran Skirk will pass with March 17 to April 7, 2026, in the second phase the 6.4 updateTo unlock the Swordswoman's constellations, you need to knock out copies of her.
To avoid missing a replay of your favorite characters, check out the article on the constantly updated banner schedule.
Strengths and Weaknesses

Skirk plays the role of a main damage dealer and, depending on her chosen stance, can deal damage with both normal attacks and her ultimate. This flexibility expands her squad roster, allowing her to be added as a secondary damage dealer to a team's revolvers, but all her groups are still limited to Hydro and Cryo combinations.
| Strengths | Weaknesses |
| Easy to build.. The heroine plays off the Serpent's Subtlety and does not need to restore energy, like other damage dealers do, which allows her to fully focus on ATK and CRIT Rate/DMG for artifacts and weapons. | Tied to Hydro and Cryo characters. Although she can be placed in teams that play off Melt and other reactions if desired, she can only be at her best and deal maximum damage in teams that consist of these elements only. For this reason, the heroine is severely limited in team setups and is unable to play with many strong allies. |
| Simple to use. The swordswoman deals all damage with normal attacks while her ult is active, so her gameplay is quite easy to master. In addition, since she does not require energy, it is easier to control process of getting stacks for Elemental Burst. | Needs Escoffier. Since the girl is too dependent on team setups, she has few options for supports and sub-DPS that can fully use her passive. At the moment, only Escoffier can consistently buff her, giving everything she needs for comfortable gameplay. |
| Easy to travel around the world.Long pressing of an elemental skill allows you to move quickly while hovering above the ground, which is convenient for exploring the open world. | Strong signature weapons and constellations. Swordswoman has quite a few suitable alternatives, but her signature weapon gives her a large amount of stats that would otherwise take a long time to get with artifacts. |
| High damage. Has strong abilities that allow her to succees in current game content. |
The Best Skirk Builds in Genshin Impact

The Sinner's Pupil takes the position of the main damage dealer in the team, so her build should maximize her combat potential. She does not need energy recharge, and when leveling up, she gets additional CRIT DMG, which makes finding good stats for her fairly easy. The heroine in most cases does not play off Melt, so there is no need for Elemental Mastery, which allows to focus on ATK and CRIT Rate/DMG.
Recommended Stats
The Skirk build prioritizes attack power. The ATK stat should be in the clock and secondary stats of other artifacts. The crown should contain CRIT DMG or CRIT Rate depending on what the character needs most for balance at a particular moment.
In most situations, it is better to take the cup CryoIf you are playing in a group with Archon Furina and Archer Ye Lan, an option is acceptable. ATK cup due to the high affix rate from the bonuses of these heroines.
| Artifact | Stats |
|
Main Stat: HP (fixed) |
Substats:
|
|
Main Stat: ATK (fixed) |
Substats:
|
|
Main Stat: ATK % |
Substats:
|
|
Main Stat: Cryo |
Substats:
|
|
Main Stat: CRIT Rate or DMG |
Substats:
|





Since the heroine primarily plays with Cryo and Hydro characters, she doesn't need Elemental Mastery. Her Elemental Burst is especially noteworthy. She activates her ultimate based on the number of stacks of Serpentine Cunning, not Energy, so it's best to omit this stat from both primary and secondary stats in artifacts and weapons.
Optimal values for the build:
- ATK: 2000 and more, depending on the presence of various buffers in the team.
- CRIT Rate: 75%-80% for stable damage output. When playing in regular teams, Frozen will add 15% more CRIT Rate off Cryo Resonance, which will allow you to get closer to the total value of 90/95%. If you have Rosaria, also take her buff into account.
- CRIT DMG should be in a ratio of 1:2 with CRIT Rate. Minimum value is about 160%, upper value of CRIT DMG is not limited.
- Energy recharge: not required.
Weapon Tier List
Best equipment has such main stats as ATK, CRIT Rate and CRIT DMG, and also has useful passives. One-handed swords with energy recharge are not needed, since this stat is useless for Skirk. The Abyssal mentor deals most damage with her normal and charged attacks.
| Name | Passive | Recommendation |
|
Azurelight |
For 12 sec. after using an elemental skill, attack power increases by 24%-48%. If the equipping character runs out of energy during this time, this stat will be additionally increased by 24%-48%, and critical damage will increase by 40%-80%. | Skirk's signature weapon, grants her a lot of the main stat, as well as CRIT Rate/DMG. Since the heroine has no energy at all, the second part of the passive will be active all the time. |
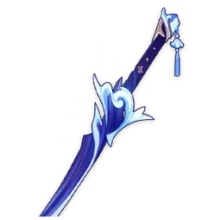 Haran Geppaku Futsu Haran Geppaku Futsu
⭐⭐⭐⭐⭐ Base ATK: 46-608 CRIT Rate: 7.2%-33.1% |
Grants 12%-24% elemental damage bonus. When allies use an E-attack, the wielder gains 0.5 stack of Wavespike every 1 sec. You can have up to 2 stacks in total. When the wielder deals elemental damage, all Wavespike stacks are consumed, and the character gains the Rippling Upheaval effect, increasing the damage of normal attacks by 20%-40% for each stack for 8 sec. | Another strong sword with a high base and crit chance. Passively increases the character's Cryo damage and normal attacks, which the Sinner's Pupil uses most often. |
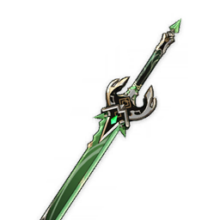 Primordial Jade Cutter Primordial Jade Cutter⭐⭐⭐⭐⭐ Base ATK: 44-545 CRIT Rate: 9.6%-44.1% |
Increases HP by 20%-40%. Grants an attack bonus equal to 1.2%-2.4% of max HP. | All-around item with a high critical chance for stat balance. Converts the wielder's health to Skirk's main stat. |
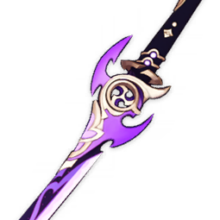 Mistsplitter Reforged Mistsplitter Reforged⭐⭐⭐⭐⭐ Base ATK: 48-674 CRIT DMG: 9.6%-44.1% |
Increases elemental damage by 12%-24%, and also applies the Mistsplitter's Emblem effect. Each level of Mistsplitter's Emblem grants 8%-16%, 16%-32% or 28%-56% to the character's elemental damage. Emblem levels can be obtained by dealing damage with normal attacks while infused (lasts 5 sec), by activating the ult (lasts 10 sec), and when the hero's energy has not reached 100%. | another all-around option, which, however, requires focusing on the critical chance in artifacts. It has a high base and gives a lot of elemental damage when having all three stacks, which is possible with just sticking to the heroine's rotation. |
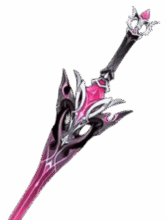 Athame Artis Athame Artis⭐⭐⭐⭐⭐ Base ATK: 46 - 608 CRIT Rate: 7,2% - 33,1% |
Critical damage of elemental burst is increased by 16/20/24/28/32%. When an elemental burst hits an enemy, the wearer gains the Blade of the Daylight Hour effect, which increases attack by 20/25/30/35/40%Additionally, nearby allies gain an attack power boost of 16/20/24/28/32%. The effect lasts for 3 sec. If the party has the "Hexerei: Secret Rite" buff, the Blade of the Daylight Hour buff is increased by an additional 75 %. Works even when the wearer is not on the battlefield. |
A valid choice for playing with the Ultimate if no other Legendaries are available. Keep in mind that you won't be able to get the ATK bonus due to the short duration of the bonus. |
 Moonweaver's Dawn Moonweaver's Dawn⭐ ⭐ ⭐ ⭐ Base ATK: 44 - 565 ATK: 6% -27,6% |
Ultimate damage is increased by 20/25/30/35/40%. If the equipped character's maximum energy does not exceed 60/40 units, then the damage of his elemental burst is additionally increased by 16/28%, 20/35%, 24/42%, 28/49%, 32/56% | At fourth awakening and above, it can compete with 5⭐ variants. Since the warrior lacks "classic" energy, she easily activates the last bonus. Like the sword above, it's only suitable for rotation through Elemental Burst. |
 Uraku Misugiri Uraku Misugiri⭐⭐⭐⭐⭐ Base ATK: 44-542 CRIT DMG: 19.2%-88.2% |
Normal attack damage increases by 16%-32%, E-attack damage by 24%-48%. After a nearby ally deals Geo damage, these effects are further increased by 100% for 15 sec. The wearer's defense is increased by 20%-40%. | Enhances normal attacks, improves survivability due to defense. Other passive effects will not work, as there are usually no Geo heroes in Skirk teams. |
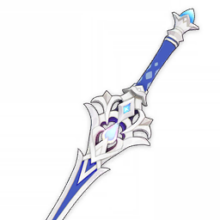 Finale of the Deep Finale of the Deep⭐⭐⭐⭐ Base ATK: 44-565 ATK: 6%-27.6% |
Activating an E-attack once every 10 sec. increases attack power by 12%-24% for 15 sec., and also gives Bond of Life equal to 25% of max HP. After Bond of Life is removed, attack power increases by additional 2.4%-4.8% of the removed debuff value (max. 150-300) for 15 sec. | Best epic weapon for this character. It is a crafted sword, so it will give a large amount of stats when fully awakened. However, it forces you to take a healer to the team to remove Bond of Life. |
 Calamity of Eshu Calamity of Eshu ⭐️⭐️⭐️⭐️ Base ATK: 44-565 ATK: 6-27,6% |
Increases normal and charged attack damage by 20-40%, as well as a critical hit chance with normal and charged attacks by 8-16%, if the character is protected by a shield. | The sword was available during the event of patch 5.2. Increases main stats, as well as the damage of normal and Charged attacks. If there is a shielder in the team - for example, Diona, Layla or Dahlia - also improves critical chance for these attacks. |
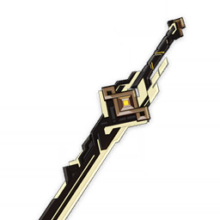 Summit Shaper Summit Shaper⭐⭐⭐⭐⭐ Base ATK: 46-608 ATK: 10.8%-49.6% |
Increases shield durability by 20%-40%. On hit, increases attack power by 4%-8% for 8 sec. The effect stacks up to 5 times and occurs once every 0.3 sec. Under the protection of a shield, the attack power bonus of this effect increases by 100%. | The weapon gives a lot of ATK, but you will have to get crits by artifacts only. It works fully with shielders only, which limits team setups. |
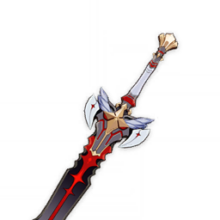 The Black Sword The Black Sword⭐⭐⭐⭐ Base ATK: 42-510 CRIT Rate: 6%-27.6% |
Increases normal and charged attack damage by 20%-40%. Critical hits with these types of attacks once every 5 sec. restore health equal to 60%-100% of ATK. | Sword with crit chance and increased normal attack damage, as well as additional healing. Has good stats only on full awakening, which is expensive, since the weapon is obtained with the Battle Pass. |
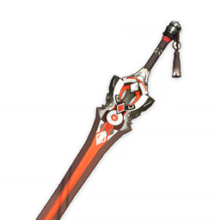 Blackcliff Longsword Blackcliff Longsword⭐⭐⭐⭐ Base ATK: 44-565 CRIT DMG: 8%-36.8% |
Defeated enemies increase the wielder's attack power by 12%-24% for 30 sec. The effect stacks up to 3 times. | Decent gear to equip if you have it. Gives a bit of CRIT Rate. The ATK buff only trigggers after defeating enemies, so it doesn't work well on bosses. |

Alternative legendary options that can be used due to their high base and K/S or K/U substats. These options are between Uraku Misugiri and Grand Finale of the Depths in power. Choose them if you don't have Moonspinner's Dawn at T4-T5 or other 5-degree gear.



To equip other heroes, use weapons tier list.
Top Artifacts
Artifacts for Skirk should increase her damage of any type - Cryo damage or normal hits. As an option, you can consider 2+2 combos or ATK sets.
| Name | Description | Recommendation |
| 2-Piece Bonus: Grants 15% bonus Cryo damage. 4-Piece Bonus: When the equipping character's energy is 0, the damage of normal attack and elemental burst is increased by 60%. After the wielder deals damage with a normal attack, this effect is no longer applied to elemental burst for 6 seconds. After the equipping character deals damage with an ultimate, this effect is no longer applied to normal attack for 6 seconds. |
Signature set of artifacts for the heroine. Increases Cryo damage, enhances normal attacks and ult. The effect will always work, since she has no energy. | |
| 2-Piece Bonus: Grants 15% bonus Cryo damage. 4-Piece Bonus: Attacking enemies with Cryo increases critical chance by 20%. If enemies have the Frozen status, their critical chance increases by another 20%. |
Universal set of artifacts for Cryo damage dealers. Works best in teams that are not mono, but the ones that play off Freeze, since in this case it increases CRIT Rate by 40%. | |
| 2-Piece Bonus: Increases damage of normal and charged attacks by 15%. 4-Piece Bonus: Increases critical rate by 12% for 5 seconds when current HP level increases or decreases. The effect can stack up to 3 times. |
Strong set for normal attack users, increases critical chance. The set will work when playing with Furina, who changes the HP level. | |
| 2-Piece Bonus: Increases ATK by 18%. 4-Piece Bonus: Normal attacks have a 36% chance to summon Valley Rite, increasing their damage by 70%. Hitting with the next normal attack removes the effect after 0.5 sec. If the buff fails to trigger, the chance to summon Valley Rite increases by 20% with the next hit. The chance to activate the bonus is checked once every 1 sec. |
ATK set, increases damage for normal attacks. Since the heroine constantly uses this fighting style in battle, she will be able to constantly activate Valley Rite. | |
| 2-Piece Bonus: Increases ATK by 18%. 4-Piece Bonus: Increases normal attack damage by 35% when using a one-handed, two-handed, or polearm weapon. |
Best set for beginners, as well as for temporary builds if there are good pieces of the set on the account. Provides the necessary main stat and an increase in normal attack damage, since the heroine uses a one-handed sword. | |
| 2-Piece Bonus: Grants 15% bonus Cryo damage. 2-Piece Bonus: Increases ATK by 18%. |
2+2 combo of sets for Cryo and ATK. Fine if you can't get any of the sets in full yet. | |
| 2-Piece Bonus: Increases ATK by 18%. 2-Piece Bonus: Increases ATK by 18%. |
Another XNUMX+XNUMX option with ATK parts. Has many variants, increases the chance of getting good stats. Best used with Furina and Yelan. |


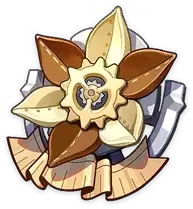


Teams

Teams for Skirk should mainly consist of Cryo and Hydro characters, so that passives that increase damage work. If desired, the heroine can go to teams playing off Melt, which partially compensates for non-working passive skills, but in most cases this is irrational, although possible.
It is also worth mentioning that the Sinner's Puple most often uses normal attacks in combat, so despite the gameplay with the stance, sub-DPS that use normal skills also work with her.
Recommended characters
Since the heroine occupies the position of the main damage dealer, to fully use her potential, she requires strong sub-DPS and supports for her team. It is better to choose allies whose abilities are active for a long time, so you don't have to switch while the stance is active.
Priority Cryo and Hydro allies
Companions whose gameplay is fully compatible with the swordswoman's mechanics:
| Character | Element | Weapon | By recommendation |
|---|---|---|---|
 Escoffier |  Cryo |  Polearm | The cook from Fontaine can rightfully be called Skirk's signature support, since she single-handedly occupies the roles of sub-DPS, support and healer. In addition, she also plays in teams with two resonances and reduces the resistance of enemies to these elements. |
 Furina |  Hydro |  Sword | Versatile sub-DPS that hits enemies from off-filed and consumes HP of the squad, which allows you to wear a set of artifacts Marechaussee Hunter. Depending on Fanfare stacks, she increases the damage of the team, acting as a strong buffer, but requires the presence of a healer in the team, so it also combines well with the aforementioned Escoffier. |
 Citlali | Cryo |  Catalyst | Since the Sinner's Pupil plays in melee, a strong shield with off-field damage can be useful to her in the absence of a healer. In addition, Citlali works well in Frozen teams, reducing Hydro resistance of enemies for sub-DPS. |
 Yelan | Hydro |  Bow | Strong secondary Hydro damage dealer that helps activate the passive due to her element and plays off normal attacks. Additionally increases the active character's damage during her ult. |
 Dahlia | Hydro | Sword | This young man provides a shield, which, although not very strong, is constantly renewed during the battle, being replaced by a new one. However, his main ability is to buff normal attack speed. This will increase the swordswoman's overall damage, allowing her to perform more actions in the same amount of time. |
Secondary damage dealer
Besides the best ones, there are several other heroes that can join the team as an epic alternative.
Supports
Support characters that boost damage or survivability of the team:


Samples of powerful teams
There are several viable squad options:
- through pure Freeze (priority), where the girl can be both a main damage dealer through a stand-up attack and a second damage dealer from an elemental explosion;
- through Freeze or mono-Cryo with Shen He and a strong buffer of another element.
Ideally, the heroine's party should consist exclusively of Hydro and Cryo characters, otherwise her passives won't work. Alternatively, she can assemble experimental teams using Melt or add heroes of other elements to Freeze teams, but in this case, her allies will need to compensate for the loss of their buffs with their own buffs.
Groups from pure Freeze for main-DD from normal attacks
Hydro and Cryo reaction teams, where Skirk plays the hyper-carry role and hits more often with a single hit than with an elemental burst.
| Character 1 | Character 2 | Character 3 | Character 4 | Features |
|---|---|---|---|---|
 Skirk Skirk | Furina | Escoffier | Yelan | The strongest group with two Resonances. Furina and Ye Lan have HP scales, so they mutually buff each other and provide a universal damage affix, while Escoffier heals, passively attacks, and creates comfortable conditions for the swordswoman. If you want to maximize Skirk's damage output, you can equip the Archon with a set. Tenacity of the Millelith, and on the archer Noblesse Oblige. |
| Skirk | FurinaYelan | Escoffier |  Mualani Mualani | An unusual but extremely powerful combo in which Mualani acts as a buffer for several characters at once: she adds up to Hydro Resonance for Furina or Yelan, providing a boost to both elements due to the set Scroll of the Hero of Cinder City and increases the ATK of the Abyssal Swordswoman thanks to Thrilling Tales of Dragon SlayersThis equipment is critically important, without it you will not be able to achieve such an effective result. |
| Skirk | Furina | Escoffier |  Shenhe Shenhe | Top 3 team playing off Frozen, where all allies buff the main damage dealer. Escoffier shows good personal damage and healing for Furina's Fanfares. Shenhe buffs Cryo damage of all allies. |
| Skirk | Shenhe | Escoffier | Yelan Xingqiu Xingqiu | The second option of a group with Shenhe through Frozen with Hydro status from Yelan or Xingqiu. While Escoffier lowers enemy resistances for the entire team, the Adept girl increases ice damage for all three characters of this element, including herself. Here she can be built into a hybrid. |
| Skirk | Shenhe |  KokomiDahlia KokomiDahlia | Escoffier | A dual support group where Escoffier can focus on personal damage rather than healing. Kokomi can be given an extra boost with Thrilling Tales of Dragon Slayers, but she should enter the battlefield before the main damage dealer. If desired, she can be replaced with Dahlia to gain a shield and increase attack speed. |
| Skirk | Furina | Citlali | Yelan | The most powerful combination of the non-Escoffier groups. Furina and Ye Lan are especially important here, as good results are achieved by cutting down Sitlali's Hydro resistance, and water-based allies must be strong. |
| Skirk | Furina Mona Mona Candace Candace | Citlali | YelanXingqiu | A team without Escoffier, in which the shielder Citlali can be put in the buffer role to reduce the resistances for the two Hydro sub-DPS and the survivability of the group. |
| Skirk | Shenhe | Kokomi SigewinneDahlia SigewinneDahlia | FurinaYelanXingqiu | A team with an ATK buff from Kokomi or a boost from Sigewinne or Dahlia. Note that when using the Melusine, it's best to pick a sub-DPS that will apply more Hydro status, as she alone won't be able to provide the team with reactions. |
| Skirk |  Rosaria Rosaria Kaeya Kaeya | Citlali Diona Diona Layla Layla | CandaceXingqiu | A more budget option. Rosaria or Kaeya will give stable off-field damage with her ult. Diona, Layla or Citlali will become strong shielders, allowing you to reliably hit enemies in close combat, while the Grandma is the best option among them. |
Hydro main-DD teams for the secondary damage dealer role from the ult
A long press of E and reset of her ultimate allow Skirk to deal massive amounts of damage in a short time and then disappear into the pocket. This allows her to play not only as a main damage dealer but also as a secondary damage dealer in Revolver, primarily paired with Hydro Core. Escoffier is a must; without her, such combinations are very weak.
| Character 1 | Character 2 | Character 3 | Character 4 | Recommendation |
|---|---|---|---|---|
 Neuvillette Neuvillette |  Furina Furina | Skirk | Escoffier | In this composition, Nevillette, who is preferably C1, is the active hero almost all the time, and Skirk only comes out to deliver a powerful ultimate. In rare cases, such as when the referee is low on HE%, their time on the field can be evened out. |
 Tartaglia Tartaglia Ayato Ayato | FurinaYelanXingqiu | Skirk | Escoffier | Unlike the group above, this one can use Ye Lan or Xingqiu in the second slot, as both main damage dealers use normal attacks. If you take Tartaglia and use Skirk's normal attacks during the cooldown of Harbinger Stance, you'll benefit from his passive talent, Weapon Mastery. |
Cryo+Hydro teams with a buffer of another element
Among such teams you can find both a combination of ice and water elements, and pure ice, but their main difference from the previous setups is the presence of Samurai Kazuha or Blacksmith XilonenNo other supports are suitable at the moment, as they can't provide such a strong buff. Shen He is also a must for such groups.
It's best to use Kazuha in a Hydro + Cryo combo, and Shilonen in a Mono-Ice combo to avoid the risk of breaking enemy statues. The results of such units aren't much better than pure Freeze without Escoffier, and in most cases, it's better to play pure Freeze without a Chef.
| Character 1 | Character 2 | Character 3 | Character 4 | Recommendation |
|---|---|---|---|---|
| Skirk | Furina | Kokomi Sigewinne Sigewinne |  Kazuha Kazuha | A Hydro Resonance party that puts a lot of emphasis on Furina's personal damage and her Fanfare stacks. Kazuha gives out a bonus to elemental damage, which compensates for the buff lost due to the party composition, and also groups up enemies. |
| Skirk | Shenhe | KokomiDahlia | Kazuha | An alternative option, already with Frost Resonance, which is closer to the hyper-carry concept due to the buffer being Shenhe instead of sub-DPS Furina. Kokomi canget the Thrilling Tales of Dragon Slayers set, Dahlia buffs basic attacks, and you can choose any of them. |
| Skirk | Shenhe |  GanyuRosaria GanyuRosaria |  Xilonen Xilonen | Mono-Cryo group, where the loss of bonuses from passives is compensated by high buffs from Shenhe and Xilonen. Ganyu is a priority due to the 15% increase in ice damage from the ultimate, but Rosaria can be taken if CRIT Rate is needed. |
Alternative Formulations (Star Conductor and Meltdown)
If desired, the girl can play through Star reaction or Meltdown, but such squads will perform significantly worse than the previous options. Don't deliberately play with such allies: use these groups only if you have a poor hero selection on your account, want to bypass mob blocks, or have no other options.
| Character 1 | Character 2 | Character 3 | Character 4 | Features |
|---|---|---|---|---|
| Skirk |  Odette Odette |  Yae Miko Yae Miko Alyosha Alyosha Beidou Beidou |  Escoffier Escoffier | Although Skirk doesn't have abilities for Star Conductor, along with Escoffier, she's strong enough to close content and bypass new mechanic blocks with Odette. Chef from Fontaine is crucial here for cutting resistances. The third slot is more optional, and while Yae Miko is the best choice, almost any Electro hero with a stable status will do, such as Fischl. |
| Skirk |  Xiangling Xiangling Mavuika Mavuika Dehya Dehya |  Bennett Bennett Thoma Thoma |  KazuhaXilonen KazuhaXilonen | Pyro sub-DPS applies status and hits from off-field. Bennett increases ATK, and the last slot can be used for Kazuha or Xilonen to reduce resistances. |
| Skirk | XianglingMavuika | Escoffier | KazuhaXilonen | Melt team with Escoffier, who, similar to the main DPS, does not fully implement her passive, but provides healing and additional damage. Xilonen compensates for the partial loss of the chef's ability and significantly reduces resistances, as does Kazuha, who works better against a crowd of enemies. |
| Skirk | Xiangling |  Barbara Barbara | Kaeya | Free Melt team, where the Sinner's Pupil can get 2 stacks of Death's Crossing from her allies Barbara and Kaeya. Xiangling needs a lot of energy recharge to use her ultimate on cooldown. |
Stats
As she levels up, her critical damage increases, as do stats like HP, ATK, and defense. Her final K/U value at level 90, excluding artifacts and weapons, will be 88.4 %. Pump up level 95/100 with the help of Wandering fortune - a worthy investment, as the Sinner's Disciple is the one that deals the bulk of the damage in most groups with her.
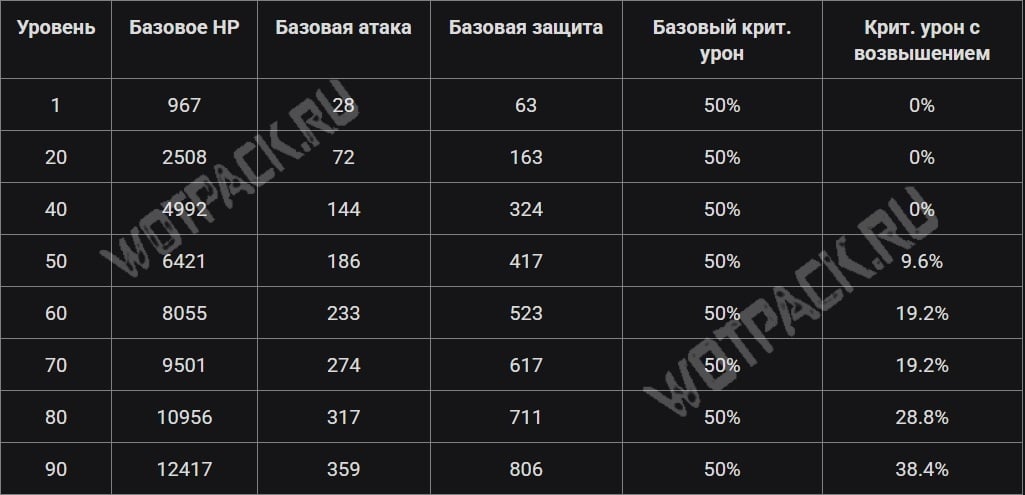
Leveling
You can get resources for leveling up your character from Fontaine и Natlan.
Ascension
Materials for character level development:
| Resource | Where to find it |
 Slivers, fragments, chunks and gemstones of Shivada Jade Slivers, fragments, chunks and gemstones of Shivada Jade |
Obtained from various sources world and weekly bosses. |
 Meshing gear ×18 Meshing gear ×18Mechanical Spur Gear ×30 Sophisticated Dynamic Gear ×36 |
Dropped upon liquidation Meks within the Hydro region. |
 A chilling look ×46 A chilling look ×46 |
Resource from the enemy Tenebrous Papilla. |
 Skysplit Gembloom × 168 Skysplit Gembloom × 168 |
A curiosity for the rise from Atocpan. |
 Hero's Wit × 421 Hero's Wit × 421 |
Quests, arteries of the earth. |
 Mora ×1 Mora ×1 |
All gaming activities. |
Talents
Materials for increasing ability levels:
| Resource | Where to find it |
 Teachings of Contention ×3 Teachings of Contention ×3Guides to Contention ×21 Philosophies of Contention ×38 |
Talent books from the Pyro Kingdom dungeon Blazing Ruins. Available on Mondays, Thursdays и Sunday. |
| Meshing gear ×6 Mechanical Spur Gear ×21 Sophisticated Dynamic Gear ×31 |
Killing mechs. |
 Ascended Sample: Knight Ascended Sample: Knight |
Boss reward in Mondstadt The Game Before the Gate. |
 Crown of Insight × 1 Crown of Insight × 1 |
Rare item from main events and offering systems. |
| Mora ×1 |
Obtained by almost all game methods. |
Skills

Skirk is a standard primary damage dealer whose main goal is to deal as much damage as possible on the battlefield. She plays off a special stance, Seven-Phase Flash, during which her attack type changes and the damage they deal increases. The main feature of the character is that she does not depend on energy, which is replaced by stacks of Serpent's Subtlety.
Basic (Active) Skills
The character is fully usable only in teams consisting of Cryo and Hydro heroes, and her skills can only receive full buffs when this condition is met. Reactions with the ice element create Void Rifts, which the heroine must absorb to make herself stronger.
Havoc: Sunder
- Source of damage: ATK.
Base ATK: Performs up to five melee attacks.
Charged Attack: consumes a certain amount of stamina and throws a crystal spear that deals damage to enemies along the way.
Plunging Attack: descends to the ground and hits an area upon landing.
Havoc: Warp
- Source of damage: ATK.
- Cooldown: 9 seconds
- Duration of Seven-Phase Flash: 12.5 seconds
- Maximum Serpent's Subtlety: 100
The skill can be used two different ways.
Tap: gains 45 Serpent's Subtlety and enters Seven-Phase Flash mode.
Hold: Gains 45 Serpent's Subtlety, moves quickly, and gains interrupt resistance. The direction of the fast movement can be controlled, reactivating the skill removes the ability to move at high speed.
Havoc: Ruin
- Source of damage: ATK.
- Cooldown: 15 seconds
Elemental Burst is activated not by energy, but by the amount of Serpent's Subtlety. If the level is 50 or higher, the heroine spends all of its points and cuts the space in front of her, dealing Cryo damage. Elemental burst damage get a bonus depending on the amount of extra Serpent's Subtlety spent, over 50. Thus, up to 12 additional points of Serpent's Subtlety are taken into account.
While the Seven-Phase Flash state is active, Elemental Burst is replaced with Havoc: Extinction.
Havoc: Extinction does not consume Serpent's Subtlety. Upon activation, grants the effect of Exhaustion that lasts until the end of Seven-Phase Flash. While Exhaustion is active, every 0.1 sec the damage of a normal attack is increased. If Void Rifts are consumed during Havoc: Extinction (requires unlocking the Reason Beyond Reason talent), the damage of this attack is further increased depending on the number of Void Rifts consumed. The effect disappears after 10 uses.
Passive Skills
Skirk's additional abilities that do not require leveling up, but are opened automatically as the character levels up:
Mutual Weapons Mentorship
If a party consists entirely of Cryo or Hydro characters, and there is at least one hero of each of these elements, the party members' Elemental Skill level increases by 1.
Reason Beyond Reason
When allies trigger Freeze, Superconductor, Star Conductor, Cryo Dispersion, Star Dispersion, or Cryo Crystal reactions, a Void Fissure is created near the enemy every 2.5 seconds. Up to 3 Fissures can exist at a time.
Void rifts are absorbed by Skirk in the following ways:
- Hitting enemies with a charged attack while in the Seven Phase Flash state.
- Activating the Elemental Burst Havoc: Extinction.
- Fast movement after long pressing Havoc: Warp.
Each Rift consumed grants 8 Serpentine Cunning.
Return to oblivion
When Hydro characters deal Hydro damage, and Cryo characters other than Skirk deal Cryo damage, Death's Crossing effect is granted for 20 seconds, stacking up to 3 times. For each level of Death's Crossing, Skirk's normal attack in Seven-Phase Flash deals 110%/120%/170% of its original damage, and her Havoc: Ruin elemental burst deals 105%/115%/160% of its original DMG.
Talent Leveling Order
Elemental Skill (E) = Elemental Burst (Q) > Normal Attacks (optional)
Since the swordswoman is the main damage dealer, it is advisable to level her main abilities up to 10. Leveling order:
- Elemental Skill - enters the Seven-Phase Flash stance. Since all the heroine's damage comes from this skill, it needs to be leveled to the maximum.
- Elemental Burst — is as useful as the elemental skill. The ult both deals its own damage and provides multipliers that increase the damage for absorbing Void Rifts, so it needs to be leveled up in along with the E-attack.
- Normal attack - do net need leveling, since all damage comes from the elemental skill.
Constellations
| Name | The effect |
| 1. Lost in the Ages | Enhances the effect of the passive "Mind Beyond Reason": after consuming Void Rifts, a crystal blade is summoned that deals Cryo damage equal to 500% of attack power to nearby enemies. Damage is considered as a charged attack. |
| 2. Falling into the abyss |
After using E, Skirk gains an additional 12 Serpentine Cunning (57 total instead of 45). Chaos Elemental Burst: Destruction gains a buff: Damage increases proportionally to the amount of Serpentine Cunning above 50 at the time of activation. Up to 12 additional Serpentine Cunning are taken into account (maximum becomes 74 instead of 62). Normal attack damage in Seven-Phase Flash mode is increased by 60%. |
| 3. Accidental sin | Increases elemental burst level by 3. Max. level: 15. |
| 4. Fragmented flow | Increases the effect of the passive Return to Oblivion: each level of Death's Crossing increases attack power by 10%/20%/50%. |
| 5. End of prayers | Increases elemental skill level by 3. Max. level: 15. |
| 6. To the source |
Each Void Rupture consumed grants 1 stack of Chaos: Sever, lasting 15 seconds and stacking up to 3 times. Chaos Cutoff:
|
Best constellations for Skirk are С1, С2 и С6:
- The first constellation Generates an additional hit after consuming Void Rifts. Since this action is mandatory in the rotation and can be repeated up to three times, a duplicate will provide a total of 1500% bonus damage from the Crystal Blade.
- The second constellation slightly enhances the swordswoman's regular ult and normal attacks during Seven Phase Flash, which is the core of her gameplay.
- The sixth constellation, like the first, is tied to consuming Void Rifts and grants additional stacks afterward. Spending each one hits an enemy, significantly increasing the heroine's overall utility and slightly increasing survivability.
How to play Skirk

The heroine's rotation requires careful analysis and understanding of mechanics, since the character is dependent on her stance and wants to constantly gain stacks for buffs. When playing her, you should first enter the Seven Phase Flash using a skill during which the heroine hits enemies mainly with normal attacks.
They appear periodically in the battle Void Rifts Reactions that need to be absorbed either with charged abilities, which will need to be integrated into the rotation, or by activating your ultimate. Depending on your group and preferred combat style, you can choose one of two rotations.
Rotation through normal attacks
Skill Order: use sub-DD and support skills > short press of elemental skill (E) > Elemental Burst (Q) > ten normal attacks and one charged attack between them.
This is a basic rotation that should be used in all groups where she works as a main damage dealer:
- Start the fight with supports and secondary damage dealers, who provide buffs and hit from off-field to activate the passive and accumulate the effect of Death's Crossing.
- After switching to Skirk, you must use an elemental skill brief by pressing and enter the Seven-phase flash mode.
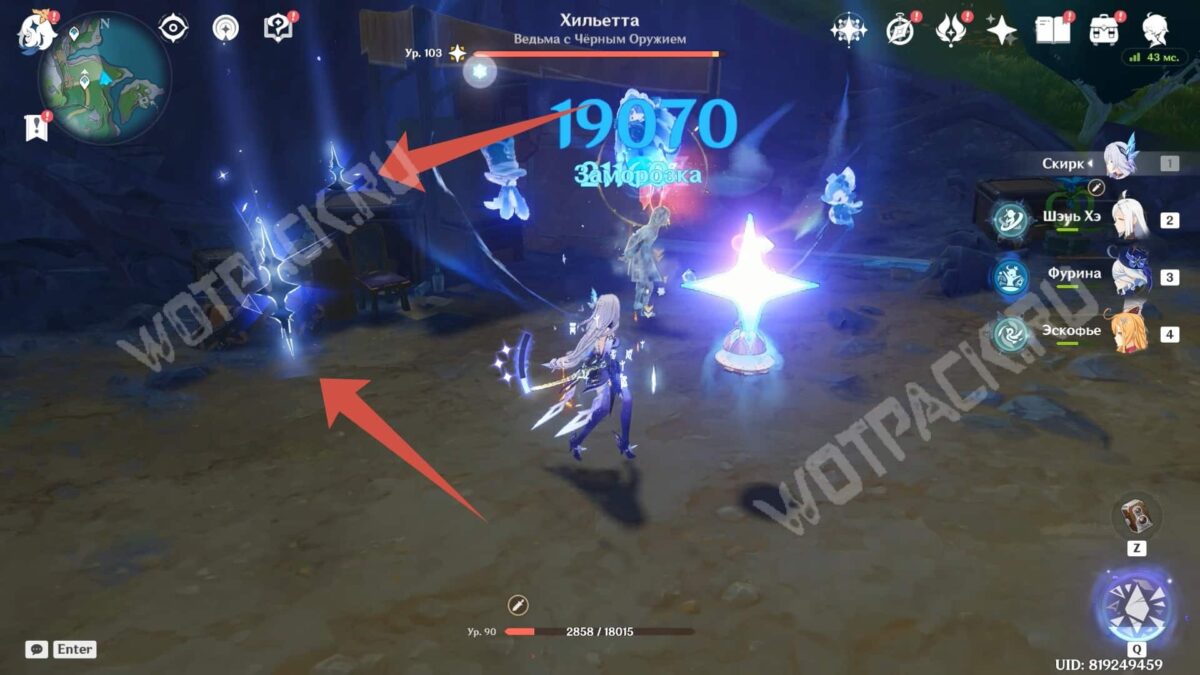
- Reset ultto absorb Void Rifts, buff normal attacks, and extend the duration of the stance. There can be one to three of them on the battlefield, and they appear as dark cracks in space.
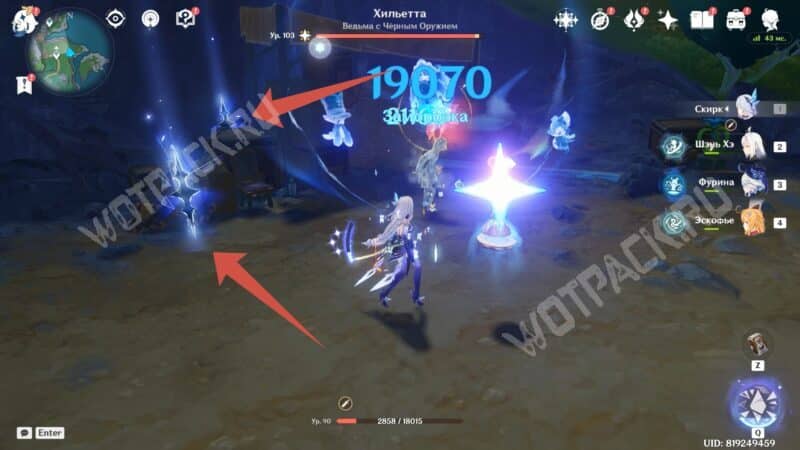
- Commit charged attack, absorbing the second or third Void Rift, depending on how many were created at the start of the fight. Three Rifts must be absorbed before dealing damage with normal attacks.
- Complete ten normal attacks, since the buff from the Chaos: Devastation ult only lasts for that number of uses. Even if the stance lasts longer, there's no point in maintaining it due to the loss of the buff, so switch to other heroes and proceed from step one.
Rotation via Ultimate
Skill Order: use sub-DD and support skills > long press elemental skill (E) > Elemental Burst (Q) > switch to other heroes.
This variant is most often used in Revolvers, where Skirk fills the secondary damage role. She doesn't take up much time on the battlefield and comes out to reset her ultimate and retreat to the pocket:
- Activate your allies' abilities. Depending on your squad, Skirk can come out either before or after your main damage dealer. Regularly use Freeze to create Void Rifts.
- Enter the battlefield as a warrior and press her E key first long by pressing.
- Then I'll reset it right awayltuIf everything was done correctly, you will see its animation.
- Switch to other squad members and use the Sinner's Disciple's abilities again either when they are off cooldown or when the ultimate is filled by itself due to Void Rifts.
Is The Character Worth Pulling?

When all conditions are met, Skirk can be considered the strongest ice damage dealer in the game, but she is also quite demanding. The girl plays exclusively with ice and water characters, because otherwise her passive skills, which significantly boost her damage, do not work. Melt teams are rather forced exceptions and are not so effective.
These disadvantages are compensated by a fairly simple build, since the swordswoman only needs ATK and crits, and there is no need for energy recharge at all due to the presence of Serpent's Subtlety. This makes it easier to choose artifacts, but at the same time makes many weapon options that have this stat among the main ones useless. Moreover, the heroine mainly uses normal attacks, which makes her friendly to all types of sub-DPS.
C1 or signature weapon
When it comes to choosing between the weapon and the first constellation, there are a few things to consider:
- C1 boosts damage after consuming Void Rifts significantly. Since this action is an integral part of the rotation, the additional damage will be activated constantly.
- Skirk's signature weapon, Azurelight, provides a lot of useful stats to balance stats such as ATK, CRIT Rate and DMG, making it slightly stronger than other legendary options.
Thus, if the heroine has some options for the equipment, for example, Haran Geppaku Futsu, Mistsplitter Reforged or Primordial Jade Cutter, then the choice should be made in favor of the constellation. Otherwise, it is better to choose the signature sword.
Is she worth pulling if there is no Escoffier?
Escoffier can rightfully be called her signature support, since she single-handedly performs many useful functions:
- Is a Cryo character for mutual activation of passive abilities that work in the team composition.
- In a team of Cryo and Hydro characters, reduces resistance to these elements by 55%. Considering that the presence of Anemo support in swordswomen's groups is not welcome, she will replace a buffer for cutting resistances.
- Provides healing, which is beneficial when using Furina, and a lot of off-field damage.
The presence of a cook significantly boosts Skirk, without her, the damage of the group drops by about 30 %. If Escoffier is not on the account, but there is Shenhe and some strong sub-DPS, then Skirk will still be able to do the content, albeit with less efficiency. However, if all the companions of the listed elements are weak, it is better to skip the swordswoman and wait for a more versatile damage dealer.
Character history and lore
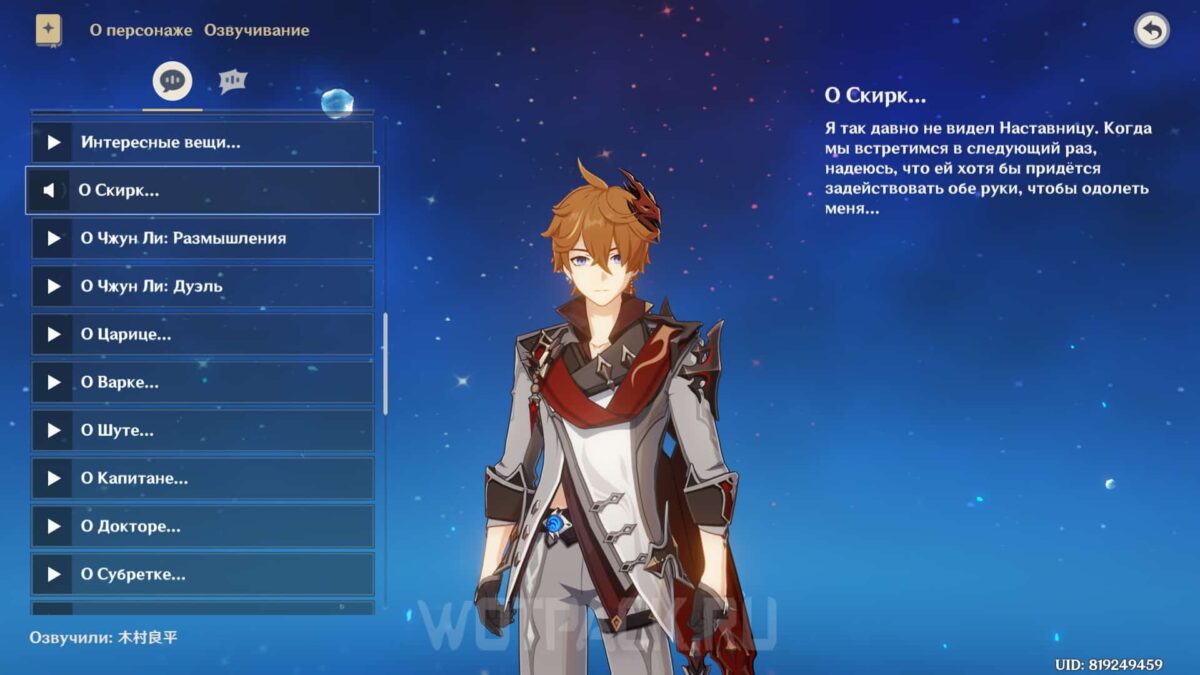
Skirk is a mysterious swordswoman and mentor of Harbinger Tartaglia, who lives in the Abyss, the darkest corner of Teyvat. From Tartaglia's stories, we can learn that at the age of 14, he fell into a crack in the ground and found himself in the Abyss, where he was found by a strong and powerful woman forged in battles. She became Ajax's master, taught him the art of combat, inciting conflicts and surviving in the Abyss, after which he returned home and met her again only in the Hydro region.








Who would be more appropriate to spin for a pack for Skirk? Vodyanitsa or Escoffier. Or both?
If she's in 7.1, I'll definitely skip her. I think it's pointless to try and get even the Natlan character now; the Queen will be much more overpowered. But over Escoffi under sandron you might think
Anyone familiar with Skirk squads? Could you please tell me who can replace Shen He, Shen He, Escoffier, and Xingqiu in the Skirk squad? Please choose from the most accessible characters.
Hello everyone, is it possible to have such a squad?
Skirk, Furina, Escoffier+ (sitlali c1 or mona c1 one of them)
It's better to use Mona. She'll have a bigger damage buff than Granny.
Is it better for her to leave the p0 ash or the p0 final depths with subsequent awakenings?
It depends on what's required and what you're willing to sacrifice to achieve it. Both swords provide the same boost, no strings attached.
And here are the conditions:
The finale is even more attack-based for Skirk's healing, meaning Skirk places a debt on himself with an E-value, and before the E-value, you need to activate the healing, otherwise one E-value will pass without buffs, and if you switch to another character, Skirk's E-value loses its meaning, as far as I remember.
Who on Team Skirk knows how to activate a healer early?
Eshu gives both Tau attack and crit chance, a Natlan sword for a shielder, for Sitlali, she is also a shielder of sorts.
Other shielders include Skirk Epic, Diona, Lyla, and Dahlia, meaning the loss of a leg from the team will have catastrophic consequences.