

В Genshin Impact The young astrologer Mona Megistus is considered a fairly versatile character, as she can serve as both a support buffer and a damage dealer with different builds. She excels against multiple enemies, as her ultimate can instantly immobilize them, but her Omen effect is useful against any opponent. Her squads can be anything, but she prefers ones that can trigger Hydro reactions, such as Freeze or Steam.
If Astrologer isn't required to deal damage, her build is fairly simple, as she only needs energy regeneration. Otherwise, if she needs to contribute in combat, Megistus will require significant investment, paying attention to stat balance. To realize Rayne's full potential, it's recommended to complete her personal quest from Witches' Lessons and create a magical resonance in the group.
| Rating | S-position in tier lists |
| Rarity | Five-star |
| Appeared in-game | September 28, 2020 (patch 1.0) |
| How to Get the Character | Standard Wish |
| Element | Hydro |
| Weapon | Catalyst |
| Gender | Female |
| Affiliation | Mondstadt |
| Constellation | Astrolabos |
| Home region | Mondstadt |
| Birthday | August 31 |
| Zodiac sign | Virgo |
| Age | 18-19 years old |
| Height | 158-163 cm |
| Special dish | Der Weisheit Letzter Schluss (Life) |
| Voice Actors |
|
How to Get the Character

She is always present among the items of the standard "Wanderlust" banner along with other legendary heroes and weapons, and appears in the Mondstadt Chronicled WishIn addition, a character can drop if they lose any event prayer.
Strengths and Weaknesses
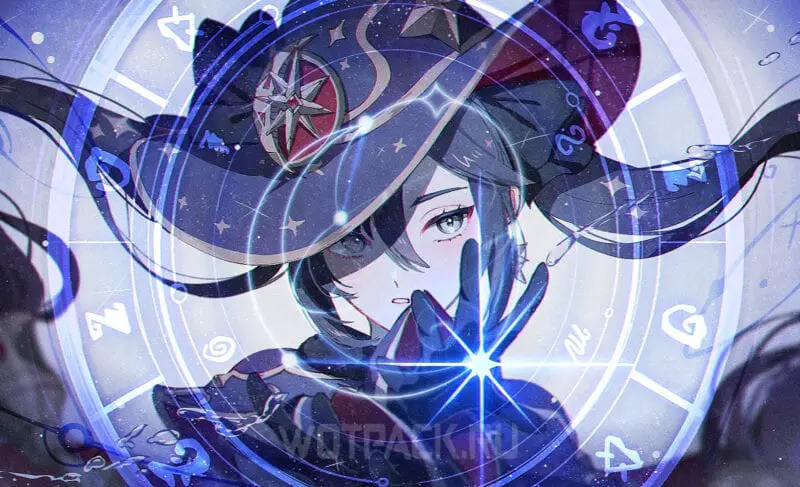
The heroine is primarily a support applicator, applying the Water status to enemies for reactions and Omen, which provides powerful buffs. With the addition of Witchcraft Resonance, her abilities have become somewhat more convenient and have made her suitable for use as a driver, especially with the right effort and good artifacts and weapons.
| Strengths | Weaknesses |
| Due to its element and flexible mechanics it will find application on almost any account, and the best teams have expanded significantly with the addition of Witchcraft heroes. Since the Illusory Phantom draws enemies toward itself, it works well against archers against charged attacks. | Expensive build for a damage dealer. For a full-fledged main-DD playstyle, a C6 is recommended. On smaller constellations, it's still strong enough to close down content, but it will require more effort. |
| Suitable for beginners Due to its simple mechanics and the ability to support builds using 3⭐ builds, such as the "Instructor" artifact set and the "Dragon Slayer Epic" weapon. | Specific gameplay, which isn't suitable for every player. To maximize damage, you need to switch between squad members, constantly trigger elemental reactions, and move around the field. |
| Can play immediately several roles, so if there is no longer a need for Hydro as a main DD, she can be converted into a support, or vice versa. | Low base defense and health require the presence of a team powerful support with healing abilities or a shield. Dodging while sprinting can seriously impact your overall rotation, as it drains stamina. |
| With buff Hexenzirkel becomes a good driver, and with the presence of constellations, can demonstrate good main-DD potential thanks to high damage multipliers of the charged strike. |
The Best Mona Builds in Genshin Impact
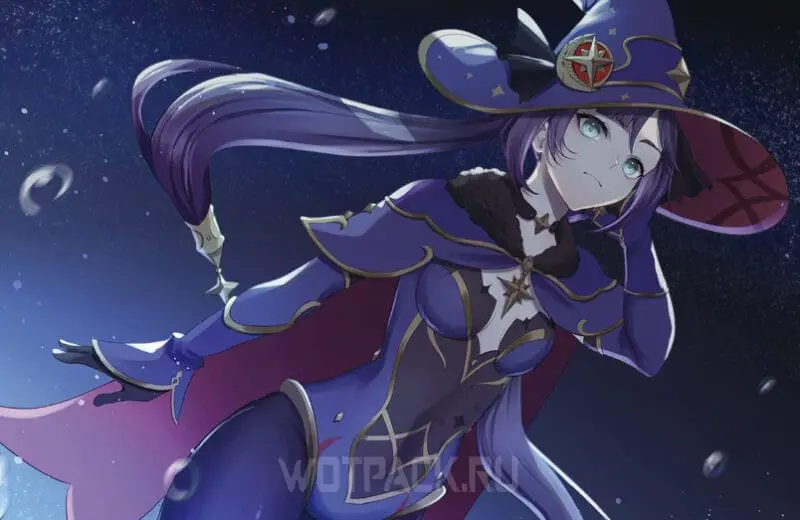
In any fight, she works as a Hydro applicator and a buffer with her ultimate, but she can also dish out damage as a sub or main damage dealer. Mona's build is chosen based on her position:
- Buffer Supports the team by using Elemental Burst on cooldown to inflict Omen status as often as possible. Among stats, energy regeneration is paramount, which is gained through artifact sets and weapons with passive effects that are beneficial to the team. Other stats in artifacts are optional.
- For building into personal damage More attention will be needed to critical stats, ATK, and Elemental Mastery. Since she increases her elemental damage bonus through energy regeneration, this stat remains valuable and still a priority.
Let's take a closer look at the distinctive features of the builds:
| Buffer | Damager |
| An inexpensive option for team support. Ideal for boosting an existing main damage dealer squad without the significant cost of upgrading. | Requires a significant investment of resources and at least the first constellation. It contributes greatly due to the damage dealt by bursting Shadow Bubbles. |
| A recommended solution for beginners, as it requires minimal investment. No stat balancing is required. | Can serve as the core of a team playing Para. A team with other Reatsky players is not recommended for this role. |
Recommended Stats
Building a damage dealer requires more than just standard stats. CRIT Rate и CRIT DMG, ATK and elemental bonus, but also high energy rechargeElemental Mastery is only required in Steam Reaction units.
In the case of a buffer, energy recovery is the only priority stat. Her elemental burst is not very expensive, but the heroine does not cope well with generating energy, so she needs batteries and elemental particles from her allies. There are no requirements for other characteristics.
Below is a table of stats that you should look for in artifacts for a damage dealer:
| Artifact | Stats |
 Main Stat: HP (constant). |
Substats:
|
 Main Stat: attack power (fixed) |
Substats:
|
 Main Stat: ATK% / VE% |
Substats:
|
 Main Stat: Hydro% |
Substats:
|
 Main Stat: Crit. chance / crit. damage |
Substats:
|
Final parameter values for a comfortable game:
- ATK: 1500 and more.
- Energy recharge: up to 140% for the main damage-dealing role. Over 180% with the Emblem of Sundered Fate set if you plan to rely on your ultimate.
- Crit Rate and Crit DMG: Maintain a 1:2 ratio. For example, with a K/U of 120%, you should pay attention to K/S and bring it up to 60%. At C4, the balance changes and you can reduce your critical chance by 15%.
- Elemental Mastery: optional feature for Steam where 120-350 units is recommended.
If you use it as a support, then just collect the maximum number of VE% without looking at other parameters.
Top weapons
Weapons are selected based on the chosen strategy—buffer or damage dealer build:
- For buffing the team An astrologer will need a book with useful passive effects, and the main characteristic of the weapon is taken into account last.
- Catalyst Maine и sub-dd should increase K/U, ATK, or have a passive that increases Normal and Charged Attacks. Elemental Mastery is only necessary in teams with the elemental reaction of Steam, and energy regeneration should be maximized through artifacts. Mona's updated build with constellations suggests placing a greater emphasis on buffing Charged Attacks than Normal or Ultimate.
For the damage dealer
The following catalysts are designed with damage dealer needs in mind, making them ideal for high personal DPS:
| Name | Description | Recommendation |
 ⭐⭐⭐⭐⭐ Main stat: 44-542 CRIT DMG: 19.2%-88.2% |
Increases critical chance by 8%-16%. When the wearer uses their E, they gain Secret of Deceit: Elemental mastery increases by 80-160 for 12 sec. When the wearer deals damage with Lunar-Bloom, they gain Moon of Truth: Crit DMG increases by 24%-48% for 4 sec. If both effects are active at the same time, they are buffed by 50%. | Although the girl won't be able to realize the second part of the bonus, the catalyst brings a lot of benefits due to its secondary stat and the first effect. |
 ⭐⭐⭐⭐ Main stat: 42-510 CRIT DMG: 12%-55.1% |
For 10 seconds after hitting with a charged attack, Elemental mastery increases by 72-144 . For 10 sec. after using an elemental skill, EM increases by another 48-96 . | The large amount of MC in the passive effect allows you to ignore this parameter when choosing artifacts, focusing on other characteristics. |
 ⭐⭐⭐⭐ Base ATK: 42–510 CRIT Rate: 6% –27,6% |
Using an elemental skill gives the wearer the Law of the Board effect for 6 seconds: their attack power increases by 20% –40%, and elemental mastery by 100–200 Units. This effect can occur once every 12 seconds and does not stack. If the wearer hits an enemy with a charged attack while this effect is active, it is extended by 6 seconds. This effect can only be extended once. | A main damage dealer option for Witchcraft teams, where Mona targets the Fire status. Increases both key stats. |
 ⭐⭐⭐⭐ Base stat:: 42-510 Critical Damage: 12%-55,1% |
When switching to the character, a random melody plays for 10 seconds. The effect works every 30 seconds:
|
An epic catalyst for the K/U, which is best suited for an ultimate in your pocket. Despite the randomness of the buffs, the weapon's average damage outperforms many alternatives. Considering that the cooldown of the heroine's ultimate is half the cooldown of the book, it's easy to adjust the catalyst's mechanics so that every other ultimate is buffed. |
 ⭐️⭐️⭐️⭐️⭐️ Base ATK: 46-608 ATK: 10,8%-49,6% |
Increases shield durability by 20%-40%. When hit, increases ATK by 4%-8% for 8 sec. The effect can stack up to 5 times and occur once every 0.3 sec. In addition, under shield protection, the ATK bonus of this effect is increased by 100%. | A strong option that's more suited for a main damage dealer than a burst damage dealer. To receive all the bonuses, you need to be on the field under a shield and attacking enemies. If Astrologer has the ability to take some of the field time away from the main damage dealer, he's a good fit for a sub-damage build. |
 Cashflow Supervision |
Increases ATK by 16-32%When the character's current HP increases or decreases, normal attacks are increased by 4 seconds. 16-32%, and charged ones - on 14-28%The effect stacks up to 3 times and occurs no more than once every 0,3 seconds. Upon reaching 3 levels on the equipped character, attack speed increases by 8%. | A powerful weapon for a primary damage dealer, but with complex mechanics. The Catalyst increases critical chance and amplifies melee attacks, all effects lasting as long as the character remains on the field and loses health. This requires exposing yourself to enemy attacks and having a healer in your party, which isn't always convenient. |
 |
Increases elemental damage bonus by 12-24%When you hit with a normal attack, there's a 50% chance to gain a blessing of the clouds, which hits nearby enemies for 15 seconds, dealing 160-320% of their ATK. This can occur once every 30 seconds. | An excellent option for ATK and elemental damage. These bonuses affect both the ultimate and the hand, increasing overall damage. The second part of the passive ability doesn't help much in combat, so it's not critical for sub-DD. |
 |
For 6 seconds after a normal or charged attack hits an enemy, the damage of the normal attack will increase by 8-16%, and the charged one - on 6-12%. The effect can stack up to 3 times and occurs once every 0,3 sec. | An excellent option for main damage dealers with energy regeneration, it's also easy to use. It passively enhances key damage dealers: Hydro bonus, Elemental Burst, normal and charged attacks. |
 ⭐⭐⭐⭐⭐ Base ATK: 44-542 CRIT DMG: 19.2%-88.2% |
Increases HP by 16 % 32 %When the current HP increases or decreases, the damage of the charged attack increases by 14 % 30 % for 4 sec. The effect stacks up to 3 times and occurs every 0.3 sec. Receiving 3 stacks or refreshing 3 of them restores 8 12 Energy units. Energy can be restored in this way once every 12 seconds. | Can be used when playing with Furina. It provides a lot of K/U, but the passive doesn't always work. If the conditions are met, it can be useful as a damage dealer, helping not only increase damage but also speed up the cooldown of her ultimate. |
 |
Increases movement speed by 10%. During combat every 4 seconds gives 8-16% Elemental bonus, the effect stacks up to 4 times and ends when the character dies or leaves the battlefield. | A legendary catalyst for critical chance, suitable exclusively for the main damage dealer. The weapon's effect requires you to be on the field most of the time and not leave it throughout the entire rotation. It is also recommended to select heroes with long-term skills for your team. |
 |
Hits with normal attacks are made by charged ones 16%-32% stronger for 6 seconds, and charged ones, in turn, increase ATK by 8%-16% for 6 seconds. | A main damage dealer option for ATK and increased right-click damage. Unlike Song of Vast Azure, it primarily buffs normal and charged attacks without contributing to energy regeneration. |
 |
Hitting with a normal attack increases the damage of elemental skills and elemental burst by 20-40% for 6 sec. Conversely, hits with elemental skills and elemental burst increase normal hits by 20-40% for 6 sec. | A weapon from the Battle Pass It works for both the primary and secondary damage dealers. However, it doesn't demonstrate impressive damage output, so it's not recommended to purchase this catalyst specifically. |
 |
Activating an elemental skill increases the damage bonus of all elements by 8-16% for 15 sec. andonce every 10 sec. applies Bond of life equal to 24% of max. HP. When the Bond of life effect is removed, bonus damage with all elements for 15 sec. increases by 2-4% for every 1000 Bond of Life HP. Damage bonus with all elements cannot exceed 12-24%. | A free crafting book from Fontaine. A good option for both main and sub-dps. Adds ATK percentage and increases elemental damage. Can work well with Hydro Resonance. |
 |
Using an elemental skill increases energy recovery by 24-48% for 10 sec. | Event weapons, good equipment for any play style. In rotation, it is recommended to use the elemental skill strictly before the ultimate. |
 Blackcliff Agate (F2P)
⭐⭐⭐⭐ Base ATK: 42-510 CRIT DMG: 12%-55,1% |
Defeated enemies increase their ATK by 12-24%. Lasts 30 seconds. The effect can stack up to 3 times. The duration of additional effects does not depend on each other. | Defeated enemies increase their ATK by 12-24%. Lasts 30 seconds. The effect can stack up to 3 times. The duration of additional effects does not depend on each other. |
 |
Within 10 sec. after triggering an elemental reaction grants 8-16% elemental damage bonus. Can be folded up to 2 times. | Crafted weapons from Liyue, suitable for newcomers to Vaporize teams. At later stages of the game it shows itself to be worse than equipment for attack power, and must be replaced. |
Equipment that is effective for other characters has been dismantled in weapon tier list.
For the buffer
Below are catalysts that have buffs for the squad:
| Name | Description | Recommendation |
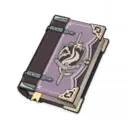 Thrilling Tales of Dragon Slayers |
When switching a character, increases the ATK of the character entering the battlefield by 24-48% for 10 sec. Can occur once every 20 seconds. | A relevant option that allows for a noticeable, albeit short-term, increase in main damage with ATK scales. |
 Favonius Codex |
Critical attacks have a 60-100% chance to create elemental particles that restore 6 Energy. Occurs once per 12-6 sec. | Simultaneously increases Hydro's bonus through energy regeneration and generates particles for the squad's ultimates. |
 Hakushin Ring (F2P) |
When a character equipped with this weapon triggers a reaction associated with the Electro element, all nearby party members whose element matches that reaction receive 10-20% bonus of your element for 6 sec. Elemental damage bonuses gained in this way do not stack. | The best catalyst for supports in teams that rely on reaction, Charged. Astrologer can easily trigger a reaction from the pocket to give Electro damage dealers a boost to their elemental damage. |
 Wandering Evenstar |
Every 10 seconds the following effect is triggered: The ATK of the character equipped with this weapon is increased by 24-48% from MS for 12 seconds. Nearby squad members gain 30% of this effect. If other squad members also have this weapon equipped, the effect stacks. This effect occurs even if the equipped character is not on the battlefield. | A situational weapon for a squad that relies on Steam reflexes. Artifacts should have a high elemental mastery. |
Choosing Artifacts
Artifacts for Mona, like weapons, are chosen based on her role. While a buffer sacrifices some of her damage output for the benefit of the group, a damage dealer focuses on increasing her personal potential.
For the damage dealer
A damage dealer's kit should take into account how much time they spend on the field and how they deal damage. Playstyles can be divided into:
- Secondary damage dealer Through the Ultimate. Sets that boost Elemental Burst or their combinations with sets that provide elemental bonuses, energy recovery, and ATK are suitable.
- Main DPS, relying on punches. Most often, full sets are built for the charge attack bonus or water damage.
The following sets and their combinations are suitable for this build:
| Name | The effect | Recommendation |
|
2-Piece Bonus: Increases attack power by 18% 4 parts: For 6 seconds, hitting an enemy with a normal attack, charged attack, elemental skill, or elemental burst creates the Blessing of Pastoral Winds effect, increasing attack power by 25%. If the equipped character has already completed the Witch's Lessons, Blessing of Pastoral Winds is upgraded to Determination of Pastoral Winds: the critical hit chance of the equipped character who has completed the trial is further increased by 20%. This effect occurs even if the equipped character is not on the battlefield. |
Suitable for the main damage role, although the damage output isn't much different from the options below. If you're playing with Pyro as a sub-damage dealer, be sure to get a watch on your MC. | |
 |
2-Piece Bonus: Increases Elemental Mastery by 80. 4-Piece Bonus: Increases the damage of a charged attack by 35% if the character uses a catalyst or ranged weapons. |
A virtually free set for dealing damage with charged attacks in Duo. Farmed passively during character ascension, as it drops from bosses. |
 |
2-Piece Bonus: Gives 15% bonus Hydro damage. 4-Piece Bonus: Increases normal and charged attack damage by 30% for 15 seconds. after using an elemental skill. |
A set for the primary damage dealer. It works after using an elemental skill, buffing your punches. It works best with a catalyst with similar mechanics, such as Ballad of the Boundless Blue or Flowing Purity. |
 Nymph's Dream |
2-Piece Bonus: Gives 15% bonus Hydro damage. 4-Piece Bonus: Hit the enemy with a normal attack, charged attack, Plunging attack, elemental skill, and elemental burst for 8 sec. create 1 level of Mirrored Nymph. When 1/2/3 or more levels of Mirrored Nymph are active, attack power increases by 7%/16%/25% and Hydro damage bonus by 4%/9%/15%. The levels of Mirrored Nymph created by normal attacks, charged attacks, Plunging attacks, elemental skills, and elemental bursts exist independently of each other. |
A powerful set that's perfect for main damage dealers. This set focuses on punches, so ultimate damage is significantly lower. |
 |
2-Piece Bonus: Increases Energy Recharge rate by 20%. 4-Piece Bonus: Increases elemental burst damage by an amount equal to 25% of your Energy Regeneration value. The effect can be increased to a maximum of 75%. |
The most powerful set for elemental burst damage. Increases the damage of the ultimate in proportion to the energy recovery value and is ideally combined with the heroine’s passive Waterborne Destiny, which also increases the Hydro damage bonus. Has high requirements for energy recovery (>180%), so a good set is expensive and takes a lot of time to farm. |
|
|
2-Piece Bonus: 15% bonus to Hydro damage. 2-Piece Bonus: Increases elemental burst damage by 20%. |
A two-part combo for a sub-DD ultimate that's noticeably inferior to a full Emblem. |
|
|
2 parts: Bonus Hydro Damage 15% 2 parts: Bonus Hydro Damage 15% |
Can be used as an intermediate main-DD build while the desired set is being assembled. |

For the buffer
Artifacts for the support position are much easier to choose, since the game doesn't have such a wide range of support kits:
| Name | The effect | Recommendation |
| 2-Piece Bonus: Increases energy recovery by 20%. 4-Piece Bonus: If the wearer has completed Witchcraft Lessons, after using an elemental skill, they gain the Light's Guidance effect, which increases elemental damage of allies by 20% for 20 seconds, based on the wearer's element. Set bonuses do not stack. When the Witchcraft: Arcane Rite resonance effect is active in the party, the effect upgrades to Mortal Hymn. With this effect, all nearby characters receive a 40% damage bonus, based on the element of the wearer and the active hero. Damage bonuses from the same element do not stack. |
A powerful set for Sabbat squads that don't rely on Lunar Reactions. Without Resonance, the girl will only buff Hydro companions. To activate the full bonus, complete the heroine's quest in Witches' Lessons. | |
 |
2-Piece Bonus: Increases elemental burst damage by 20%. 4-Piece Bonus: Activating an elemental burst increases the attack power of all party members by 20% for 12 seconds. |
Four pieces of the set increase the entire squad's ATK after using Elemental Burst. Given the Ultimate's low cooldown, the window without the bonus is 3 seconds. The only caveat is that the Astrologer must be the only one equipped, as the passive effect does not stack. |
 |
2-Piece Bonus: Increases HP by 20%. 4-Piece Bonus: When an elemental skill hits enemies, the attack of all nearby characters in the squad is increased by 20%, and their shield strength is increased by 30%. The effect lasts 3 seconds. and can occur 1 time every 0,5 seconds. This effect can be activated even if the character equipped with this set of artifacts is not on the battlefield. |
An optional support kit that allows you to buff ATK teams from the pocket. |
 |
2-Piece Bonus: Increases Elemental Mastery by 80. 4-Piece Bonus: Triggering an elemental reaction increases elemental mastery of all party members by 120 for 8 sec. |
A good option for early ranks and decks that rely on elemental reactions. Ideal for groups with Mualani. |

Teams
Astrologer is versatile and self-sufficient in terms of gameplay, making her suitable for many teams. Teams for Mona typically feature heroes with high area-of-effect damage, Hydro-based reactions, or ATK buffers to maximize damage output.
Recommended characters
The game features a variety of characters that Astrologer works well with. For example, Phantom draws enemy attention, which is helpful for Archers or Catalysts. Her Elemental Status is useful in a team that relies on reactions. Her Elemental Burst damage can rival top-tier DPS, and Omen's AoE buff is great for dealing with crowds of enemies.
Heroes of Witchcraft
Companions that are suitable for building teams with active Sabbat resonance:


Main DPS
Characters that can take the role of the main damage dealer in teams.
| Character | Element | Weapon | Recommendation |
|---|---|---|---|
 Ayaka Ayaka |  Cryo Cryo |  Sword Sword | Throughout the battle, she keeps enemies frozen with her elemental ability and infusion. With the "Blizzard" set, she also gains a K/S bonus and consistently hits enemies hard, draining a lot of their HP. |
 Ganyu Ganyu | Cryo |  Bow Bow | Main damage dealer that deals high area damage through charged attacks. The Phantom holds the attention of enemies and imposes Hydro status, and the mobility of the astrologer allows you to always be at a decent distance from opponents. |
 Wriothesley Wriothesley | Cryo |  Catalyst Catalyst | A melee Cryo Catalyst, for which the girl also serves as the applicator. She possesses a powerful superpower, easily boosted to high levels under Omen's buff. |
 Wanderer Wanderer |  Anemo Anemo | Catalyst | A good off-hand damage dealer. He gains bonus energy for his elemental skill when in contact with Hydro. The heroes' ultimates have matching cooldowns, and the Wanderer's elemental blast hits the area multiple times, maximizing Omen's effects. |
 Raiden Raiden |  Electro Electro |  Polearm Polearm | Possesses strong damage-dealing potential. Requires expensive ultimates and frequent use, in exchange for restoring energy to allies. Megistus' Elemental Burst is moderately expensive but has a low cooldown, so these characters work well together. |
 Cyno Cyno | Electro | Polearm | Electro main-dd, playing from EM. Requires a sub-DD with long-term abilities for the team, since he cannot go into the pocket so as not to disrupt the state of the ultimate. |
 Alhaitham Alhaitham |  Dendro Dendro | Sword | Dendro damage dealer who, like Cyno, plays from his elemental mastery. The Mechanics allow you to permanently trigger the Bloom reaction using infusion and Mirrors. |
 Mavuika Mavuika |  Pyro Pyro |  Claymore Claymore | The heroine's Hydro status won't be enough to consistently counter Mavuiki's Steam, but she can still be considered as a buffer. |
 Hu Tao Hu Tao | Pyro | Polearm | One of the best potential teammates playing in the region. The skill converts damage into Pyro, and the ultimate deals devastating damage over a huge area. The Astrologer's abilities will greatly increase the damage dealt due to the Vaporize reaction and Omen status. |
 Yanfei Yanfei | Pyro | Catalyst | Excellent Pyro damager for single-target and area-of-effect damage. The seal mechanic allows for reduced stamina consumption while simultaneously increasing damage. At C4, it also provides the squad with a shield. |
 Klee Klee | Pyro | Catalyst | Sparkle Knight plays well with Steam's reaction, so she'll benefit from the elemental application. Phantom also has the useful ability to attract enemy attacks, grouping melee monsters for a charged attack. |
 Tartaglia Tartaglia |  Hydro Hydro | Bow | Hydro main DD with mixed fighting styles. The close-range ult will perform well under the bonuses of the Omen status. |
 Neuvillette Neuvillette | Hydro | Catalyst | Hydro deals damage through charged attacks, with damage scaling based on health. This will also close Hydro Resonance and provide a boost to healing. |
 Clorinde Clorinde | Electro |  Sword Sword | Clorinda's stance lasts a relatively short time, so Omen's short duration isn't critical to the buff's value. When playing this duo, it's best to stack the Astrologer entirely as a support, without focusing on the extra damage. |
Secondary damage dealer
Heroes that deal damage without being on the field.
| Character | Element | Weapon | Effects |
|---|---|---|---|
 Rosaria Rosaria | Cryo | Polearm | A decent Cryo battery, applicator and damage dealer who uses her ultimate. Shares a percentage of her critical chance, well suited for rotation with bursty damage dealers. |
 Charlotte Charlotte | Cryo | Catalyst | Inflicts Cryo damage over time on enemies. Restores health based on ATK with an elemental explosion. |
 Beidou Beidou | Electro |  Claymore Claymore | Electro pocket damage dealer, source of mass elemental status. Powered by normal and charged strikes, launches chain lightning that travels between enemies. Also reduces damage and can absorb some of it with a shield. |
 Fischl Fischl | Electro | Bow | Pocket-dd dealing damage to single targets. With her skills, the Princess of Condemnation summons a companion for joint attacks. At C6 she plays as a full-fledged sub-dps, performing attacks together with the active hero. Electro reactions also trigger additional damage to enemies. |
 Yae Miko Yae Miko | Electro | Catalyst | A completely self-sufficient Electro sub-dd. Creates up to three cherry blossoms on the field that continuously attack opponents. Due to the expensive elemental burst, she is in dire need of a battery. |
 Xingqiu Xingqiu | Hydro
| Sword | Universal pocket dd. Supplements the damage dealer's basic attacks with his own attacks, provides interruption resistance and reduces damage taken. Copes well with the role of a battery; on C2 also cuts off Hydro resists. |
 Furina Furina | Hydro
| Sword | Depending on the Pneuma mode, can be a healer and sub-dps. Her E also deals damage, but more actively, and does not distract enemies. |
 Yelan Yelan | Hydro | Bow
| Similar in mechanics to Xingqiu, but damage is based on maximum health, so it has an advantage in Hydro Resonance matches. Its passive skill increases the active character's damage during its ultimate. |
 Xiangling Xiangling | Pyro | Polearm
| Deals Pyro area damage. Can trigger Vaporize by herself or impose a status for the Hydro damage dealer. |
 Nahida Nahida | Dendro | Catalyst | Stable Dendro applicator. Her elemental skill lasts a long time on enemies, has a low cooldown and works at short intervals. Her Elemental Burst increases elemental mastery for the active character in the skill's area of effect. |
Supports
Characters that buff damage dealers or focus on squad survivability.
| Character | Element | Weapon | Effects |
|---|---|---|---|
 Diona Diona | Cryo | Bow | Shielder, healer, battery and elemental mastery buffer, all in one. Speeds up movement while under a shield and reduces stamina consumption. Applies Cryo effects to enemies in the area of the elemental burst, reducing their attack power. |
 Layla Layla | Cryo | Sword | Generates a strong permanent shield, the duration of the shield coincides with its cooldown. Applies Cryo with her ultimate and is a good battery. |
 Qiqi Qiqi | Cryo | Sword | A powerful pocket healer that relies on ATK. It applies a Cryo effect to nearby enemies. |
 Kazuha Kazuha | Anemo | Sword | One of the best supports in the Vaporize, Melt, Charged and Frozen packs. By using an elemental ability, Swirls statuses and increases the bonus of the elements that reacted. His ultimate absorbs one of the elements on enemies and continuously hits opponents. |
 Sucrose Sucrose | Anemo | Catalyst | An alternative to Kazuha that increases elemental mastery. Excellent for grouping enemies and consistently cutting off their resistances with the Viridescent Venerer. The heroine's ultimate is also colored in the element it comes into contact with. |
 Kuki Kuki | Electro | Sword | A HP-dependent healer. The skill continuously attacks Electro in a small radius and heals the active character, while the super ability deals damage based on the heroine's maximum health. Passive skills increase the heroine's damage and healing abilities based on her Elemental Mastery. |
 Sara Sara | Electro | Bow | A buffer based on base ATK. Using an elemental skill grants a crow feather, which can be dropped on the field with a targeted shot. The active character within the feather's explosion area increases their attack power. Grants a high damage multiplier to elemental explosions, which deal area-of-effect damage. Restores energy to allies with a passive talent. |
 Kokomi Kokomi | Hydro | Catalyst | A healer who plays off maximum health. Summons a familiar onto the field that inflicts the Wet status on enemies and heals allies in a small radius. In a pack with Hydro Resonance, takes the advantage of additional health. One of the best drivers for the sub-DD whose skills depend on attack speed and basic attacks. |
 Bennett Bennett | Pyro | Sword | Healer, basic attack buffer and Pyro battery. Universal and suitable for many teams where a buff to the attack power parameter and instant high healing are needed. At C6, the requirements for squad selection increase, since Pyro infusion can harm the gameplay features of some characters. |
 Thoma Thoma | Pyro | Polearm | A shielder whose skills deal Pyro damage from the pocket. In the role of a sub-dd, his potential is low, but the application is at a high level. |
 Zhongli Zhongli |  Geo Geo | Polearm | Excellent Geo shield and debuffer. The duration of the generated shield is much longer than the cooldown of the ability, so squad members are always safe. Cuts resistance to all elements in a small radius, and with his superpower imposes the negative Petrification status on all enemies. |
 Baizhu Baizhu | Dendro | Catalyst | Dendro healer and shielder playing off his ultimate. With his talent increases the damage of Dendro reactions, is an excellent support for teams with this element. |
 Citlali Citlali | Cryo |  Catalyst Catalyst | Suitable for a support role in teams with Pyro and Hydro heroes, but not the best option for the booster position due to the excessive Cryo status. |
 Mizuki Mizuki | Anemo |  Catalyst Catalyst | Although Megistus doesn't have much Hydro status, she can act as an ally to Mizuki as a pocket buffer. |
 Nicole Nicole | Pyro | Catalyst | An excellent support character for Witchcraft heroes. Her skill grants a shield and increases the entire team's attack power, and her ultimate creates Projections that attack the active ally's element. |
Optimal Teams
As a buffer and sub-DD, her roles differ only due to her builds, while Mona's teams for these roles are the same. For Astrologer's main DD, a team is chosen to focus on Par's reaction, as she deals significantly less damage otherwise.
Cryo
Ice Damage Units:
| Character 1 | Character 2 | Character 3 | Character 4 | Features |
|---|---|---|---|---|
 Ayaka Ayaka |  Shenhe Shenhe Rosaria Rosaria |  Mona Mona |  Kazuha Kazuha Kokomi Kokomi | Team with permanent Frozen for Ayaka. The main dd is the source of persistent Cryo status, and the sub dd triggers resonance for her, buffs her, or works as a battery. Mona, paired with a support in the last slot, applies and supports Hydro on opponents. |
 Ganyu Ganyu |  VentiKazuha VentiKazuha | Mona |  CitlaliLaylaZhongli CitlaliLaylaZhongli | Squad with Ganyu as the main DD. Like the pack above, it is designed for Frozen, where Anemo support groups enemies, the astrologer applies Hydro, and in the last slot is reserved for a shielder with interruption resistance and survivability. |
 Wriothesley Wriothesley Lohen Lohen |  Yelan Yelan Xingqiu Xingqiu | Mona | Citlali DionaLayla DionaLayla | Freeze with a Cryo damage dealer at the core of the team and two Resonances. The core of the group relies on normal attacks, which are countered by a Hydro sub-DD. Mona serves as an additional Hydro applicator and buffer with her ultimate. The Shielder covers the Resonances and keeps the main damage dealer's health at the required level. |
| Wriothesley | ShenheRosaria | Mona | Bennett | Frozen with a Cryo Catalyst at the heart of the team and two resonances. The Duke uses his normal attacks that the Hydro sub-dd works with. Mona is an additional Hydro applicator and buffer with her ultimate. The shielder triggers the resonance and maintains the health of the main damage dealer at the required level. |
 Skirk Skirk | Furina | Mona |  Escoffier Escoffier | A squad for Skirk consisting entirely of Cryo and Hydro. All sub-DDs combine buffering and status inflicting abilities, ensuring consistent damage output throughout the fight. Escoffier also provides healing and helps stack Furina's Fanfare. |
 Eula Eula Freminet Freminet |  MikaRosaria MikaRosaria Yun Jin Yun Jin | Mona | Kuki Dori Dori | Team with physical a damage dealer in the role of a hyper-carry, in whose buffs the entire team invests. Eula/Freminet deal most of the damage, Mona strengthens them with her ult and the Thrilling Tales of Dragon SlayersFor the second buffer, either Mika, Rosaria's C6, or Yun Jin are ideal. The fourth slot is occupied by an Electro Healer for the Superconductor reaction. |
Pyro
Groups playing from fire damage:
| Character 1 | Character 2 | Character 3 | Character 4 | Features |
|---|---|---|---|---|
 Mavuika Mavuika | Furina | Mona |  XilonenCitlali XilonenCitlali | With two Hydro sub-DDs, Mavuika will be able to fully utilize her charged attacks and constantly hit with the Vaporize reaction. Xilonen or Citlali will help with the ultimate set and resistance cut, which will simultaneously cover the need for survivability. Mona both gives a buff from the ultimate and covers Hydro resonance. |
 Hu Tao Hu Tao | Kazuha | Mona | Zhongli | Popular Hu Tao pack. Kazuha groups up enemies and buffs elemental damage, Mona casts Hydro for the main part of the battle, and Zhongli prevents enemies from dealing damage. The astrologer's elemental burst works in synergy with the main DPS ultimate. |
Hu Tao Yanfei Yanfei | YelanXingqiu | Mona |
| A team with a Pyro Damage Dealer, powered by Steam. Hydro Sub-Damage Dealers in the second and third slots inflict the Wet status, giving the main damage dealer the opportunity to close the reaction. One of the supports provides the team with shields and Cryo for survivability. |
| KleeYanfei | Kazuha Sucrose Sucrose | Mona |  BennettNicole BennettNicole | A squad supporting the Pyro Catalyst. Mona performs the usual functions of the Hydro Applicator, Kazuha or Sukrose group enemies and dispel status effects. Bennett or Nicole close the Pyro Resonance, generate energy for the DPS ultimate, and buff the attack damage. |
Hydro
Examples of units with a water damage dealer:
| Character 1 | Character 2 | Character 3 | Character 4 | Features |
|---|---|---|---|---|
| Neuvillette |  Ineffa Ineffa | Mona | Sucrose | The group uses Lunar Charge with Nevillet. Ineffa protects the team and provides Electro for the reaction. Mona and Sucrose additionally utilize Witchcraft Resonance. If the Astrologer has C1, the reaction will be further boosted. |
 Tartaglia Tartaglia | Kazuha | Mona | BennettNicole | A command to boost Tartaglia's damage output. Kazuha increases elemental damage upon contact with Hydro, Mona inflicts Omen on the enemy, and Bennett or Nicole buffs attack power. Childe uses all buffs for melee attacks. |
 Nilou Nilou |  Nahida Nahida Lauma Lauma | Mona |  Baizhu Baizhu Yaoyao Yaoyao | Nilu's Budding team. Mona closes Hydro Resonance and increases the damage of Dendro Core explosions. Nahida buffs the entire team's Elemental Mastery and attacks from the pocket, but she can be swapped out for Lauma for Lunar Budding if desired. The Dendro healer ensures the team's survivability. |
| Mona |  Xiangling Xiangling Durin Durin | Sucrose | NicoleBennett | A team for Mona's main damage dealer, relying on Steam. Xiangling is the source of the AoE Pyro status, Sucrose draws enemies in, spreads the status, and grants Witchcraft with Elemental Mastery. If desired, Xiangling can be replaced with Durin, who will significantly boost the team. Bennett closes the Resonance and generates energy for the sub-damage dealer's ultimate, but he can be replaced with Nicole, who will buff not only Mona but also secondary damage dealers. |
| Mona | Xiangling |  Barbara Barbara |  Kaeya Kaeya | F2P squad for beginners with a main dd astrologer. The team has pocket damage dealers with similar mechanics: ultimates damage opponents in a certain radius around the main damage dealer. Hydro Resonance allows Barbara to heal better, but she can swap with a Shielder or another available healer. |
Dendro
Groups via Dendro reactions:
| Character 1 | Character 2 | Character 3 | Character 4 | Features |
|---|---|---|---|---|
 Alhaitham Alhaitham | Mona |  Fischl Fischl Yae Miko Yae Miko | KukiDori | A team from Stimulation with Al-Haytham. Thanks to Electro Resonance, there won't be any energy issues with reactions. It's best to gather Mona in a set in such a squad. Instructorset, as ATK not particularly in demand for this damage dealer. |
 Tighnari Tighnari | Mona | Baizhu |  Raiden Raiden | An alternative Stimulation unit with long-range damage from Tignari. Raiden will provide the team with stable Electro status and energy regeneration. Bai Zhu will provide a full-fledged heal. As in the previous case, it's best to give Mona the Instructor set. |
 Nefer Nefer | Mona | Kokomi Aino Aino | Lauma | Although Mona doesn't buff Lunar Budding, she does increase Omen's overall damage, which is useful for Nefer and her squad. If you have a C1 Lauma, you can ditch Kokomi and replace it with Aino for buffs. |
| Lauma | Mona | Kuki | YelanXingqiuAino | A strong group through Vegetation with Lauma as the driver. Hydro sub-DDs will provide status effects for the buds, and Cookie, fully assembled in MC, will be able to detonate them. |
Electro
Teams with electric DD:
| Character 1 | Character 2 | Character 3 | Character 4 | Features |
|---|---|---|---|---|
| Clorinde | Fischl Beidou Beidou | Mona | BaizhuYaoyao | A team with an Electro damage dealer. Since Mona has a small amount of Hydro status, you shouldn't count on a large number of Dendro Cores from Budding or the extra damage from Vegetation. However, Omen's buff is extremely useful and will positively impact your team's damage output. |
| Cyno | Nahida | Mona | Baizhu | A group with Saino from Vegetation. Since the Mahamatra general may have trouble with VE without a second Electro, it's recommended to give him more of this stat. Nahida and Bai Zhu provide status and buffs. Mona deals Hydro, distracts enemies, and casts Omen. |
 Flins Flins | Ineffa | Mona | Sucrose | A command from Lunar Charge, which also buffs Mona if she's C1. Since Astrologer provides little status, use the absorption from Sucrose's ultimate to trigger reactions more frequently. |
Anemo
Squads through Anemo damage dealers:
| Character 1 | Character 2 | Character 3 | Character 4 | Features |
|---|---|---|---|---|
 Mizuki Mizuki | Mona | Fischl | Yae MikoIneffa | A Hydro-Electro team, where the main damage comes from Electro damage dealers. Mona doesn't offer much status, but is more useful for buffing and distracting enemies. Mizuki plays the field and inflates the elements. If you replace the priestess with a robot, you'll also be able to summon Lunar Charge. |
 Chasca Chasca | Mona | Xiangling | Citlali | A group with Chaska will coat bullets in Pyro, Hydro, and Cryo elements, triggering the corresponding reactions. Mona will provide an Omen buff, and Xiangling will deal pocket damage. Sitlali, in addition to Cryo and a shield, will react with allies and reduce their resistance to Pyro and Hydro. |
 Wanderer Wanderer | Mona |  Faruzan Faruzan | CitlaliDionaLayla | A squad using Hydro and Cryo Dispersion. Faruzan is useful for cutting resistances, providing an Anemo damage bonus, and helping replenish energy. Mona grants status and Omen increases damage. Among the shielders, you can choose the most convenient Cryo option. |
 Ifa Ifa | Mona |  Ororon Ororon | Furina | A party with Aifa uses Charged and Hydro Resonance. Furina and Mona provide Resonance and mutual buffs, and the HP drain for Fanfar is compensated by the Sauroveterinarian. Ororon carries the Scroll of the Hero of the Burned City and restores energy. |
Witchcraft: The Secret Rite
Depending on the composition, the Astrologer can either take the main damage role and actively fight on the field, or act as a support for the group, coming out of the pocket for a couple of right-click attacks to extend the duration of Omen. Since the bonus only applies to Steam, it's impossible to utilize it without interacting with Fire companions, except perhaps occasionally supplementing the group with an Electro companion.
| Character 1 | Character 2 | Character 3 | Character 4 | Description |
|---|---|---|---|---|
 Mualani Mualani | Durin |  Mona Mona | XilonenCitlali | With Hydro Resonance locked, Mualani will receive a HP boost, which scales her abilities, and numerous bonuses from Mona herself if she has C1 unlocked. Shilonen and Sitlali protect the team and wear the set. Scrolls of the Hero of the Burnt City. |
| Mona | DurinXiangling | KazuhaSucrose Prune Prune |  Bennett Bennett | Astrologer as a main damage dealer when playing pure Steam. Depending on your hero selection, Magic Resonance can be countered with Durin, Sucrose, or Prune, but the synergy with the dragon is more powerful. |
| Mona | Durin | Ineffa |  Jahoda Jahoda | Although the witch's skills only provide a boost to the Fire and Water interaction, the girl buffs Lunar Charge on the first const, allowing for a similar combo. This unit combines the effects of several elements, magical and lunar resonances, and includes healing, fanning, and resonance. Set Serenades of the Silk Moon It's better to bet on Yagoda. |
| Durin | Mona |  Furina Furina | Bennett (C6) | Durin acts as the group's driver, fighting with normal attacks in an active position under the buff of Bennett's Field and the infusion on his sword. Mona provides a reaction buff and covers Furin's vital HP resonance. Despite the lack of resistance reduction, the team's good synergy makes it comparable to lineups with "classic support" heroes. |
 Varka Varka | VentiFaruzanSucrose | YelanXingqiu | Mona | There is no healer in the team, so equip it on Mona Prototype Amber, so she can restore HP to squad members after her ultimate resets. Swapping Ye Lan or Xingqiu for Furina is not recommended, as she reduces allies' health to 50%, making it significantly more difficult to survive against her. |
| Lohen |  Mona Mona | Furina | Escoffier | A strong Freeze lineup with a vice-captain. For comfort, the Astrologer should take C1 and equip a good support set. For example, Celestial Gift or Noblesse ObligeThe young man needs strong sub-DDs, so the witch's apprentice with personal damage is better off buffing her allies. |
Extra Stats For Leveling
Depending on the level of pumping, an additional characteristic is increased - energy recharge. At the same time, her basic parameters are increased, including health, ATK и defense. Spend Wandering luck There's no point in leveling the Astrologer to 95/100, as even with the constellations, it has more powerful competitors. The exact values for each stat are shown in the table:
| Level | Base HP | Basic attack | Base DEF | Energy Recharge% |
| 1 | 810 | 22 | 51 | 0% |
| 20 | 2102 | 58 | 132 | 0% |
| 40 | 4185 | 115 | 263 | 0% |
| 50 | 5383 | 148 | 338 | 8% |
| 60 | 6752 | 186 | 424 | 16 % |
| 70 | 7964 | 220 | 500 | 16 % |
| 80 | 9184 | 253 | 576 | 24 % |
| 90 | 10409 | 287 | 653 | 32 % |
At level 90 she has 132 % energy restoration and 26,4 % own Hydro damage bonus.
Leveling
Next, let's look at what resources and materials are required to level up Megistus to the maximum level, as well as to enhance her talents.
Ascension
To level up to 90 you need to spend the following components:
| Resource | Where to find it |
 |
Drops after killing world and weekly bosses |
 Shimmering Nectar ×30 Elemental Nectar ×36 |
Resource obtained from Whopperflowers. |
 |
Component falling out of The Oceanid. |
 |
A Monstadt curiosity that can be found in the region's settlements. |
 Hero's Wit × 421 |
Can be obtained for completing quests, events, clearing the world and the earth's arteries. |
 Mora ×1 653 000
|
Any gaming activities. |
Talents
To level up your talents, in addition to the Jumping Nectar, you will also need:
| Resource | Where to find it |
 Guides to Resistance ×21 Philosophies of Resistance ×38 |
Talent Books, which can be farmed in the Monstadt dungeon Forsaken Rift on Tuesday, Friday и Sunday. |
Shimmering Nectar ×21 Elemental Nectar ×31 |
Dropped by Whopperflowers. |
 |
Advanced talent leveling material dropped from Andrius. |
 Crown of Insight × 1 |
A rare component required to upgrade a talent to its maximum level of 10. |
|
Mora ×1 653 000
|
For various events and tasks, exploration of the world and arteries. |
You can calculate the exact amount of components using the official calculator.
Skills
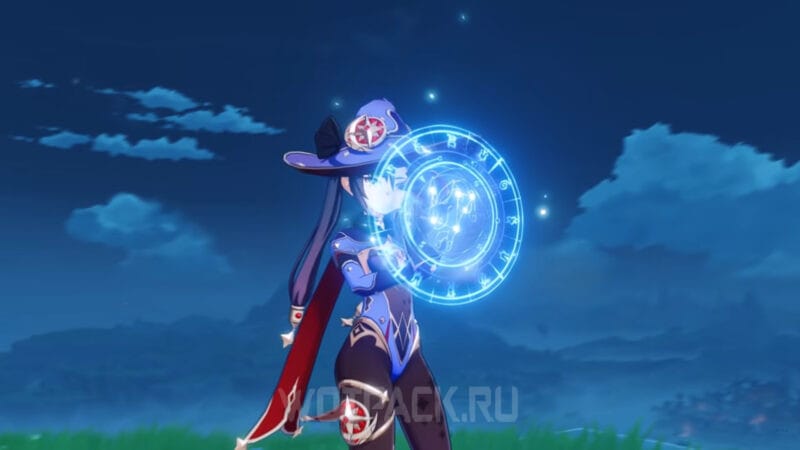
Basic attacks and abilities deal Hydro damage to both single targets and area-of-effect damage. Her elemental skill summons a phantom that distracts enemies and attacks in a small radius. An elemental explosion traps monsters and inflicts a negative status effect that increases allies' damage to the target.
Basic (Active) Skills
We will indicate the exact duration of each ability, cooldown time and effects.
Circles on the water
- Damage source: ATK.
Normal attack: Attacks with bubbles that hit Hydro up to four times.
Charged Attack: A quick spell that deals Hydro area damage and drains stamina.
Plunging Attack: It flies rapidly toward the ground, accumulating water energy. Upon landing, it deals Hydro damage in an area.
reflection of doom
- Damage source: ATK.
- Recharge: 12 seconds
Summons a phantom that draws enemy attacks to itself and deals Hydro damage in a small radius. The phantom explodes before disappearing. Long-pressing the phantom allows you to jump back after creation.
Star Phantasm
- Damage source: ATK.
- Bubble duration: 8 seconds
- Omen Duration: 4 seconds
- Recharge: 15 seconds
- Enegry consumption: 60
Encases enemies in Shadow Bubbles and inflicts the Omen effect. All enemies are inflicted with the Wet status, and weak monsters trapped within the bubbles are unable to move or attack.
After the duration expires or upon hitting enemies, the Shadow Bubbles burst. The damage dealt by Hydro is a multiplier from the bubble explosion and the bonus damage taken by the enemy from Omen.
illusory flow
Replaces the standard way of fast movement. In the open world, it allows you to move on the surface of the water, and during battle, apply the Wet status to enemies and summon phantoms.
Passive Skills
Hidden abilities, one of which is related to magical resonance, are aimed at improving its combat potential.
"Come 'n' Get Me, Hag!"
If after 2 sec. After activating the Illusory Torrent skill, there are enemies around Mona, she creates one phantom. A phantom created in this way lasts for 2 seconds, the damage from its explosion is equal to 50% of Mirror Reflection of Doom.
Waterborne Destiny
Increases Mona's Hydro damage bonus by 20% of her energy recovery.
Witches' Eve Ritual: The Birth of the Constellations
After completing Witch Lessons: A Test of InsightMona will become a Witch character. If there are at least two such characters in the party, the effect of Witchcraft: Secret Rite is activated, which strengthens Witch characters.
Witchcraft: The Secret Rite – Mona's normal or charged attack, when hitting enemies, grants her one stack of Glimmer of the Water Luminaries. This effect lasts for 8 seconds, stacks up to 3 times, and can occur once every 0,1 seconds. When other characters in the party nearby activate the Steam reaction on an enemy, all stacks of Glimmer of the Water Luminaries are applied, increasing the damage of that Steam reaction by 5% for each stack.
Additionally, whenever her normal or charged attack hits enemies, the Omen status on them is extended by 2 seconds. This effect can occur once every 0,5 seconds, for a maximum of 8 seconds.
Principium of Astrology
When crafting Ascension materials for weapons, has a 25% chance to recover some of the used materials.
Talent Leveling Order
Elemental Burst (Q) > Elemental Skill (E) > Normal Attack.
The leveling priority depends on the astrologer's role in the team:
- For a buffer Ultimate is the most valuable, as it buffs the Astrologer's Omen for his main damage dealer. E-class can be omitted entirely if the heroine plays in Cryo squads and isn't focused on damage.
- Megistus as main damage dealer и sub-dd It relies on all three talents: superpower, elemental skill, and normal attacks, so resources are spent evenly on skills.
Constellations
| Name | Effects |
| 1. The Flood Prophecy | When a character from Mona's team hits an enemy with the Omen status, hydro reactions get the following buffs for 8 sec.:
|
| Witchcraft: the effect of enhancing reactions remains. Additionally, when reactions are triggered by characters not on the field, the damage buff of the listed Hydro reactions increases to 160% of their original value. |
|
| 2. Lunar chain | Normal attack hits have a 20% chance to automatically trigger a charged attack. Can occur once every 5 seconds. |
| Witchcraft: Hits with a normal attack have a 20% chance to automatically activate a charged attack. Hitting with a subsequent normal attack within 5 seconds of using Elemental Burst automatically activates a charged attack. The effect can occur every 5 sec. When Astrologer uses Hold, all allies gain 80 Elemental Mastery for 12 seconds. |
|
| 3. Infinite rotation of the planets | Increases the level of the Star Phantasm skill by 3. Max level: 15 |
| 4. Prophecy of Oblivion | Hits by any member of your squad over an enemy with the Omen status increase their crit chance by 15%. |
| Witchcraft: The K/S effect remains. Additionally, the K/S of all Witch characters in the party is increased by 15% when hitting enemies with the Omen status. | |
| 5. A Twist of Fate | Increases the Reflection of Fate skill level by 3. Max level: 15 |
| 6. The Rhetoric of Cataclysm | Every second spent moving while using Illusory Flow increases the damage of Mona's next charged attack by 60%. This maximum bonus damage can be increased to 180% of the charged attack's damage. Lasts up to 8 seconds. |
| Witchcraft: When Megistus, as the active character, is in Illusory Flow form or there are nearby enemies with Omen, her subsequent hold's damage is increased by 60% every second, up to 180%. This effect lasts for up to 8 seconds. Additionally, her charged attack deals 200% of its initial damage to enemies with Omen. |
Some cons get a boost after completing quests in Little Witch's DictionaryThe best constellations of Mona are C1 and С4:
- The first constellation Increases damage from elemental reactions between Hydro and Electro, Pyro, or Anemo, including Lunar. The damage increase is a significant bonus in teams that utilize these types of interactions. However, it's important to note that Omen's passive only triggers on the second hit. The second part of the passive also works incorrectly. After the buff, she gained a significant advantage for pocket damage dealers, increasing Mona's utility as a driver with strong sub-damage dealers who deal the main damage.
- The fourth one Additionally increases critical hit chance against enemies with the Omen status. The constellation triggers after each use of the ultimate ability, which, with the new ability to extend Omen to 8 seconds, has become a significant buff. Furthermore, it provides additional buffs to Witchcraft heroes, tailoring their abilities to them.
The second and sixth levels of the constellation will increase her effectiveness as a main damage dealer, providing a decent damage boost. This is useful as a driver, but for a fully supportive build, only the boost from the second constellation with the allies' buff will be useful.
How to play Mona

She has flexible gameplay, allowing her to fulfill a variety of roles and occupy different positions. A damage-focused build allows her to lead the team, poke from the pocket, or become a caster with her ultimate. She excels in combination with the burst damage of some main damage dealers, greatly increasing their damage output.
The Astrologer-Buffer's capabilities are more limited, but they don't fundamentally alter gameplay: she's still included in the team due to the need for Hydro and her Omen status. The squads she's useful in don't depend on her build, so her skill activation sequence remains unchanged.
Rotation
Approximate rotation during the game:
- Use the defensive skills of your supports - apply healing or generate shields.
- Activate your pocket damage dealers' skills in order of their duration and summon Mona's Phantom to the field. Swirl statuses on enemies if the team has an Anemo support.
- If your squad has heroes with destructive area damage, apply buffs first, then use Mona’s superpower. Try to immediately deal damage with the team's main DD, since Omen's effect lasts only 4 seconds.
- Use your main damage dealer's attacks while your sub-damage and defensive skills are active.
- Monitor the energy of your ultimates and repeat the rotation on cooldown.
If Witchcraft buffs have been received, the rotation changes slightly:
- Use support abilities for buffs or pocket damage.
- Switch to Mona and use her skill to inflict Hydro status and distract enemies.
- Activate the heroine's Elemental Burst to activate Omen. Use 4 Basic or Charged Attacks, as they will help build stacks of Glimmer of the Water Luminaries for Steam and extend Omen's duration to 8 seconds.
- Switch to your main damage dealer and rotate them while Omen's buff is active.
- Repeat the rotation as abilities cooldown.
Is The Character Worth Pulling?
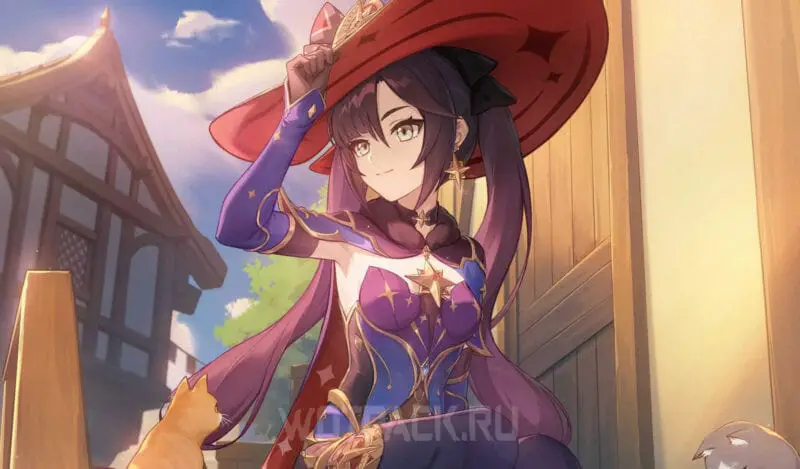
Mona is a Hydro Catalyst in Genshin Impact, boasting dynamic yet straightforward gameplay. She boasts high damage potential thanks to her ability multipliers, excels at countering Hydro attacks, and distracts enemies with her skill. She uses an elemental explosion to trap enemies in bubbles, hindering the movement of small monsters, and also applies the Omen debuff to buff allies' damage. With the Witchcraft buff, the astrologer now has several signature units that allow her to fully utilize her potential, as well as the ability to extend Omen, which, despite its considerable power, was her weakness due to its short duration.
Her key feature is the availability of an alternative build, which is significantly easier to assemble. She remains effective without constellations and plays well with free weapons. She possesses a range of abilities that are relevant in the early game, late game, and high-level Spiral Abyss. She is also rightfully considered one of the best characters in the standard banner and consistently ranks high on the tier list.








Which DD set with The Widsith is best? Day of Rising Winds, Nymph's Dream, or Heart of Depth
There are still stories from books, so it's probably better
Sabbath set and put
I'll take it for the anniversary. Mona is irreplaceable for my account if I want to set damage records for myself.
What do you think about mine through lunar crystallization?
There are no Zi Bai or other options to replace DD because there are few geo and hydro characters. I came up with something like this.
Mona (Maine DD)
Linnea (sub DD)
Illugi (favonium)
Aino (C3 with a weapon from the MS event)
Will it work fine?
No, it won't be good. This isn't a moon crystal anymore, but a wash with signs of a crystal.
Better yet, at least put Noel if she's a C4, or put another Geo DD
With the presence of a line, any character can hit with a moon crystal
If you want her to bet really high numbers like Main DD, Durin, Nicole, and C6 Monkeys, that's a must-have for her.
Please help, Skirk Escoffier Dahlia squad, who should I put in fourth place? I have Columbine, Mona C1, and Xingqiu. If Mona, what set of artifacts should I use on her and what on Dahlia?
I want to make a pack of Columbine c2; Fischl c6; Lauma c2; Mona c2. Which one is extra and who should I swap it for?
Lauma plays with the buds, not with stimulation, so Fischl doesn't get along with her.
Columbine is played with Lauma and Fischl separately, so there are two options: Lunar Charge, where Fischl is a sup-dd, and Lunar Budding, where Lauma is either a dd or a sup-dd. You can't mix them all together.
C1 Mona plays with Electro characters.
Result: Lunar Charge. Ditch Lauma and replace her with any powerful electrical damage dealer (Fleance, Clorinda, Varesa, or even Keqing will do).