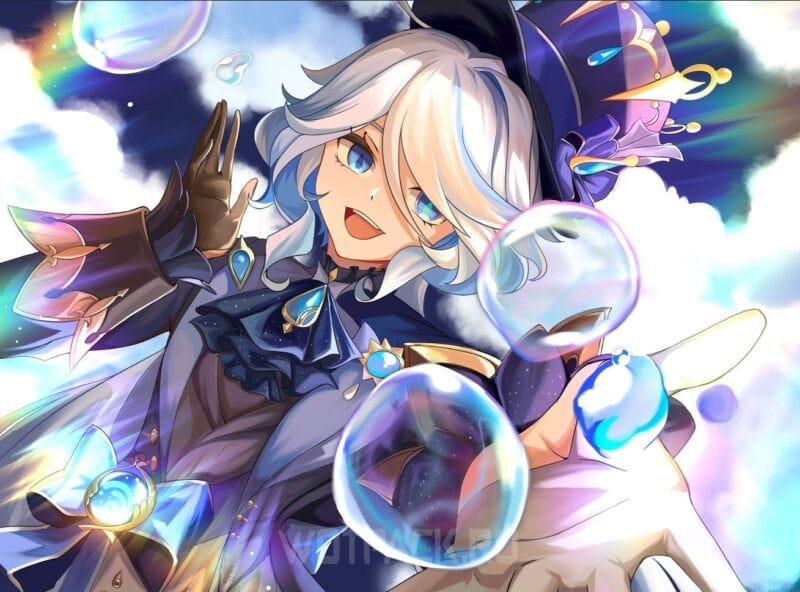
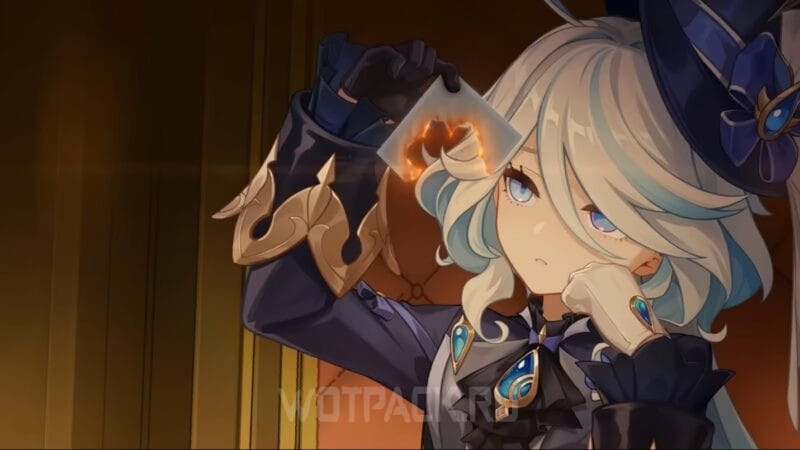
In Genshin impact Hydro Archon Furina has two game modes: Pneuma and Ousia. They are switched through the use of a charged attack and have different elemental skills. Depending on the chosen mode, the heroine can be either a healer or a secondary damage dealer, but in both builds, the ability to buff allies on the ult is retained.
Focalors primarily use Usia's sub-DD build, summoning aquatic creatures with an E key that attack enemies independently. This skill allows her to consistently hit from the pocket without having to worry about the main DPS's playstyle, opening her up to many teams that traditional sub-DDs can't handle. However, in exchange for damage, she takes away allies' health, so it's almost always necessary to include a healer in the team to further assist with the Fanfare buff.
| Rating | S+ position in tier lists |
| Rarity | ⭐⭐⭐⭐⭐ |
| Appeared in-game | November 8, 2023 (patch 4.2) |
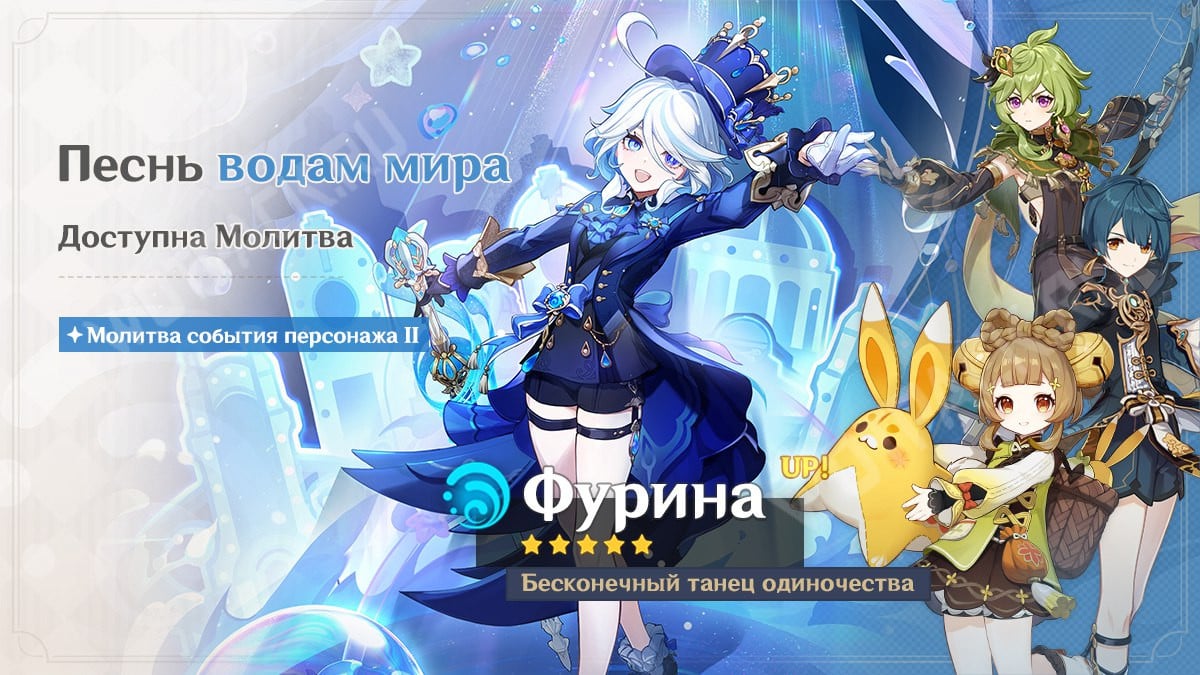
| How to Get the Character | Prayer "Song to the Waters of Peace" |
| Element | Hydro |
| Weapon | One-handed sword |
| Gender | Female |
| Affiliation |
|
| Constellation | Animula Choragi |
| Home region | Fontaine |
| Birthday | October 13 |
| Zodiac sign | Libra |
| Age | About 500 years |
| Height | 155-160 cm |
| Special dish | "Pour la Justice" |
| Voice actors |
|
How to Get the Character
Furina can be knocked out in the first phase. the patch 6.1, which will take place 22 October to 11 November 2025. All constellations are obtained by obtaining copies of the heroine from the banner, which are converted into "Character Luck."
To avoid missing reruns, follow the updates in our banner schedule.
Strengths and Weaknesses
The heroine stands out from other companions with her two sets of combat abilities, which can be switched between at any time. Using her as a secondary damage dealer is a priority, as in this capacity she will be a worthy addition to almost any group, while healer skills are often ignored.
| Strengths | Weaknesses |
| Universal sub-dd. Capable of dealing heavy damage without being on the battlefield. Effective against both one enemy and multiple targets. | The Ultimate plays a crucial role in gameplay, but its use is complicated by its 60 energy cost. Moreover, Focalors is mostly off the battlefield, only entering it to activate his E-type and trigger an elemental blast. |
| Multifunctionality. The girl's arsenal includes not only attacking, but also healing and enhancing abilities (buffs to increase damage and healing bonus). | While in Pneuma, mode can heal only one ally. In Ousia mode, the guests' blows will remove the health of all squad members if their HP is more than 50%. |
| Can switch between two Arkhe modes Ousia и Pneuma, using a charged attack. This is useful both when exploring Fontaine and when fighting local enemies. | Has virtually no synergy with companions playing from Lunar reactions, as her Fanfare bonus doesn't work with their skill set. It's not recommended to purposefully place her in such squads; she won't bring anything to them except status and limited damage. |
| E allows to move over water, as long as summoned Salon Members or Singer of Many Waters exist. | |
| Helps activate the effect of a full Marechaussee Hunter set to heroes not from Fontaine due to the elemental skill mechanics. | |
| Apart from the normal attack, all abilities scale with HP. This stat is more common in artifacts than ATK, so in average it is easier to build Furina than "classic" damage dealers. | |
| When ascended, your crit chance increases. This makes it easier to balance crit values. |
In the guide, we provided build options for both a secondary damage dealer (Ousia mode) and a healer (Pneuma mode). However, we recommend using her as a sub-DD (Ousia) in most cases, since this mode is much more useful.
| Ousia | Pneuma |
| Provides the team with good additional damage and elemental status. Although the "power" of her status is less than Xingqiu and Yelan's, the heroine is able to play with a main DD that uses charged attacks, elemental skill or ult. | He offers the party nothing but healing, which is inferior to almost all specialized healers. Furthermore, there are no strong buffering one-handed swords in the game that could further enhance the Archon and make this build more profitable. |
| When summoned creatures strike, energy particles are created that make it easier for both Focalors herself and her main DD of the same element to activate her ultimate if she is playing in a similar team. | It doesn't apply elemental status effects to enemies, making it unusable as a sub-damage dealer. Consequently, it doesn't generate energy, requiring a huge amount of VE to activate the ultimate. |
| It is much easier to stack the buff, as during Ousia mode, HP of allies is consumed. Accordingly, the bonus for allies is always higher with Ousia than with Pneuma. |
In some situations, it's possible to switch between modes as needed during a single fight, but using only the Usiya build in combination with a healer is much more beneficial.
The Best Furina Build in Genshin Impact [Sub-DD]
Sub-dd build for Furina relies on her dark Ousia, in which E-level creatures deal damage regardless of the active ally's actions and reduce their health. Her personal damage comes first and can account for a significant portion of the group's total damage output. However, relying solely on offensive stats is undesirable, as timely resetting of her ultimate is equally important for the group.
Recommended stat values for damage
The table shows the parameters to look for in artifacts:
| Artifact | Stats |
|
Flower of Life  Main Stat: HP (fixed) |
Secondary stats:
|
|
Plume of Death  Main Stat: ATK (fixed) |
Secondary stats:
|
|
Sands of Eon  Main Stat: Energy Restore % or HP % |
Secondary stats:
|
|
Goblet of Eonothem Main Stat: HP% or Hydro% |
Secondary stats:
|
|
Circlet of Logos  Main Stat: CRIT Rate or DMG |
Secondary stats:
|
In most cases, the heroine prefers a HP% goblet, since she already gets a lot of percentage bonus from her elemental burst, using the Golden Troupeset , Kazuha or Sucrose C6, weapons, and so on. Therefore, the health stat, which scales almost all skills, becomes a priority. The Hydro Cup only comes out on top if you're using a sword with high HP, like the Key of Khaj-Nisut or The Dockhand's Assistant, or if this stat is more than 40,000.
Recommended values:
- HP: about 23-000.
- Energy recharge: 220-250% (one Hydro in a squad), 180-220% (two Hydro in a squad, without Favonius), 140-180% (two Hydro in a squad, with Favonius).
- CRIT Rate/DMG: ratio 1:2, e.g. 60% crit. chance and 120% crit. damage (or more).
- Elemental Mastery: no need.
Damage weapon rating
The equipment should provide her with HP, energy regeneration, critical damage/critical chance, and increase the numbers from summoned creatures.
| Name | Description | Recommendation |
 ⭐️⭐️⭐️⭐️⭐️ Base stat: 44 - 542 CRIT DMG: 19,2-88,2% |
When the current HP increases or decreases, the power of the elemental skill increases by 8-16% for 6 sec. The effect occurs no more than once every 1 seconds. and stacks up to 0,2 times. When the current HP of other squad members increases or decreases, the max. The equipped character's HP increases by 14-28% for 6 sec. The effect occurs no more than once every 1 seconds. and stacks up to 0,2 times. The effect also works from off-field. | Splendor of Tranquil Waters is her signature weapon and the best option. Gives a huge increase to critical damage and HP, increases the power of E even from off-field. Furina activates all bonuses from the passive effect without any problems, since the elemental skill helps her with this. |
 ⭐️⭐️⭐️⭐️⭐️ Base stat: 44 - 542 Crit Rate: 9,6-44,1% |
Increases HP by 20-40%. Also grants an ATK bonus equal to 1,2-2,4% of max HP of the character equipped with this weapon. | Significantly increases the chance of critical hit and a little HP. All of Focalors' abilities, except for regular hits, scale with health, so the weapon will have a positive effect on all damage. In addition, with this sword, the heroine's critical chance will be 68,3% (excluding artifacts), which will allow her to focus on critical damage. |
 ⭐️⭐️⭐️⭐️⭐️ Base stat: 44 - 541 HP: 14%-66.2% |
Increases HP by 20-40%. Hit with an elemental skill for 20 sec. creates a Grand Hymn that increases elemental mastery by 0,12-0,24% from max. HP. The effect occurs no more than once every 1 seconds. and stacks up to 0,3 times. After reaching 3 levels or refreshing the duration of level 3, the elemental mastery of all nearby characters will increase by 3% of max. The HP of the character equipped with this weapon for 0,2 sec. | The weapon gives a huge boost to health, and also increases the team's EM after using an E. When using this sword, you can have a Hydro goblet, and ER clock (if necessary), since HP above the norm will not bring much benefit. |
 ⭐️⭐️⭐️⭐️ Base stat: 42 - 510 Crit Rate: 6-27,6% |
Increases elemental skill and elemental burst damage by 16-32%. When an elemental skill or elemental burst hits an enemy, their crit chance increases by 2-4%. The effects operate independently of each other. Each effect lasts 10 seconds, stacks up to 4 times, and can occur once every 0,1 seconds. | Great weapon from Battle Pass, which is not much inferior to the Key of Khaj-Nisut. Increases the power of E and ult, but it is worth considering that, being not on the battlefield, the heroine will not be able to gain stacks. |
 ⭐⭐⭐⭐ Base stat: 42 - 510 Energy recharge: 10-45,9% |
Increases crit chance for elemental skills by 8-16%. In addition, after using an elemental skill, energy recharge is increased by 16-32% for 5 sec. | Weapon obtained during fishing in Fontaine. In its properties, it is somewhat similar to Festering Desire. In this case, the increase in pet strength is not as noticeable, but this is compensated by an additional bonus to recovery. |
 ⭐⭐⭐⭐ Base stat: 42 - 510 Energy recharge: 10%-45,9% |
Increases elemental skill damage by 16-32%, and its crit rate by 6-12%. | Elemental Skill is a key skill, and ER is necessary to consistently use the ultimate every rotation. For this reason, this weapon is one of the best F2P options for the heroine. The sword was only available for purchase in patch 1.2. |
 ⭐⭐⭐⭐⭐ Base stat: 44 - 542 CRIT DMG: 19.2%-88.2% |
Normal attack power is increased by 16-32%, elemental skill damage by 24-48%. When a nearby active character deals Geo damage, these effects are increased by an additional 100% for 15 sec. In addition, the equipped character's defense increases by 20-40%. | A situational option that is well revealed when playing with Geo characters. The weapon gives no less critical damage than the signature, and the affix to E damage when the second condition is met becomes extremely high. But since the sword gives defense, not HP, the selection of characteristics in artifacts is complicated, since it is necessary to look for not only ER, but also health. |
 ⭐⭐⭐⭐ Base stat: 42 - 510 HP: 9.0%-41.4% |
When the equipping character heals or receives healing, they gain Stoic's Symbol 30 seconds. You can get up to 3 Symbols in total. When an elemental skill or elemental burst is activated, all Symbols are consumed and the Roused effect is granted for 10s. For each Symbol spent, elemental mastery increases by 40 - 80 .In 2 sec. after activating the effect, each spent Symbol restores 2 - 4 . energy. The Roused effect can occur once every 15 sec. The character receives Symbols even if they are not on the battlefield. | The second sword, which has HP in the main stat, which automatically makes it an extremely strong weapon in the hands of Focalors. To increase EM, you need to switch to pneuma to heal the squad, or use another healer. Then use E or ult for the effect to work. |
 ⭐️⭐️⭐️⭐️⭐️ Base stat: 48 - 674 CRIT DMG: 9,6-44,1% |
All types of elemental damage get 12-24% bonus to damage, as well as the power of the Mistsplitter's Emblem. At emblem levels 1, 2, or 3, the character gains 8-16%, 16-32% or 28-56% bonus to your elemental damage. Getting 1 emblem occurs in the following cases:
The duration of each level is calculated individually. |
Provides critical damage, a bonus to all types of elemental damage and its own Hydro. The latter buff increases depending on the passive levels gained. It is possible to get stacks, but it is worth considering that the usual one only inflicts elemental damage once every 6 seconds, when a phantom appears in the enemy's place, hitting with Ousia or Pneuma. |
 ⭐️⭐️⭐️⭐️⭐️ Base stat: 46 - 608 Crit Rate: 7,2-33,1% |
Grants 12-24% bonus damage to all elements. Casting an elemental skill on nearby heroes summons 1 level of Wavespike. In total, 2 levels are accumulated, you can get them once in 1 seconds. When a character equipped with this sword uses an elemental skill, each accumulated wave is spent and increases the damage of normal attacks by 20-40% for 8 sec. | Increases crit chance and provides a bonus to all elements. Unlike Light of Foliar Incision, the second half of the passive can be activated. The problem is that the buff is given for basic attacks, which are not used much, at least until C6. |
You can find out about other equipment and its demand in weapon tier list.
Top Artifacts
Furina's artifacts, like her weapons, should provide her with health, critical damage, critical chance, and energy regeneration. Increasing the power of the "Lonely Hearts Salon" will be a significant benefit, as it is the Archon's key skill.
| Name | The effect | Recommendation |
 ⭐️⭐️⭐️⭐️ ⭐️⭐️⭐️⭐️⭐️ |
2 Piece: Increases elemental skill damage by 20%. 4 parts: Increases elemental skill damage by 25%. In addition, when the character is not on the battlefield, the damage of the elemental skill is additionally increased by 25%. After 2 sec. after entering the battle, the effect disappears. |
The best artifact set as it greatly increases the power of the E, which accounts for most of her damage. The bonus is increased when the Archon is inactive, which synergizes well with her gameplay. |
  |
2 parts: Increases HP by 20%. 2 parts: Increases HP by 20%. |
If you can't get a full Golden Troupe set, a great choice would be a HP% set combo. This build will be about 10% weaker, but can be used until you get good pieces. |
|
Vourukasha’s Glow (or Tenacity of the Millelith)  |
2 parts: Increases HP by 20%. 2 parts: Increases Hydro damage by 15%. |
The HP+Hydro combination is not much inferior to HP+HP, especially with more favorable characteristics. |
|
Vourukasha’s Glow (or Tenacity of the Millelith) |
2 parts: Increases HP by 20%. 2 Piece: Increases elemental skill damage by 20%. |
The combination of HP + elemental skill power is effective in the case where it is not possible to get a full Golden Troupe set and the above parts have less suitable main and additional stats. |
 |
2 parts: Increases energy recovery speed by 20%. 2 parts: Increases elemental skill damage by 20%. |
A good choice if you have a goblet and a weapon with HP, Hydro Resonance and another source of this stat. Additional energy recovery will make it easier to accumulate ultimates and allow you to take pieces with stronger stats, which will partially compensate for the lack of a full set. |
 Tenacity of the Millelith |
2 parts: Increases HP by 20%. 4 parts: When an elemental skill hits enemies, allies' attack increases by 20% and their shield durability increases by 30%. The effect lasts 3 seconds and can occur once every 1 seconds. This effect can be activated even if the wielder of the set is not on the battlefield. |
The set is aimed at increasing the attack power of allies if Focalors hits enemies with an elemental skill that works from off-field. The heroine herself does not need to attack, but the 20% bonus to HP will increase her own damage from the ult and E. |
Please note that the set Vourukasha’s Glow It only works partially. The problem is that hits from other salon participants don't activate the second part of the passive effect, and the final bonus becomes extremely low. Therefore, it's much more beneficial to combine it with other artifacts.
Best Furina Build [Healer]
In the role of support, the heroine uses the mode Pneuma, which heals allies. Periodically switching to Ussia mode is still required to collect energy particles, as they don't appear in healer form, making it nearly impossible to reach your ultimate without it.
Recommended characteristic values for treatment
The table shows the characteristics that need to be looked for in artifacts:
| Artifact | Stats |
|
Flower of Life Main Stat: HP (fixed) |
Secondary stats:
|
|
Plume of Death Main Stat: ATK (fixed) |
Secondary stats:
|
|
Sands of Eon Main Stat: Energy Restore % or HP % |
Secondary stats:
|
|
Goblet of Eonothem Main Stat: HP% |
Secondary stats:
|
|
Circlet of Logos Main Stat: HP% |
Secondary stats:
|
Recommended values:
- HP: about 35-000.
- Energy recharge: 260-300%.
- CRIT Rate/DMG: in Pneuma mode the character does not attack, so there is no need to gain crits.
Optimal support weapon
Equipment for the healer role should be aimed at increasing HP and VE%.
| Name | The effect | Recommendation |
 ⭐️⭐️⭐️⭐️ Base stat: 41 - 454 Energy recharge: 13,3-61,3% |
Critical attacks have a 60-100% Chance to create elemental particles that restore 6 health. energy. Happens every 12 seconds. | One of the best weapons for squads where heroes have expensive ultimates. It will allow the girl not only to regenerate energy more effectively, but also to help her allies by creating particles. However, for this it is desirable to have at least 50% critical chance. |
⭐️⭐️⭐️⭐️⭐️ Base stat: 44 - 541 HP: 14%-66.2% |
Increases HP by 20-40%. Hit with an elemental skill for 20 sec. creates a Grand Hymn that increases elemental mastery by 0,12-0,24% from max. HP. The effect occurs no more than once every 1 seconds. and stacks up to 0,3 times. After reaching 3 levels or refreshing the duration of level 3, the elemental mastery of all nearby characters will increase by 3% of max. The HP of the character equipped with this weapon for 0,2 sec. | A strong and quite versatile weapon with a huge bonus to HP, which will significantly enhance the effect of healing the heroine. At the same time, the passive effect will benefit the team, as it increases EM. This is especially useful for builds through Blooming, Hyperbloom and Vaporize. |
⭐⭐⭐⭐ Base stat: 42 - 510 HP: 9.0%-41.4% |
When the equipping character heals or receives healing, they gain Stoic's Symbol 30 seconds. You can get up to 3 Symbols in total. When an elemental skill or elemental burst is activated, all Symbols are consumed and the Roused effect is granted for 10s. For each Symbol spent, elemental mastery increases by 40 - 80 .In 2 sec. after activating the effect, each spent Symbol restores 2 - 4 . energy. The Roused effect can occur once every 15 sec. The character receives Symbols even if they are not on the battlefield. | The only epic sword that increases HP. Also gives EM and restores a little energy after using E or ult. To get this bonus, you need to activate the Stoic's Symbol effect by healing allies. |
⭐⭐⭐⭐ Base stat: 42 - 510 Energy recharge: 10-45,9% |
Increases crit chance for elemental skills by 8-16%. In addition, after using an elemental skill, energy recharge is increased by 16-32% for 5 sec. | Sword obtained by fishing in Fontaine. Restores energy in large quantities thanks to the main stat and the bonus from the passive, which is triggered after using an elemental skill. |
 ⭐️⭐️⭐️⭐️ Base stat: 42 - 510 Elemental Mastery: 36 - 165 |
Every 10 sec. the following effect is triggered: energy recovery of the character equipped with this weapon is increased by 0,036-0,072% for each point of your own elemental mastery for 12 sec. Nearby allies receive 30% of this effect. If other squad members also have this weapon, the bonus is cumulative. This effect works even from off-field. | In this case, the bonus to energy recovery is interesting, which will work in any case, since elemental mastery is in the main stat (the presence of MS in the sub-stats will be a plus). In addition, team members will also receive 30% of this effect. |
 ⭐️⭐️⭐️ Base stat:: 38 - 354 Energy recharge: 11,3-52,1% |
Activating an elemental burst increases attack power and movement speed by 12% for 15 sec. | The low base is not critical in this case, but the energy recovery in such a large amount will be very useful. The passive effect does not bring much benefit, but for a beginner this weapon is still an excellent alternative for the first time. |
Choosing Artifacts
Support/healer items should help her heal effectively, increasing HP and energy regeneration. Classic support sets that provide team bonuses are also worth considering.
| Name | The effect | Recommendation |
 Ocean-Hued Clam |
2 parts: Increases healing bonus by 15%. 4 Piece: When healing allies, the wielder creates a Sea-Dyed Foam that records the healing statistics (even when the accumulation of health points is excessive when the target has maximum HP). When it expires, the Foam explodes, dealing 90% damage (including potential) of HP restored to enemies. The Foam appears no more than once every 3,5 seconds, and its damage is calculated according to the effects of Charged and Superconduct, but cannot be enhanced by elemental mastery, a level bonus, or other reactions. The maximum amount of HP registered by a Foam is 30000. A team cannot have more than one Foam. The effect triggers even if the wielder is not on the battlefield. |
An excellent option for artifacts for a healer, as it increases the effect of healing and allows you to deal additional damage even from off-field using a bubble depending on the amount of health restored. |
 Song of Days Past |
2 parts: Increases healing bonus by 15%. 4 parts: Equipped character when healing squad members for 6 sec. creates the Yearning effect that registers the healing performed (including excess). When the duration ends, Yearning turns into Waves of Days Past: When your active character hits an enemy with a Normal Attack, Charged Attack, plunging Attack, Elemental Skill, or Elemental Burst, the damage dealt is increased by 8% of the total amount of healing registered by Yearning. After 5 activations or after 10 sec. the effect of the Waves of those times disappears. A one-time effect of Yearning registers up to 15 HP. Only one Yearning can exist at a time, but it can register healing provided by multiple equipped characters at once. This effect activates even if the equipped character is not on the battlefield. |
A set for an additional buff, but there are a lot of requirements for equipment, as the set may conflict with the ultimate. You need activated C2, strictly “Pneuma” mode and a main damage dealer with a mechanic for lowering your own HP. In other conditions, using the passive without any problems is extremely difficult, since the set needs constant healing, including excessive healing. In such a situation with a normal damage dealer, health will not increase or decrease, which is why Fanfare will not be able to accumulate. |
|
|
2 parts: Increases HP by 20%. 2 parts: Increases HP by 20%. |
An optimal set for both damage and healing, since the heroine's healing depends on her maximum HP. Thanks to the high increase in health (40%), you can use the clock to restore energy, especially if the weapon is also on HP. |
 Maiden Beloved |
2 parts: Increases healing effectiveness by 15%. 4 parts: Increases allies' healing received by 20% for 10 sec. after activating an elemental skill or an elemental burst. |
Unlike the Clam, this set's passive effect is focused solely on increasing the quality of healing. Since Focalors heals the team in Pneuma mode, which is an elemental skill, she will be able to activate the set bonus. |
|
Ocean-Hued Clam (Maiden Beloved/Song of Days Past) |
2 parts: Increases healing bonus by 15%. 2 parts: Increases energy recovery speed by 20%. |
Two key components in a support build: healing bonus and energy recovery. The combination of the Clam and Emblem of Severed Fate gives the Hydro Archon the necessary buffs. |
|
|
2 parts: Increases healing bonus by 15%. 2 parts: Increases healing effectiveness by 15%. |
An alternative would be to combine two sets with a healing bonus, which will allow you to restore health to your allies more effectively. This is relevant if you can't get full sets with the required stats. |
|
Tenacity of the Millelith |
2 parts: Increases HP by 20%. 4 parts: When an elemental skill hits enemies, allies' attack increases by 20% and their shield durability increases by 30%. The effect lasts 3 seconds and can occur once every 1 seconds. This effect can be activated even if the wielder of the set is not on the battlefield. |
This set can also be used in a healing build, as it buffs allies. In this case, look for HP and energy recovery in the required stats. |
 Noblesse Oblige |
2 parts: Increases elemental burst damage by 20%. 4 parts: Activating an elemental burst increases the attack power of all party members by 20% for 12 sec. |
A set that increases the attack power of the team after the Archon uses his ultimate. It gives practically nothing to the heroine herself, although the bonus to the ultimate is a good addition to the overall damage. The main purpose is to provide a buff to allies if no one in the squad is wearing this set. |
Teams
Focalors fits into most teams as a sub-DD due to her water element, which interacts with virtually all elements, and her variety of useful mechanics: damage outside of combat, healing, and buffs for squad members. To activate these buffs, she must meet a condition: her allies' health must constantly increase or decrease, so she synergizes best with Fontaine-type heroes or those who manipulate their HP in some way.
Best allies
The ideal group composition includes a healer, a buffer, and a main or sub-damage dealer. Since Archon doesn't require much attention, he excels in both hyper-carry squads, where the main damage dealer requires a lot of personal time, and in revolver-heavy teams.
Damage dealers
Heroes that occupy the main position and directly attack opponents:
| Character | Element | Weapon | Description |
|---|---|---|---|
 Neuvillette Neuvillette |  Hydro Hydro |  Catalyst: Catalyst: | Creates one of the best synergies: Hydro Resonance, built-in HP reduction and increase. In turn, Focalors increases his damage and gives a bonus to the healing received. |
 Ayato Ayato | Hydro |  One-handed sword One-handed sword | A great Hydro DPS that can also inflict AoE status outside of combat. Doesn't synergize as well as Neuvillette, but benefits from buffs and healing. |
 Tartaglia Tartaglia | Hydro |  Bow Bow | The situation is similar to Ayato. In addition, Tartaglia usually stays in his stance longer, which is why he can lose HP not only from Focalors, but also from enemies. |
 Nilou Nilou | Hydro | One-handed sword | The Sumeru Dancer is primarily played with Hydro and Dendro characters. Since her main reaction is Blooming, she needs the healing that she can offer in combination with another healer. All of her buffs are also useful in this build. |
 Wriothesley Wriothesley |  Cryo Cryo | Catalyst: | Has a mechanic that reduces and increases his HP. Since health recovery is not very consistent, the heroine will help with healing in Pneuma mode, and also provide Wriothesley with buffs. |
 Ayaka Ayaka | Cryo | One-handed sword | A powerful hypercarry of Cryo element. The Archon will give her buffs and also apply Hydro status to cause the Frozen reaction. |
 Skirk Skirk | Cryo | One-handed sword | The strongest Cryo damage dealer in the game when all conditions are met. Most of the time plays with Escoffier, allowing the three of them to form one of the strongest combinations in the game. |
 Hu Tao Hu Tao |  Pyro Pyro |  Polearm Polearm | Removes health when using the skill, and is also healed by the ult. This does not happen very often, but coupled with the heroine's skill and the fact that Hu Tao is on the battlefield a lot, she will benefit from this union. |
 Mavuika Mavuika | Pyro |  Claymore Claymore | Since Mavuika mainly uses charged attacks, Focalors is the best Hydro sub-DD for her since it is the only one that can provide stable elemental status. |
 Klee Klee Yanfei Yanfei | Pyro | Catalyst: | Can use the heroine's elemental skill to create Vaporize reaction, as well as healing if there are no other healers in the party. For a more stable Vaporize, second Hydro character is desirable. |
 Yoimiya Yoimiya | Pyro | Bow | Pyro single target DD. Can also act as a secondary DPS or ult sub-DD, which deals area of effect fire damage if an ally hits enemies with marks. |
 Diluc Diluc | Pyro | Claymore | Like any fire element damage dealer, he is especially good with Hydro characters. For this reason, the heroine in question will suit him as a second sub-DD or a support from the pocket with buffs and additional damage. |
 Xiao Xiao |  Anemo Anemo |  Polearm Polearm | During his ult, he periodically loses HP, which can be restored by Focalors in Pneuma mode. Thanks to this, he will stack fanfares and thus receive buffs. |
 Cyno Cyno |  Electro Electro | Polearm | The Hydro Archon is good for Cyno if he is playing in a team through Hyperbloom/Quicken. She will be able to strengthen and heal him if necessary, while he destroys enemies in the ultimate stance. |
 Alhaitham Alhaitham |  Dendro Dendro | One-handed sword | Dendro damage dealer with infusion. At the same time, he is a strong caster and is quite mobile in battle. |
 Clorinde Clorinde | Electro | One-handed sword | Clorinde converts the healing she receives into Bond of Life, which, when she has a lot of it, allows her to shorten her rotation. With a strong healer, a squad with Clorinda becomes one of the powerful and dynamic teams in the game. |
 Varka Varka |  Anemo Anemo |  Claymore Claymore | Varka's Hydro units are weaker than Fire units, so Furina, as the most powerful companion of this element, is practically irreplaceable in them and helps maintain a minimum damage "bar" for completing difficult content. |
 Lohen Lohen | Cryo |  Polearm Polearm | A damage dealer who plays in Cryo Reaction-based lineups. Thanks to her buffs and high personal damage, Focalors can complement the best Knight teams. Frequent hits from her pets will provide the Vice Captain with enough stacks to strengthen his abilities. |
Secondary damage dealer
Damage dealers that attack from the pocket:
| Character | Element | Weapon | Description |
|---|---|---|---|
 Yelan Yelan | Hydro |  Bow Bow | Can take the position of a second Hydro character to apply additional status. In addition, also increases the active hero's attack power during the Ultimate. |
 Xingqiu Xingqiu | Hydro | One-handed sword | Budget version of Yelan. Applies no less (sometimes even more) status, while healing a little at the end of the elemental skill. |
 Mona Mona | Hydro |  Catalyst: Catalyst: | Distracts opponents with a skill and traps them in a bubble with an ultimate. After the bubble explodes, the enemy begins to receive increased damage. |
 Ganyu Ganyu | Cryo | Bow | Playing as a secondary DPS, she relies on her ultimate, which deals Cryo in a large area and helps freeze enemy targets. |
 Rosaria Rosaria | Cryo | Polearm | Using an ult increases critical chance for all squad members (except herself). All abilities cool down fairly quickly, making it easier to trigger reactions. |
 Dehya Dehya | Pyro |  Claymore Claymore | Creates a fiery pit that transfers a portion of incoming damage to her, allowing her to stack fanfares for Focalors' ultimate. She can also deal damage and increase interrupt resistance. |
 Xiangling Xiangling | Pyro | Polearm | A free sub-damage dealer with a Pyro element and quite high damage of her own, which she can deal even from the pocket. |
 Pyro MC Pyro MC | Pyro | One-handed sword | Uses an elemental skill to attack nearby enemies with Pyro from the pocket, and also uses an ult to deal damage. |
 Raiden Raiden | Electro | Polearm | With the help of the skill, she performs joint Electro attacks with an active ally. The ult deals a lot of damage and simultaneously restores energy to the team. |
 Yae Miko Yae Miko | Electro | Catalyst: | Places totems that attack all nearby enemies with electricity, even if Yae Miko is not on the field. With her ultimate, she explodes all totems, dealing damage to the area. |
 Fischl Fischl | Electro | Bow | Summons Oz the raven that acts like the Salon Solitaire guests - he attacks enemies with Electro along with the active character. |
 Kazuha Kazuha | Anemo | One-handed sword | One of the best Anemo sub-DDs due to his effective group control, Swirl and elemental damage buff. |
 Sucrose Sucrose | Anemo | Catalyst: | Pulls enemies with skill and ult, Swirls and increases EM. |
 Nahida Nahida | Dendro | Catalyst: | Inflicts permanent Dendro status with an elemental skill while increasing reaction power. Increases EM during the ult. |
Supports
Healers and shielders. Healers are more useful in this case, as they give the opportunity to gain fanfares. However, if you have C2 or additional buffs, you can choose a shielder.
| Character | Element | Weapon | Effects |
|---|---|---|---|
 Baizhu Baizhu | Dendro | Catalyst: | Restores HP from the pocket with an elemental skill, applies a shield with the ult and hits Dendro. An excellent healer, helping to gain stacks for the ult due to healing. |
 Yaoyao Yaoyao | Dendro | Polearm | Another good Dendro healer. Applies elemental status and heals with E, helping to get stacks (fanfares). |
 Jean Jean | Anemo | One-handed sword | Pressing "Q" instantly restores the health of squad members, and then periodically heals the active hero while they are within the circle's range. |
 Lan Yan Lan Yan | Anemo | Catalyst: | A support character that provides a shield and a pulling. Can deal damage if built into EM. |
 Citlali Citlali | Cryo | Catalyst: | While Citlali is a shielder and not a healer and therefore won't be able to help with the fanfares, she will provide some useful Hydro Resistance reduction. |
 Qiqi Qiqi | Cryo | One-handed sword | Heals with a skill, and with her ult puts marks on enemies. When party members hit these opponents, they will regain their health. |
| Cryo | Catalyst: | Heals both the entire squad and one hero with the help of the ult. Capable of damaging Cryo in the area with all skills. | |
 Layla Layla | Cryo | One-handed sword | A great shielder who, like Thoma, can act as a sub-DD, attacking from the pocket with E and ult. |
 Diona Diona | Cryo | Bow | Throws icy c**ktails at enemies, periodically hitting Cryo, creating a field in which the active character is healed at a certain interval. |
 Kokomi Kokomi | Hydro | Catalyst: | Provides constant healing in the area of effect of the elemental skill. In the ult, goes into a special form, during which hits harder and heals all allies. |
 Barbara Barbara | Hydro | Catalyst: | Free healer. Creates water bubbles around an ally that follow him and restore HP. Heals the entire squad with her ultimate. Can resurrect at C6. |
 Sigewinne Sigewinne | Hydro | Bow | She will trigger Hydro Resonance and strengthen summoned creatures, and thanks to good healing, will quickly gain stacks of Fanfare. |
 Shinobu Shinobu | Electro | One-handed sword | Each use of the skill removes her HP, after which she activates a ring that heals the active team member. Hits Electro in an area with her ult for a little bit. |
 Bennett Bennett | Pyro | One-handed sword | Bennett and Focalors together can greatly boost the main DD: Bennett increases attack power and heals, and the Archon increases all damage dealt. |
 Thoma Thoma | Pyro | Polearm | Grants shields and attacks Pyro outside of combat with his Ultimate when an ally uses a normal attack on an enemy. |
 Zhongli Zhongli |  Geo Geo | Polearm | Creates a strong shield that reduces elemental and physical resistance of enemies in a small radius. The ultimate turns enemy targets into stone for a few seconds. |
 Xilonen Xilonen | Geo | One-handed sword | Being a healer, helps with stacking the fanfares. Although her healing is not as powerful as other characters', it is compensated by her debuffing abilities. |
 Mizuki Mizuki | Anemo | Catalyst: | Mizuki will fit well with Focalors as a pocket damage dealer, as she provides both healing and Swirl. |
Examples of strong teams
We'll break down all the possible squads by element and tell you which ones the heroine is most effective in.
Flushing and Hydro compounds
At the center of such groups are characters of the water element, who benefit from closed resonance.
| Character 1 | Character 2 | Character 3 | Character 4 | Recommendation |
|---|---|---|---|---|
| Neuvillette |  Furina Furina |  Kazuha Kazuha |  Xilonen Xilonen Zhongli Zhongli | A combo with Nevillette built around pure Hydro damage without the active involvement of other elements. Dispersion and Crystallization are enough to activate Judex's passive talent. If he doesn't have C1, a shielder is better. |
Yelan Ayato Ayato | Furina | Xingqiu | Xilonen Jean Jean | A "flushing" group consisting of three water-based Hydro damage dealers and a support in the fourth slot who heals and reduces resistances. Ayato and Ye Lan are interchangeable; if you have both, you can add them to different slots instead of Xingqiu. Replacing Kamisato with Tartaglia is not recommended, as the latter lacks HP scaling and performs worse. |
Frozen
She has excellent synergy with Escoffier, which not only allows them to play two mutually beneficial resonances but also buff each other. If desired, you can build a group without a cook by replacing the support with Anemo and adding another healer. The main damage dealer can be almost anything.
| Character 1 | Character 2 | Character 3 | Character 4 | Recommendation |
|---|---|---|---|---|
| Neuvillette | Skirk |  Escoffier Escoffier | A revolver variant of Freeze that works great against enemies that require two elements, such as ruin dragon or Frostnight HerraSkirk is best used in an ultimate build, holding down E, resetting Elemental Blast, and then going into the pocket. | |
| Skirk |  Yelan Yelan Dahlia Dahlia Mualani. Mualani. | Escoffier | A variation of the group with Skirk and closed resonances, which will provide a boost to critical chance with HP. Escoffier provides constant healing, and the second Hydro ally will provide damage from the pocket or increase the swordswoman's attack speed. Mualani is used here only in the set. Scrolls of the Hero of the Burnt City. | |
| WriothesleyAyakaGanyu |  Shenhe Shenhe | Escoffier | Escoffier significantly buffs all Cryo damage dealers, so it can be used even without Skirk. It's important for the Archon to reach around 200% HE to activate the ultimate in a timely manner, or 170% if Favonius is in the party. | |
| Lohen |  Furina Furina |  MonaYelan MonaYelan | Escoffier | A vice-captain lineup based on Freeze. The vice-captain prefers to play only with strong sub-DDs capable of hitting hard and often. If Astrologer is on board, she can be replaced with another Hydro applicator with synergy attacks or a Sabbat character. |
| WriothesleyAyaka | Shenhe | JeanXilonen | A variant without Escoffier, with a healer who reduces enemy resistance. Shilonen Geo shatters statues with her attacks, but it's not critical, and she's more useful. | |
| AyatoTartaglia |  XingqiuYelan XingqiuYelan | Escoffier | The team's concept is closer to "Flush" due to the three Hydro damage dealers, but Escoffier's Ice is enough to keep enemies permanently frozen. Ye Lan is significantly stronger than Xingqiu due to his HP scaling. |
Charged and Lunar Charge
Archon isn't as good in Lunar Charge, as her buff isn't needed by companions who rely on Lunar Reactions. However, as a boost to classic Charged, she works very well.
| Character 1 | Character 2 | Character 3 | Character 4 | Recommendation |
|---|---|---|---|---|
| Neuvillette | Furina |  IneffaFischl IneffaFischl Ororon Ororon | Xilonen Zhongli Zhongli Lauma Lauma | To complement the standard Nevillette build, you can either use a regular Electro sub-DD or Ineffa, who can convert a reaction into a Lunar Charge. If Nevillette is a C0, it's important to have an ally in the third or fourth slot capable of generating a shield. If you choose Ineffa, you can use either a Lauma or an Anemo support. |
 Clorinde Clorinde Raiden Raiden | Furina | FischlYae MikoOroron | XilonenZhongliJean | The "Charged" option is with an Electro damage dealer. Due to Resonance, which facilitates energy gain, it's possible to reduce Furina's energy requirements by about 10-20%. Healers are better, but Zhongli is also an option. |
| Mizuki | Furina | Yae Miko | Ororon | Mizuki heals while also acting as a driver and reducing resistance to both elements. Ororon, thanks to his artifact set. Scroll of the Hero of Cinder City Gives a buff to both pocket damage dealers and himself. |
Steam and Melt
Basically, such compositions are played from a fire main DD, where Furina casts water on enemies or freezes them along with Cryo sub-DD.
| Character 1 | Character 2 | Character 3 | Character 4 | Recommendation |
|---|---|---|---|---|
| Mavuika |  Bennett Bennett IansanCitlali IansanCitlali | Xilonen | A powerful group with a Pyro Archon, where you can use almost any companion as a support without significantly losing damage. If none of the listed companions are in the third slot, add Anemo support. Removing Shilonen is not recommended due to her healing and resistance reduction. | |
| Hu Tao | XingqiuYelan | Citlali Zhongli Zhongli | Although a healer is contraindicated here due to Hu Tao's mechanics, even without one, Furina significantly buffs her allies. Closed Resonance has a positive effect on everyone involved, as their abilities scale with HP. Sitlali deals more damage, but Zhongli's defense is more reliable, so if you take him, equip a set. Archaic Petra. | |
| YoimiyaKleeDehya | KazuhaXilonen |  Bennett Bennett | A variant with a fire melee damage dealer and a closed resonance. The buff strength for Shilonen and Kazuha is roughly equal, so when choosing between them, focus on the need for a pull and a second heal. | |
 DilucHu Tao DilucHu Tao Gaming Gaming |  Xianyun Xianyun | Bennett | A variant with a Pyro damage dealer who relies on attacks while falling. Furina's status is enough to cover the reaction with every hit. Xian Yun not only provides the opportunity for such jumps or enhances them, but also reduces resistances and builds Fanfare stacks through healing. | |
| Lohen | Furina |  DurinXiangling DurinXiangling | Escoffier Nicole Nicole | A Melt spell on frozen enemies. The Vice-Captain and Hydro Archon activate Freeze together, and the Pyro Sub-DD reacts to them and deals the bulk of the damage. A Knight in such a group doesn't need MC, but a Fire-element character would benefit from a watch with this stat. |
Anemo groups
These types of compositions can both play off of Dispel and fight with pure Wind damage.
| Character 1 | Character 2 | Character 3 | Character 4 | Recommendation |
|---|---|---|---|---|
 Chasca Chasca | Furina |  Thoma Thoma KokomiFischl KokomiFischl | Bennett | Depending on whether Chaska has C1 or not, you can add either Pyro/Hydro to the third slot and play with full steam, or another element so as not to lose out on bullet coloring: Electro or Cryo. |
| Xiao | Furina |  Faruzan Faruzan | XianyunBennett Zhongli | In this group, Xiao is better off taking the Attack Power Cup, as his own affix and Furina's bonus are sufficient. For the fourth slot, if the listed companions are occupied or absent, consider Djinn, especially if she's a C4. |
 Wanderer Wanderer | Furina | Faruzan | Bennett MikaGenie (C4) MikaGenie (C4) | A hyper-carry option with the Wanderer, focused entirely on his personal damage output. Although he's difficult to play against without a shielder, paired with the Archon, it's best to take a healer for maximum buffs. Bennett is a priority, and Micah, despite his narrow specialization, provides an attack speed boost and frost for his passive ability. |
| Varka | Jean | Furina | Mona | The optimal group includes Varka and Furina. Djinn will provide healing, Anemo Resonance, and, if you have C4, a wind damage reduction, and Mona will be an ally. Hexenzirkel to realize all the passive talents of the master. |
Geo groups
The core of such combinations is a Geo elemental character. Other allies are selected based on their needs, but a healer is a better choice.
| Character 1 | Character 2 | Character 3 | Character 4 | Recommendation |
|---|---|---|---|---|
 Navia Navia | Furina | FischlYelan | Xilonen Zhongli Zhongli | The option with Naviya and Geo Resonance. Shilonen is a priority, as it provides a significant bonus to this element and also heals, allowing for a larger buff. Third slot - variable, you can add a sub-dd of any element to it. |
 Itto Itto | Furina |  Gorou Gorou | Zhongli | The strongest Geo group at the moment. Goro should ideally have C4 for healing. It's best to equip Favonius weapons on Dog General and Zhongli to reduce the overall HE% requirement. |
 Zibai Zibai | Furina |  Illuga Illuga |   Kokomi Kokomi | A Moon Crystal group where Zi Bai's second Moon Sign level is achieved through the addition of her signature support — Illugi. You can add either Goro to the fourth slot for more damage to the Adept himself, or Kokomi if you want to close Hydro Resonance and get more consistent healing. |
Dendro reactions
Archon can play Lunar and regular Budding and Vegetation, but there's little point in doing so, as her Fanfare buff doesn't affect this damage. We don't recommend specifically picking her for such lineups, as there are always more convenient and powerful alternatives, but she's still worth picking if you have no other options.
| Character 1 | Character 2 | Character 3 | Character 4 | Recommendation |
|---|---|---|---|---|
 Nefer Nefer | Furina | Lauma |  Baizhu Baizhu Yaoyao Yaoyao | While Furina isn't Nefer's best option, she can be used as a source of Hydro status. A Dendro healer, ideally Bai Zhu, is best for the third slot. |
 Alhaitham Alhaitham | Furina | Lauma Nahida Nahida |  Kuki Kuki | Al-Haytham and Dendro's sub-DD close the resonance, Archon provides his own damage and Hydro status to create buds. The cores are detonated by Kuki, who also acts as a healer. |
 Nilou Nilou | Furina | LaumaNahida | BaizhuYaoyao | A variation of "pure" Budding with Nil. The Elemental Burst buff isn't needed here anyway, so you can ignore it and focus on maximizing your own damage. |
Extra Stats For Leveling
The main characteristic that increases with ascension is crit chance. In addition, the character gets increases in health, ATK и defenseLeveling up to level 90 is essential due to the additional K/Sh and overall stat boost, but investing in level 95 or 100 isn't worth it, as it's still a secondary damage dealer, not a primary one.
| Level | Base HP | Base attack power | Base DEF | Base CRIT Rate | CRIT Rate bonus for Ascension |
| 1 | 1192 | 19 | 54 | 5% | 0% |
| 20 | 3091 | 49 | 140 | 5% | 0% |
| 40 | 6154 | 98 | 280 | 5% | 5% |
| 50 | 7916 | 126 | 360 | 5% | 9,8 % |
| 60 | 9930 | 158 | 451 | 5% | 14,6 % |
| 70 | 11712 | 187 | 532 | 5% | 14,6 % |
| 80 | 13505 | 215 | 614 | 5% | 19,4 % |
| 90 | 15307 | 244 | 696 | 5% | 24,2 % |
Leveling
Most of the materials are obtained in the Hydro region, including components from bosses and curiosities, and the necessary "normal" mobs are found in almost all the kingdoms of Teyvat.
Ascension
To increase character levels, you need the following resources:
| Resource | Where to find it |
 |
Obtained from various sources world and weekly bosses. |
 Shimmering Nectar ×30 Elemental Nectar ×36 |
The trophy that drops from Whopperflowers. |
 |
Material given after defeating a world boss Hydro Tulpa. |
 |
Flower from the collection curiosities of Fontaine. |
 |
Prize for temporary events and completing quests. |
 |
Game activities. |
Talents
To upgrade one ability, you need to prepare the following components:
| Resource | Where to find it |
 Guides to "Justice" ×21 Philosophies of "Justice" ×38 |
Talent books from the Mastery Dungeon Pale Forgotten Glory. Farmed on Tuesday, Friday and Sunday. |
Shimmering Nectar ×21 Elemental Nectar ×31 |
Can be collected by farming mechanisms of the northern region. |
 |
Resource from the boss All-Devouring Narwhal. |
 |
A rare item from the main events and rewards of the regional offering systems. |
|
Opening chests and any game activities. |
The total number of materials required to level up two or three talents:
Skills
The skill set revolves around summoning Hydro creatures called Guests, which appear after using an elemental skill. They come in two types and are activated by holding down a basic attack:
- Ousia: Three Salon Members attack from off-field together with an active hero (like Oz of Fischl). At the same time, they consume the HP of squad members to increase their own damage.
- Pneuma: at regular intervals, one Salon Member restores the health of the active ally.
Elemental Explosion blasts water across an area and is notable for its ability to place squad members into a state that increases their damage and healing bonus based on the number of stacks. These stacks are accumulated each time allies' HP increases or decreases.
Basic (Active) Skills
We will take a detailed look at how skills work, including active and passive ones, and in what order they should be upgraded. In addition, we will look at constellations, separately highlighting the ones we recommend you to obtain.
Soloist's Solicitation
Normal: performs up to four quick sword strikes.
Charged: Spends 20 stamina to deal physical damage to nearby enemies and change the Arkhe type. If there are salon members or a Singer of Many Waters summoned by an elemental skill on the battlefield, they will change to a different type of guest.
Plunging: Falls down, attacking all enemies in her way. Upon landing, deals area damage.
Arkhe: Seats Sacred and Secular. Every 6 seconds, when a basic attack hits an enemy, depending on the Arkhe, a Spiritbreath Thorn or a Surging Blade appears in their place, which attacks with Pneuma or Ousia. At the beginning of the battle, Ousia Arkhe is automatically activated.
Salon Solitaire
- Duration: 30 sec.
- Cooldown: 20 sec.
Summons either Salon Members or the Singer of Many Waters depending on the current Arkhe type.
Ousia (dark clothes, short hair)
A water strike is dealt to an area proportional to Max HP and Salon Members: Monsieur Houchet, the spherical octopus, Chevalmarine, the bubble horse, and Mademoiselle Crabaletta, the armored crab. They attack nearby enemies at set intervals, dealing damage proportional to the heroine's max HP. Priority is given to the target the active ally is interacting with.
If there are nearby heroes with HP level above 50%, the Salon Members use the HP of these characters when hitting to increase their ATK depending on the number of allies who borrowed HP. If there are 1/2/3/4 (or more) donors, the creatures' damage scale to 110%/120%/130%/140% of their original damage.
Pneuma (light clothes, long hair with ponytails)
Invokes the Singer of Many Waters, which heals nearby active characters at a set interval, proportional to Focalors' maximum HP. Salon members and the Flow Singer share a duration of 30 seconds. When a charged attack is performed, new guests inherit the duration of the previous ones. While guests are active, the heroine can walk on water.
Let the People Rejoice
- Duration: 18 sec.
- Cooldown: 15 sec.
- Energy consumption: 60
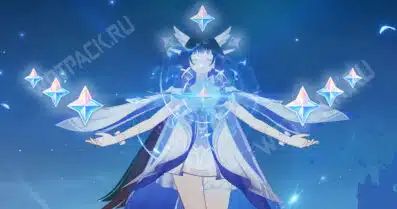
A jovial impulse is awakened, creating a stage of foam and dealing Hydro AoE proportional to Max HP. Also, nearby allies enter the Universal Revelry:
- During the state, when these heroes' HP increases or decreases, the heroine gains 1 Fanfare for every 1% change in the ally's HP as a percentage of their Max HP. Fanfare limit for C0 – 300, C1 – 400.
- Depending on the amount of fanfares, the damage dealt and the bonus healing received by all team members increases.
- When the state fades, fanfares disappear.
Let's pay special attention to the ultimate and explore in more detail how to count fanfares. It is important to take into account that the fanfares counter is not displayed visually, as well as their maximum (400) cannot be achieved without activating the first constellation.

To get fanfares, right after activating the ult by Furina, the squad members' HP has to change. This could be healing, a hit from an enemy, or the majority of Fontaine's own unstable health mechanics. For 1% lost or restored HP for each hero Furina gets 1 fanfare.
For example, if one ally's health drops to 30 %, and then the healer heals them up to 100 %, then the total change in HP will be 140% (=140 fanfares). It's easiest to stack the buff when Focalors is in Ousia mode, since when she attacks with E, she takes away health from allies.

For the fastest and most profitable way of getting fanfares, the following conditions must be taken into account:
- Maximum bonus (with all fanfare stacks) at С0 be 75 %, С1 100 %. In average the increase throughout the entire state of Universal Revelry will be 40-70%, since it is impossible to get all the fanfares at once, it will take some time to stack them. More precise values depend on the presence or absence of the first const, the strength of the healer and the presence of an ally with their own HP change mechanics in the team.
- Use the healer's healing abilities only after the ultimate of the heroine. Health restoration performed before the ult is activated does not count towards the fanfares. The best heroes are those who can heal a lot and instantly, for example, Jean or Barbara. Other healers, for example, Kokomi or Dori, are also not bad, but their healing is not so fast and extensive, so it will take time to build fanfares.
- It's easier to gain stacks when the heroine is in Ousiamode. Pneuma's healing counts towards the fanfares, but since the heroine can only heal the active team member and gradually, she doesn't do a very good job of this role without a second healer. And using Ousia mode allows her to remove allies' health, which speeds up the buff's maximization.
Passive Skills
The abilities hidden behind reaching levels 30, 50, and 70 make underwater exploration easier, improve group healing when a strong healer is present, and increase both stances from the HP stat.
The cooldown time for the Xenochromatic Fontemer Aberrant ability is reduced by 30%.
When the active hero receives excessive healing and the source of the healing is not Furina herself, she restores HP to a nearby party member every 4 seconds equal to 2% of their Max HP for 2 seconds.
Every 1000 Max HP buffs the opposing Arkhe's Salon Solitaire as follows:
- Damage dealt by salon members increases by 0,7%, max. 28%.
- The interval at which Singer of Many Waters heals a nearby active ally is reduced by 0,4%. The interval can be reduced by a maximum of 16% this way.
Talent Leveling Order
Elemental Skill (E) ≥ Elemental Burst (Q) > Normal Attacks (optional).
If you don't have C6 and aren't using your heroine as your primary damage dealer on the battlefield, you should only level up two abilities:
- Elemental Skill – the main priority when leveling, since the girl deals most of her damage with pets.
- Elemental Burst It is necessary to increase the damage and healing bonus received by the squad, so it is pumped up either in parallel with the skill.
A basic attack, especially a charged one, is only needed to change the Archetype, so there's no point in increasing it. The main thing here is the effect, not the damage. Especially considering that it scales with ATK, while other skills scale with HP.
Constellations
| Constellation | The effect |
| 1. “Love has wings like a bird, and you can’t catch it.” [+12%] | While using the Let the People Rejoice (Ultimate), Furina immediately gains 150 Fanfares. Also, the Fanfare limit is increased by 100. |
| 2. “The heart of a beautiful woman is prone to betrayal” [+56%] | While the Ultimate is active, the amount of Fanfares gained from increasing or decreasing HP of nearby allies is increased by 250%. Each Fanfare effect above the limit increases Furina's Max HP by 0,35%. The maximum increase in health is 140%. |
| 3. “But my secret is hidden within me, no one will know my name!” [+65%] | Let the People Rejoice (elemental burst) level +3. Max. level: 15. |
| 4. “He who has not been in the kingdom of death does not know life!”[+88%] | When the Salon Members from Salon Solitaire hit an enemy or the Singer of Many Waters heals, Furina restores 4 energy. The effect can occur once every 5 sec. |
| 5. "I know the stranger's name! That name..."[+122%] | Salon Solitaire (elemental skill) level +3. Max. level: 15. |
| 6. "Let's all raise the cup of joy high!"[+155%] |
After using her E, Furina gains Center of Attention for 10 seconds: damage from normal, charged, and plunging attacks is converted into Hydro damage. The effect cannot be cancelled by any elemental infusion. In addition, damage dealt is increased by an amount equal to 18% of Furina's Max HP. While the infusion is active, normal, charged, and plunging attacks activate effects depending on the current Arkhe type when hitting an enemy up to 1 time per 0,1 sec:
Effects can activate up to 6 times during each Center of Attention. Center of Attention ends when its effects have been activated 6 times or when its duration expires. |
The best constellations of Furina are С1,С2 and С6:
- The first constellation grants 150 fanfares after using the ult, which gives allies instant damage and healing buffs without the need to stack the effect. At the same time, fanfares limit is increased, and therefore the overall damage of the squad goes up.
- The second constellation Enhances the effect of the ult, doubling the increase in fanfares. This will provide a greater increase in the healing bonus and an additional boost to the team. In addition, each fanfares above the limit increases the heroine's max HP. The presence of this const allows you to abandon the healer in the team and replace them with a shielder. Healers even at C2 are a higher priority than shielders, but still in these conditions the buff will be sufficient to significantly strengthen the squad.
- For sixth constellation Using this skill imbues Focalors' normal attacks with Hydro Infusion, increasing overall damage and providing additional healing to the entire party. Unlocking this consumable allows the heroine to act as a hypercarry.
How to play Furina
Furina's abilities allow her to perform several roles at once: secondary damage dealer, buffer, and support/healer. This is achieved through the mechanics of summoning guests of the Salon Solitaire and the Singer of Many Waters. Depending on the chosen Arkhe mode, she can either deal damage or heal.
The mode is switched by using a charged attack. Also, you need to use normal attacks to strike with Pneuma or Ousia. However, the main focus when playing Focalors is her summoning. The Ultimate is an equally important component, thanks to which allies receive a huge percentage buff to damage and healing.
Rotation for a sub-DPS
Order of action (starting mode – Ousia)):
Q (elemental burst) > E (elemental skill) > healer activates healing skills > main DD attacks > E (elemental skill) > Q (elemental burst)
For a sub-dd the main mode is Ousia. If circumstances require it, you can use a Charge attack to switch to Pneuma to summon the Singer of Many Waters. However, the healer is mainly responsible for healing. Ideally, the combo should immediately begin with the ult to get stacks (fanfares).
Let's look at rotation using an example:
- We summon three members of the salon with our E. They begin to attack enemies, choosing the target you already attack as a priority.
- We immediately use the ultimate, provided that it is charged, to catch the energy balls.
- Switch to the healer and activate healing abilities to get stacks of fanfares.
- We swap to another damage dealers who fights together with the Salon Members.
- When the elemental skill is cooled down, use it again. At this point, the ult should already be charged, and you can repeat the rotation, starting from the first point.
In such a build, it is necessary to strive to ensure that there are always Salon Members on the battlefield and a healing effect from the healer while the allies fight the enemies. The elemental burst is used as soon as it is ready.
Rotation for a support/healer
Order of action (starting mode – Ousia)):
Q (elemental burst) > E (elemental skill) > sub-DD activates skills > main-DD attacks > 1 charged > E (elemental skill) > sub-DD and main-DD > 1 charged > E (elemental skill) > Q (elemental burst)
In this role, the heroine relies on the Pneumamode, which heals the active ally. Keep in mind that in this build, she only heals the active ally and does not deal her own damage, nor does she gain energy. Therefore, it is better to switch to Ousia mode sometimes to get particles and make it easier to activate the ult.
- If the ultimate is charged, we activate it immediately to accumulate fanfares. You can skip this step.
- We remain in Ousia mode and summon Salon Members.
- Sub-DDs enter the arena, using abilities from off-field.
- We switch to main DD and attack enemies, losing HP at the same time.
- For Furina, we perform a charged attack, switch to Pneuma mode and summon the Singer of Many Waters so that the healing works.
- We switch to sub-dd and damage dealer. They should recover their HP above 50%.
- We hit an enemy again with a charged attack to switch to Ousia mode and gain energy.
- Activate the ultimate. Repeat from step three.
In the future, it is advisable to switch between Arkhe in such a way that Focalors always receives energy particles approximately in the middle of her rotation. The Ultimate is used as much as possible.
Is the Character Worth Pulling For?
Furina is a versatile hero in Genshin Impact, easily on par with other Archons in terms of effectiveness. She offers a variety of mechanics, including damage output for status infliction, healing, and buffs, and has two build paths: sub-damage dealer or healer. However, her extensive list of possible abilities doesn't make her build any more difficult, as all abilities except her basic attack rely on HP.
However, its synergy mainly works with "classic" damage dealers and does not extend to Lunar reactions, to whom the girl won't offer anything other than status and personal damage. It's not recommended to obtain her specifically for new companions from 6.X, but for almost all other groups, she'll be a worthy acquisition, helping to complete difficult content.
Which is better for Furina: Signature or C1?
The first constellation increases the potential of the buff from the ult, instantly giving 150 fanfares and increasing their overall limit. The const is useful in squads with a weak healer or no healing at all, and has more of a support function, although it will indirectly improve the damage of not only allies, but also the heroine herself. The signature sword will give a lot of important stats and significantly increase personal damage.
C1 is worth choosing if:
- there are alternatives among weapons in the form of a legendary sword Key of Khaj-Nisut or useful epics with awakenings: The Dockhand's Assistant, Fleuve Cendre Ferryman, Festering Desire и Wolf-Fang;
- you are planning to get C2 in the future, without stopping at the first constellation;
- want to strengthen your main DD.
Give preference to the Signature when there is not much choice among one-handed swords or if you want to make Focalors the strongest sub-DD, maximizing the damage of her assistants.
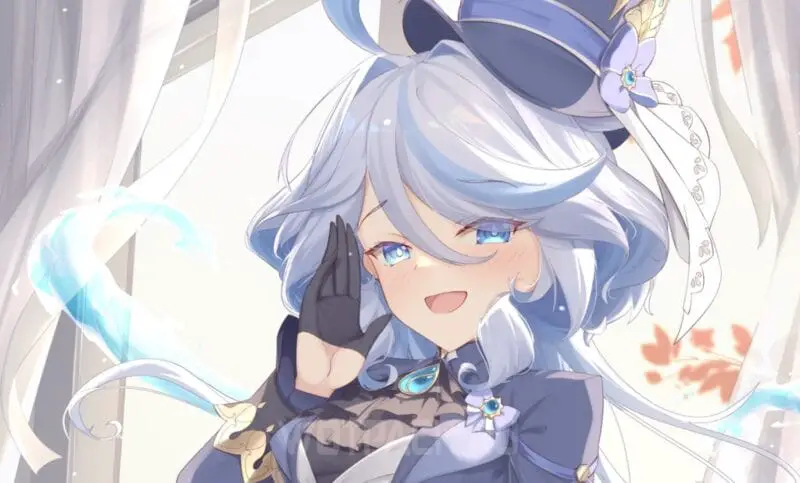
Trailer and Biography
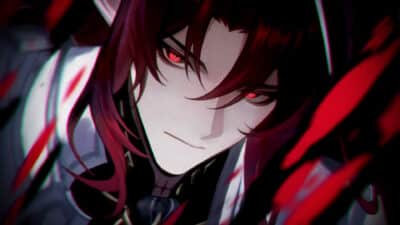
Furina is the Archon of Fontaine, the goddess of justice and judgement, also known as Focalors. After the cataclysm that occurred 500 years ago and the death of the previous Archon, she took his place. Some didn't admit her status and eventually left the lands of the kingdom. However, there were those who admired the incredible speeches and elegant posture of the new ruler.
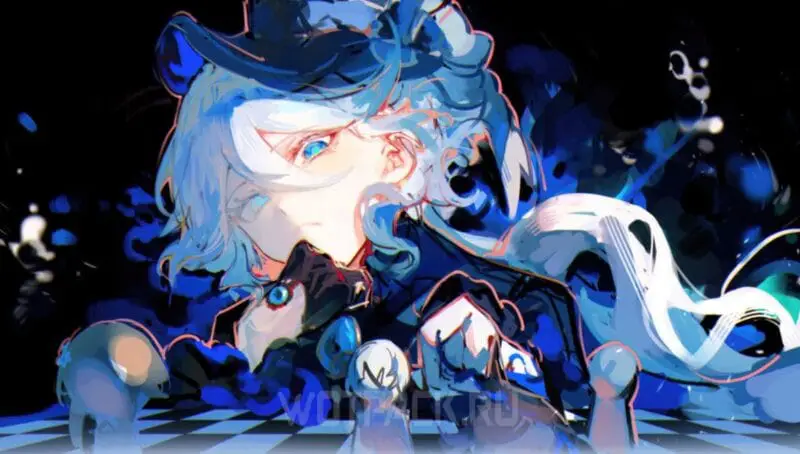
Despite the love and respect of the people, it remains a mystery to many what Focalors really thinks about. This girl is extremely impatient and often behaves like a child. Whether this is a show for the public or an attempt to hide her true feelings, is unknown. Currently, she spends her days yawning at court hearings, waiting for new dramas and glee, because for her it is just a way to have fun.
There is also a prophecy in Fontaine, according to which one day all the inhabitants of the kingdom will dissolve in water and only the Archon will remain, crying on her throne. This mysterious belief becomes one of the central plot themes, which at the same time sheds some light on the enigmatic personality of the mistress of waters and laws.
The development of Focalors' story can be found in her quest Animula Choragi: The Little Oceanid.
Video dedicated to the Hydro Archon:


Loen Furina Durin Nicole
What will be the rotation? Please help.
If Furina C6 gets into Bennett's C6 ult, what will she hit with? Pyro or Hydro?
Hydro. Benet's Pyro only kills characters before Inazuma. After that, they were given their own 100% infusion. Furina's infusion at C6 is very short, lasting 6 hits. I think subsequent attacks from the right hand deal fire damage. Hydro guys always hit with water.
How much restoration is needed for a truck with a pipe in a detachment with two hydraulics?
Why isn't Noel among your allies? She heals the entire squad with her ult (and when paired with Navia, she's a total disaster)?!
Furina plays with everyone (except for the Nodkraevites, but you can play with them too if you want), so there's no point in writing out all the characters
I already have Furina C2, I'm planning to get C1 (possibly) with Neviletta's Signa - DD, Escoffier (I don't even know if C1 or Signa is better here), and Charlotte is C0 for now - for extra healing
Coffee's C1 gives critical strike for cryo attacks, so Fura and Neva don't need her C1, and the price of Legion for her crit is too expensive, because Coffee doesn't hit hard enough to require C1 for that.