

В Genshin Impact Vodyanitsa, the singer, is a Hydro support character who fights with a catalyst and combines the roles of buffer and healer. Her primary sources of support are her passive abilities and skill: the mermaid summons a special "microphone" that attacks enemies in tandem with the active character and reduces monster resistances.
Siren is heavily tied to teams with Freeze and Star Scatter, preferring to fight in such compositions and performing significantly worse in other groups. Unlike other legendary companions, Snowy, the heroine does not have the Star Wedge and cannot activate it on her own Star reactions, which makes it dependent on satellites that can implement this mechanic.
| Rating | S+ position in tier lists |
| Rarity | ⭐⭐⭐⭐⭐ |
| Appeared in-game | Update 7.1 |
| How to Get the Character | Character Event Banner |
| Character Assignment | "Countercurrent Variation" |
| Element | Hydro |
| Weapon | Catalyst |
| Ascension Stat | HP% |
| Gender | Female |
| Affiliation | The Royal Troupe |
| Constellation | Golden Fin |
| Home region | Snezhnaya |
| Namecard | Maelstrom |
| Birthday | March 29 |
| Zodiac sign | Aries |
| Age | About 500 years |
| Height | 160-165 |
| Special dish | Iridescent aria |
| Voice actors |
|
How to Get the Character
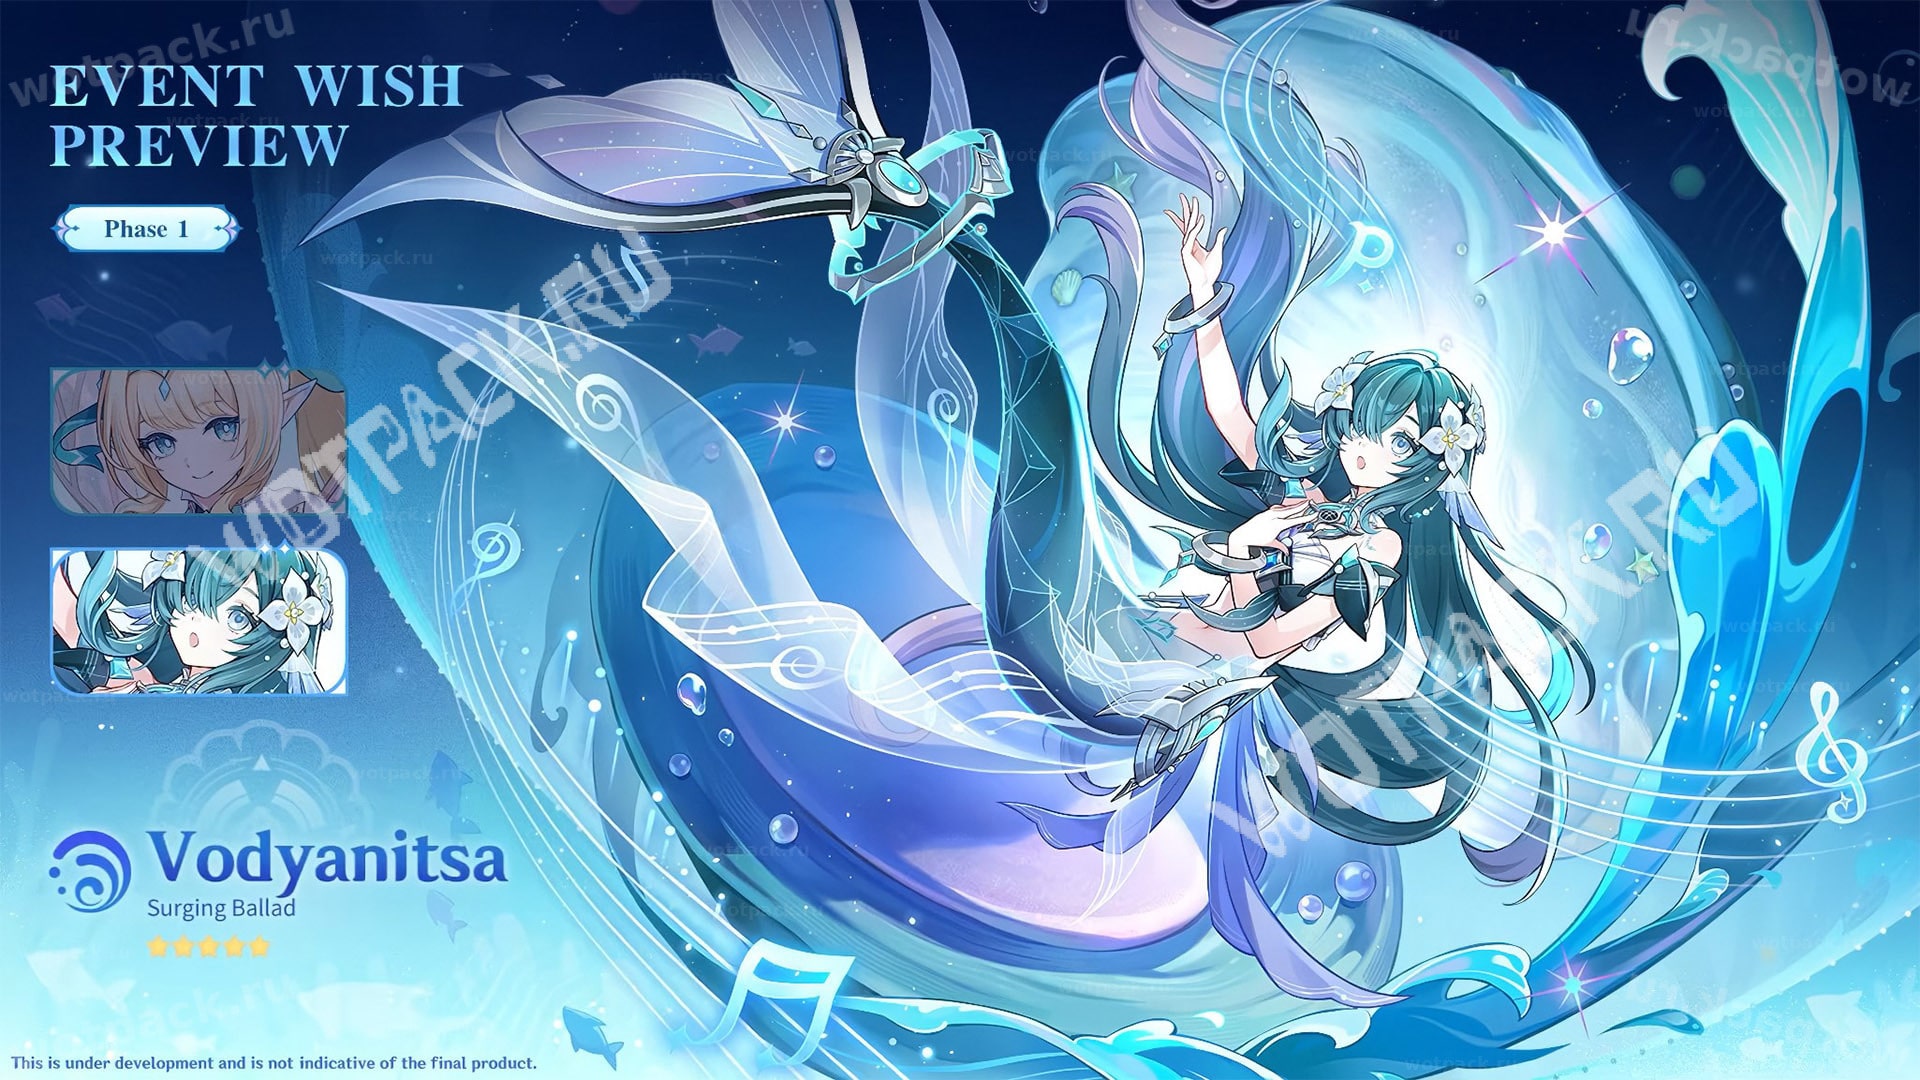
The mermaid can be knocked out in the first half. version 7.1, which will pass from September 23 to October 14, 2026.
Follow the banner scheduleto stay up to date with all upcoming reruns.
Strengths and Weaknesses

Siren is a typical support, whose job is to spend minimal time on the field, applying buffs and clearing the way for the damage dealer. Her skill mechanics are similar to those of Medusa. priestesses of Kokomi, but has its own nuances of operation.
| Strengths | Weaknesses |
| Reduction of resistance. Cuts resistance to Cryo and Hydro elements, as well as to Anemo if Star Dispersion was activated. | Does not activate Star Reactions. Vodyanitsa has a standard God's Eye, which prevents her from utilizing the Snowy mechanic. Because of this, she's tied to heroes with Star Wedge and can't act as a standalone Star Rage buffer without the right heroes. |
| Increased damage and interrupt protection. Increases the damage of Ice and Water allies and buffs the main damage dealer from Star Dispersion. Works on both the active hero and the sub-damage dealer. | The signal locks in commands from two reactions. The mermaid's native catalyst has a condition that triggers Cryo+Hydro and Cryo+Anemo reactions to buff ATK. This closes the game for other team combinations. |
| Skill mobility. Unlike the designs Astrologer Mona and Kokomi, the mermaid's horn follows the active hero and strikes with him. | Buffs only Hydro, Cryo and Star Dispersion. The passive's damage increase applies exclusively to water, ice, and star damage, and also has a limit on the number of hits, similar to how feathers work. disciples of the Shen He adepts. |
| Lots of treatment. The skill heals the active ally every 1,5 seconds, allowing you to effectively maintain health even when fighting aggressive monsters. | Requires a lot of health. To fully utilize the passive ability, you need to reach between 40,000 and 65,000 HP. Reaching these levels with free-to-play weapons can be difficult. |
| Transformation into a mermaid. Using E, he can assume the form of a water spirit and move quickly through the air and water for 10 seconds. In Fontaine's waters, he remains in his true form at all times. | Little status. Applies Hydro every 3 seconds. Not critical for Star Dispersion, but in Freeze groups, this may not be enough for consistent play. |
The Best Water Dragon Builds in Genshin Impact

Her primary function is to maintain the health of allies and reduce enemy resistances. The build for Vodyanitsa is very similar to that of Dancer Nila—all the most important bonuses are hidden in passive talents, and there's no point in deliberately seeking anything other than health.
Recommended Stats
The singer's key stat is HP percentage. It determines healing, damage from her summoned "microphone," and the buffs she provides to the team. Her abilities have a clear cap, which is reached at 65,000 health. There's no need to build higher. Her health requirements are very high, so the watch, cup, and crown should be purchased exclusively for HP. In situations where more healing might be needed, increasing the team's overall damage will still be a priority, so the crown for the healing bonus is not recommended.
In sub-stats, you should look for more health, and investing in Elemental Mastery makes no sense. In Freeze, it has no effect, and in Star Scattering The mermaid doesn't contribute to the group's overall damage due to status mechanics and reaction activation. Her ultimate is mostly unnecessary and just takes up time on the field, so there's no need to intentionally boost her HE%.
| Artifacts | Stats |
 Flower of Life Flower of LifeMain Stat: HP (fixed) |
|
 Plume of Death Plume of DeathMain Stat: ATK (fixed) |
|
 Sands of Eon Sands of EonMain characteristic: HP % |
|
 Goblet of Eonothem Goblet of EonothemMain Stat: HP% |
|
 Circlet of Logos Circlet of LogosMain Stat: HP% |
|
Optimal parameters for opening up a girl:
- HP: minimum - 40,000, for maximum buffs - 65,000 units.
- CritsThe ratio is 1:2, but you don't have to intentionally gain weight. The main thing is to invest in your health.
- Energy recharge и EM as needed, but not to the detriment of HP.
Top weapons
Due to the high requirements for the primary stat, the best loadout option would be a weapon with health in the sub-stat. Options with crits from weapon tier list There's no point in considering other stats. The heroine's entire potential depends on HP, and the minimum buff threshold is already too high for most builds.
| Weapon | Effects | Recommendation |
 Ode to the Whirlpool Ode to the Whirlpool⭐️⭐️⭐️⭐️⭐️ Base ATK: 44 - 541 HP%: 14,4% - 66,2% |
The healing bonus is increased by 4-8%. The equipped character, when healing allies, gains the effect of Uatzamonga's Prophetic Honey: the wearer's max HP increases by 4-8%, and the attack power of the active hero increases by 0,4-0,8% (maximum up to 8-16%) for every 1000 units over 40,000 units of the owner's max HP. The effect lasts 10 seconds and can stack up to 3 times. For 5 seconds after nearby characters activate Freeze or Star Dispersion, the aforementioned effect of increasing max HP and attack power is additionally increased by 75%. This effect works even outside of combat. |
Vodyaniska's signature weapon has the largest health boost and also grants an additional attack to allies. It's the best choice for any Freeze or Star Scatter team, where the main damage dealer relies heavily on ATK. |
 Thrilling Tales of Dragon Slayers Thrilling Tales of Dragon Slayers⭐️⭐️⭐️ Base ATK: 39 - 401 HP%: 7,7% - 35,2% |
When switching from a carrier, increases the attack power of the character entering the battlefield by 24-48% for 10 sec. Can occur once every 20 seconds. | The optimal weapon available, providing a significant amount of attack damage to a single ally. Most damage dealers who want a singer in their party play for this stat. However, due to the rarity of the equipment, the overall health boost will be lower than with other options. |
 Everlasting Moonglow Everlasting Moonglow⭐️⭐️⭐️⭐️⭐️ Base ATK: 46 - 608 HP%: 10,8% - 49,6% |
Increases healing bonus by 10-20%, and also increases the damage of a normal attack by 1-3% from max. The HP of the character equipped with this weapon. Within 12 sec. after using an elemental burst, hits with a normal attack on the enemy restore 0,6 energy. Energy can be restored no more than once every 0,1 seconds. | The Catalyst has the most favorable stats thanks to a significant HP boost and increased healing. The buff granted to the team will also increase due to the increased HP boost. You shouldn't intentionally loot it, but you can give it away if you have it on your account. |
 Jadefall’s Splendor Jadefall’s Splendor⭐️⭐️⭐️⭐️⭐️ Base ATK: 46 - 608 HP%: 10,8% - 49,6% |
Using an ult or shield grants the Willstone effect for 3 seconds: the damage bonus of the equipped character's element is increased by 0,3-1,1% for every 1000 units of maximum health, but no more than 12-44%Additionally, 4,5-6,5 units of energy are restored every 2,5 seconds. This effect occurs outside of combat. | She's quite effective due to her sub-stat, but requires her ultimate to be used for her passive to work. Increasing her personal damage isn't as important as her damage-dealing stats or healing in normal situations, so the gear effect can be ignored. |
 Prototype Amber Prototype Amber⭐️⭐️⭐️⭐️ Base ATK: 42 - 510 HP%: 9,0% - 41,3% |
Within 6 sec. cooldown after using an elemental burst restores 4-6 energy once every 2 sec., and all squad members restore 4-6% HP every 2 seconds. | A craftable variant with additional healing. It has the third-highest health bonus in the game. Resetting her ultimate allows Vodyanitsa to heal more than just the active ally, which can be useful in teams with Director Furina or when her regular healing is lacking. |
 Ring of Yaxche Ring of Yaxche⭐️⭐️⭐️⭐️ Base ATK: 42 - 510 HP%: 9% - 41,3% |
Activating E-Shki grants the effect of the Jade Crown: the damage of the normal attack of the equipped character is increased by 0,6-1% For every 1000 units of max HP for 10 sec. Normal attack damage can thus be increased by a maximum of 16-32%. | The catalysts from the free Natlana line and the Patch 5.0 event gift can only be considered temporary options. They have a suitable substat, but a completely useless effect. Give them away if you have absolutely no other options, but replace them at the first opportunity. |
 Ash-Graven Drinking Horn Ash-Graven Drinking Horn⭐️⭐️⭐️⭐️ Base ATK: 42 - 510 HP%: 9% - 41,3% |
When an attack hits an enemy, damage is dealt over an area equal to its position. 40-80% from max. HP. This effect can occur once every 15 sec. |
Suitable Artifacts
Due to the need to accumulate a lot of health, Vodyanitsa's artifacts are quite limited. Due to the lack of Star Blade, she can't equip Forge Heart, which increases the damage of Star Reactions. Most sets focused on healing won't help her reach the desired HP, so it's better for her to use [them]. farm 2+2 combination or Millelite Resilience.
| Name | The effect | Recommendation |
 Tenacity of the Millelith Tenacity of the Millelith⭐⭐⭐⭐ ⭐⭐⭐⭐⭐ |
2-Piece Bonus: +20% to HP. 4-Piece Bonus: The skill hits enemies, increasing the attack of all nearby characters in the squad by 20% and their shield strength by 30%. The effect lasts 3 seconds and can occur once every 0,5 seconds. It occurs even if the caster is not on the battlefield. |
The set synergizes perfectly with the heroine's skill, which attacks every 3 seconds, which perfectly matches the set's effect timing. Additionally, her main stat is increased. This is especially useful in groups where allies focus primarily on ATK. |
 Tenacity of the Millelith/ Tenacity of the Millelith/Vourukasha’s Glow ⭐⭐⭐⭐ ⭐⭐⭐⭐⭐ |
2-Piece Bonus: +20% to HP. 2-Piece Bonus: +20% to HP. |
A 2/2 build focused on maximizing health. In practice, it's best to immediately test whether it's more beneficial for a specific team to invest in the Siren's HP or give her a buffer kit. |
 Tenacity of the Millelith/Vourukasha’s Glow Tenacity of the Millelith/Vourukasha’s GlowSong of Days Past/Ocean-Hued Clam ⭐⭐⭐⭐ ⭐⭐⭐⭐⭐ |
2-Piece Bonus: +20% to HP. 2-Piece Bonus: +15% to healing. |
An option for situations where the girl's own healing is insufficient. The healing boost may compromise her primary stat, so only use it as a last resort. |
 Song of Days Past Song of Days Past⭐⭐⭐⭐ ⭐⭐⭐⭐⭐ |
2-Piece Bonus: +15% to healing. 4-Piece Bonus: When healing party members, the wearer creates a Striving effect for 6 seconds, which records the healing done (including overhealing). When the duration ends, Striving transforms into Waves of Old: when your active character's normal attack, charged attack, falling attack, elemental skill, or elemental burst hits an enemy, the damage dealt is increased by 8% of the total healing recorded by Striving. Afterward 5 After 10 seconds, the effect of Waves of Old disappears. A single Striving effect registers up to 15,000 HP. Only one Striving can be active at a time, but it registers healing provided by multiple equipped characters. This effect activates even if the equipped character is not on the battlefield. |
A decent buffering set that can boost heroes who rely on classic reactions. It's only worth putting Vodyanitsa in it if you already have Millelith in your party and she has sufficient HP. Keep in mind that her horn automatically hits enemies every 3 seconds and consumes Waves of Old. |
 Noblesse Oblige Noblesse Oblige⭐⭐⭐⭐ ⭐⭐⭐⭐⭐ |
2-Piece Bonus: +20% ult damage. 4-Piece Bonus: Activating an elemental burst increases the attack power of all party members by 20% for 12 seconds. The effect does not stack. |
A very situational set, which can be considered for Vodyanitsa if she already has the signature and there's a Millelith wearer in the party. Without the native catalyst and the HP bonus from both pieces of the set, reaching the desired 65,000 health will be practically impossible. Farming will be further complicated by the need to find recovery in sub-stats. |
 Instructor Instructor⭐⭐⭐ ⭐⭐⭐⭐ |
2-Piece Bonus: +80 units to MS. 4-Piece Bonus: Triggering an elemental reaction increases elemental mastery of all party members by 120 for 8 sec. |
A beginner's first option. This set doesn't work outside of combat, but it can provide a nice short-term boost to MS for all allies. There's no need to deliberately search for good fragments; they'll quickly refill. |
Teams

The heroine feels comfortable in lineups with Hydro and Cryo hyper-carries, as well as with companions using Star Spread. There are no strict requirements for Freeze and Star Spread without a signal, so she can be considered as an option in a team with a Hydro damage dealer through other reactions, although this will be less effective than with her native reactions.
Suitable Heroes
The singer reveals herself best with these characters:
| Character | Element | Weapon | Features |
|---|---|---|---|
 Spring Spring |  Anemo Anemo |  Sword Sword | A Star Scatter damage dealer capable of independently triggering a reaction. Can summon Anemo Vortexes and receive buffs from the mermaid. |
 Mizuki Mizuki | Anemo |  Catalyst Catalyst | A standard banner heroine who deals direct damage with Star Dispersion and benefits from Water Beast's buffs. Her abilities are dependent on her MC, so her signature isn't essential. |
 Skirk Skirk |  Cryo Cryo | Sword | A main damage dealer who plays in Frost groups. Thanks to her resistance reduction, interrupt resistance, and healing, the Siren easily fits into her best squads. |
 Odette Odette | Cryo | Sword | A sub-DD with Star Wedge, which unlocks Snow's mechanic. One of the most sought-after companions for Starblade teams. |
 Cryo Traveler Cryo Traveler | Cryo | Sword | Unlocks Star Reactions for the squad and deals damage off-field. An ideal ally for those without Odette on their account. |
Main DPS
Companions that deal the main damage in a group.





Sub-dps and supports
Heroes that attack from the "pocket" and buff other companions.


Top Teams
With signature gear, she only truly shines in Star Scatter and Freeze. Teams for Watergirl aren't very diverse due to her narrow specialization, although there are some meth compoundsThe girl doesn't buff or change reactions in any way, but only increases the damage of specific companions through a passive multiplier and reduced resistances.
Star Swirl
Reaction can deal damage of its own, but it relies on the number of activations. Therefore, Vodyanitsa serves solely as a source of Hydro, keeping smaller enemies in place and prolonging her Cryo status thanks to her passive Freeze. Her ability to transform Starry Anemo Vortex into Wandering Vortex is only needed to implement the Anemo resistance reduction and prolong the Radiance - Starry Glitter status.
| Character 1 | Character 2 | Character 3 | Character 4 | Recommendation |
|---|---|---|---|---|
| Spring | Odette |  Faruzan (C6) Faruzan (C6) |  Water lily Water lily | The strongest composition with the Squad Leader at the helm. Here, Odette and Vodyanitsa wear support sets from their top 1, and Faruzan equips in Noblesse Oblige. |
| Spring | OdetteCryo Traveler |  Venti Venti Sucrose Sucrose | Water lily | An alternative option with Vesna is to assign the buffer role to another Anemo companion. In this case, the hero can be assigned to the Anemo companion. Viridescent Venerer or the Ceremony of the Ancient Nobility. |
| Mizuki | Odette | Cryo Traveler | Water lily | A group with a Clinical Psychologist as the center. Here, Vodyanitsa can afford to skip Millelith due to the presence of Cryo Traveler, who will take over that role. In this case, it's best to equip her with 2+2 HP to increase buffs for her allies. |
| Mizuki | OdetteCryo Traveler | VentiFaruzan (C6) | Water lily | A team designed to frequently activate Star Dispersion by pairing two Anemo heroes. The second Wind-elemental companion should wear Viridescent Venerer to provide more resistance reduction to Cryo. This will impact the damage of the Ice sub-DD and the Vortex Burst. |
 Chasca Chasca | OdetteCryo Traveler |  Furina Furina | Water lily | Chaska activates Star Dispersion, allowing her passive to cut Anemo, while also hitting Hydro and Cryo enemies with reduced resistance to those elements. Depending on the mermaid's signature, she can be equipped as a Millelith or a 2/2. If she's short on HP, she can be given to Furina as a Millelith. |
Frozen
This reaction doesn't receive any significant boosts from the Siren, but it does benefit from simultaneously cutting Hydro and Cryo resistances. Healing allows her to be teamed with Furina, who will additionally grant her Water status, which the mermaid herself doesn't have much of.
| Character 1 | Character 2 | Character 3 | Character 4 | Recommendation |
|---|---|---|---|---|
Skirk Lohen Lohen |  Escoffier Escoffier |  Furina Furina | Water lily | Skirk's premium team, in which she delivers the most damage. In this combo, Escoffier can be given Scroll of the Hero of Cinder CityTo avoid duplicating the Millelite kit, this group is suitable for any Cryo main-dd. |
| Skirk | Escoffier |  Yelan Yelan Xingqiu Xingqiu | Water lily | A composition without a Hydro Archon. The water sub-DD can be equipped in a set for personal damage or given Noblesse Oblige To boost your primary damage output, reroll Millelite depending on the mermaid's health. |
| Lohen | Escoffier |  Mona Mona | Water lily | A group that combines Escoffier's buffs with Sabbat Resonance. The singer hits frequently enough to help Loen build up his passive stacks. If the Arcane Rite buff isn't important or there's no signal, Mona can be replaced with Furina or Ye Lan. |
Lohen Ayaka Ayaka | FurinaYelan |  Nicole Nicole | Water lily | Nicole attacks with the active hero's element, so she doesn't interfere with Freeze's ability, but she does provide additional interrupt resistance and buffs her attack. When paired with Loen, the siren may need to deal more damage. |
Stats
As the singer ascends, her base stats increase, including health and HP percentage. With her health requirements, progression to level 90 is critical, but investing in levels 95 and 100 is Wandering luck not so important.
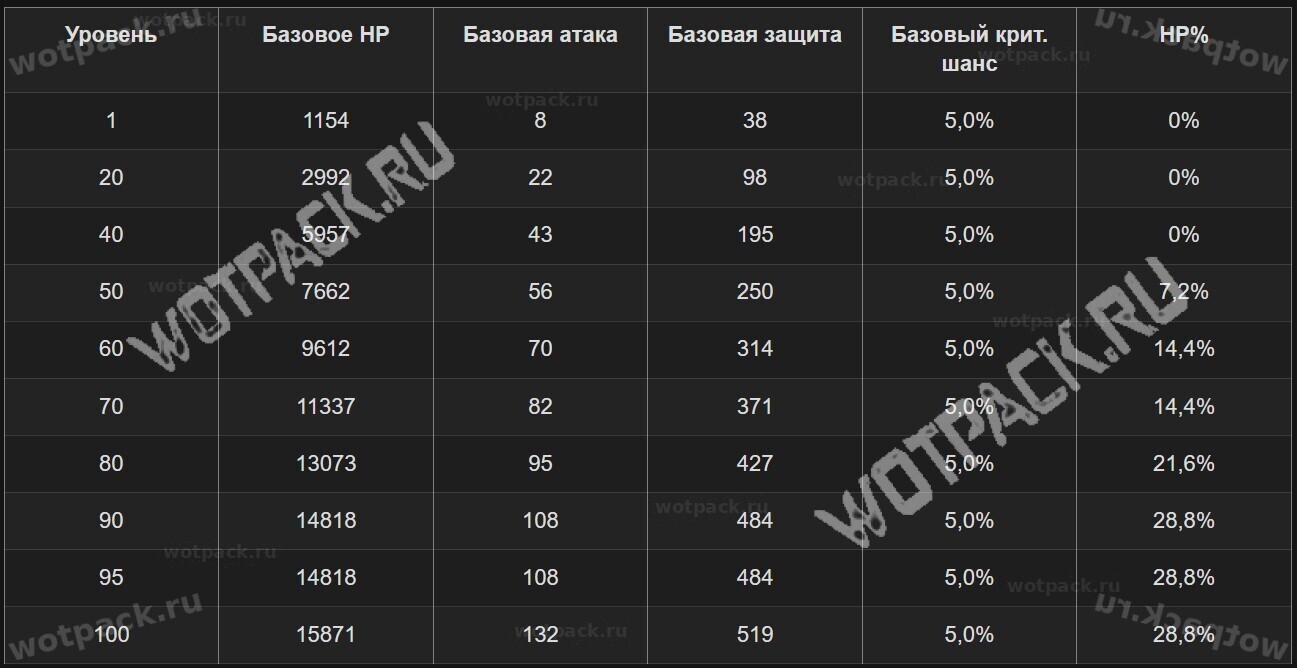
Leveling

To develop the level and skills of the mermaid, you need to collect materials in Snowy and fight with Dottore's first bossNow we can fully prepare for the heroine's release.
Ascension
To raise the singer to level 90, you will need:
| Resource | Where to find it |
 Slivers, fragments, chunks and gemstones of Varunada Lazurite. Slivers, fragments, chunks and gemstones of Varunada Lazurite. |
Dropped by world and weekly bosses or crafted using nitrogen dust from other stones. |
 Chimera Core ×18 Chimera Core ×18Symbiotic Chimera Core ×30 Chimera Core ×36 |
Dropped by mutated chimeras. |
 Unscorched flowering branch ×46 Unscorched flowering branch ×46 |
Can be obtained after defeating Immortal construct. |
 Hellebore × 168 Hellebore × 168 |
Flower related to curiosities of the Snowy. |
 Hero's Wit × 421 Hero's Wit × 421 |
Given as a reward for completing quests and events, opening chests, and also for Earth Artery flowers. |
 Mora ×1 653 000 Mora ×1 653 000 |
In-game shops, exploration, battles, quests, temporary events and tasks. |
Talents
To develop one of the main skills to level ten, collect:
| Resource | Where to find it |
 Teachings on "Fortitude" ×3 Teachings on "Fortitude" ×3Instructions for "Fortitude" ×21 Philosophy of "Fortitude" ×38 |
Talent books from the dungeon Abandoned Shrines, which can be obtained in Tuesday, Friday or Sunday. |
| Chimera Core ×6 Symbiotic Chimera Core ×22 Chimera Core ×31 |
Farmed from different types of chimeras found throughout the Cryo region. |
 Madman's Shackles ×6 Madman's Shackles ×6 |
Awarded for defeating Heretic of the False Moon - weekly enemy from Nod-End. Can be crafted from other fragments of this boss using solvents of dreams. |
 Crown of Insight × 1 Crown of Insight × 1 |
A rare resource that can be obtained through Seal Offering systems or major update events. |
| Mora ×1 653 000 |
All gaming activities. |
Skills

The singer joins the ranks of support characters who heal allies and inflict status effects while off the battlefield. Activating the skill summons a special item that follows the active character, healing them and attacking enemies. Monsters damaged by E-type damage have their Cryo and Hydro resistance reduced.
The elemental explosion hits in a small radius, slightly affects the girl's personal damage, but provides no bonuses for the team.
Basic (Active) Skills
Mermaid's primary talents are designed to increase her allies' damage and sustain their health in combat. Mermaid is most useful for hyper-carries with Stellar Dispersion, as well as Hydro and Cryo main damage dealers.
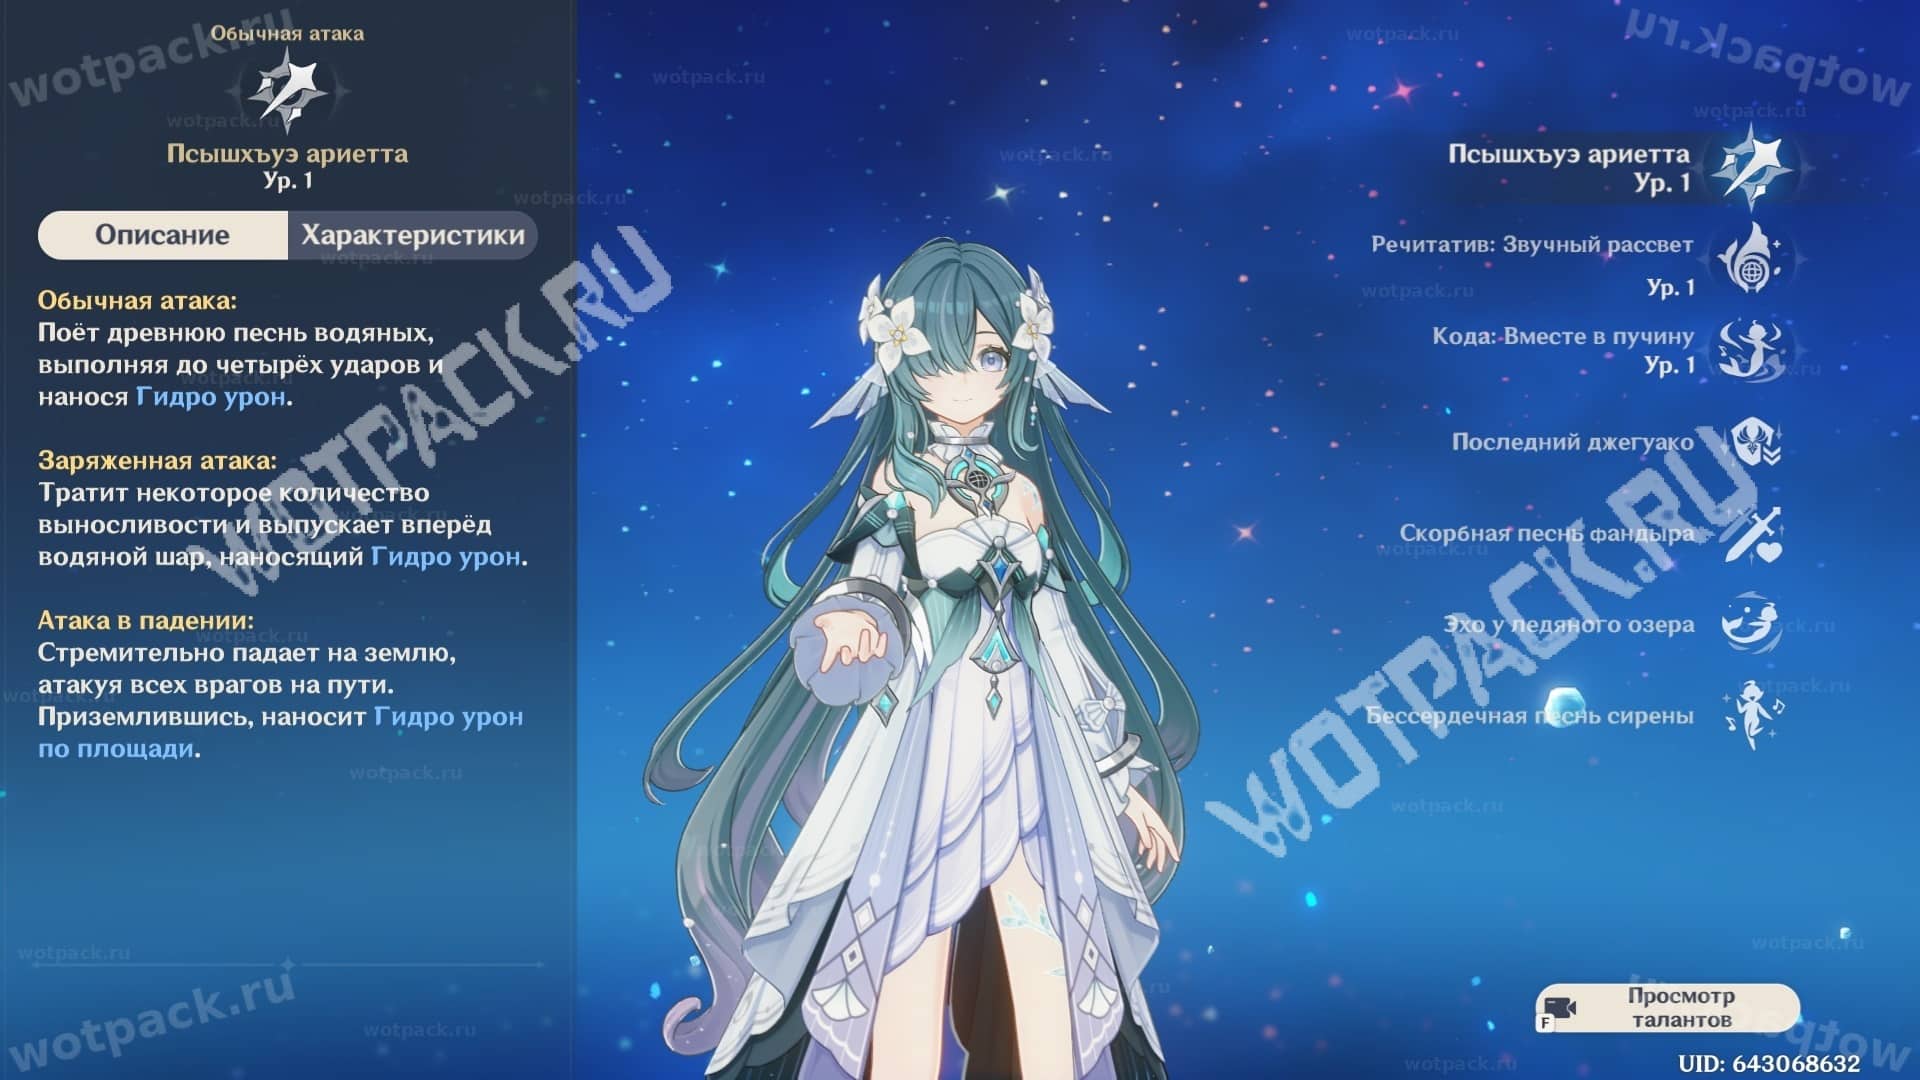
- Source of damage: ATK.
Normal attack: Up to four hits per hand.
Charged Attack: Releases a water ball that deals Hydro damage.
Plunging Attack: Plummets downwards, attacking all monsters in its path. Upon landing, it deals Hydro damage to the area.
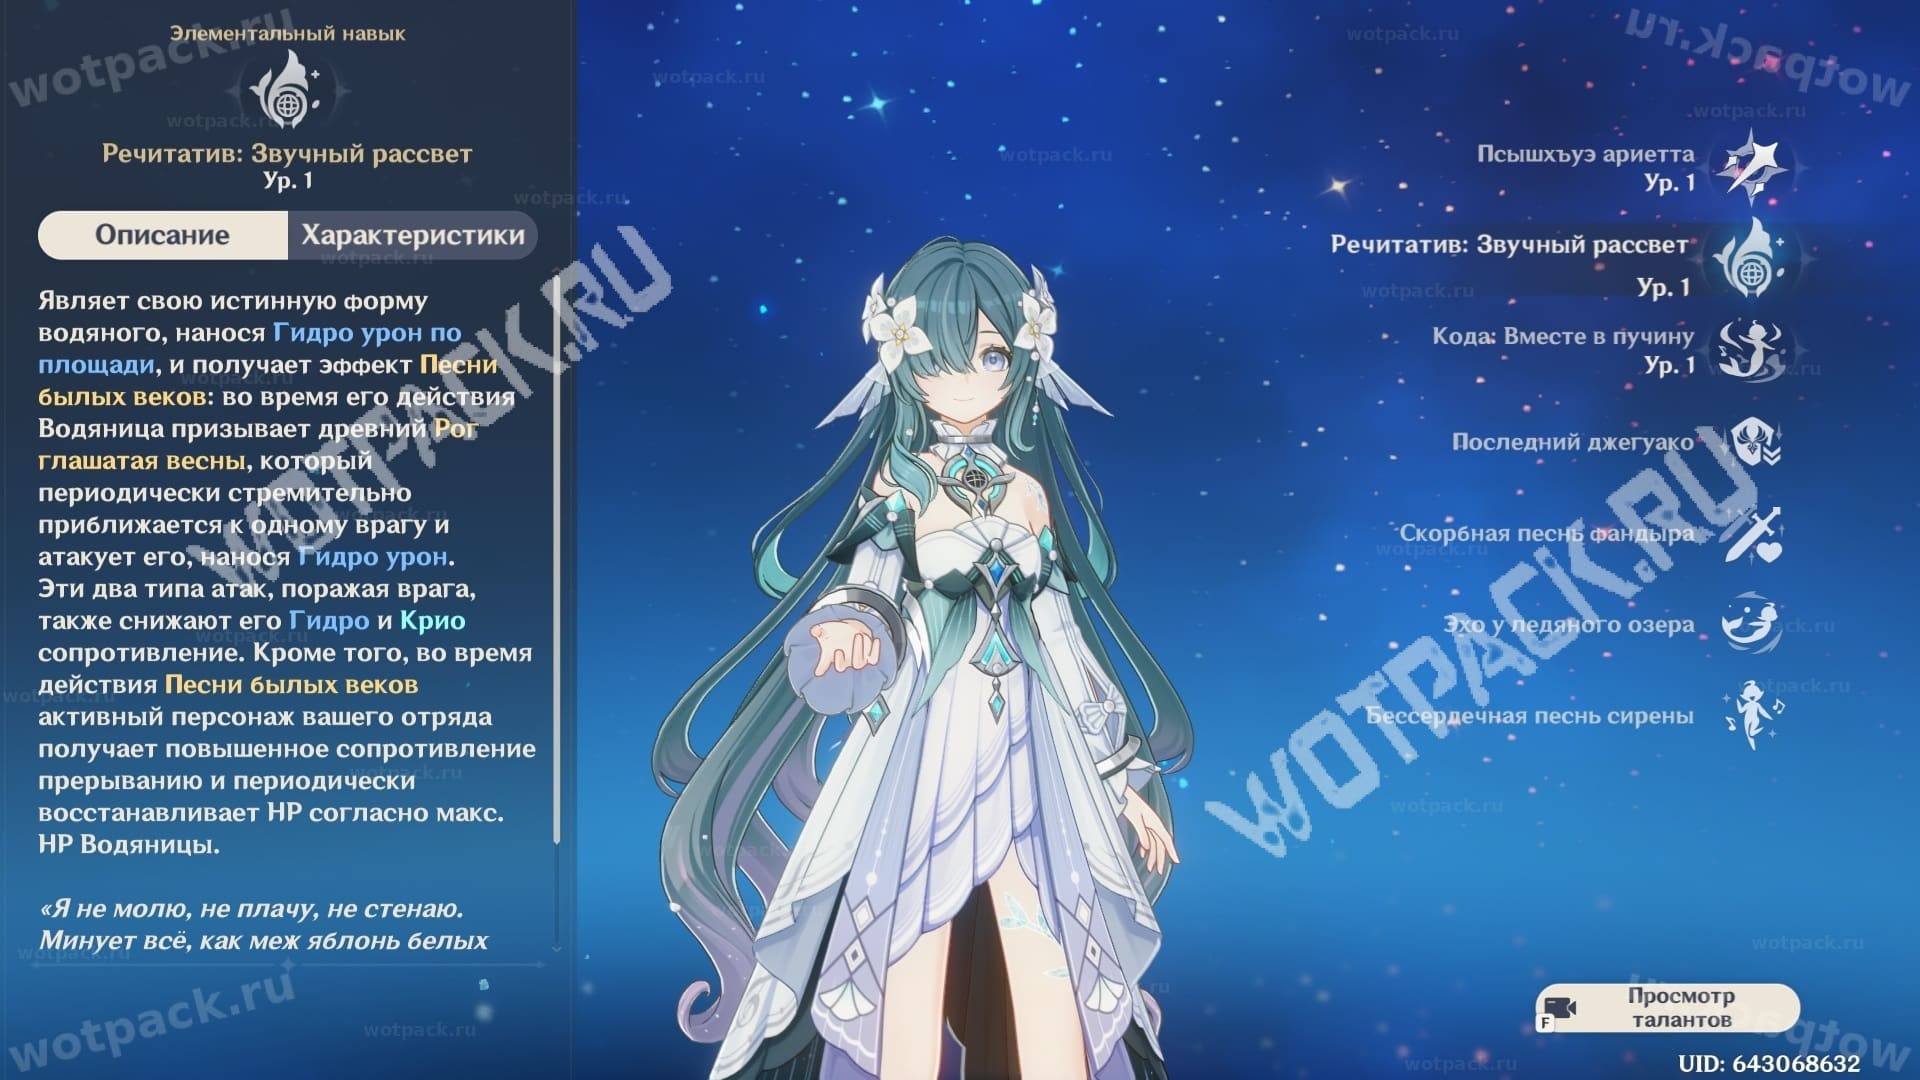
- Source of damage: HP
- Cooldown: 16 seconds
- Duration: 16 seconds
- Treatment interval: 1,5 seconds
- Horn strike interval: 3 seconds
Summons the Horn of the Spring Herald onto the field—a small "microphone" that attacks nearby enemies, heals the active ally, and reduces mobs' resistance to Cryo and Hydro. The resistance reduction lasts for 6 seconds and is refreshed with each new strike of the horn.
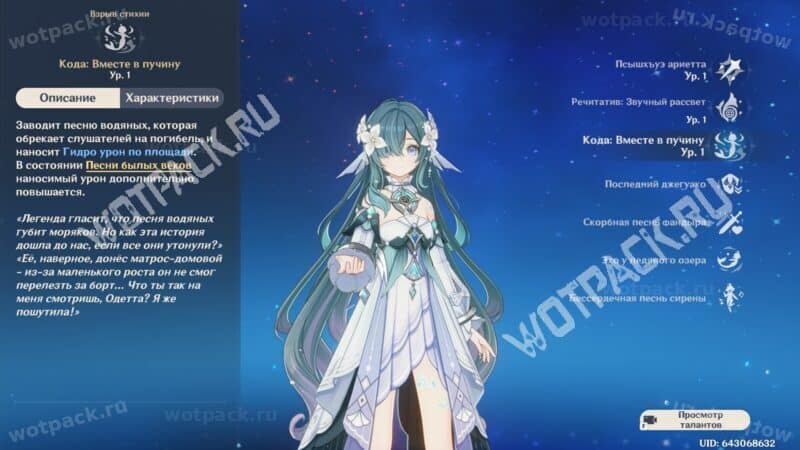
- Source of damage: HP
- Cooldown: 15 seconds
- Enegry consumption: 60
Hydro's area-of-effect damage buff is applied to itself if the "microphone" is active. Doesn't affect resistance reduction.
Passive Skills
The mermaid's primary support potential lies in her passive abilities. These include health buffs for damage dealers, as well as a reduction in Anemo resistance when casting Star Dispersion.
When using the elemental skill Chant: Resounding Dawn, the starry Anemo vortex on the field becomes a wandering vortex, and if nearby party members activate Star Dispersion during Song of the Past, a wandering vortex will be created instead of the starry Anemo vortex.
Creating or detonating a Wandering Anemo Vortex reduces the resistance of nearby enemies by 35% for 6 seconds.
Additionally, if nearby party members enter the Radiance - Star Scattering state while Song of Old Ages is active, the Radiance - Star Scattering state is extended by 4 seconds.
When using the elemental skill Recitative: Resounding Dawn, Waterling also gains 25 levels of Lead Vocal and 10 levels of Choir.
Each of these effects lasts for 30 seconds. Using an elemental skill refreshes their number.
- Lead Vocals: Whenever your active character deals Hydro or Cryo damage with a normal attack, charged attack, falling attack, elemental skill, or elemental burst, one level of Lead Vocal is consumed, increasing the damage dealt. If there is a Whirlwind on the field, or for 5 seconds after the Whirlwind explodes, this effect only occurs when the character deals Star Scattering reaction damage.
For every 1000 points of Waterwort's Max HP above 40,000, this effect's Star Dispersion damage is increased by 260, and its Hydro and Cryo damage is increased by 140. The maximum increase to Star Dispersion's reaction damage that can be obtained this way is 6500, and the maximum increase to Hydro and Cryo damage is 3500. - Chorus: Activated by squad members outside of battle or by other nearby characters (not the active character). The effects are similar to the Lead Vocal.
If you long-press an elemental skill outside of combat, Vodyanitsa will reveal her true form as a water spirit and can swim for up to 10 seconds, consuming stamina. As a water spirit, she can also move across the surface of the water. When the elemental skill is used again, the duration of the state expires, or stamina is depleted, Vodyanitsa exits her water spirit form.
Additionally, Vodyanitsa can swim even faster, consuming more stamina.
Vodyanitsa, the prima donna of the Royal Troupe, instead of playing a musical instrument, sings with her own voice.
Talent Leveling Order
Elemental Skill (E) > Elemental Burst (Q) (optional) > Normal Attacks (ignore)
Priority for developing mermaid abilities:
- Elemental Skill is the girl's primary skill, which must be maxed out. It determines the horn's damage, the amount of healing received, and the percentage reduction to ice and water resistance. This percentage increases as the level increases.
- Elemental Burst – hits an area but doesn't provide any significant bonuses. Can be dropped periodically if there's a free window for animation. Download it if you have spare resources.
- Regular attacks—punches—don't do anything useful and you won't be using them in combat to deal damage, so there's no point in spending materials on them.
Constellations
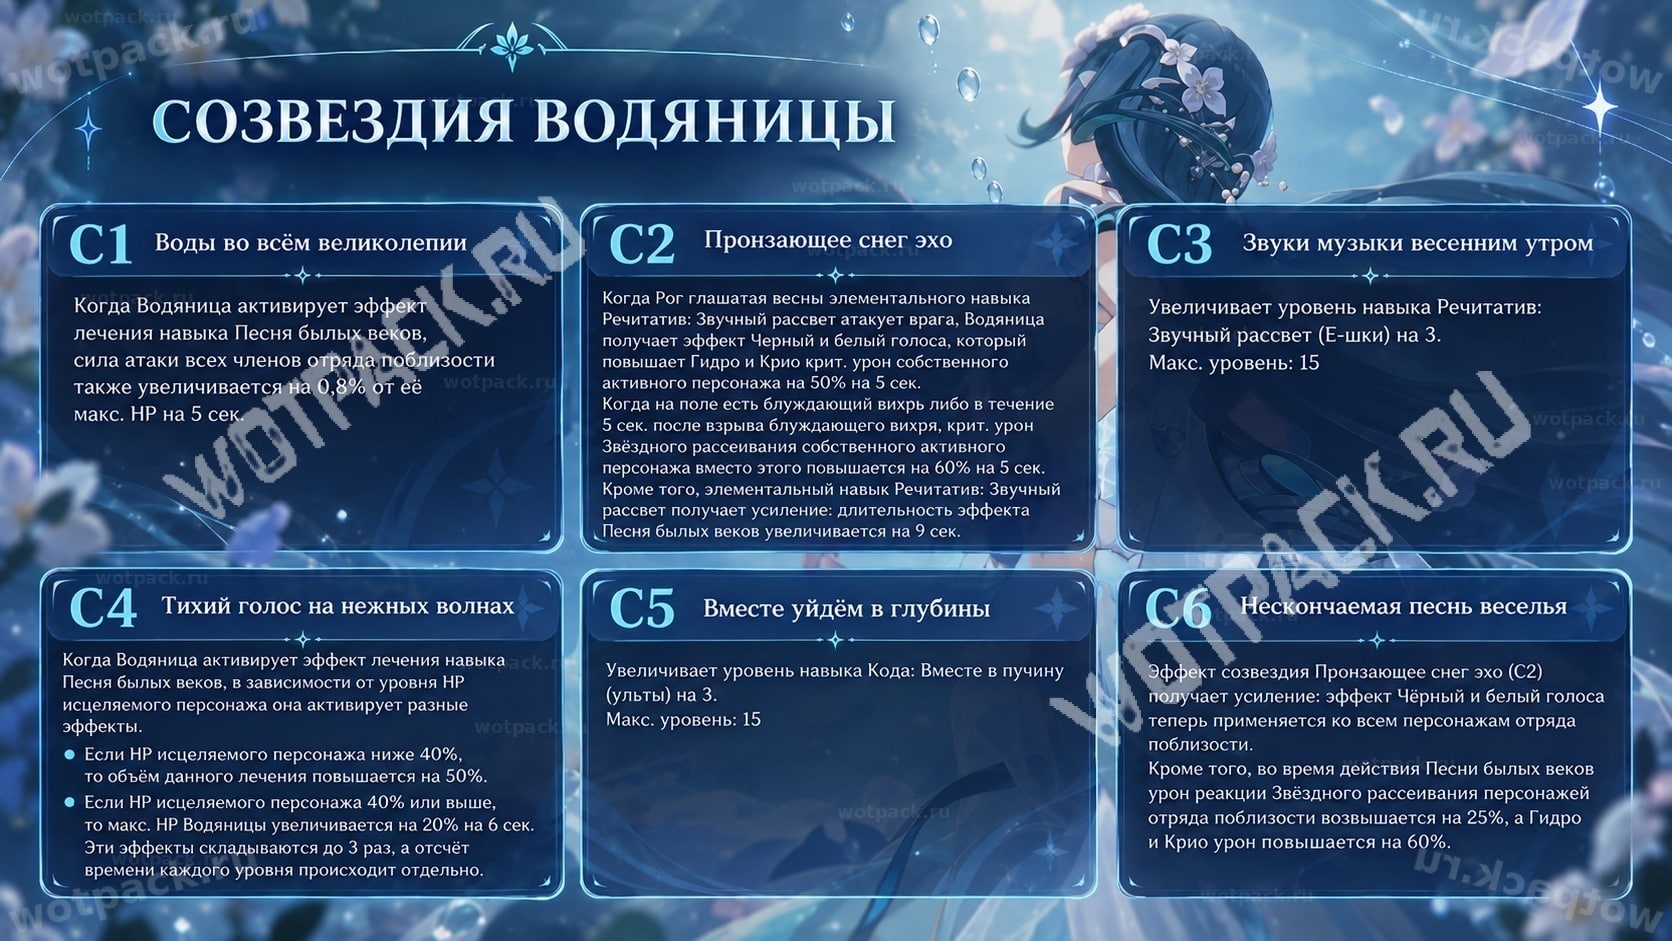
The best constellations of Vodyanitsa are: C1, C2 и C6.
- The first Const directly increases the ATK of all allies based on Vodyanitsa's HP. If she has 40,000-65,000 HP, all companions will receive a 320-520 HP boost.
- The second Constant grants the active hero K/U if they attack with Water or Ice damage. The bonus for Stellar Dispersion is slightly higher, making this star especially valuable for Spring's team. Also, the Siren's E-class with this star lasts for 25 seconds and doesn't need to be refreshed on cooldown.
- The sixth Constellation allows you to distribute the entire bonus of the second constellation to every hero on your team. This is especially valuable for a group playing in two resonances. It also provides a multiplier that affects the Stellar Dispersion formula, as well as a direct buff to Hydro and Cryo damage.
Separately, it is worth highlighting third A constellation that increases the skill level and increases the percentage of resistance reduction. Fourth Affects the squad's survivability and the amount of healing received, and also slightly increases the damage of the mermaid herself and her buffs due to a temporary increase in HP.
How to play as Vodyanitsa

Vodyanitsa's abilities are mostly "pocket-based." She doesn't need to be on the battlefield for long periods of time, taking up time with the main damage dealer. Her skill summons a horn onto the field that follows the active companion, similar to bones. mercenaries Ye Lan"Microphone" periodically attacks nearby enemies, reducing their Ice and Water resistance when it hits. To implement this mechanic for Star Dispersion, you need to trigger the reaction itself and create a stellar Anemo Vortex.
Elemental Burst deals Hydro damage in a small area and increases the Rogue's damage if it was active before pressing Q. This multiplier only affects the mermaid's damage output, so it's not necessary to spend time adjusting it. You can reset it if there's a window in your rotation and other heroes' abilities aren't ready to use yet. All buffering abilities are hidden in a passive ability that grants all teammates a special status that increases their damage. It's calculated based on health and only affects Star Diffusion damage, as well as Hydro and Cryo attacks.
Rotation
Skill Order: other supports' abilities > sub-DD skill delivery > E (elemental skill) > main-DD rotation
Siren can easily fit into almost any team's rotation, but her weapon is important to consider. If she's wearing Epic, she should be positioned directly in front of the main damage dealer. With Signature gear or another Catalyst, her placement isn't as important.
Rotation when playing with a singer with a signature:
- Hand over all heroes' abilities, based on their duration. Heroes whose buffs last longer than 16 seconds should be listed here.
- Use Watercress's E-class. If her horn lasts longer than other abilities, it should be the first one in your rotation.
- Use the skills of the remaining companions.
- Bring your main damage dealer into the fight and attack until the buffs wear off. Then start over.
Is The Character Worth Pulling?

Rusalka is a niche support who fits into a small number of meta groups but excels in her role within them. She complements the team perfectly. Warrior SkirkShe can excel in teams with Hydro damage dealers and can also fit into the Spring Brigade's leader lineup. Together with Furina, they form a powerful combination of healing and damage reduction buffs, suitable for many main damage dealers with classic reactions. Her key advantage is the simultaneous reduction of resistance to Ice and Water, and in Star Dispersion, she also applies Anemo.
What to Choose: C1 or Signature?
When choosing between the first Consta and the native Catalyst, you need to consider the current needs of the team she'll be joining. Signa provides enough health to reach the 65,000 HP cap. She also has an excellent F2P alternative with an ATK bonus, despite having lower HP in her substat. It's important to consider how important the full buffs from the mermaid's passive are in a given situation. For convenience, let's compare Ode of the Maelstrom with the most suitable weapon:
| Thrilling Tales of Dragon Slayers R5 | Signature catalyst | |
| Increase in ATK |
|
At 65,000 HP:
|
| How much health is in the sub-stat? |
|
|
| How easy is it to reach 65k health? |
|
|
The first Constellation alone provides a significant amount of attack power to the entire team, so when choosing between it and Signal, it's best to take C1, especially if you can get C2 right afterward. Signal is only worth turning to if you want to maximize the Siren's bonuses and have sufficient resources.
Character biography, trailers, and lore

Vodyanitsa is a representative of the vodyanoi, a type of alf in Snezhnaya famed for their songs and ability to transform into mermaids. After Anastasia Feodorovna's accession to the throne, conflict erupted in the kingdom, leading many alfs to flee the country. The girl decided to stay and continued performing on stage. She is now the prima donna of the Royal Troupe, whose concerts are a dream for many residents of Snezhnaya.

In addition to her concert activities, the siren is a member of the organization "Rokot," a society that opposes the "Frost" project. She cares about the problems facing ordinary people and sympathizes with those who sincerely admire her singing.
Trailer
The girl was first shown in the video "Sudden Snowstorm," which not only showcased her appearance but also outlined her role in the story and showed her interactions with other characters:

The rest of the characters from the teaser were revealed in an article about all the residents of Snezhnaya.








does she heal players in co-op?
No, Vodyanitsa in co-op only heals “her own”.
thank you
Hello, could you please help me? I have a pack of Skirk, Escoffier, Furina, and Mona. Escoffier has Scrolls, Furina has Millelite, and Mona has Ceremony. If I replace Mona with Vodyanitsa, which artifacts should I use?
Dress Escoffier in a corpse, leave Furina as is, and for a full buff, gather 2 on 2 HP (for example, Milelith and Vurakashi)
Furin in scrolls, Escoffier in ceremony, and Vodyanitsa in millelith - this will cause the most damage, of course, if the artifacts have acceptable stats.
If there are no good pieces, then you can experiment with a dummy in the astral realm
I got it as a waifu, there's no one to bet with...
So if you have Mizuki and Odette, or Cryo/Hydro DD/sub-DD, you can put them there. Or do you just not have anyone suitable?
Who's more versatile, Escoffier or Watercress? I don't know which one to use. They seem to work the same. Both provide Hill, reduce Hydro and Cryo resists, and buff Cryo and Hydro, but Watercress also buffs Anemo. Could there be a difference in the numbers? Could someone please tell me?
Definitely Escoffier. Water lily doesn't perform well in teams with cryo or anemo, but rather coffee.
No, preferably cryo + hydro coffee to fully unlock the passive side.
I think Escoffier will be more versatile. She's very good at cutting Cryo/Hydro resistance (when properly planted) and also deals damage from her pocket. She can also be used as an oplicator outside of Freeze damage, although she won't be fully effective there. Meanwhile, Vodyanika is only used for Freeze/Star Dispersion, so putting her in other decks makes little sense, as there are almost always better characters. It's also worth remembering that Vodyanika buffs not regular Anemo damage, but specifically Star Dispersion, which can't be triggered without Vesna/Sandrone/Odette.
and cryo gg. literally take Mizuki and cryo gg, which everyone has, and disperse
What can be collected with nevillette and watercress? Who should be placed with them?
shilonen and sitlali
I also saw a version with Furina and Escoffier in the beta, but I haven’t tested it myself.